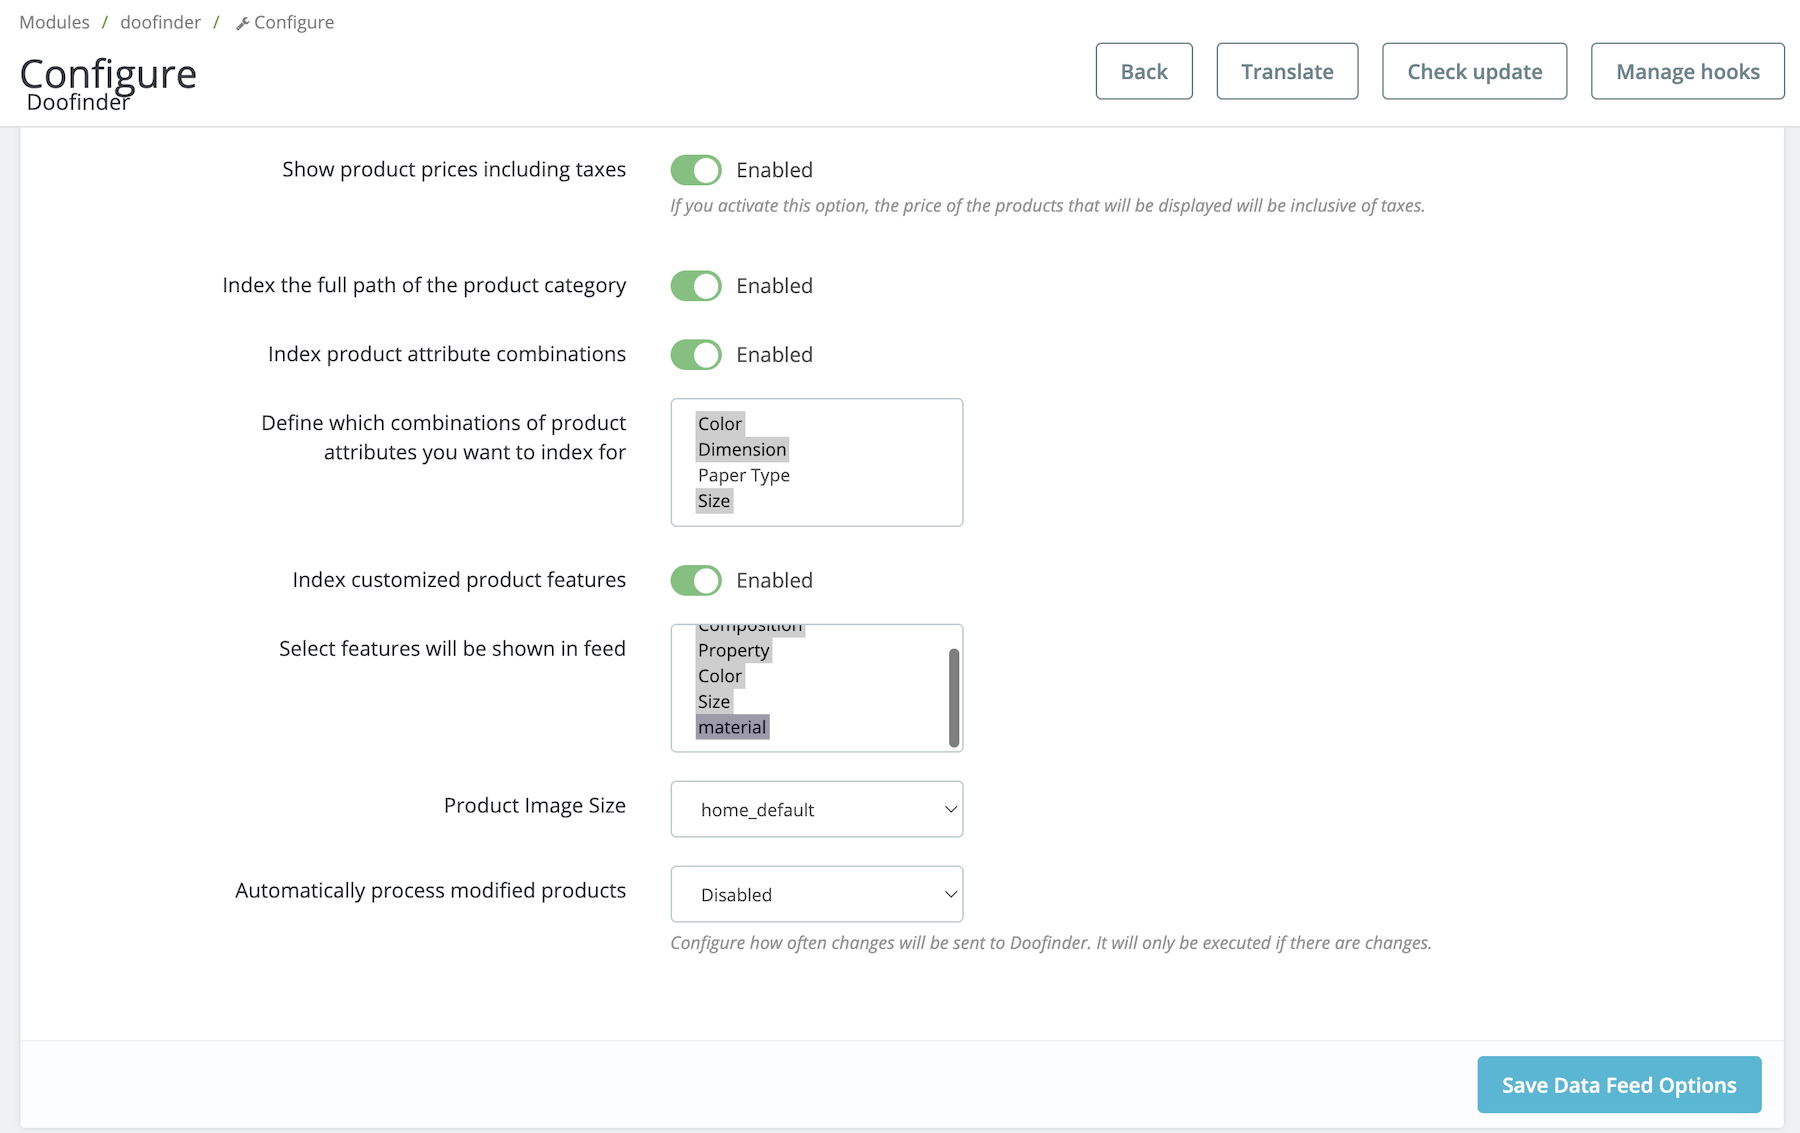
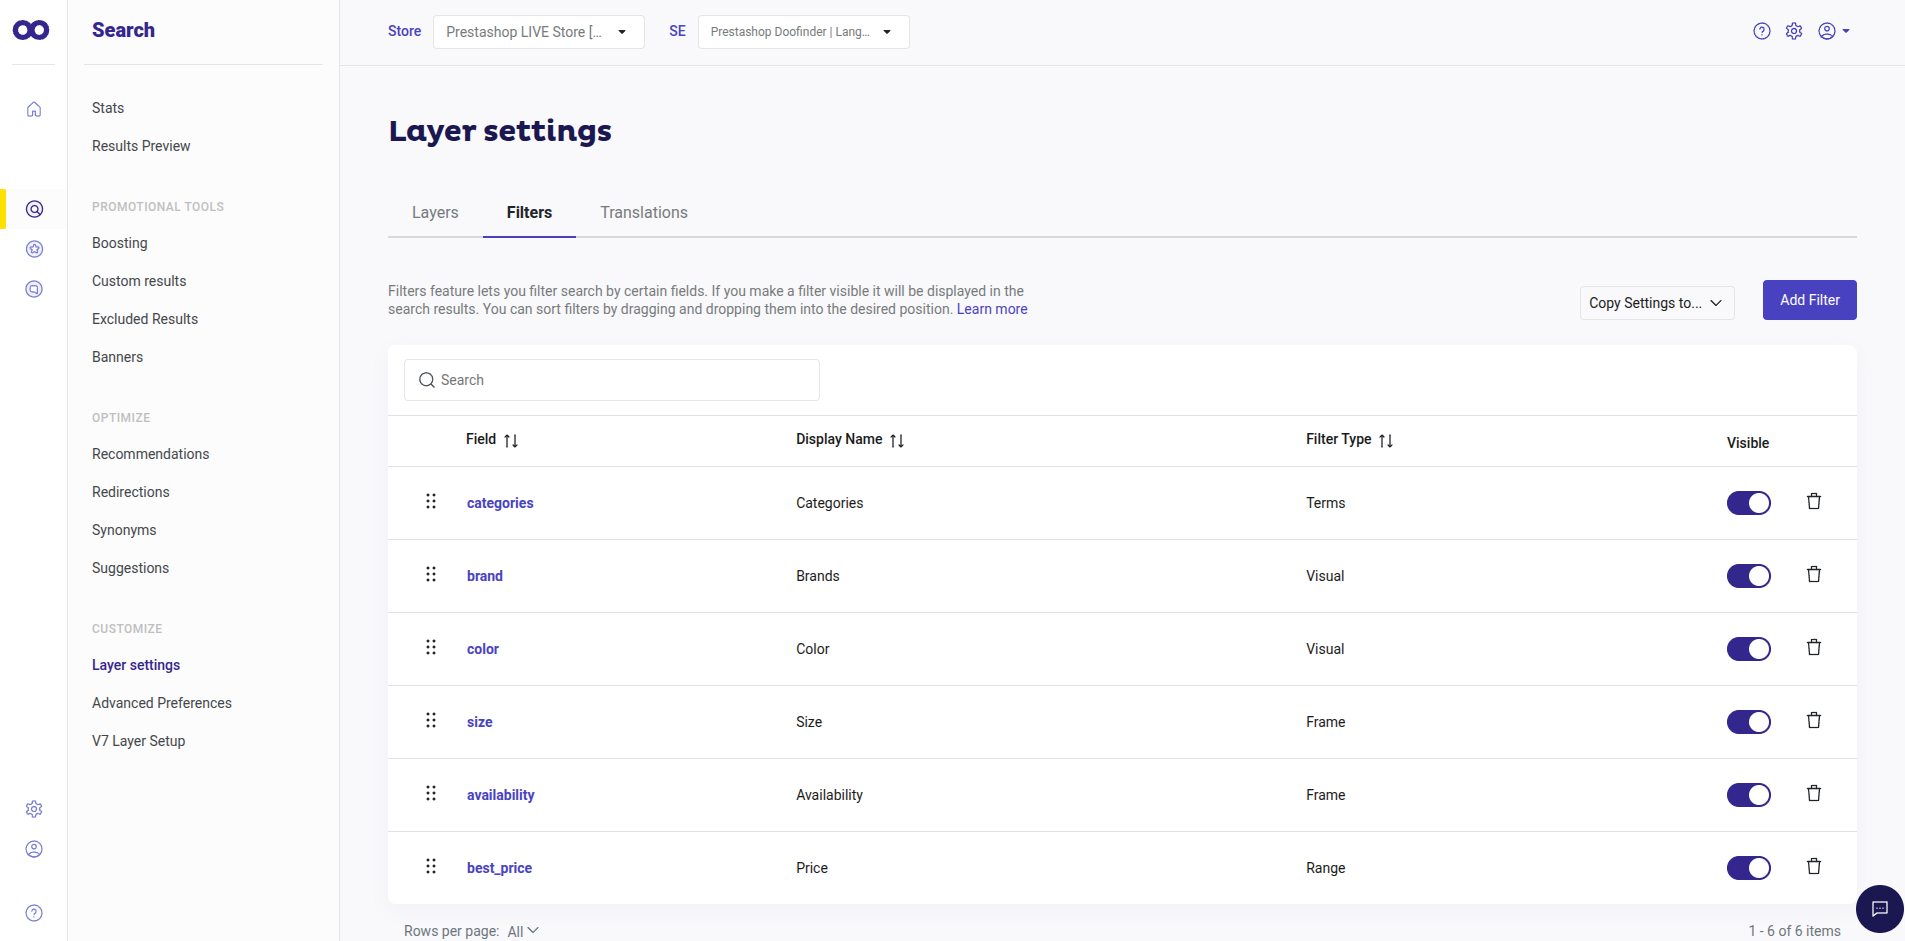
Custom Fields in Prestashop are called "Features". In order to configure the Custom Fields, you have to create a Feature with its corresponding values and then associate it to a specific product. Then, you'll be able to manage it on the Doofinder Plugin and index it so it can be visible on your Layer.
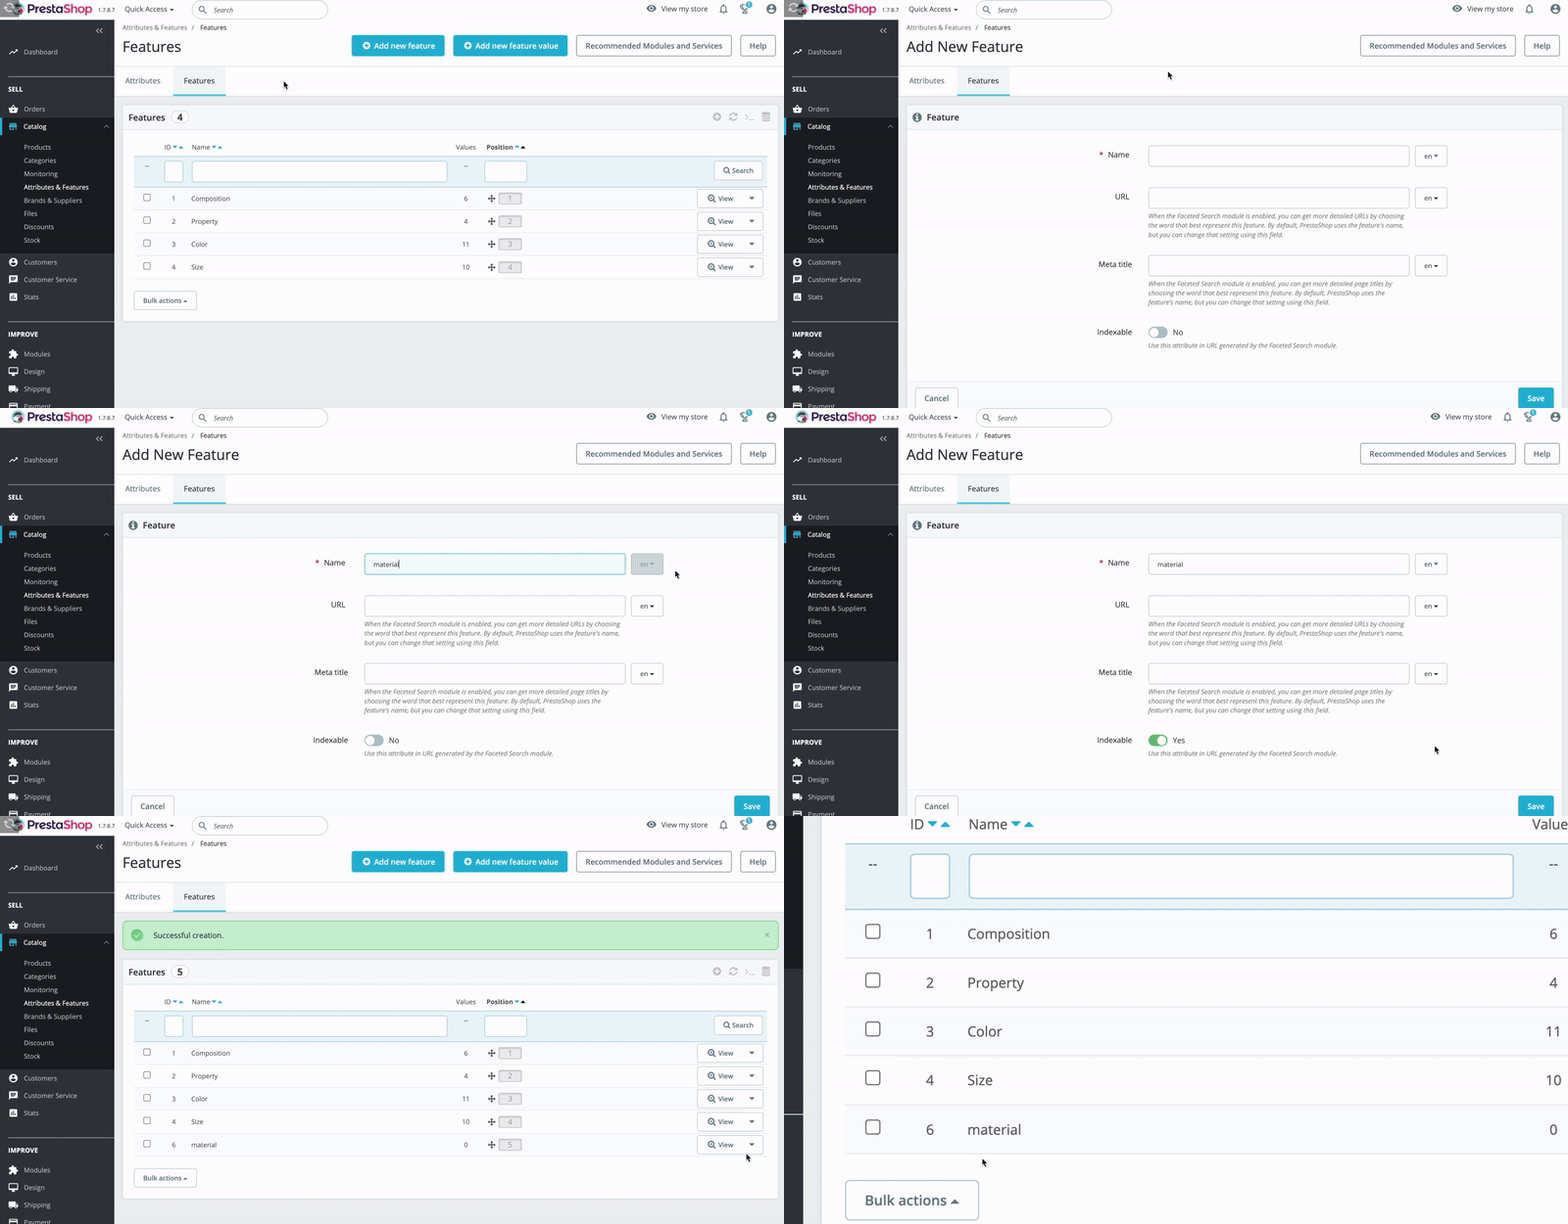
Step 1: Creating a Feature
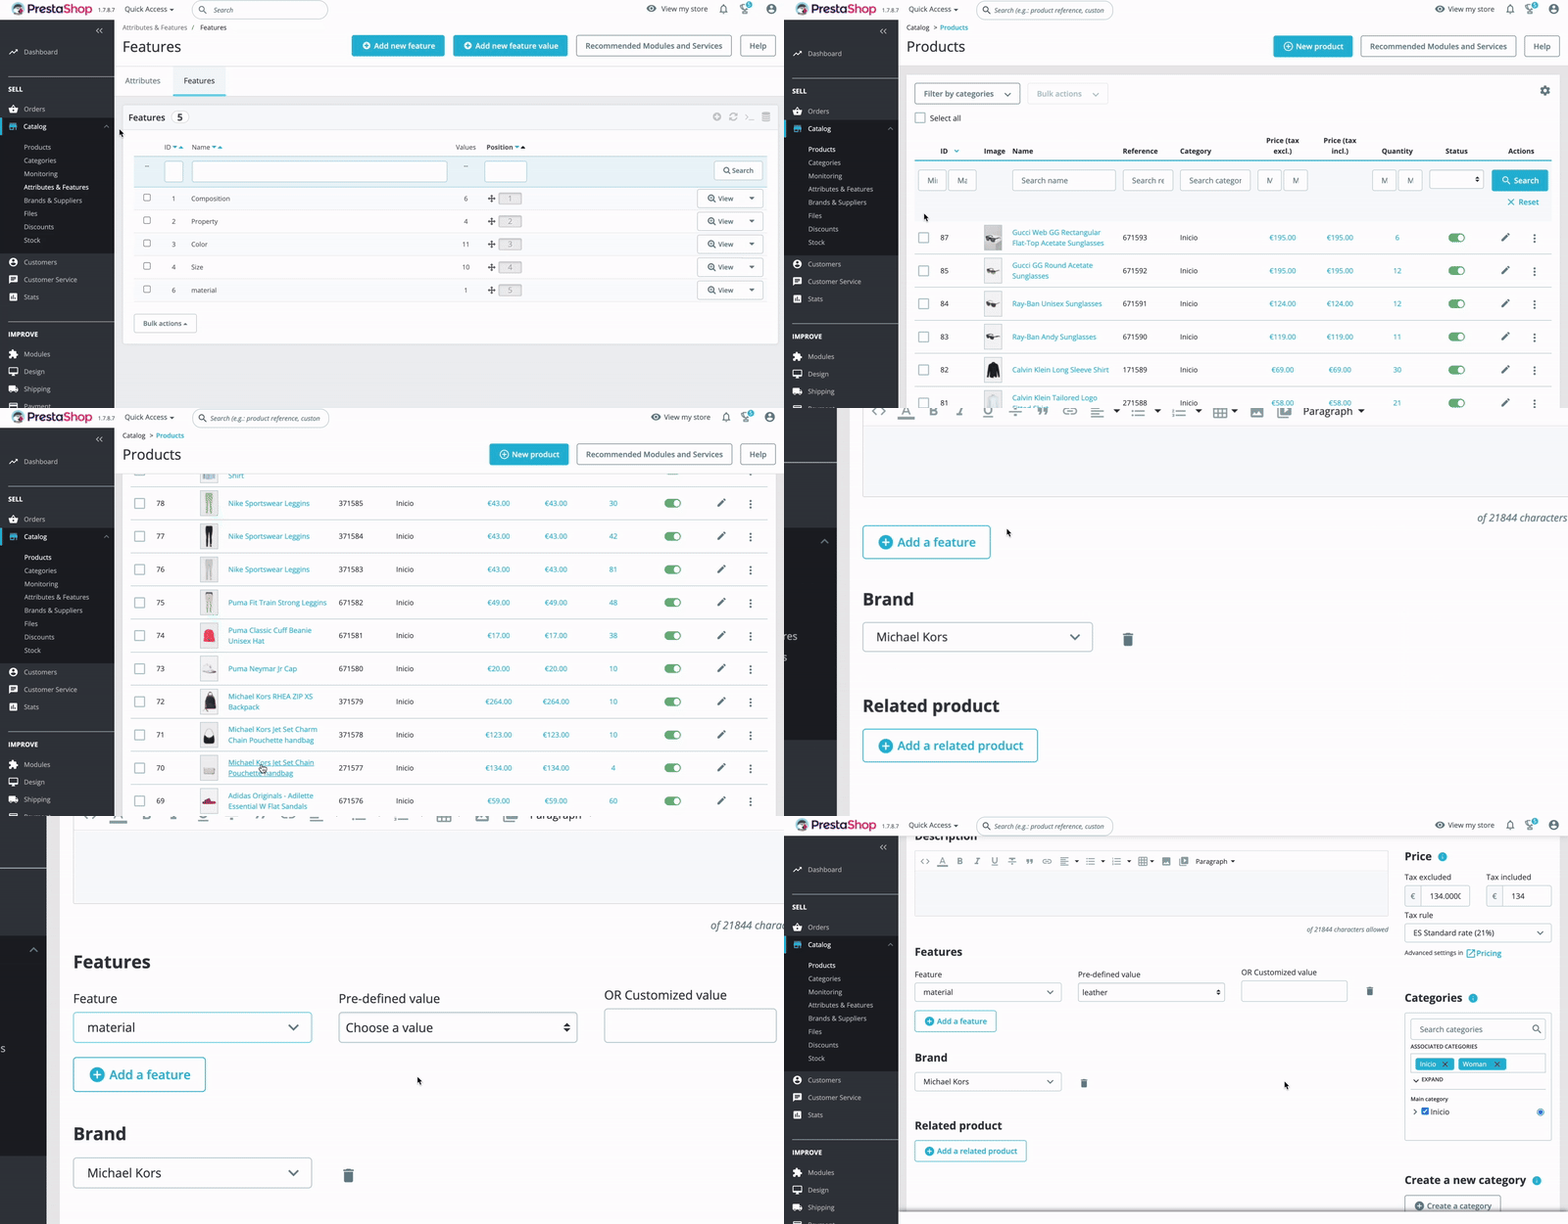
To create a Feature, go to "Catalog" > "Attributes & Features", click on "Features" and create a new one by clicking on 'Add new feature'.
Enter the name of the feature and Save.
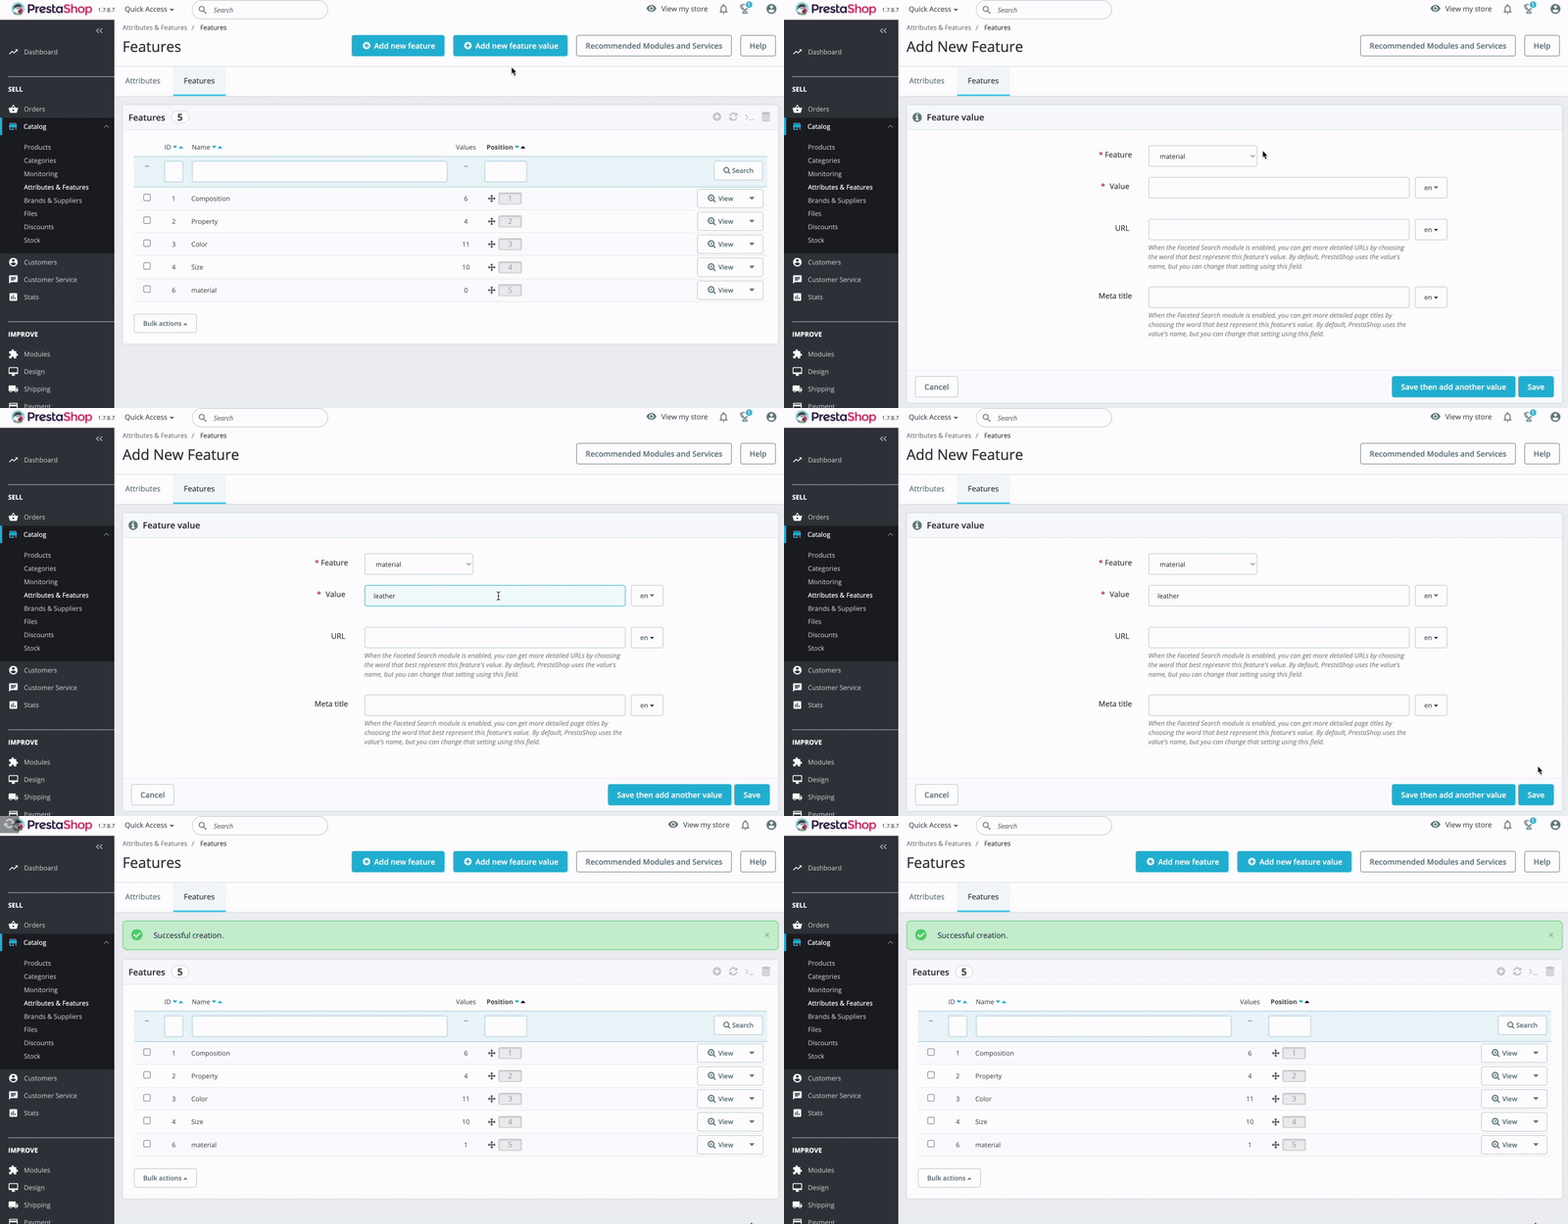
Step 2: Creating a New Feature Value
Once the feature is created, click on "Add New Feature Value", select a feature from the drop-down menu and enter the corresponding value. Always remember to Save.
Step 3: Add the New Feature and the New Value to a Product
To add a feature and its value to a product, we have to go to "Products" and select the one we want to edit by clicking on it. Click on 'Add a feature', select the feature and the pre-defined value from the drop-down menu. Then Save.
Finally, to include the product features in the feed, you must go to the Doofinder Plugin settings and enable the option. Now, you can see the features you've created before. They will now be visible as a "Filter" on your layer, to see them just go to Search > Layer Settings > Filters.
