Sales Data Configuration is the section in which you can configure your checkout and payment URLs to track sales effortlessly and unlock Doofinder’s sales related features, such as Recommendations’ Best Seller Logic or Conversion Rate statistic on Search.
By configuring this section, you will have high-end sales data collection, which will help you enhance your sales with solid analytics, and attract customers through upscale product recommendations.
To set up Sales Data Configuration, go to your Doofinder Admin Panel > Configuration > General Settings > select your Store > go to the Sales Data panel.
Once on the section, you’ll find three parts:
- Select your sales data source
- Checkout Summary Pages URLs
- Payment Confirmation Page URLs
Let’s explore them all.
Managing Sales Data configuration at Store level means that all Search Engines are configured seamlessly in the same place. If using checkout & confirmation URLs, make sure to configure all checkout and payment URLs of every Search Engine on this panel.
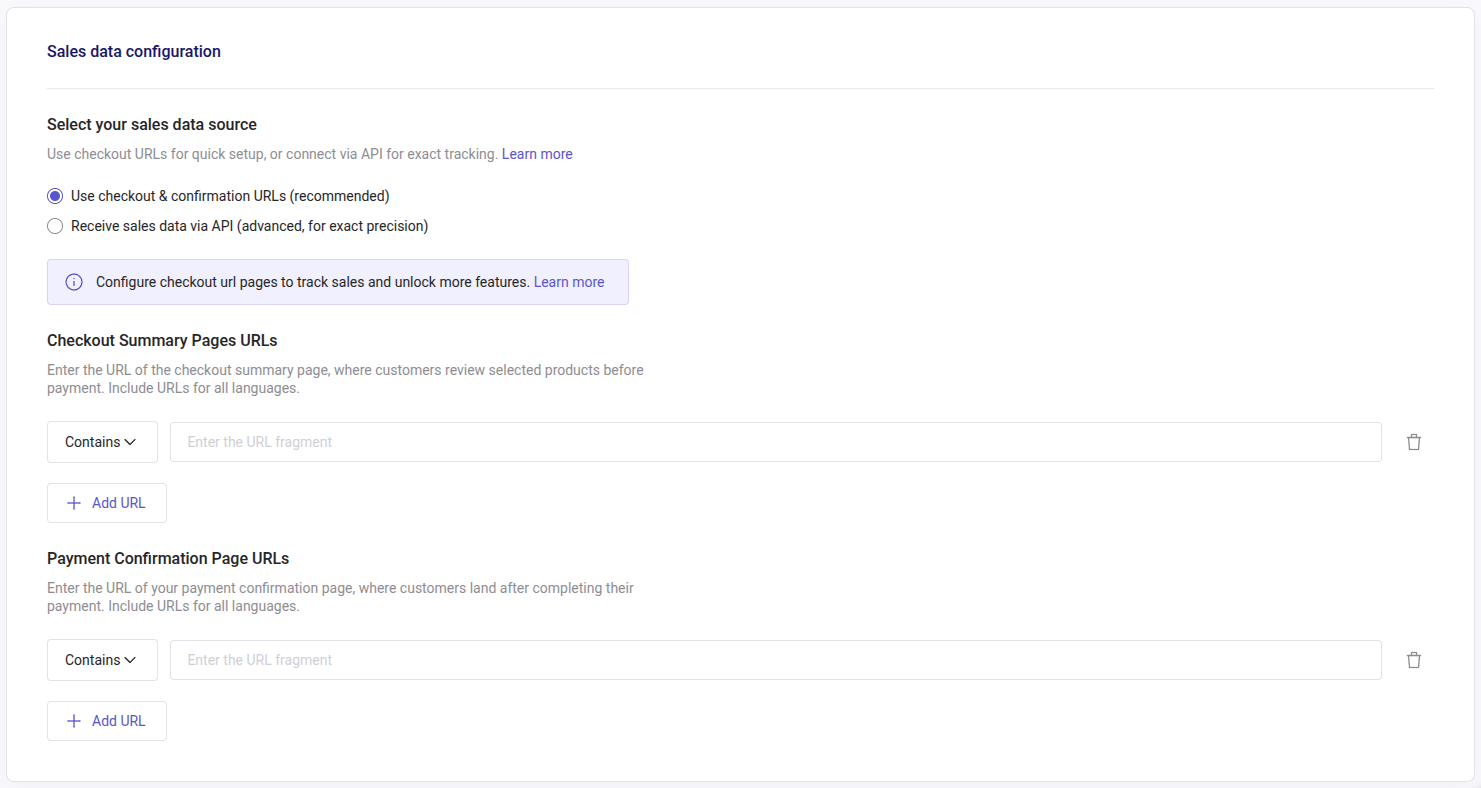
Select Your Sales Data Source
In this section, you will find two options:
- Use checkout & confirmation URLs (recommended)
- Receive sales data via API (advanced, for exact precision)
Choose the option that best fits your needs. Checkout & Confirmation URLs are the easiest and fastest way to include your sales data.
For more control, select the API option. Bear in mind that you will still need to include the Payment Confirmation Page URLs below. If configuring via API, read the Sales Data API Integration section.
Using the API is only recommended for advanced users with coding expertise.
How to Configure Checkout Summary Pages URLs
This page is where customers review the products they have selected before going to payment, it is the summary of products of their order.
-
On the dropdown list, choose between “Contains”, “Equals”, "Starts With, or "Regex" for the URL fragment you’d like to use.
-
Use “Contains” for URLs that may be partial, fragmented, or if you want to configure simple URL patterns to match all URLs sharing the same structure. For example, use
/cart. Doofinder will match any URL containing/cart, whether it isfr/cart/,/cart?action=show, orcheckout/cart/index/. -
Use “Equals” for URLs that are an exact match. For example,
https://shopify.doofinder.com/cart. Doofinder will match only URLs equal tohttps://shopify.doofinder.com/cart. -
Use "Starts With" for URL structures that may contain dynamic parameters or variations after a fixed base path. For example, URLs that may include session IDs after, or if there are different versions per region after,
https://shopify.doofinder.com/cart,https://shopify.doofinder.com/checkout. -
Use "Regex" when you need more precise control over dynamic patterns, or when any other option would match too many pages, so you can limit the match. It is not recommended if a "Contains", "Equal", or "Starts With" rule works.
If you configure URLs incorrectly, Doofinder won’t be able to track sales. For example, if you choose “Contains” or “Equals” and pick the URL /es/carrito?action=showid234, it will only register sales for this user, as Doofinder is looking for every URL that contains the whole fragment.
Make sure that Doofinder Script is loaded on all screens during the checkout process. If it isn’t, no sale event will be registered.
-
-
Fill out the boxes with the URLs selected of the checkout summary page. Make sure all domains fall under the same URL, or include URLs for all languages.
-
To configure more URLs, click on the button “+Add URL”; a new row will appear.
-
Once finished, scroll down to the bottom of the panel and click on “Save”.
To erase any of the URLs configured, just follow the box of the URL to the right and click on the trash icon.
How to Configure Payment Confirmation Page URLs
This page is where customers land after completing payment, it usually looks like a “thank you” page.
-
On the dropdown list, choose between “Contains”, “Equals”, "Starts With, or "Regex" for the URL fragment you’d like to use.
-
Use “Contains” for URLs that may be partial, fragmented, or if you want to configure simple URL patterns to match all URLs sharing the same structure. For example,
/confirmation-order/or/confirmation-order/*/payment-method/credit-card. Doofinder will match any URL containing/confirmation-order/, or/confirmation-order/(anything in between)/payment-method/credit-card. -
Use “Equals” for URLs that are an exact match. For example,
https://shopify.doofinder.com/confirmation-order/ -
Use "Starts With" for URL structures that may contain dynamic parameters or variations after a fixed base path. For example, URLs that may include session IDs after, or if there are different versions per region after,
https://shopify.doofinder.com/confirmation-order, orhttps://shopify.doofinder.com/payment-method -
Use "Regex" when you need more precise control over dynamic patterns, or when any other option would match too many pages, so you can limit the match. It is not recommended if a "Contains", "Equal", or "Starts With" rule works.
If you configure URLs incorrectly, Doofinder won’t be able to track sales. For example, if you choose “Contains” or “Equals” and select the URL /confirmation-order?user_id=234, it will only register sales for this user, as Doofinder is looking for every URL that contains the whole fragment.
Make sure that Doofinder Script is loaded on all screens during the checkout process (including the confirmation order page). If it isn’t, no sale event will be registered.
-
-
Fill out the boxes with the URLs selected of the payment confirmation page. Make sure all domains fall under the same URL, or include URLs for all languages.
-
If you need to configure more URLs, click on the button “+Add URL”; a new row will appear.
-
Once finished, scroll down to the bottom of the panel and click on “Save”.
To erase any of the URLs configured, just follow the box of the URL to the right and click on the trash icon.
Sales Data API Integration
Remember, this applies only if you choose “Receive sales data via API (advanced, for exact precision).”. Find full access to the API documentation.
In this case, follow these steps:
After selecting the Receive sales data via API (advanced, for exact precision) option in the Doofinder Admin Panel, implement the following API request in your checkout flow:
-
Endpoint: POST /api/v2/stats/carts
-
Request Body:
The request body must be in JSON format and include the following fields:
{
  "checkout_json": [
    {
      "id": "1",
      "price": 29.99,
      "quantity": 2
    },
    {
      "id": "2",
      "price": "12.50",
      "quantity": 1
    }
  ],
  "hashid": "hashid",
  "session_id": "session_id",
  "user_id": "user_id",
  "currency": "EUR"
}
A successful request will return an HTTP 200 OK response with confirmation of the registered cart data.
{
    "status": "registered"
}
Javascript
const url = "https://eu1-api.doofinder.com/api/v2/stats/carts";

const data = const data = {
  "checkout_json": [
      {
          "id": "1",
          "price": 29.99,
          "quantity": 2
      },
      {
          "id": "2",
          "price": "$12.50",
          "quantity": 1
      }
  ],
  "hashid": "hashid",
  "session_id": "session_id",
  "user_id": "user_id",
  "currency": "EUR"
};

fetch(url, {
  method: "POST",
  headers: {
    "Accept": "application/json",
    "Content-Type": "application/json"
  },
  body: JSON.stringify(data)
})
  .then(response => response.json())
  .then(result => {
    console.log("Cart registered successfully:", result);
  })
  .catch(error => {
    console.error("Error registering cart:", error);
  });