How to index additional fields
Before you proceed with the Sorting Options, please read below!
By default, Doofinder doesn't index every field detected in your feed. Instead, it automatically indexes a set of essential fields needed for the connection to work, covering things like: identifiers, product info, pricing, images, stock/availability, and a few internal Doofinder attributes. See more here!
If you need other feed fields indexed beyond these defaults, you can add them manually:
- Open the Select the fields to be indexed dropdown and choose the additional attributes detected in your feed.
- Reindex your feed so the new fields are picked up, see how!
This only applies to non-API integrations (feed-based data sources). If you're integrating via API, this indexing behavior doesn't apply to you.
What is Sorting Options?
With Sorting options, you can add and customize the fields that appear in the layer’s sorting dropdown menu, tailoring search result ordering to your business needs and customer preferences.
This feature allows you to diversify sorting options, enabling customers to arrange their search results in a way that best suits their needs, enhancing their shopping experience.
You will find this feature in your Admin Panel > Search > Layer Settings > Sorting Options.
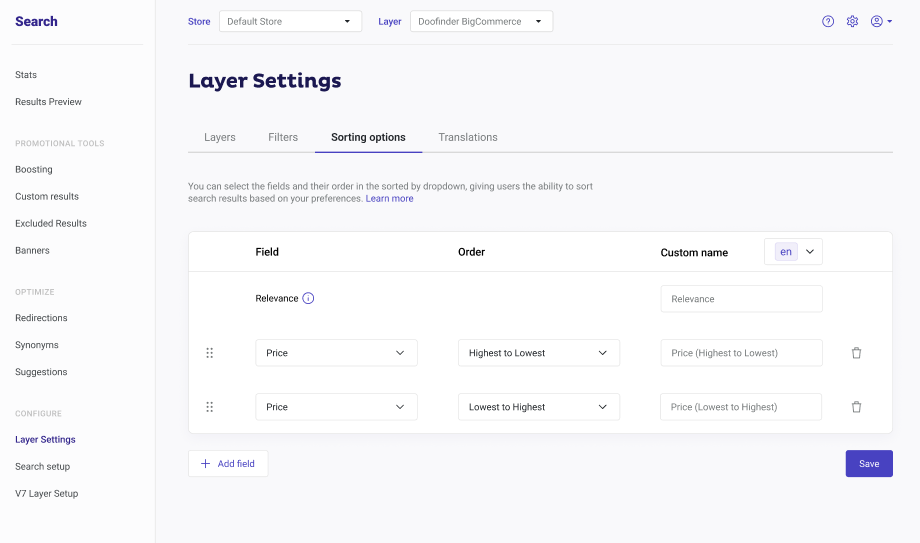
Default Sorting Options
The following fields are the default sorting options given by Doofinder:
- Relevance: order highest to lowest. Comes by default, it is not possible to eliminate or reorder this sorting option.
- Price: order lowest to highest.
- Price: order highest to lowest.
- Title: order A to Z.
- Title: order Z to A.
Custom Sorting Options
Sorting options allows you to add more arrangement possibilities. When you click the "+ Add field" button on the left side of the panel, a new field will appear with its corresponding dropdown menus.
By clicking on the field dropdown menu, you can select numerical or text-based fields from your data feed.
-
If you choose a numerical field, the available sorting options will be Lowest to Highest or Highest to Lowest. To offer both options, you must add the same field again and select the opposite order.
-
If you choose a text field, the available sorting options will be A to Z or Z to A. To offer both options, you must add the same field again and select the opposite order.
Remember that custom fields are based on the fields already present in your data feed. If a sorting field does not appear in the dropdown menu, it means it is not included in your feed.
How to Add Sorting Options
This feature is applied at layer level. If you change the layer of your eCommerce, you will need to configure and add the fields for the new layer.
-
To add a field in the Sorting options feature go to your Admin Panel > Search > Layer Settings > Sorting Options. In the top bar select the Store and Layer where you want to add sorting options.
-
In the Sorting options panel click on “+Add field”. A new empty field box will then appear in the panel.
-
Click the dropdown menu in the empty field box under the field column, and select the field you want to add to your layer's sorting options.
-
Decide the sorting order you want to offer your customers:
- For numerical fields: Choose Highest to Lowest or Lowest to Highest.
- For date fields: Choose a date value field, such as
date_createdordate, and select Newest to Oldest or Oldest to Newest. - For text-based fields: Choose A to Z or Z to A.
-
Lastly, customize the display name for each field in each language.
In the Custom Name dropdown menu (located next to the Custom Name column), select the language for which you want to create a custom sorting name. The default language option, such as "en," will be preselected. Finally, save your changes.
If the selected language is not available, a warning will appear for the translation selected.
Take a look at the example below: