Installation
Follow this step by step guide to Install the Doofinder VTEX Plugin.
- To access the backoffice, in the shop url add
/adminand log in. - Go to Apps > App Store, search for "Doofinder" and click on "install".
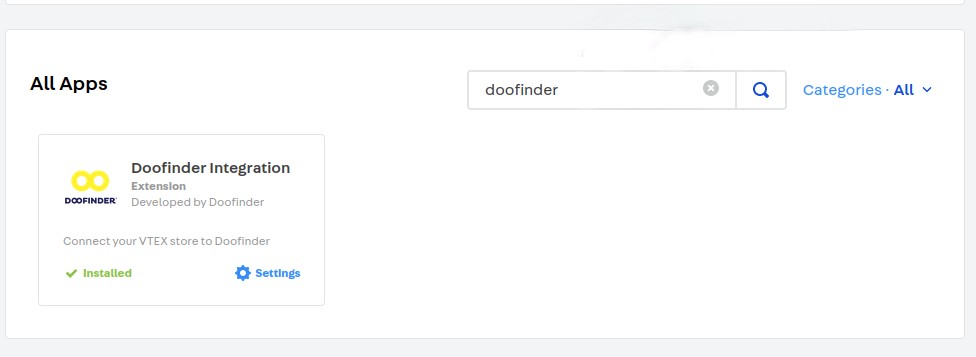
Note that the region must be "eu1" or "us1", and the language must be the shortened locale, e.g. "en" or "es".
Post Installation
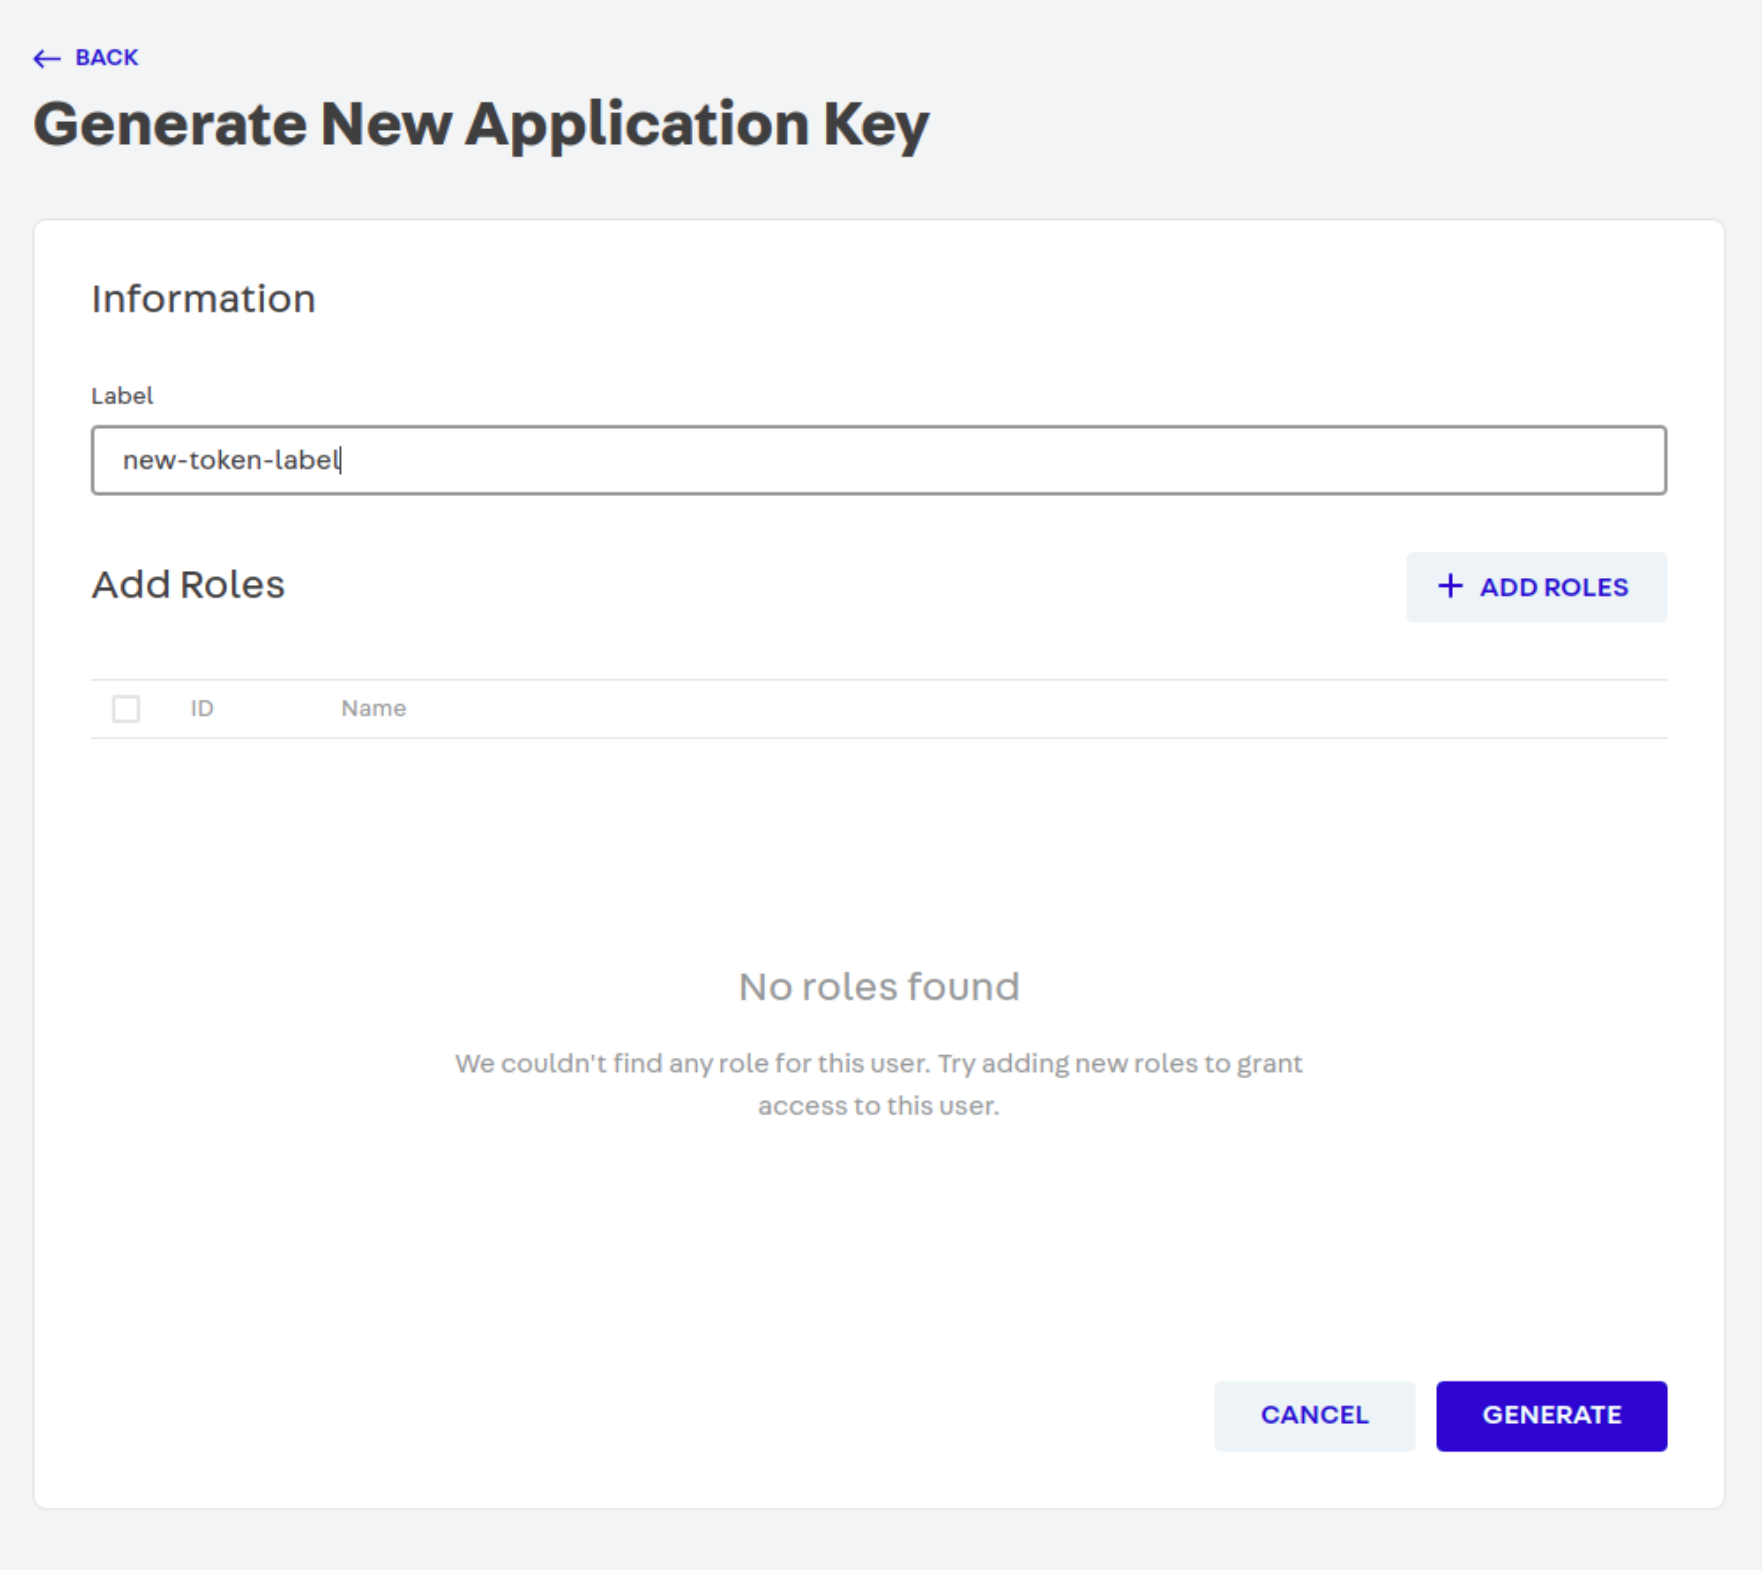
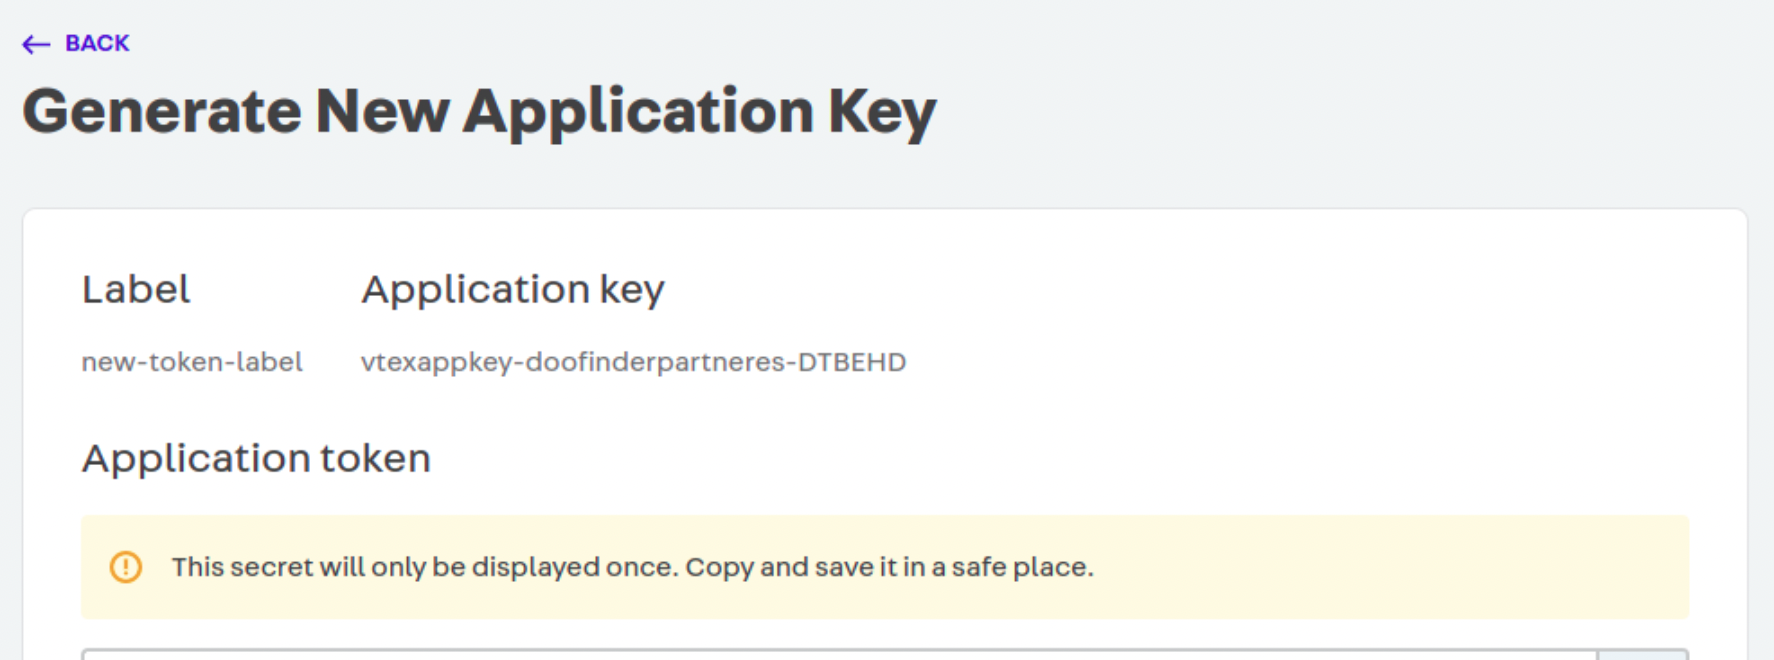
Once installed, you need to generate an API token that will be used later during the Store creation. To do this, go to: Account Settings > Account Management > Application Keys > Manage My Keys > Generate New

When adding a new key, make sure that both values are saved, since the token value is only retrieved on creation and, for security reasons, can no longer be accessed.
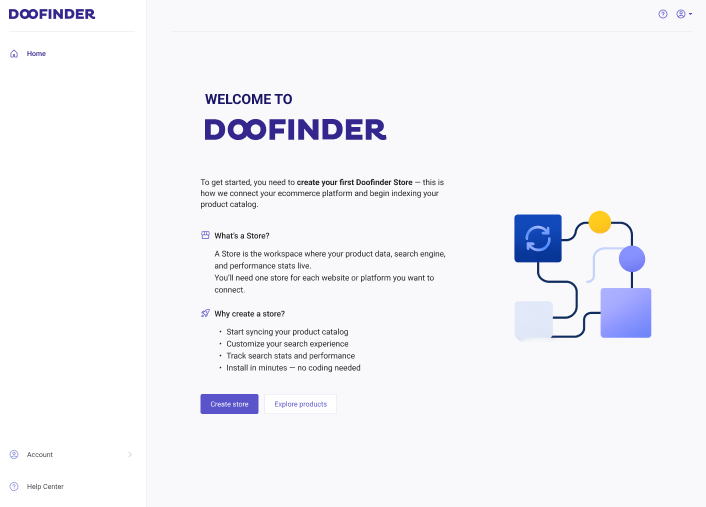
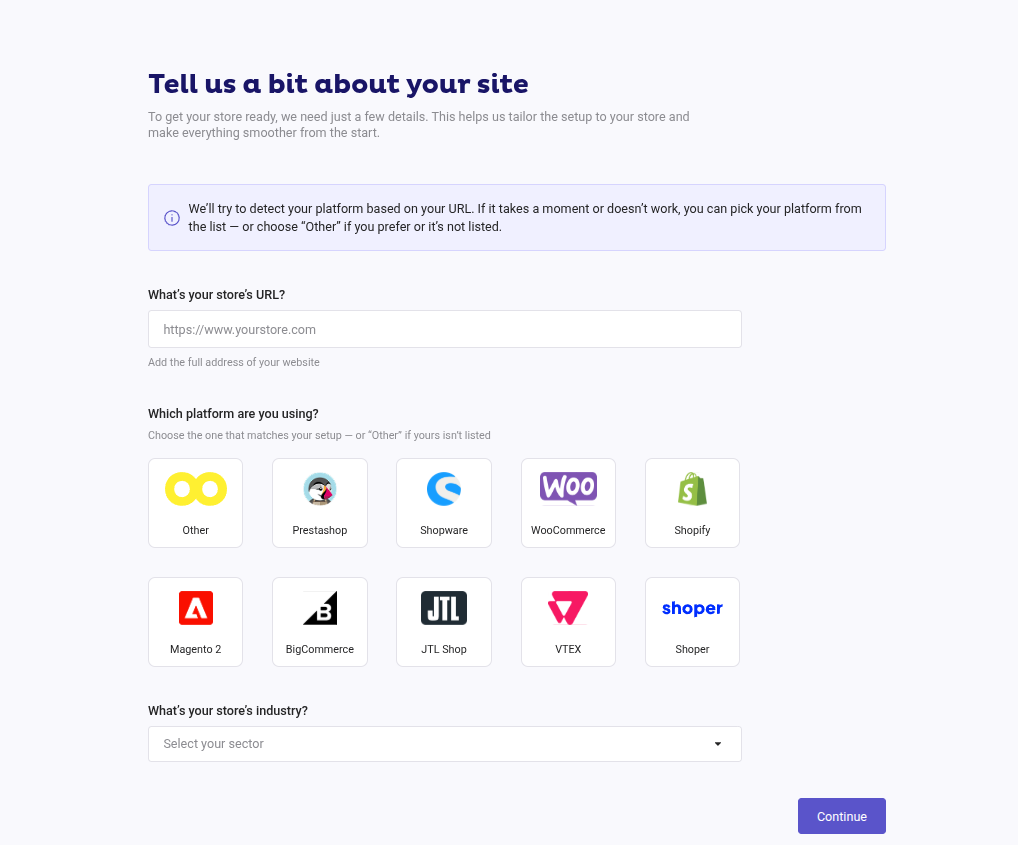
1. Log In and Create Store in Doofinder
- Log in to your Doofinder Admin Panel.
- If you are new, a "Create store" button will appear on the front page. Click on "Create Store".
- Once clicked, a pop-up window will appear where you need to:
- Enter the complete URL of your website. Doofinder will detect your platform automatically. If not, select your platform in the following block.
- Select your store’s industry.
- In the following panel, complete the Application Key, and Application Token generated in the previous step.
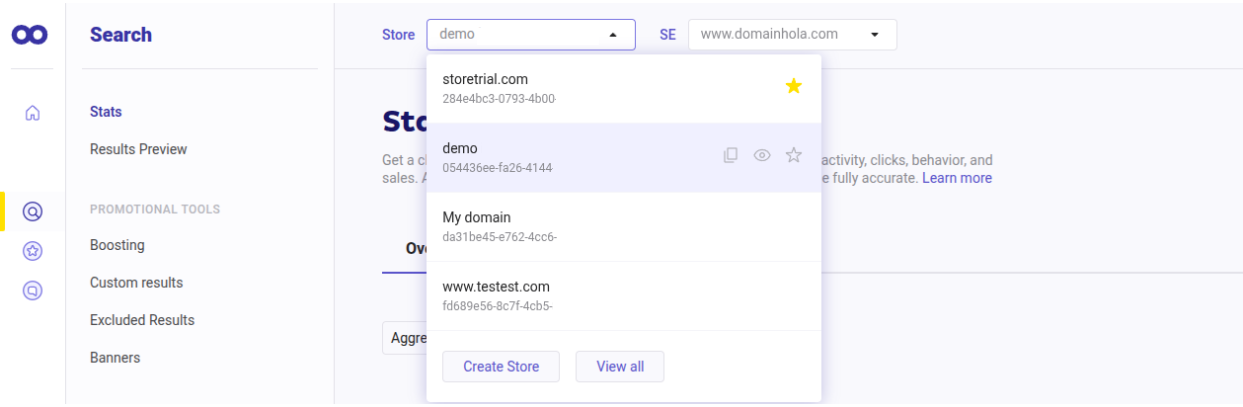
If you don't see it or prefer a different method, go to the top bar > click the "Store" dropdown menu > select "Create Store".
Click "Continue".
2. Platform Connection
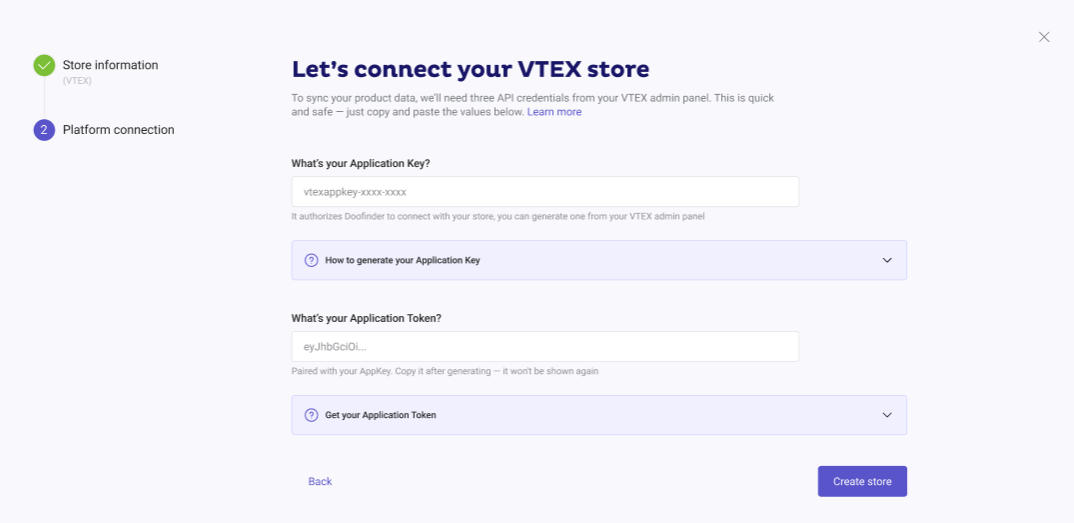
Click “Create store”.
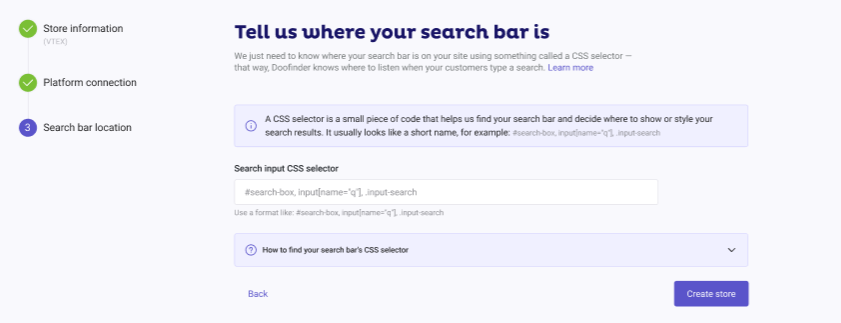
3 (only if CSS is not detected): Manually Set Search Bar Location
Doofinder will detect the CSS selector of your search bar automatically.
If it can’t detect it, you’ll need to enter the selector manually before the Store connection step (the final step where your Store and Search Engine are created).
You can use an id, name, or class as the CSS selector. For example:
-
#search-box -
input[name="q"] -
.input-search
For more information, check our guide on CSS Selector.
The panel will look like this:
Doofinder Script
Once you complete the installation process in Doofinder, the script will be automatically added to your theme; no further action is required on your part.
Visits and Cart Data Tracking
In VTEX, the single script does not load on the cart page automatically, which means that neither visits nor cart data are tracked. Therefore, some customizations are required from your side within the checkout JavaScript files to make sure the checkouts are being tracked correctly.
Firstly, you would need to paste the script below into your custom JavaScript file:
window.installationId = 'YOUR_INSTALLATION_ID';
window.zone = 'YOUR_ZONE_EU1_US1_or_AP1';

const scriptTag = document.createElement('script');
scriptTag.src = 'https://cdn.doofinder.com/vtex/checkout.js';
scriptTag.async = true;
document.head.appendChild(scriptTag);
Notice that you have to fill up the window.installationId and window.zone, both found in the installation script. Example of installation ID “c51597d0-9953-4e8b-90b2-1fa5cf4d615” and zone “eu1, us1 or ap1”, see below:
<script src="https://eu1-config.doofinder.com/2.x/c51597d0-9953-4e8b-90b2-1fa5cf4d615.js" async></script>
Then you would need to paste the custom JS into your VTEX backend.
The method will depend on whether you are using the standard checkout or the Checkout UI (a special plugin designed to display the checkout interface with enhanced CSS styles).
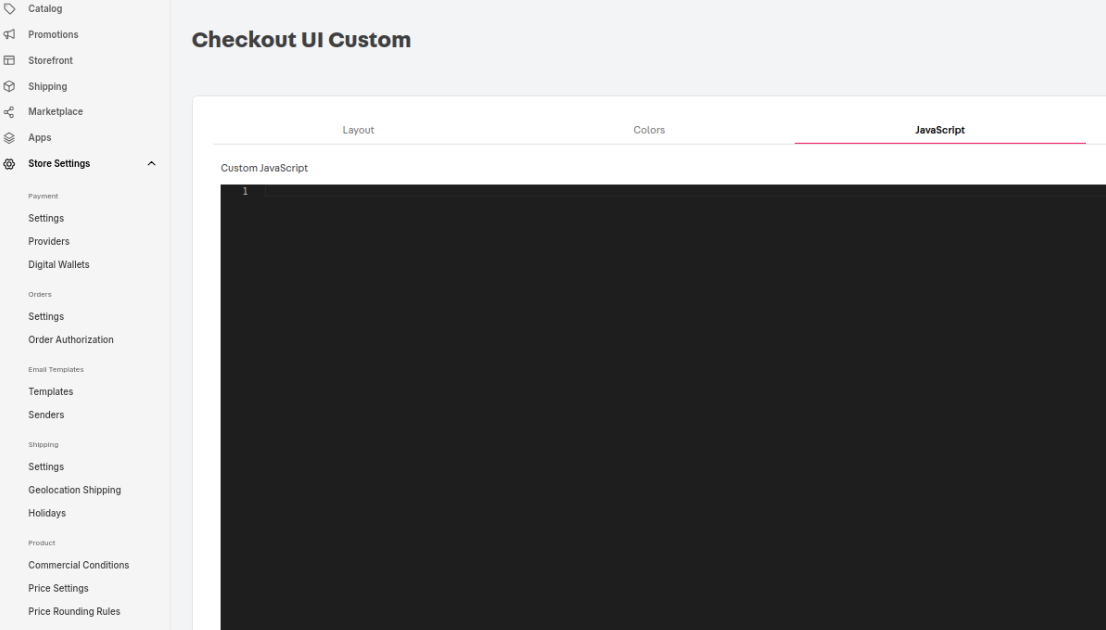
- Option 1: with Checkout UI
Go to the VTEX admin panel (/admin) > Store Settings > Storefront > Checkout UI Custom > Open the tab labelled "Javascript" > Paste the script provided at the beginning of the code and publish the changes. See:
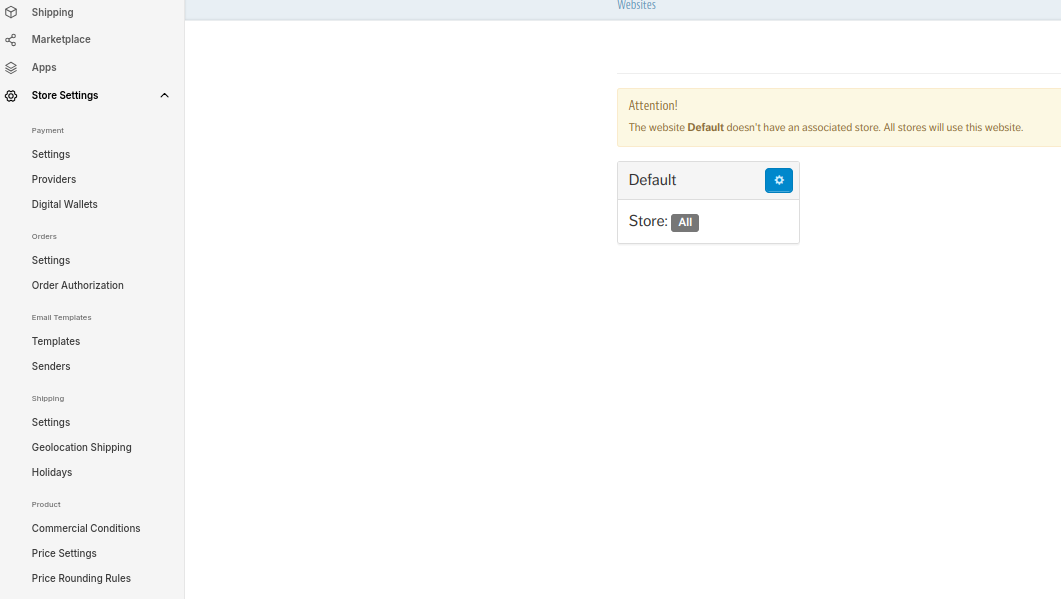
- Option 2: standard checkout
Go to the VTEX admin panel (/admin) > Store Settings > Storefront > Checkout > Click on the gear icon of the active checkout (if it has not been edited, it will be named "Default"):
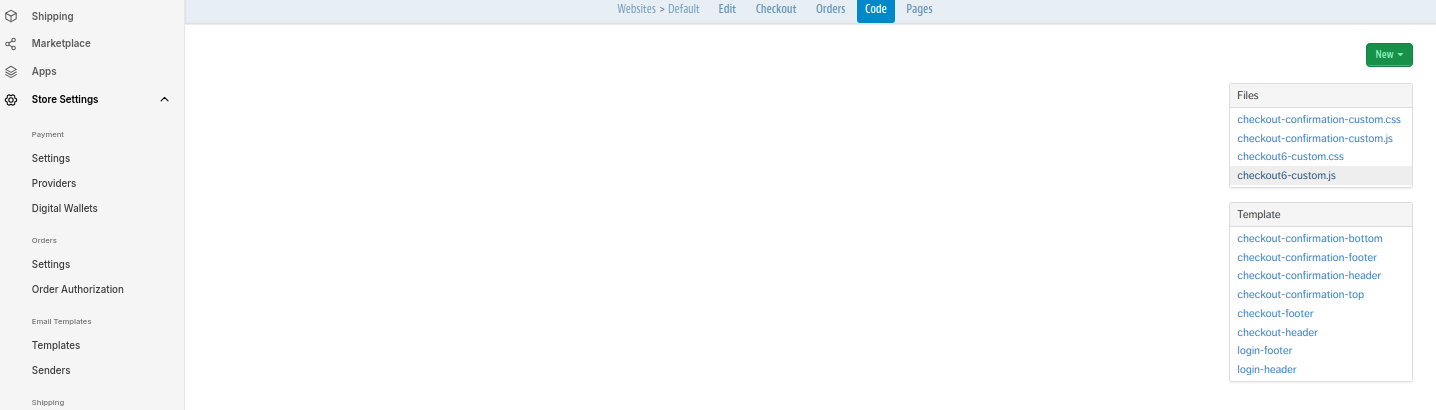
Click on the gear icon and then on the "Code" tab > click on "checkout6-custom.js" > Paste the script provided at the beginning of the code and save the changes:
With these few steps, you should have the checkouts correctly configured.
More information on how to track your sales data can be found here!