Doofinder can be installed via Component Manager as a free purchase done in Magento Marketplace , once downloaded you need to follow these steps in composer.
Installation Via Composer
To install the module through composer:
composer require doofinder/doofinder-magento2
The module should now be installed and working on the platform.
To activate it, run the following command in the Magento root folder:
bin/magento setup:upgrade
A new "Doofinder" menu should have been added to your Magento Admin Panel.
Initial Setup
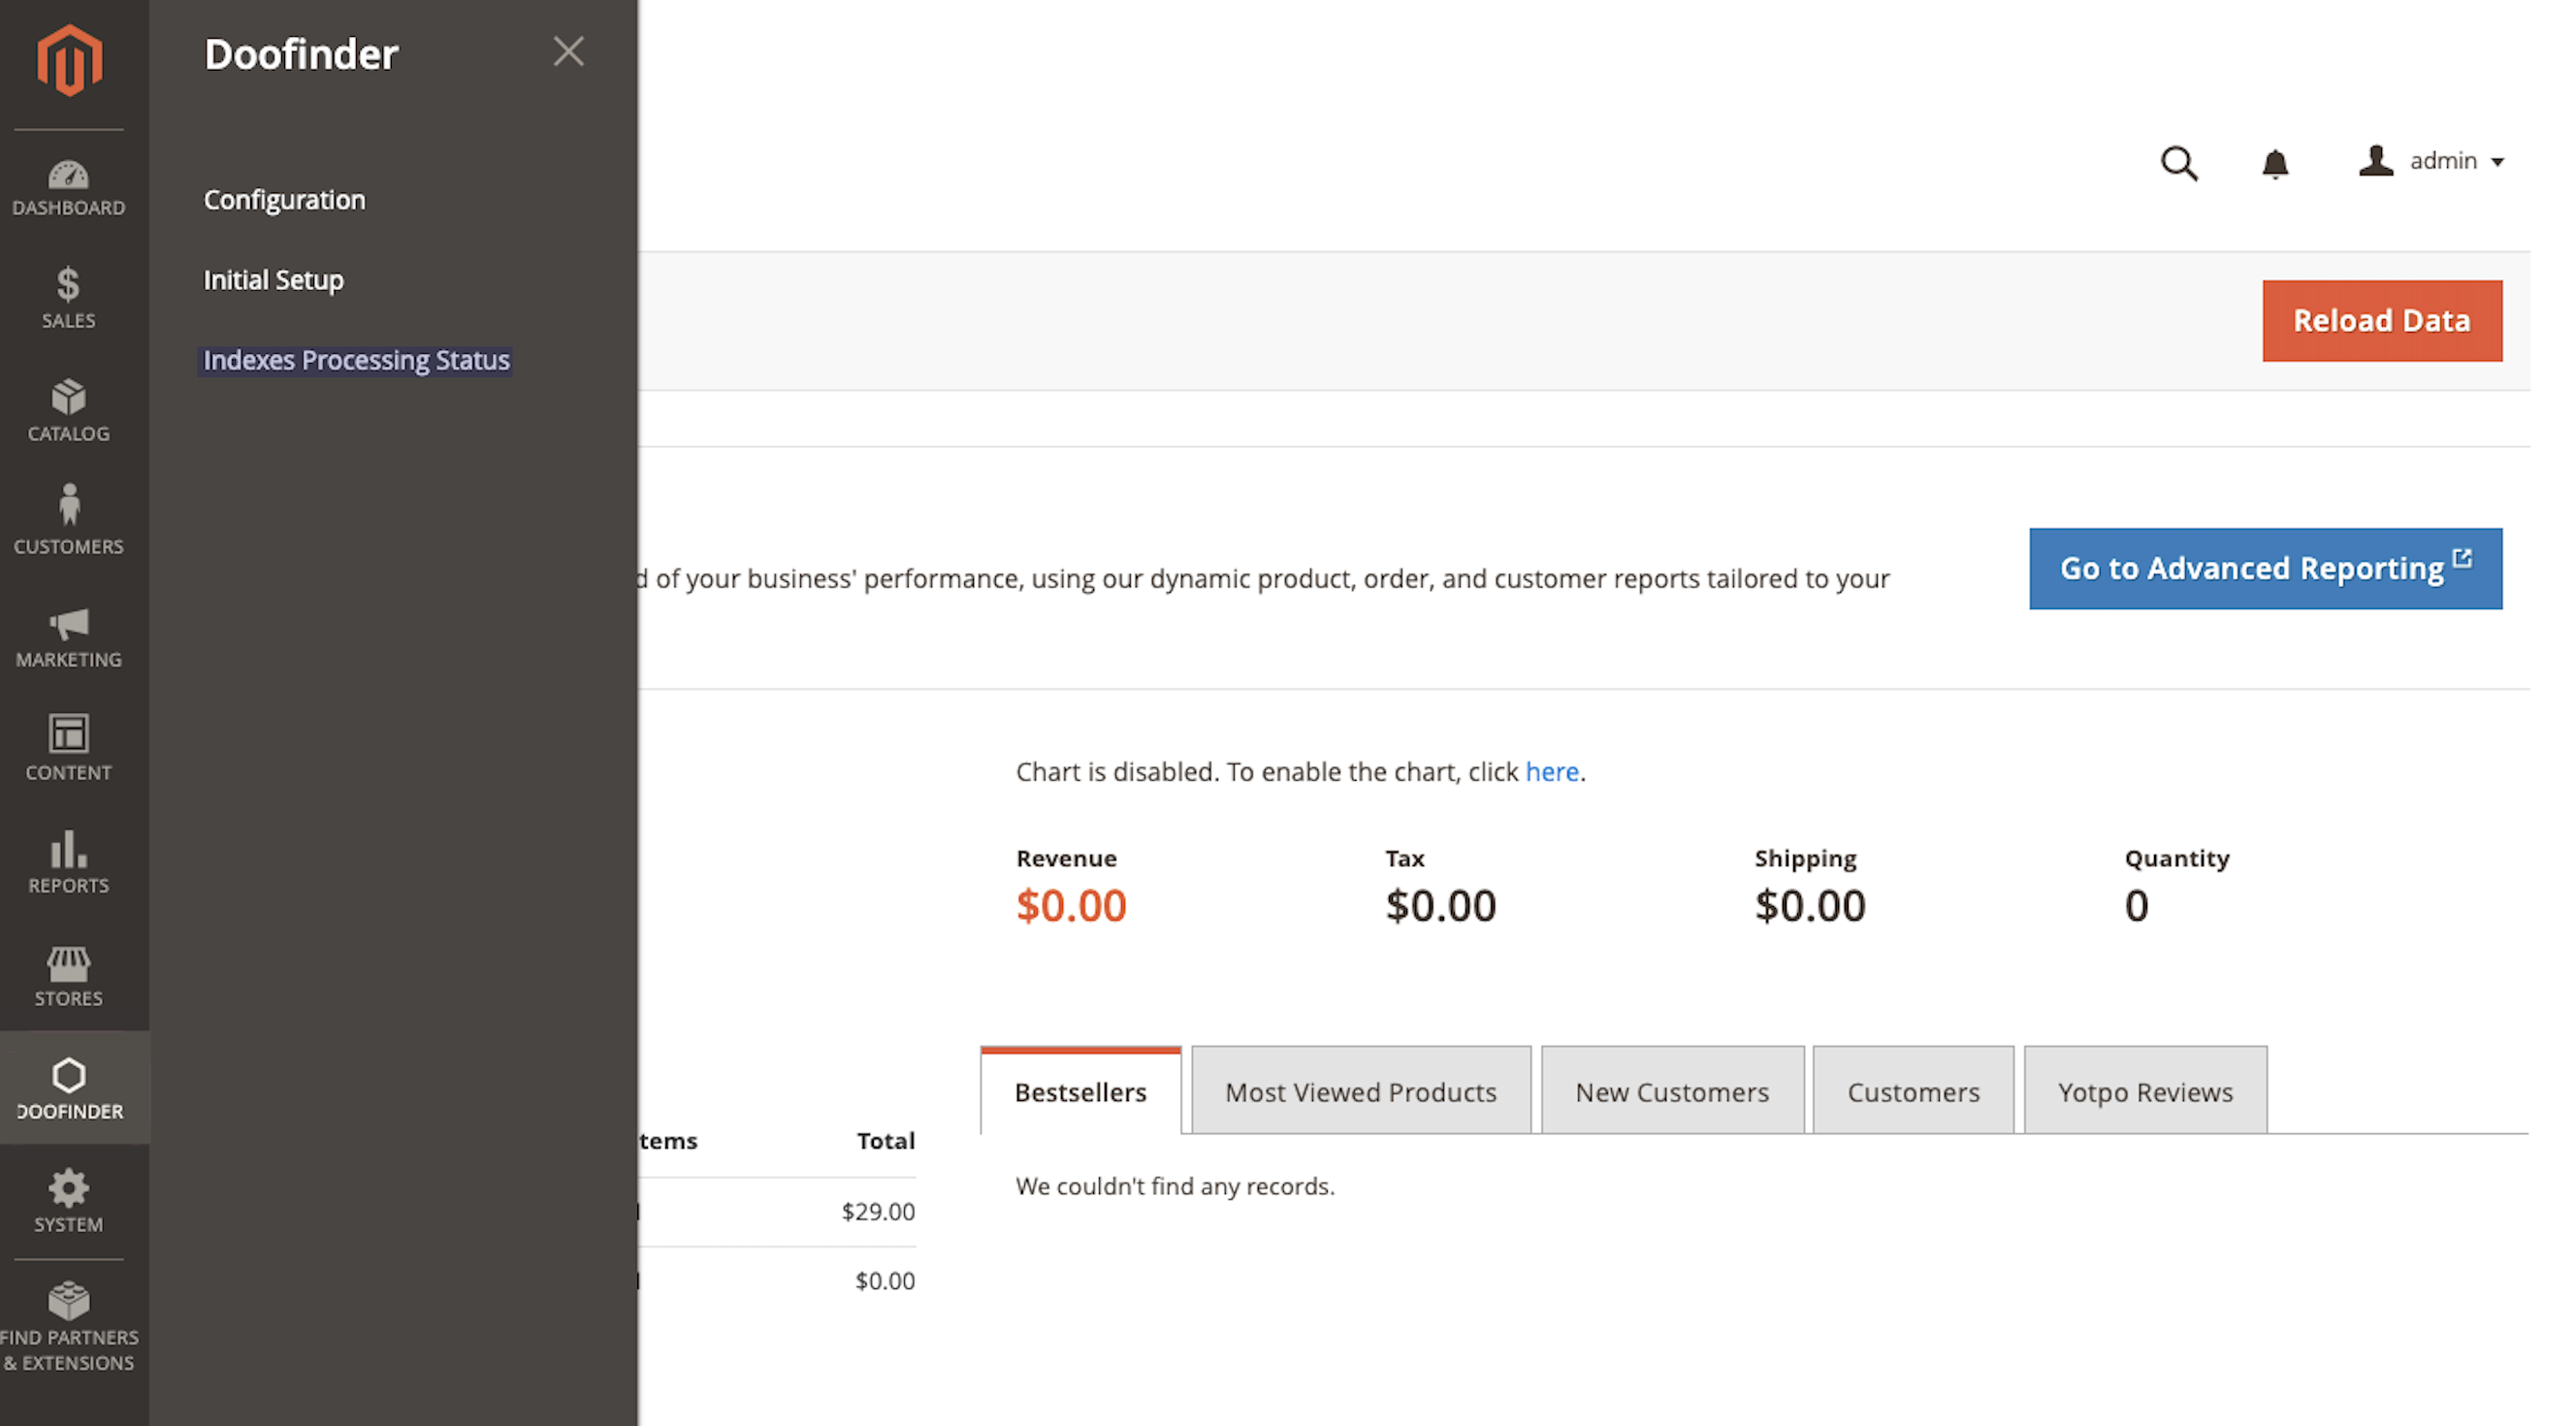
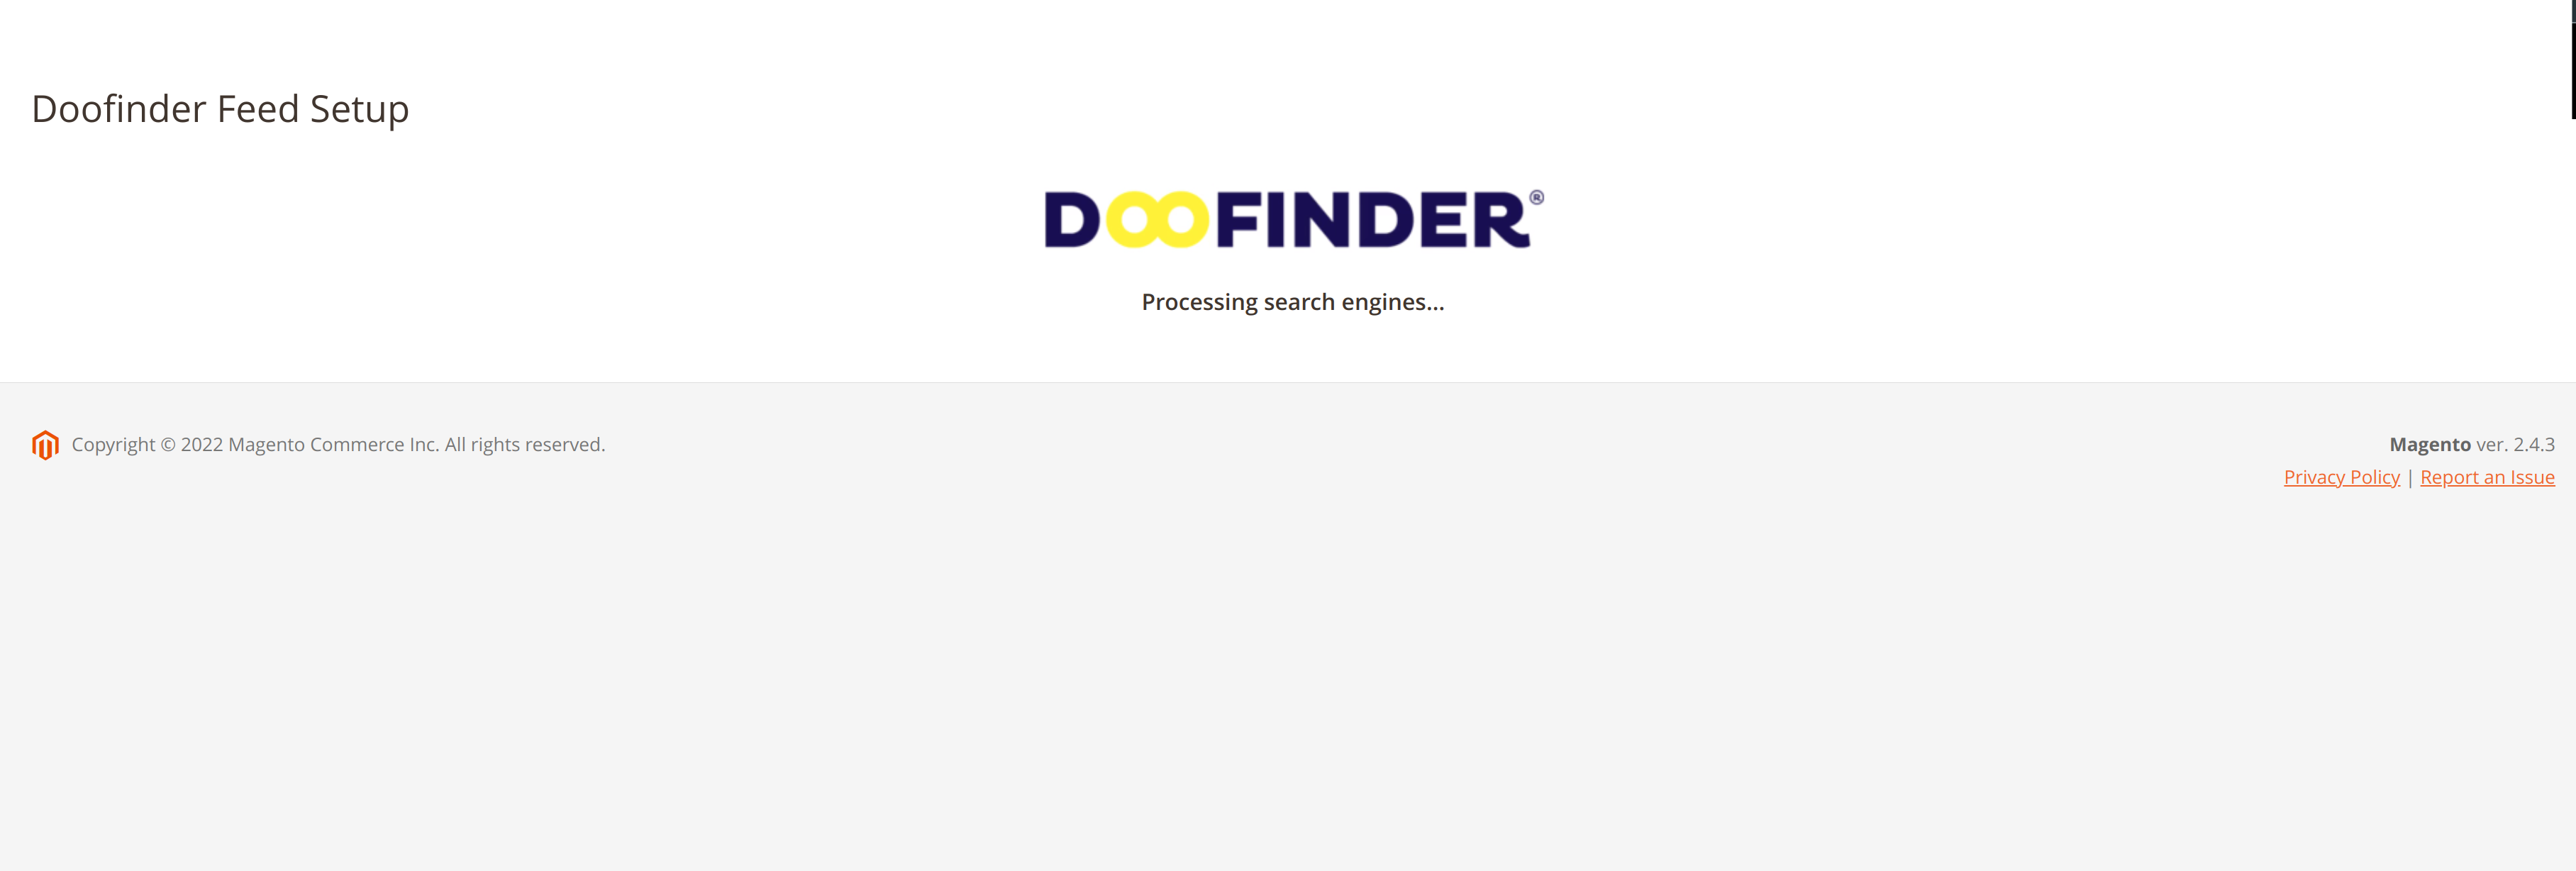
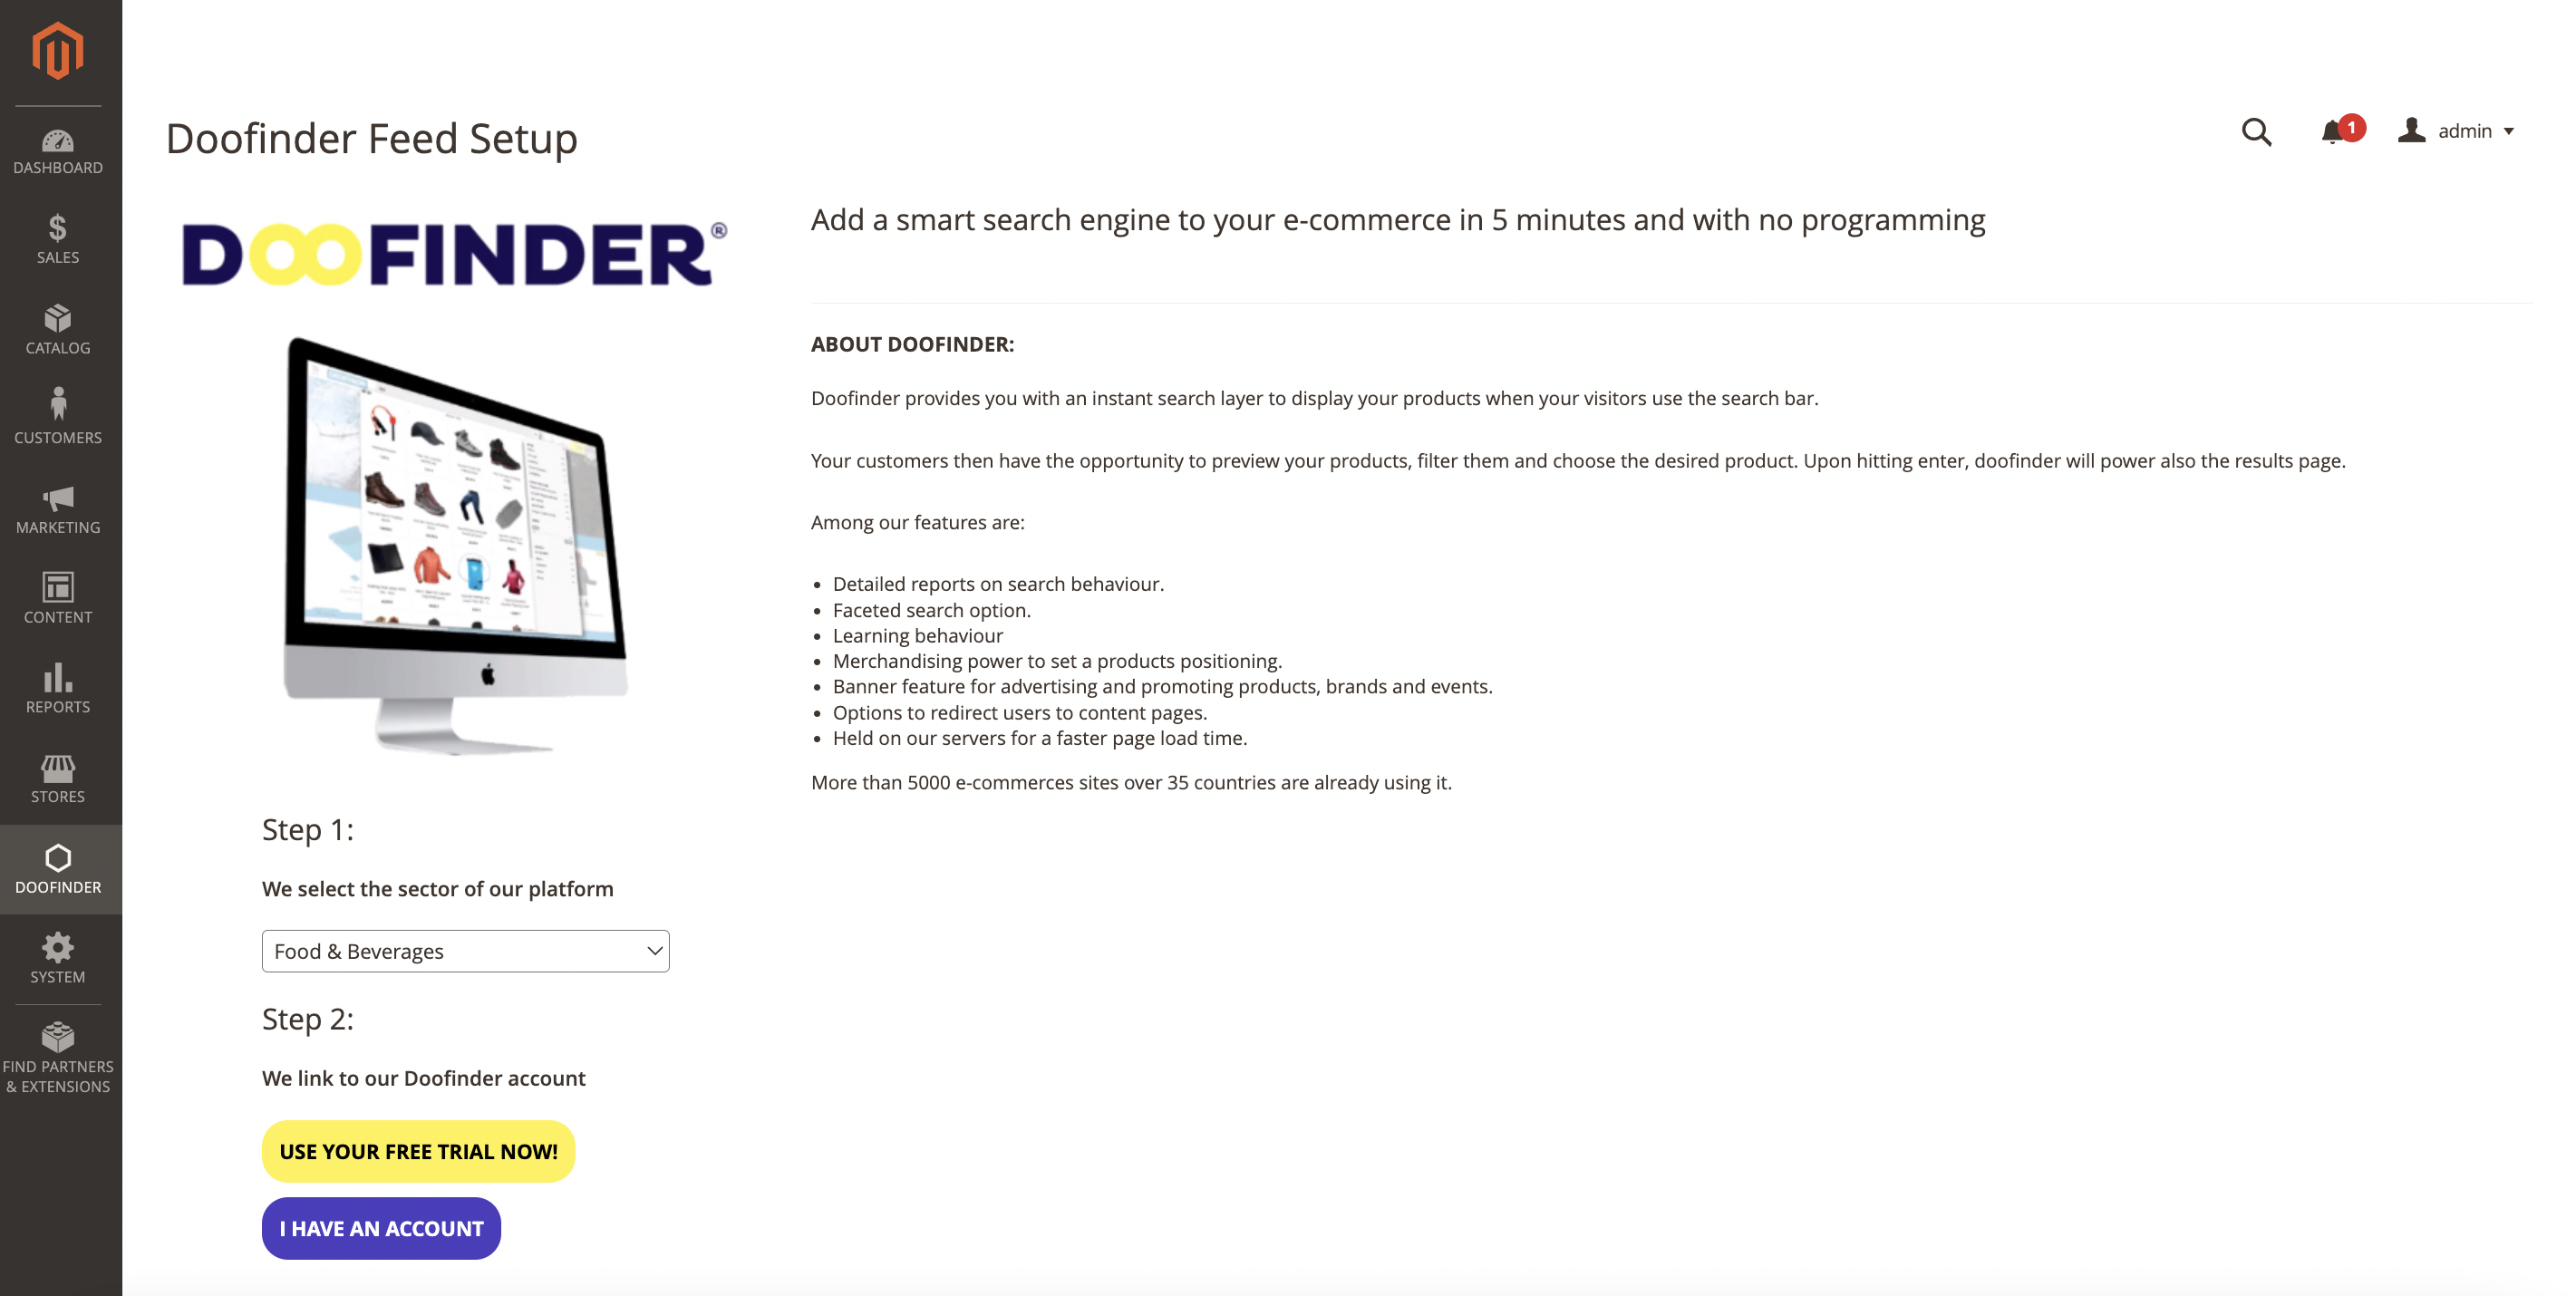
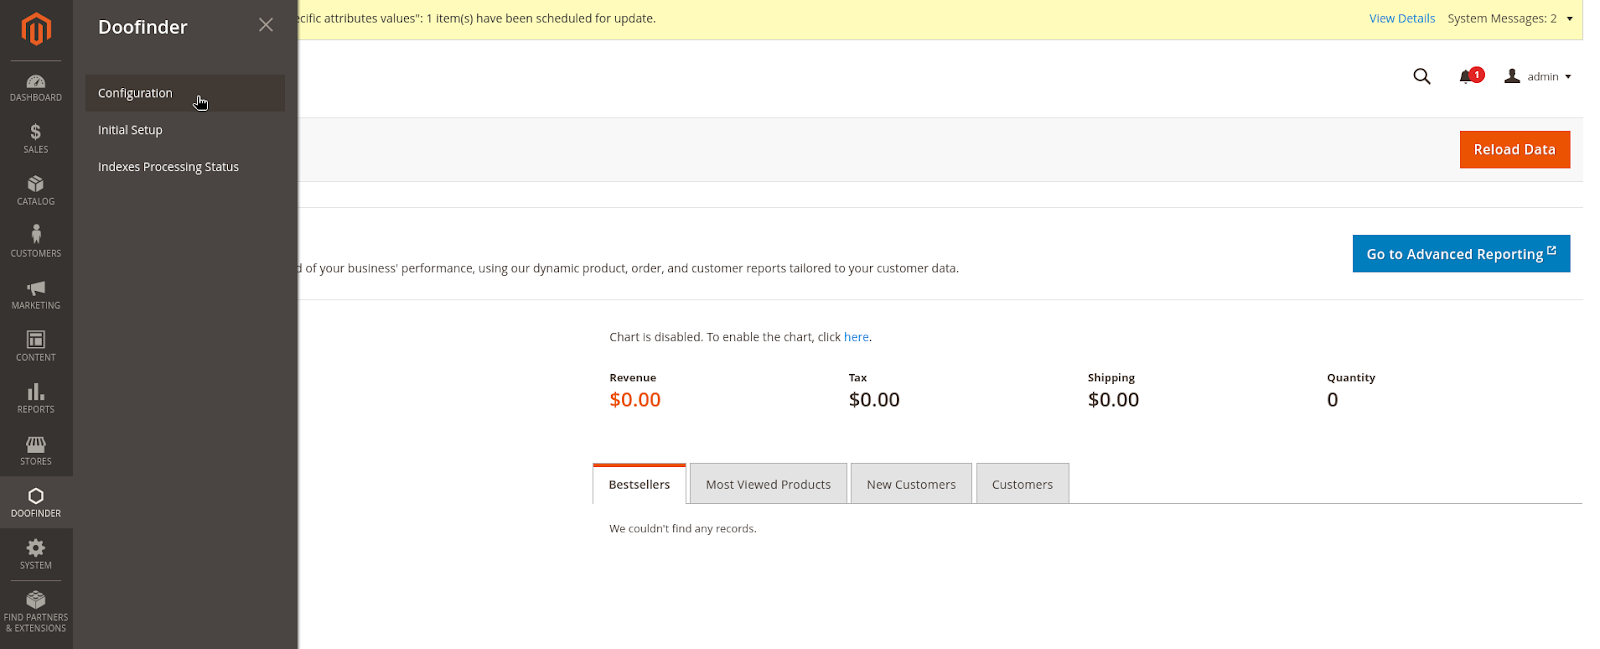
Click on the Doofinder icon under Stores to display the option's menu and select "Initial Setup".
- Select your Store's sector.
Click on dropdown menu to select your store's sector.
After a few seconds, the integration will be ready and the next step of the configuration flow will be activated.
- Link your website to a Doofinder Account.
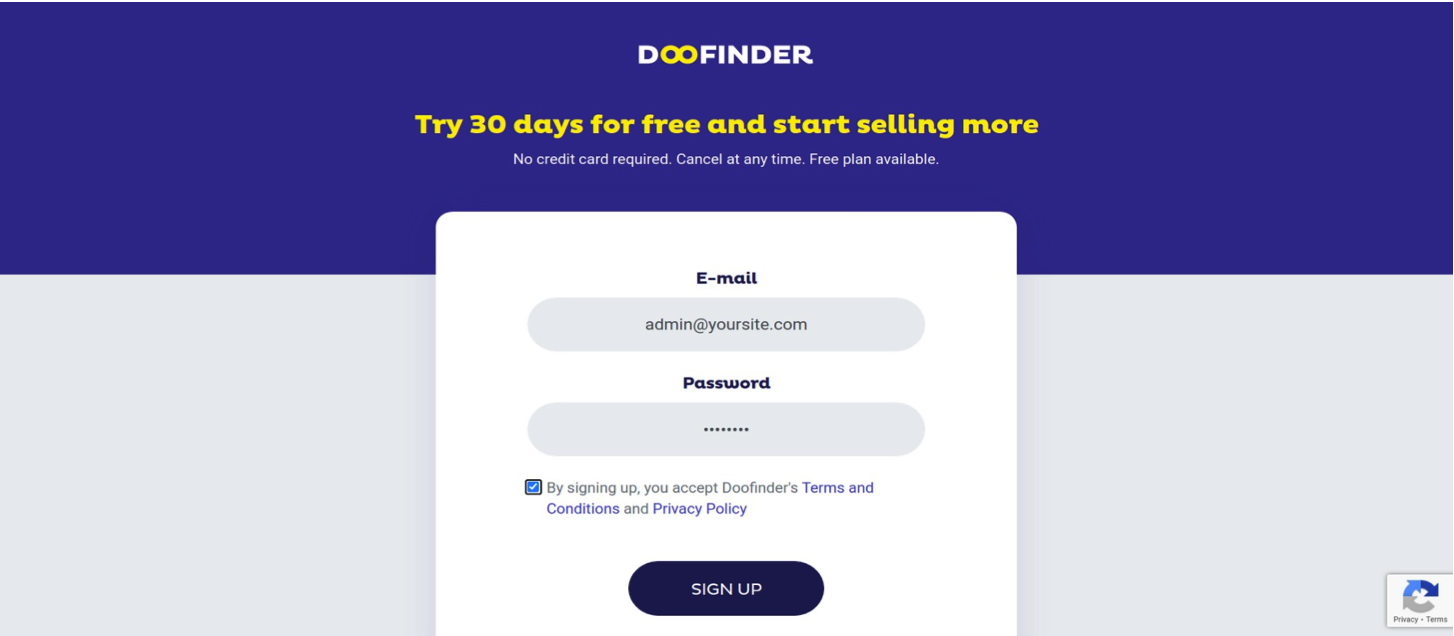
To link your website to a Doofinder account, you can log in with an existing account or register for a new free trial very easily.
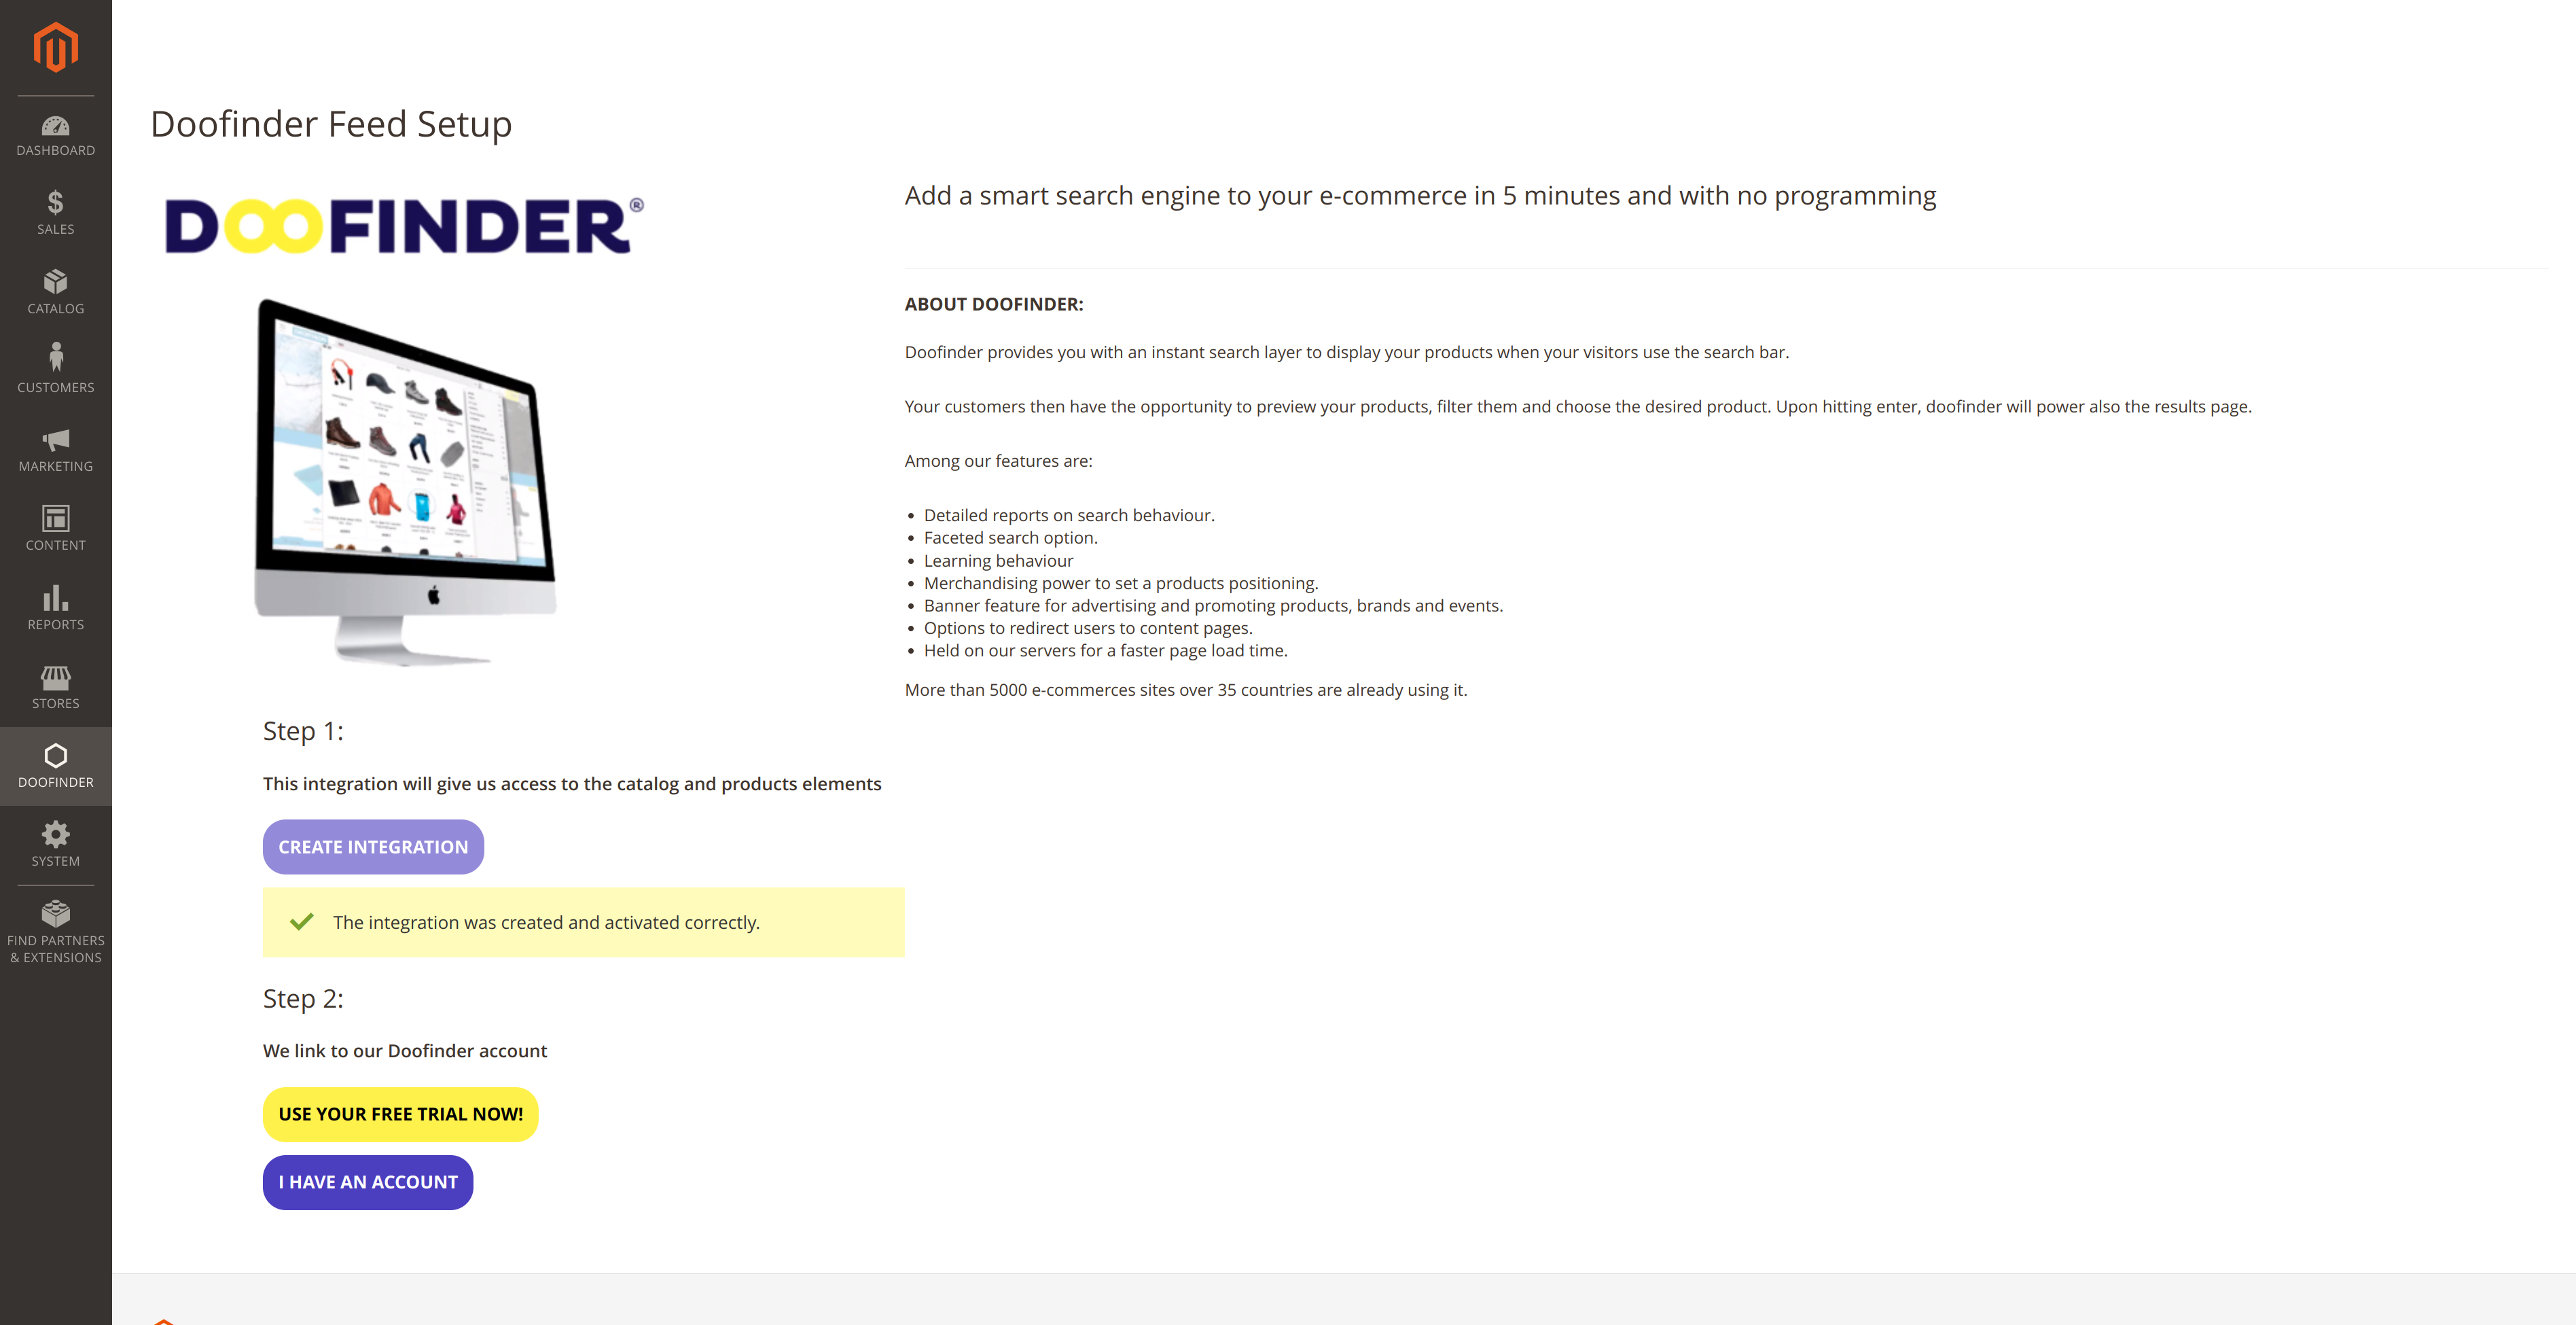
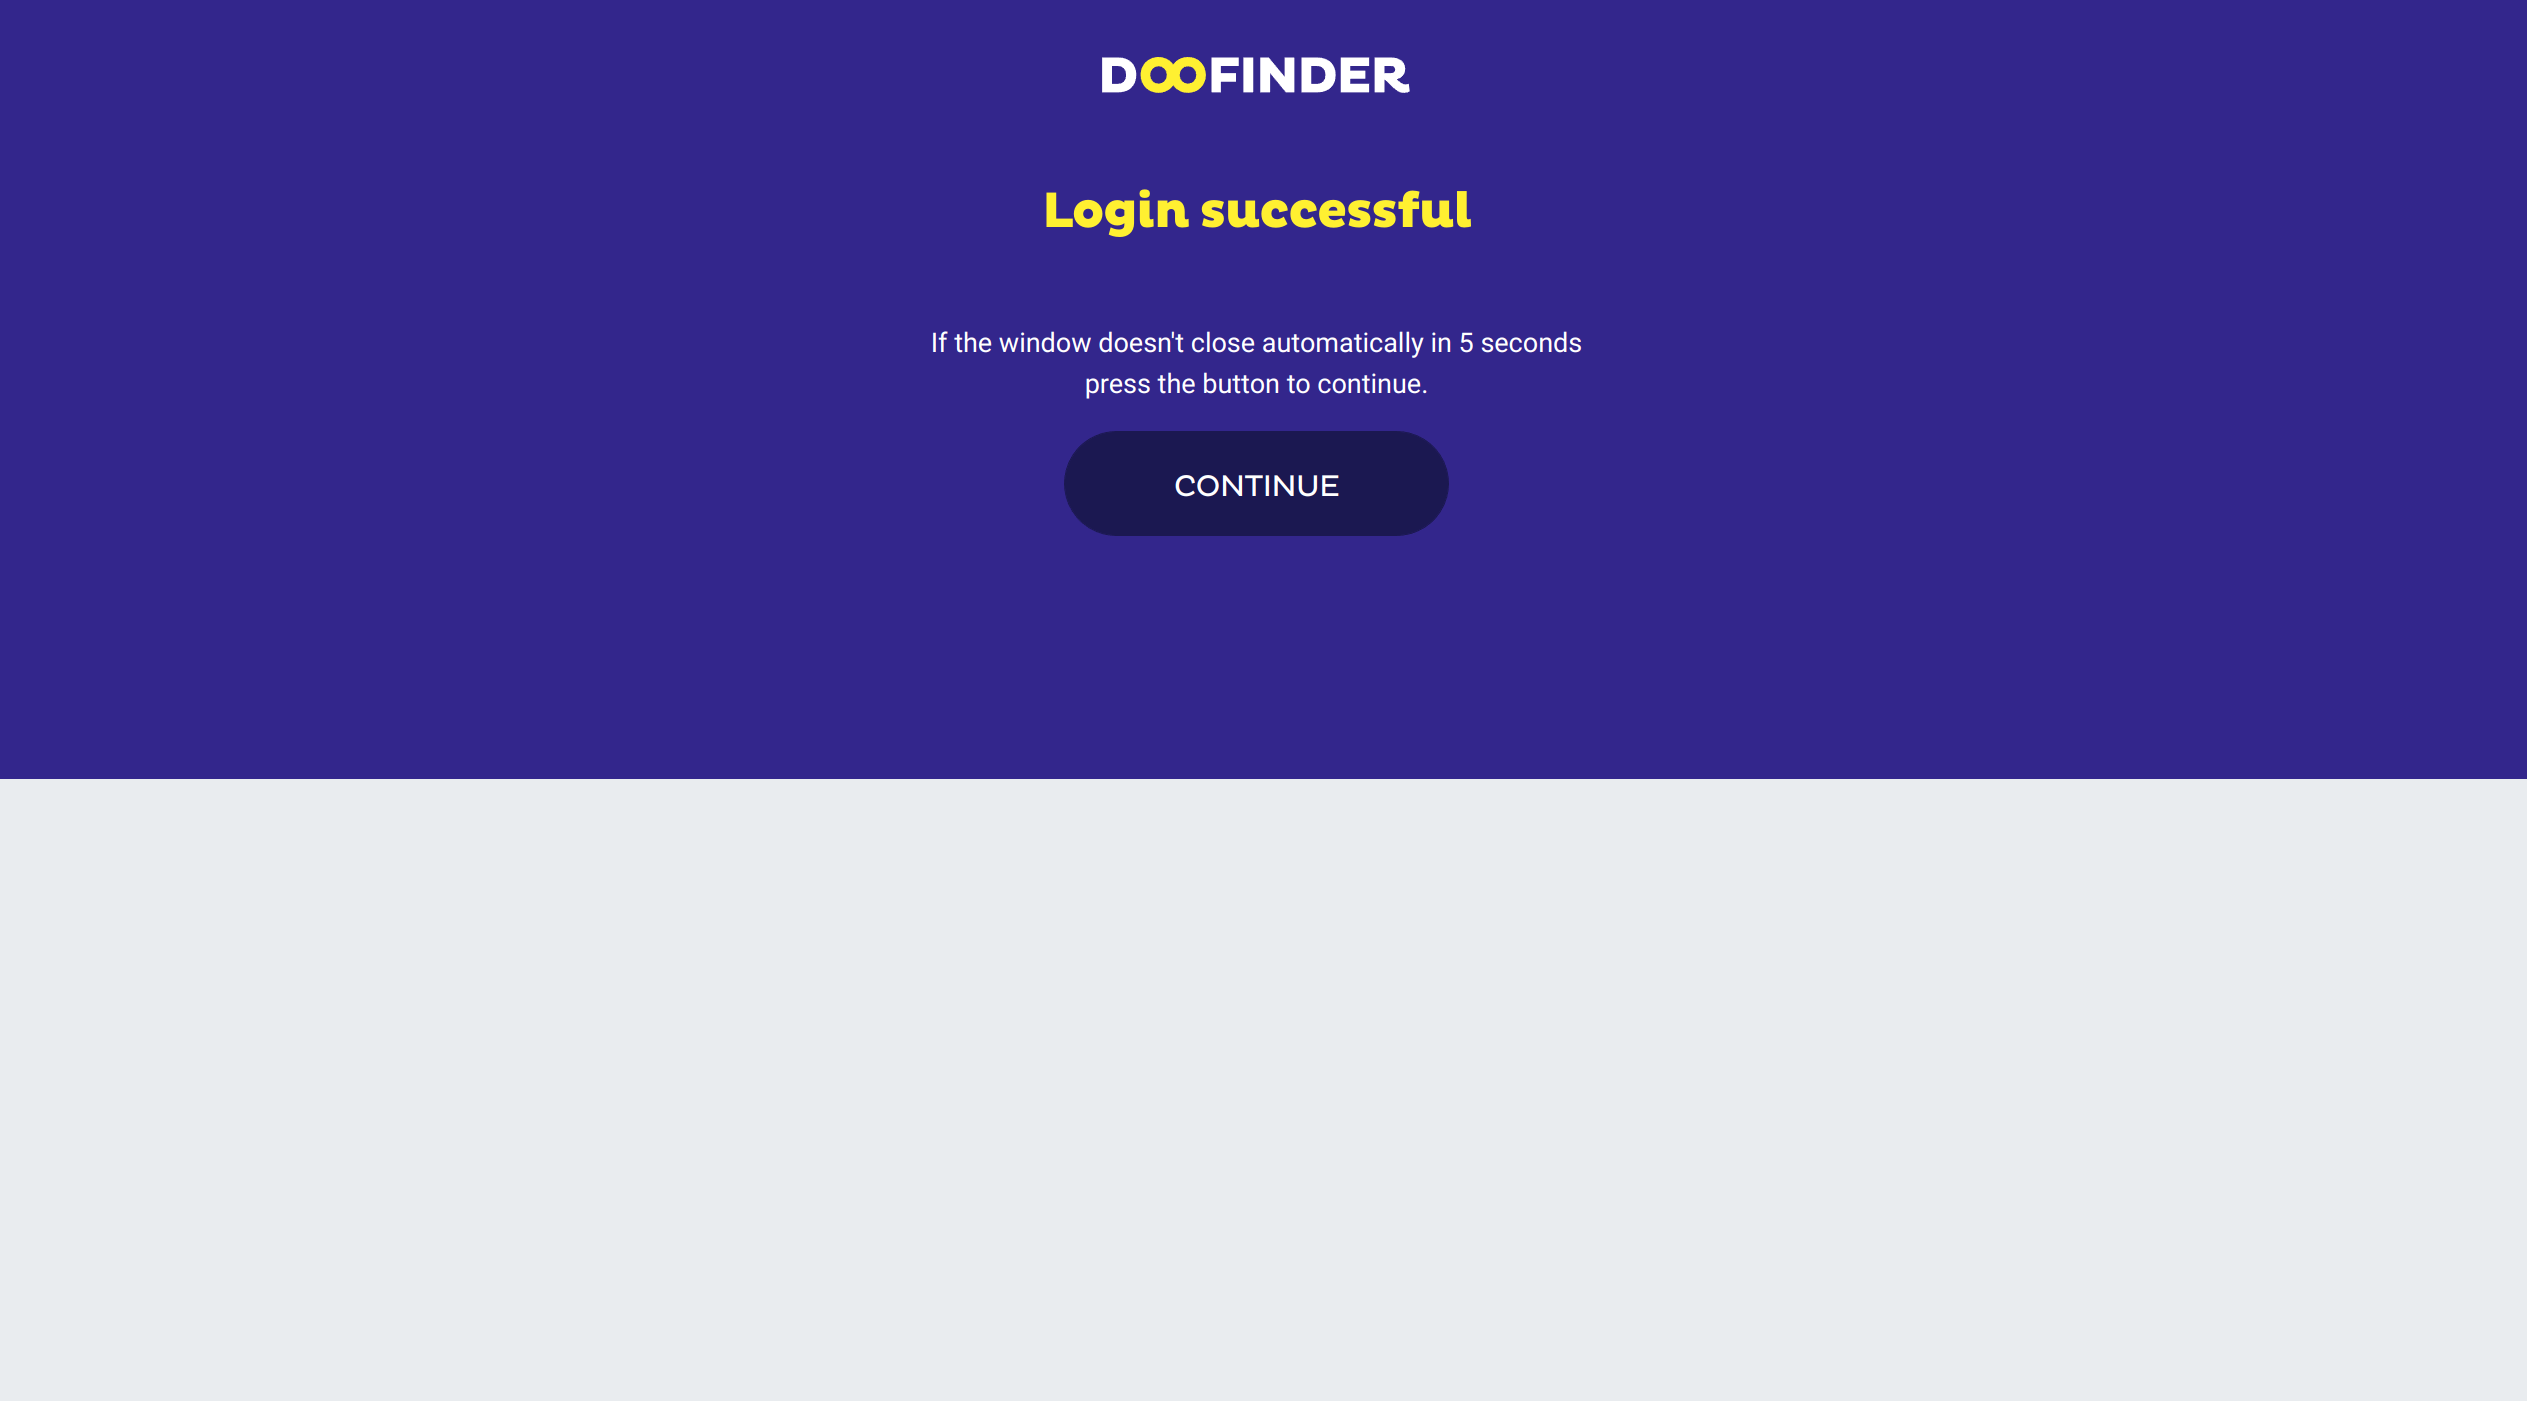
Simply click on the corresponding button and fill in the pop-up form. Once submitted, the pop-up window will close and the initial setup flow will be finished.
If you are creating a new account, be sure to use an email address that you have not used before. This is a unique field. Also, make sure that your website has not been previously linked to a Doofinder account. You can only link your website to one account.
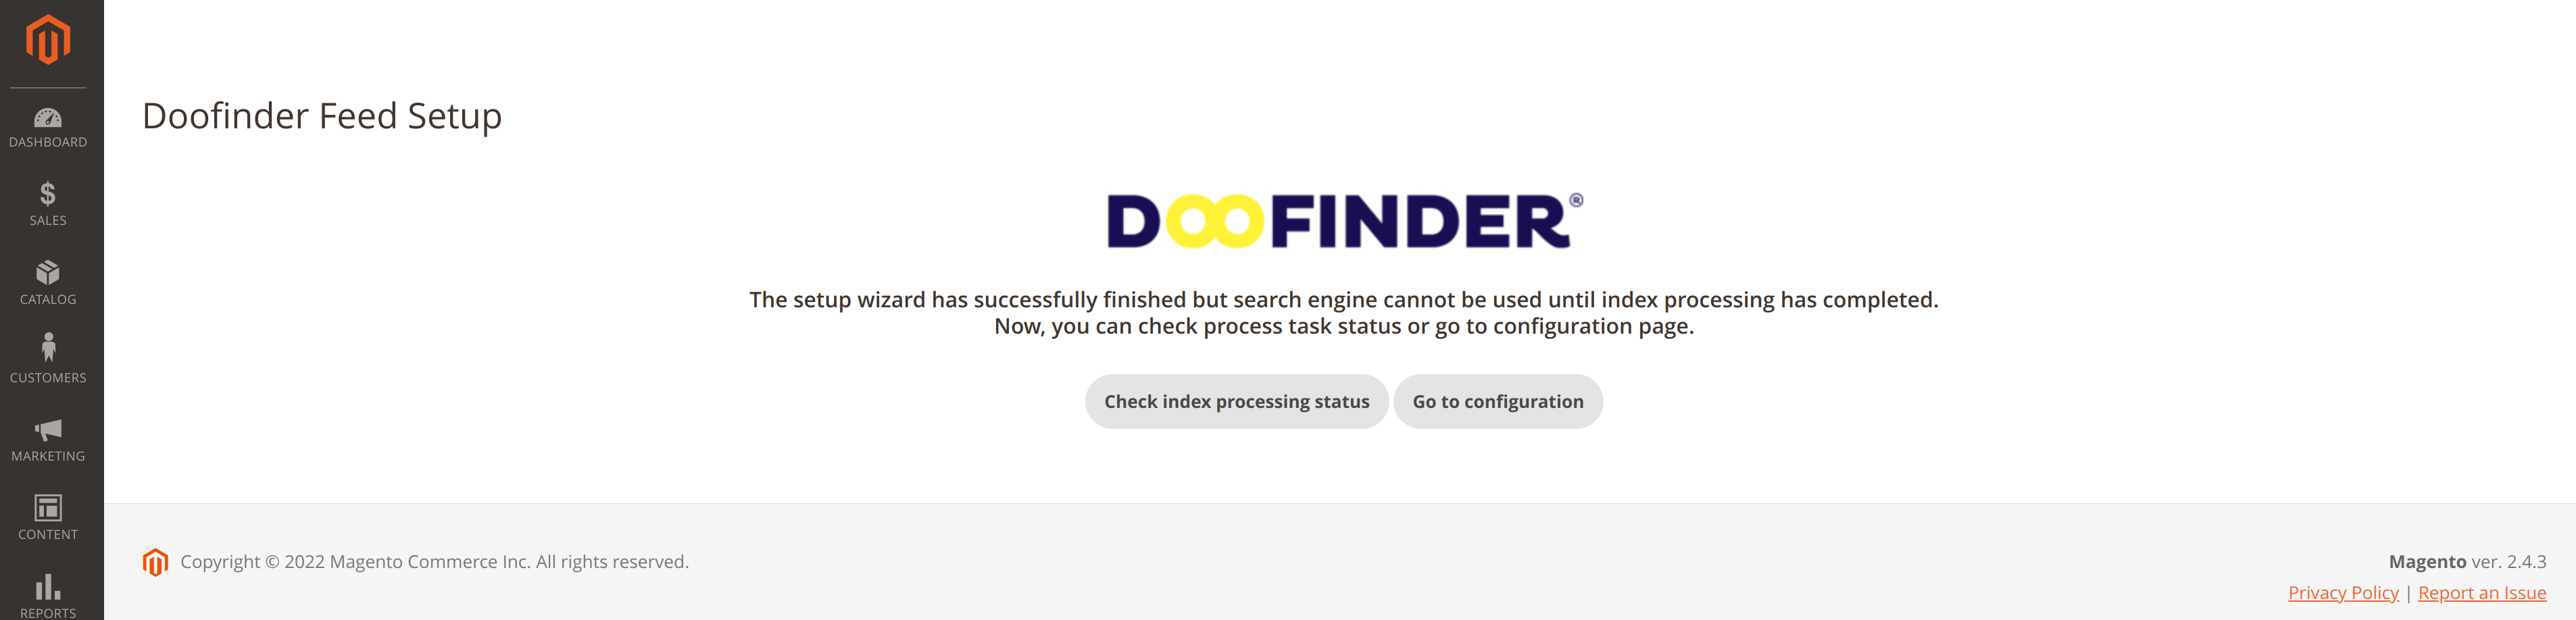
Once you have linked your website to a Doofinder account, the configuration process will automatically create the Search Engines, indexes and all other settings.
On the following screen, you will have two options:
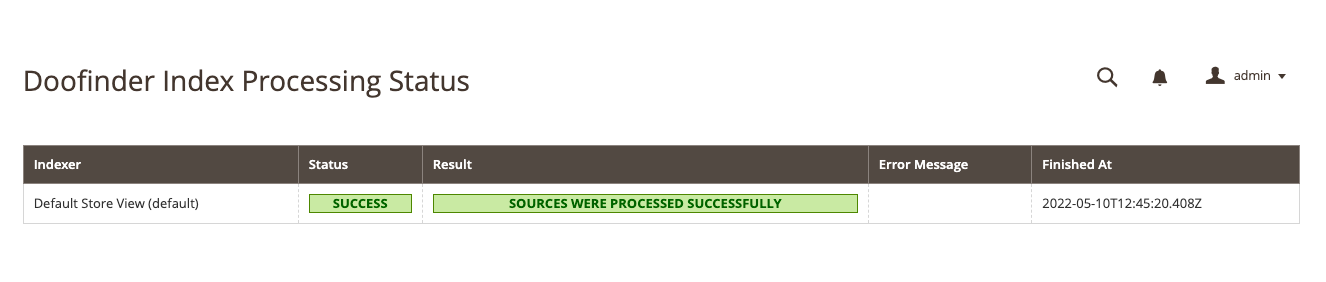
- Check Index processing status
Here you will find the current status of the indexing process, whether it is OK or there is an error (and the corresponding message), and the date and time of the last synchronization.
Check the following example of a successful indexing process:
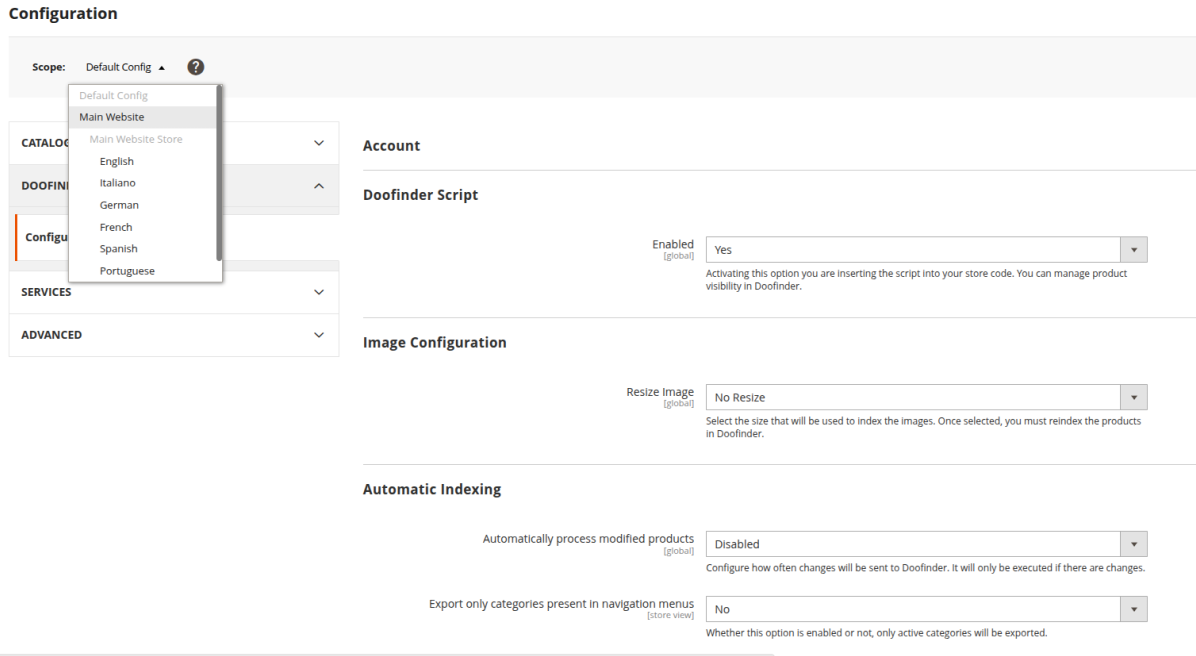
- Go to Configuration
In this section, you can check if all settings have been created correctly.
Once all the products are indexed the doofinder script option will be set to yes.
New Store Under The Same Installation
When a new store is added to your Magento backend, and you have already integrated your Magento with Doofinder, follow the steps below to integrate the newly created store to your Doofinder admin. Make sure to have at least one store view associated with the new created store.
In your Magento backend you should have the configuration as it follows: your main store and the subsequent stores. In our example, we call it “Main Website Store” and “My new store”, see:

With that, you can proceed with the steps to integrate your new created store with Doofinder.
-
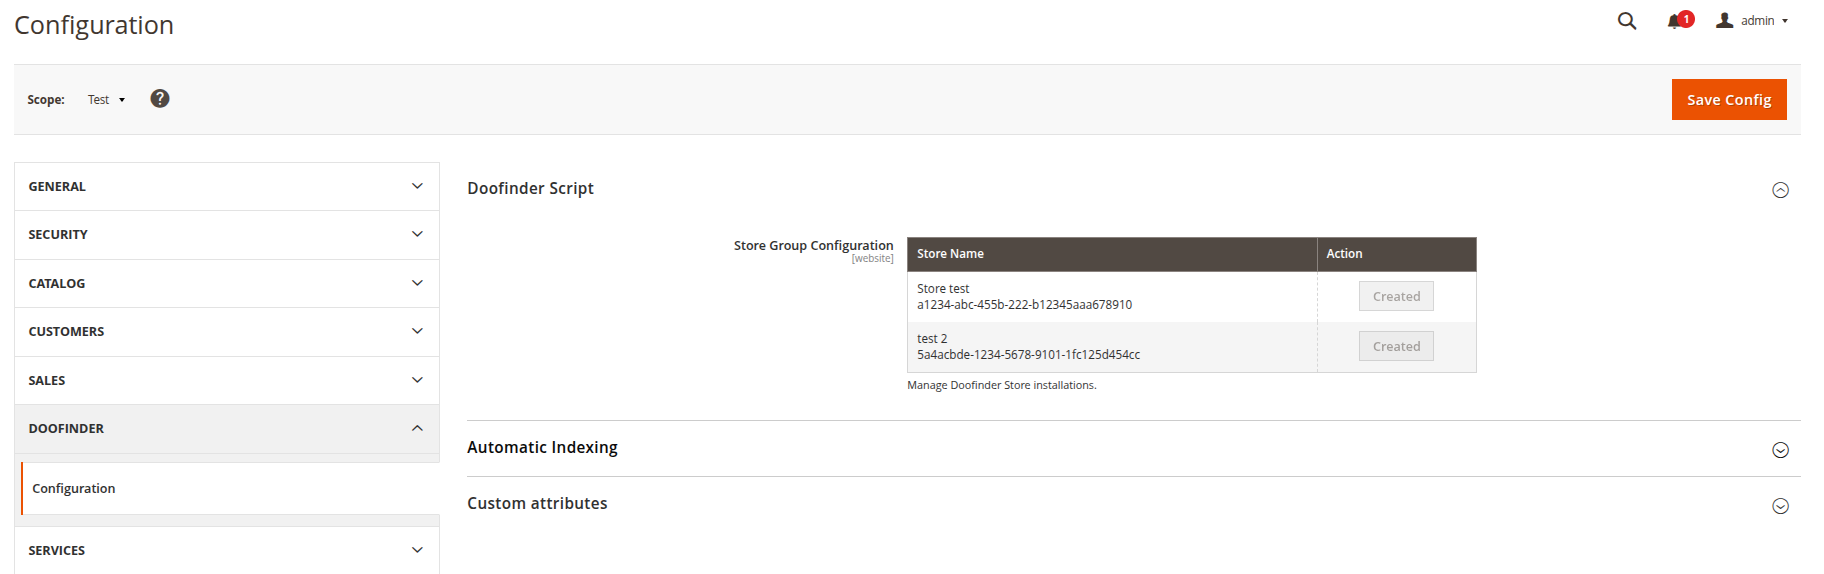
Go to your Magento backend > select your Main Store > Doofinder Configuration:
-
Select the website scope associated with the new store:
-
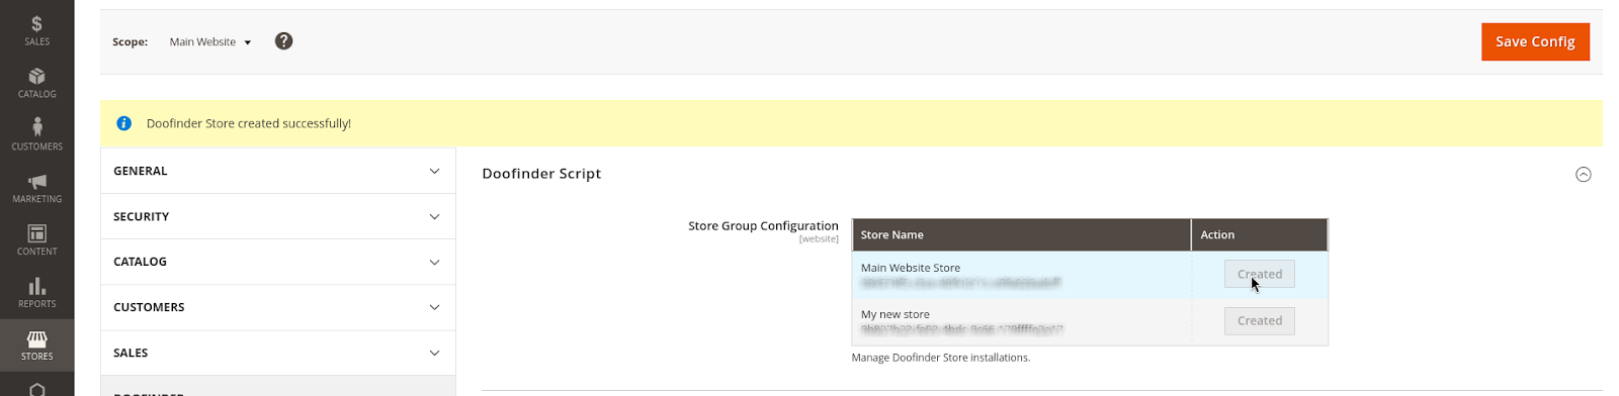
Under Doofinder script, you will find a table with the associated stores with Doofinder. The new store should appear along with a “Create” button. It is important that at least one store view exists associated with that store, in order to be created successfully. Click on “Create”:
-
The message “Doofinder Store created successfully” should be shown, and the new store should appear in your Doofinder admin:
New Store View Under The Same Installation
The steps below applies only when the search engine never existed before in Doofinder. If already existed and was removed by mistake or any other reason, reach out to us.
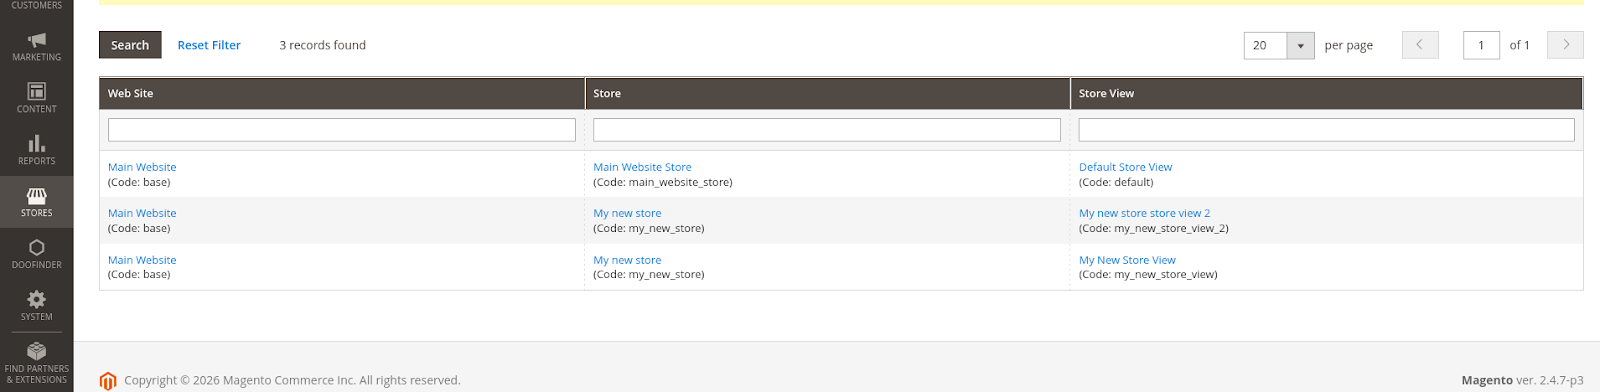
Add a new Search Engine in Doofinder for an existing Magento installation: to create a new Store View (called Search Engine in Doofinder) you must have it created firstly in your Magento backend, as it is shown in the screenshot below:
This means:
- 1 Magento Store View = 1 Doofinder Search Engine
In this scenario you already have an existing store integrated with Doofinder, but you want to add an extra search engine, as an example, it could be a new language view. You must have then your store in Magento > followed by the new store view (language).
-
Go to your Magento backend > select your Main Store > Doofinder Configuration:

-
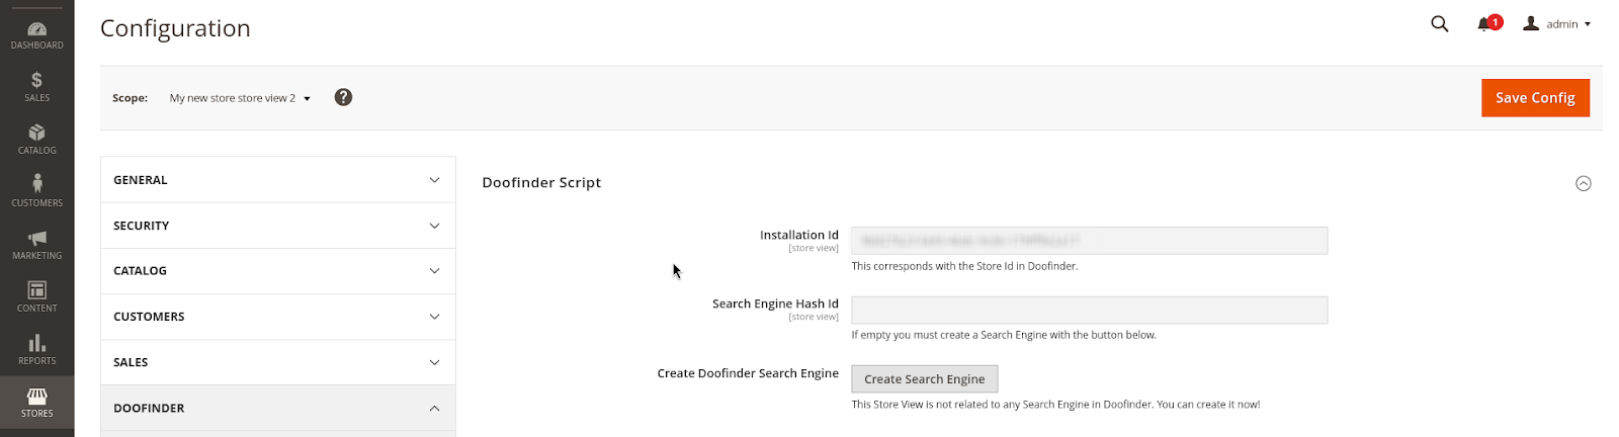
Select the store view you would like to create:
-
You will notice that the search engine hash-id is empty and a “Create Search Engine” button, click in it:
-
A pop-up banner “Create Search Engine” will appear, click on “OK”!
The Search Engine should be successfully created in your Doofinder admin and the hash-id filled up in Magento.
B2B Pricing - Activation
1. Requirements
- Ensure that the latest version of the Doofinder module is installed. It must be from version v1.5.2 or later.
- See here instructions on how to update the module!
2. How does it work?
The plugin automatically processes and sends the tier pricing (B2B pricing) data to Doofinder after the module is upgraded (if you’re a new client, most likely you are already under a correct version).
The df_multiprice field is used for multi-price support across all platforms, here what we do is to instead of only sending the tiered pricing per currency we send per currency + price name. This allows proper handling of different B2B price groups and currencies.
3. Indexing Process
Once the module is updated and configured, run the indexing process. After indexing is completed, B2B pricing will be available in Doofinder.
Contact support if there are any issues.
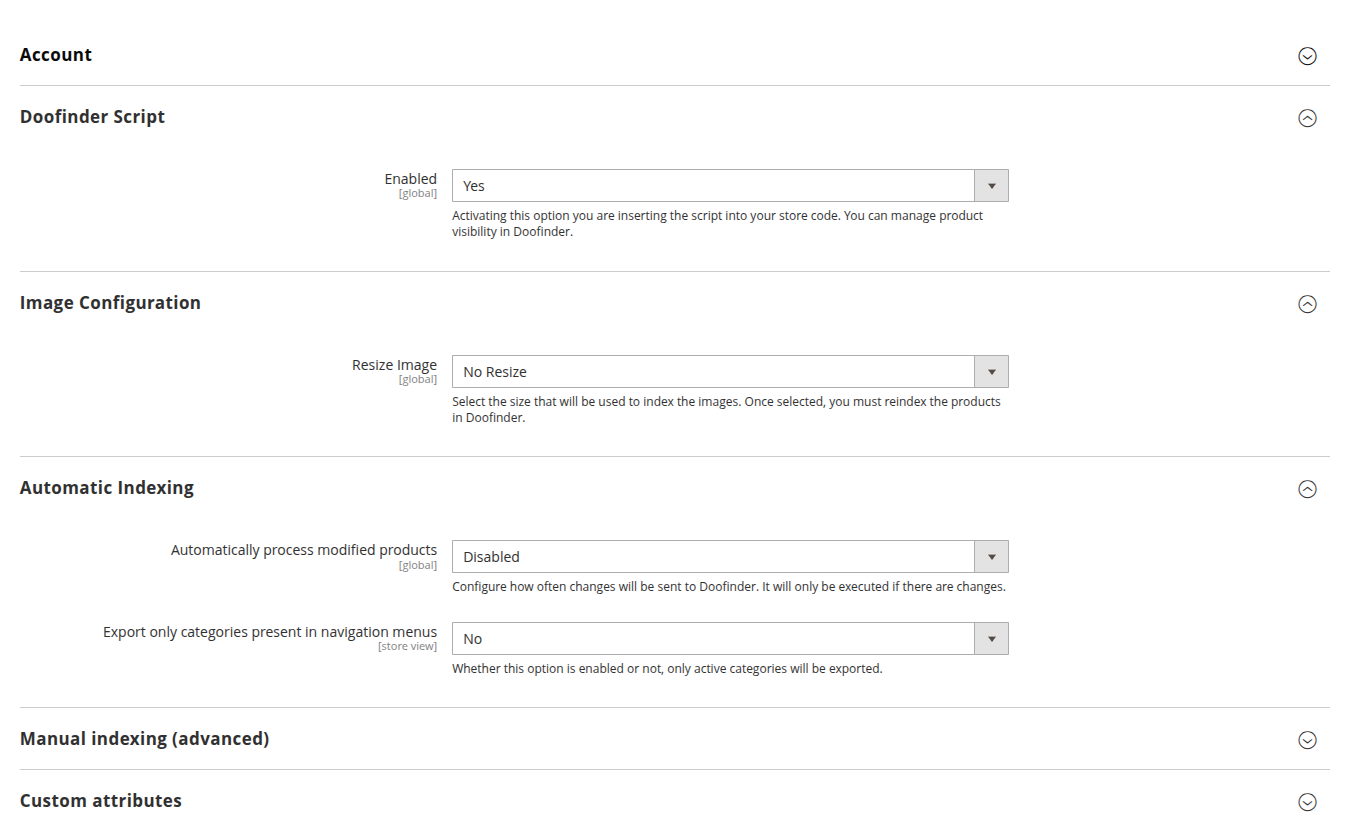
Module Configuration Fields
- Account: In here you will find your API KEY.
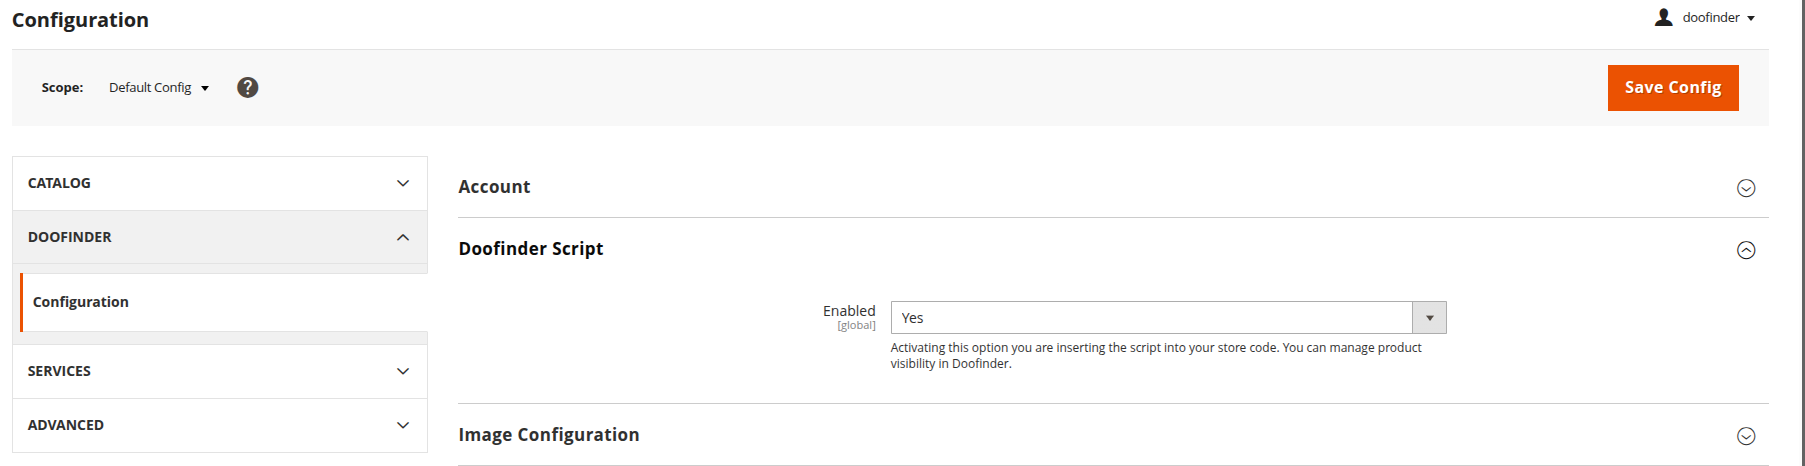
- Doofinder Script: You can activate or deactivate the search layer/script by selecting YES or NO.
- Image Configuration: Select the size of the image to display on the layer. Once the size has been chosen, you must reindex the products in Doofinder.
- Automatic Indexing: you can configure when registered product changes are sent to Doofinder and whether to export only categories present in navigation menus.
- Manual Indexing: Advanced option for indexing.
- Custom Attributes: Attributes selected as 'Enabled' will be included in the feed indexation.
- Doofinder Integration Configuration (Advanced): you will be able to reset the integration, in order to re-launch the setup wizard if necessary.
Layer
The layer will be automatically created in your Magento 2 website.
Magento 2 works with our Fullscreen Live Layer by default.
Once the indexing is finished, the script will be enabled, therefore the layer too. You can enable or disable the script in your Magento Store > Doofinder > Configuration > Account > Doofinder Script.
This module no longer works with V7 and Embedded Layer.
Create Additional Indices
When using the Magento plugin you can automatically enable different Multi-Indices, such as:
- Categories
- Website pages
Refer here to learn how to create additional indices.
Installation ID and Script
The Installation ID and the Script are generated automatically during the installation process.
Module Update
Doofinder has its own Module for the majority of platforms, which must be regularly updated in order to keep the functionalities working properly, and latest updates pull through. Although not mandatory, we recommend always keeping the modules up-to-date.
How Do I Update The Module?
In Magento, from the composer you can upgrade your module downloading the zip file of the latest version of it here!