Integrating Doofinder with Klaviyo enhances your ability to create personalized marketing campaigns. This connection uses search data from Doofinder to help you:
- Understand your customers' search behaviors.
- Build advanced audience segments in Klaviyo.
- Automate and customize marketing flows based on real user activity.
By leveraging these insights, you can engage your customers with targeted messaging, increasing the relevance and impact of your campaigns.
How to Integrate Klaviyo
You have two paths to connect Doofinder with Klaviyo. One is from the Admin Panel, and the other one is from Klaviyo.
In both cases, the Single Script is required. If you are using the old script, Doofinder will appear connected to Klaviyo but won't record any data. If you need to update your script, read on how to update it.
This connection is only available for Shopify, Prestashop (version 5.0.3 or later), and WooCommerce (2.7.1 or later). If your plugin is an earlier version, you will need to update it. To integrate Klaviyo with another plugin or a custom page, refer to Custom Integration.
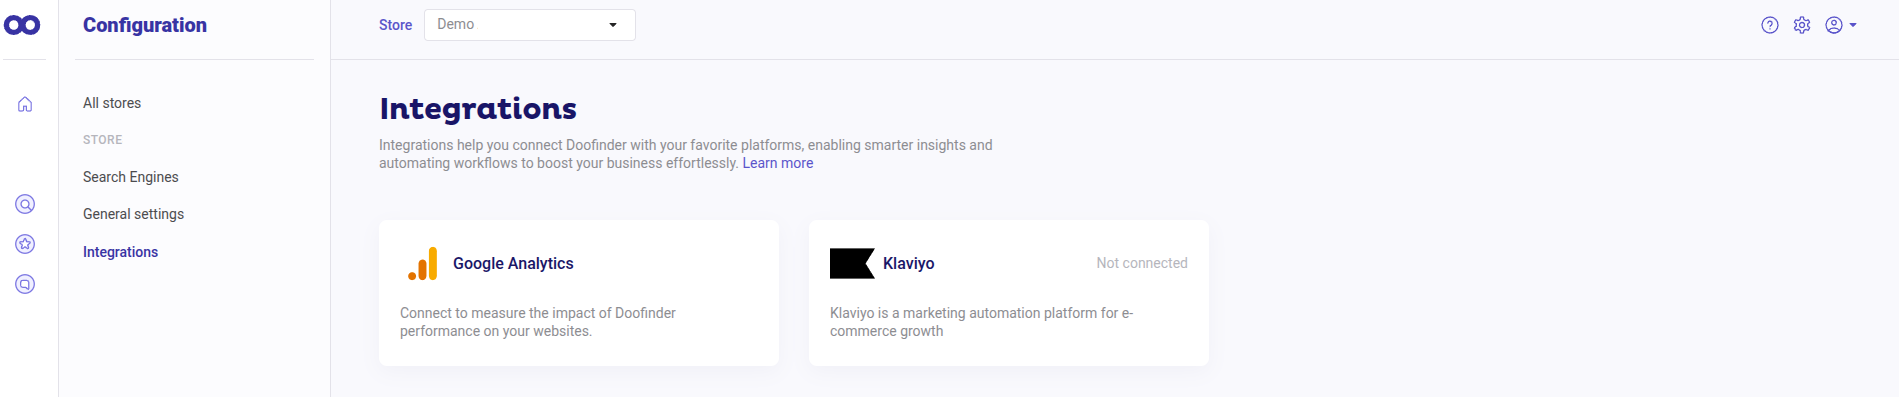
From Doofinder’s Admin Panel
- Go to your Doofinder’s Admin Panel
- Navigate on the left-side menu and look for Configuration > click on Integrations.
-
In the top bar, select the store you want to integrate Klaviyo with from the dropdown menu.
-
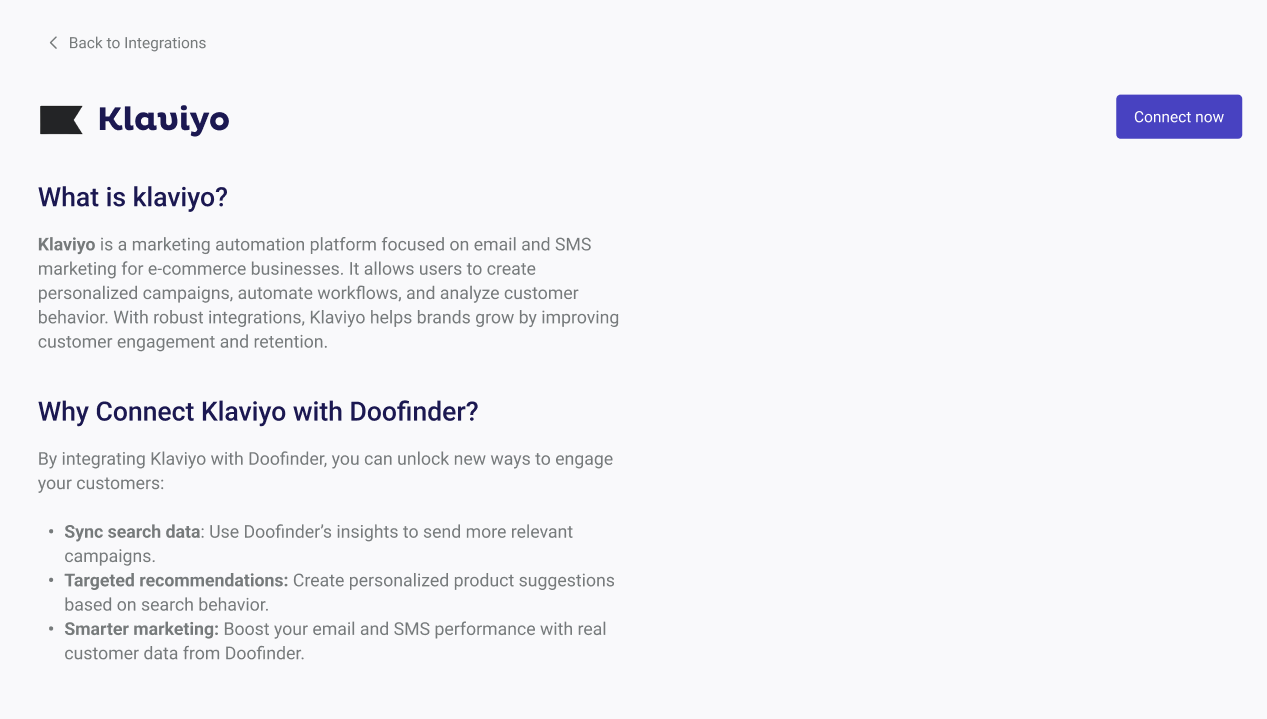
Go to Klaviyo > click on the “Connect Now” button
-
Proceed with the instructions to authorize the connection
Once authorized, this is how it will look like in the Admin Panel:
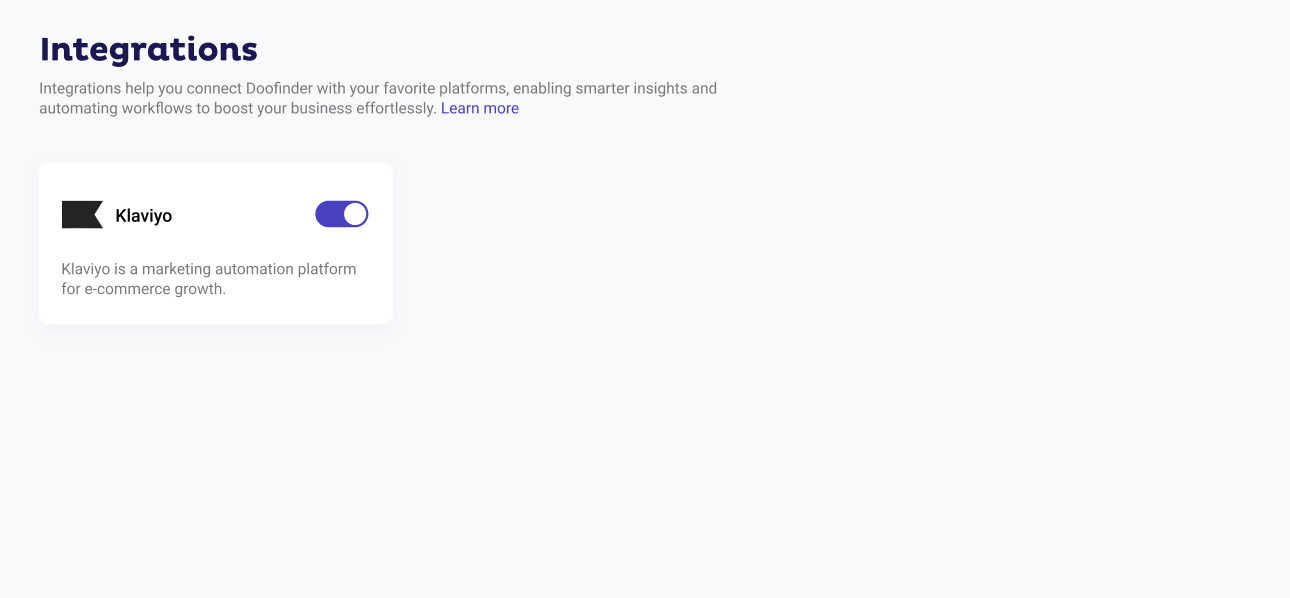
Data is sent to Klaviyo only when the Klaviyo switch is enabled in Doofinder. Disabling the switch stops data transmission from Doofinder but does not remove the integration. To fully disconnect the integration, it must be deactivated from Klaviyo.
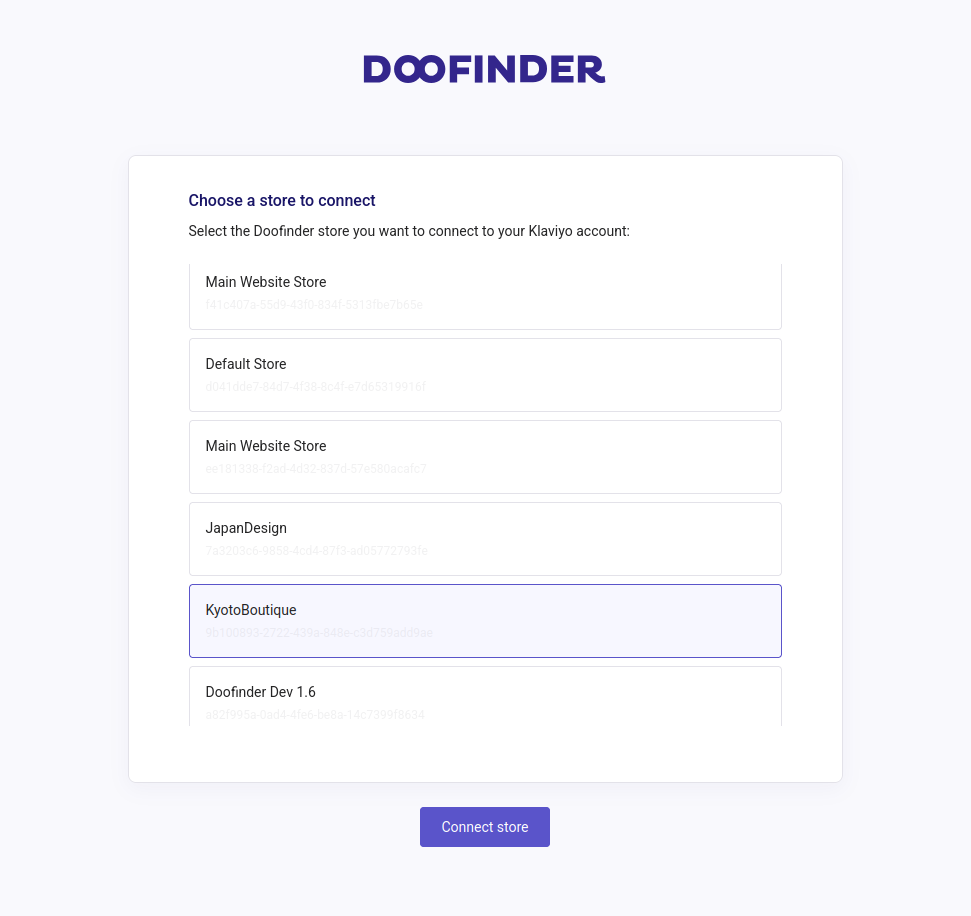
From Klaviyo’s Dashboard
- Log in to your Klaviyo account
- Navigate to Klaviyo’s Integration Directory > click on “Add integrations” > search and select Doofinder > click on “Connect”
- Proceed with the instructions to authorize the connection at a store level.
Custom Integration
To connect Doofinder with Klaviyo on other platforms, you will need to copy and paste the following code before Doofinder's Single Script to ensure proper functionality:
For custom pages, you will need to adjust the line dfKvCustomerEmail= 'email' to retrieve the logged-in user's email. You can use either var or window, depending on your preference. Both approaches are supported.
- Using
var:
If using var, do not change it to let or const because those do not become part of the global window object.
  <!-- START OF DOOFINDER INTEGRATIONS SUPPORT -->
  <script>
    var dfKvCustomerEmail = 'email';
  </script>
  <!-- END OF DOOFINDER INTEGRATIONS SUPPORT -->
- Using
window.:
    <!-- START OF DOOFINDER INTEGRATIONS SUPPORT -->
  <script>
    window.dfKvCustomerEmail = 'email';
  </script>
  <!-- END OF DOOFINDER INTEGRATIONS SUPPORT -->
How the Integration Works
Once the integration is activated, Doofinder will send search data events to Klaviyo.
These events allow you to:
- Build dynamic customer segments based on search behaviors.
- Set up automated flows triggered by specific search interactions, such as adding an item to the shopping cart.
When integrating Klaviyo with Doofinder for the first time, it takes approximately one hour for Doofinder's event data to be sent to Klaviyo. Once the integration is complete, you will be able to view your Doofinder data in Klaviyo.
Doofinder Events Sent to Klaviyo
Doofinder sends the following events and their associated properties to Klaviyo, enabling you to tailor your campaigns based on customers' interactions with Doofinder on your website.
Events that occur in Doofinder are sent to Klaviyo once every hour. Events taking place in Doofinder will be sent to Klaviyo in the forthcoming sync.
Event Types and Properties
The following events are sent to Klaviyo, all of them share some properties, while some include additional properties.
Currently, the event properties listed below are predefined and cannot be modified. Take a look at each of the events:
Doofinder Search & Discovery:
- Store Name: The name of the store where the event occurred
- Date: The timestamp of the event
- Localization: Geographic location
- Keyword: The search term used
Doofinder Filter
- Store Name: The name of the store where the event occurred
- Date: The timestamp of the event
- Keyword: The search term used
- Filter Name: The name of the filter applied
- Filter Value: The value selected for the filter
Doofinder Clicks
- Store Name: The name of the store where the event occurred
- Date: The timestamp of the event
- Localization: Geographic location
- Keyword: The search term used
- Product Name: The name of the product clicked
- Product Link: The URL of the product clicked
Doofinder Add to Cart
- Store Name: The name of the store where the event occurred
- Date: The timestamp of the event
- Localization: Geographic location
- Product Name: The name of the product added to the cart
- Product Price: The price of the product added to the cart
For the Add to Cart event to function and send data, you must configure the Sales Data settings in Doofinder to enable tracking. Follow the Sales Data configuration guide to ensure seamless event tracking in Klaviyo.
How to Use Doofinder Data in Klaviyo: Segments and Flows
Segments
Use Doofinder event data to build segments in Klaviyo. For instance:
- Customers who entered a particular keyword in the search bar.
- Customers who applied filters for specific categories.
- Customers who viewed products by clicking on search results but didn’t complete a purchase.
Flows
Create personalized automated flows using Doofinder event data. Examples include:
- Abandoned Search Flow: Trigger an email sequence when a customer searches for a product but doesn’t add it to their cart.
- Filter Based Recommendations Flow: Provide tailored recommendations based on the filters a customer applied during their search.
- Cart Add Flow: Trigger targeted emails for products that customers added to their cart.
To create a flow for a specific Search Engine, you need to filter by language in Klaviyo, since the integration is at Store level.
Troubleshooting Klaviyo Integration
- Make sure you are using the Single Script.
- Make sure you have a login feature in your store, since this integration only recognizes users if they are logged in.
- If you are using one of our plugins, make sure that you have the latest version installed.
- Make sure the integration is correctly configured and authorized on both platforms. To do so, check the “How to Integrate Klaviyo” section above.
- Make sure that the integration is connected, and the switch is enabled and active on the Klaviyo integration page in the Doofinder’s Admin Panel.
- Wait an hour after activating the integration. Remember that events' data are sent to Klaviyo once an hour.