By following these steps you will learn how to create a Recommendations Carousel from scratch.
Previous Requirements
- Single Script Installated or Updated
- Started Trial, or a Doofinder Plan that fits your criteria.
How to Configure Recommendations: Create your Carousel with Detailed Steps
These are the simplified steps for configuring a Carousel. Dive into the article to find out more about them:
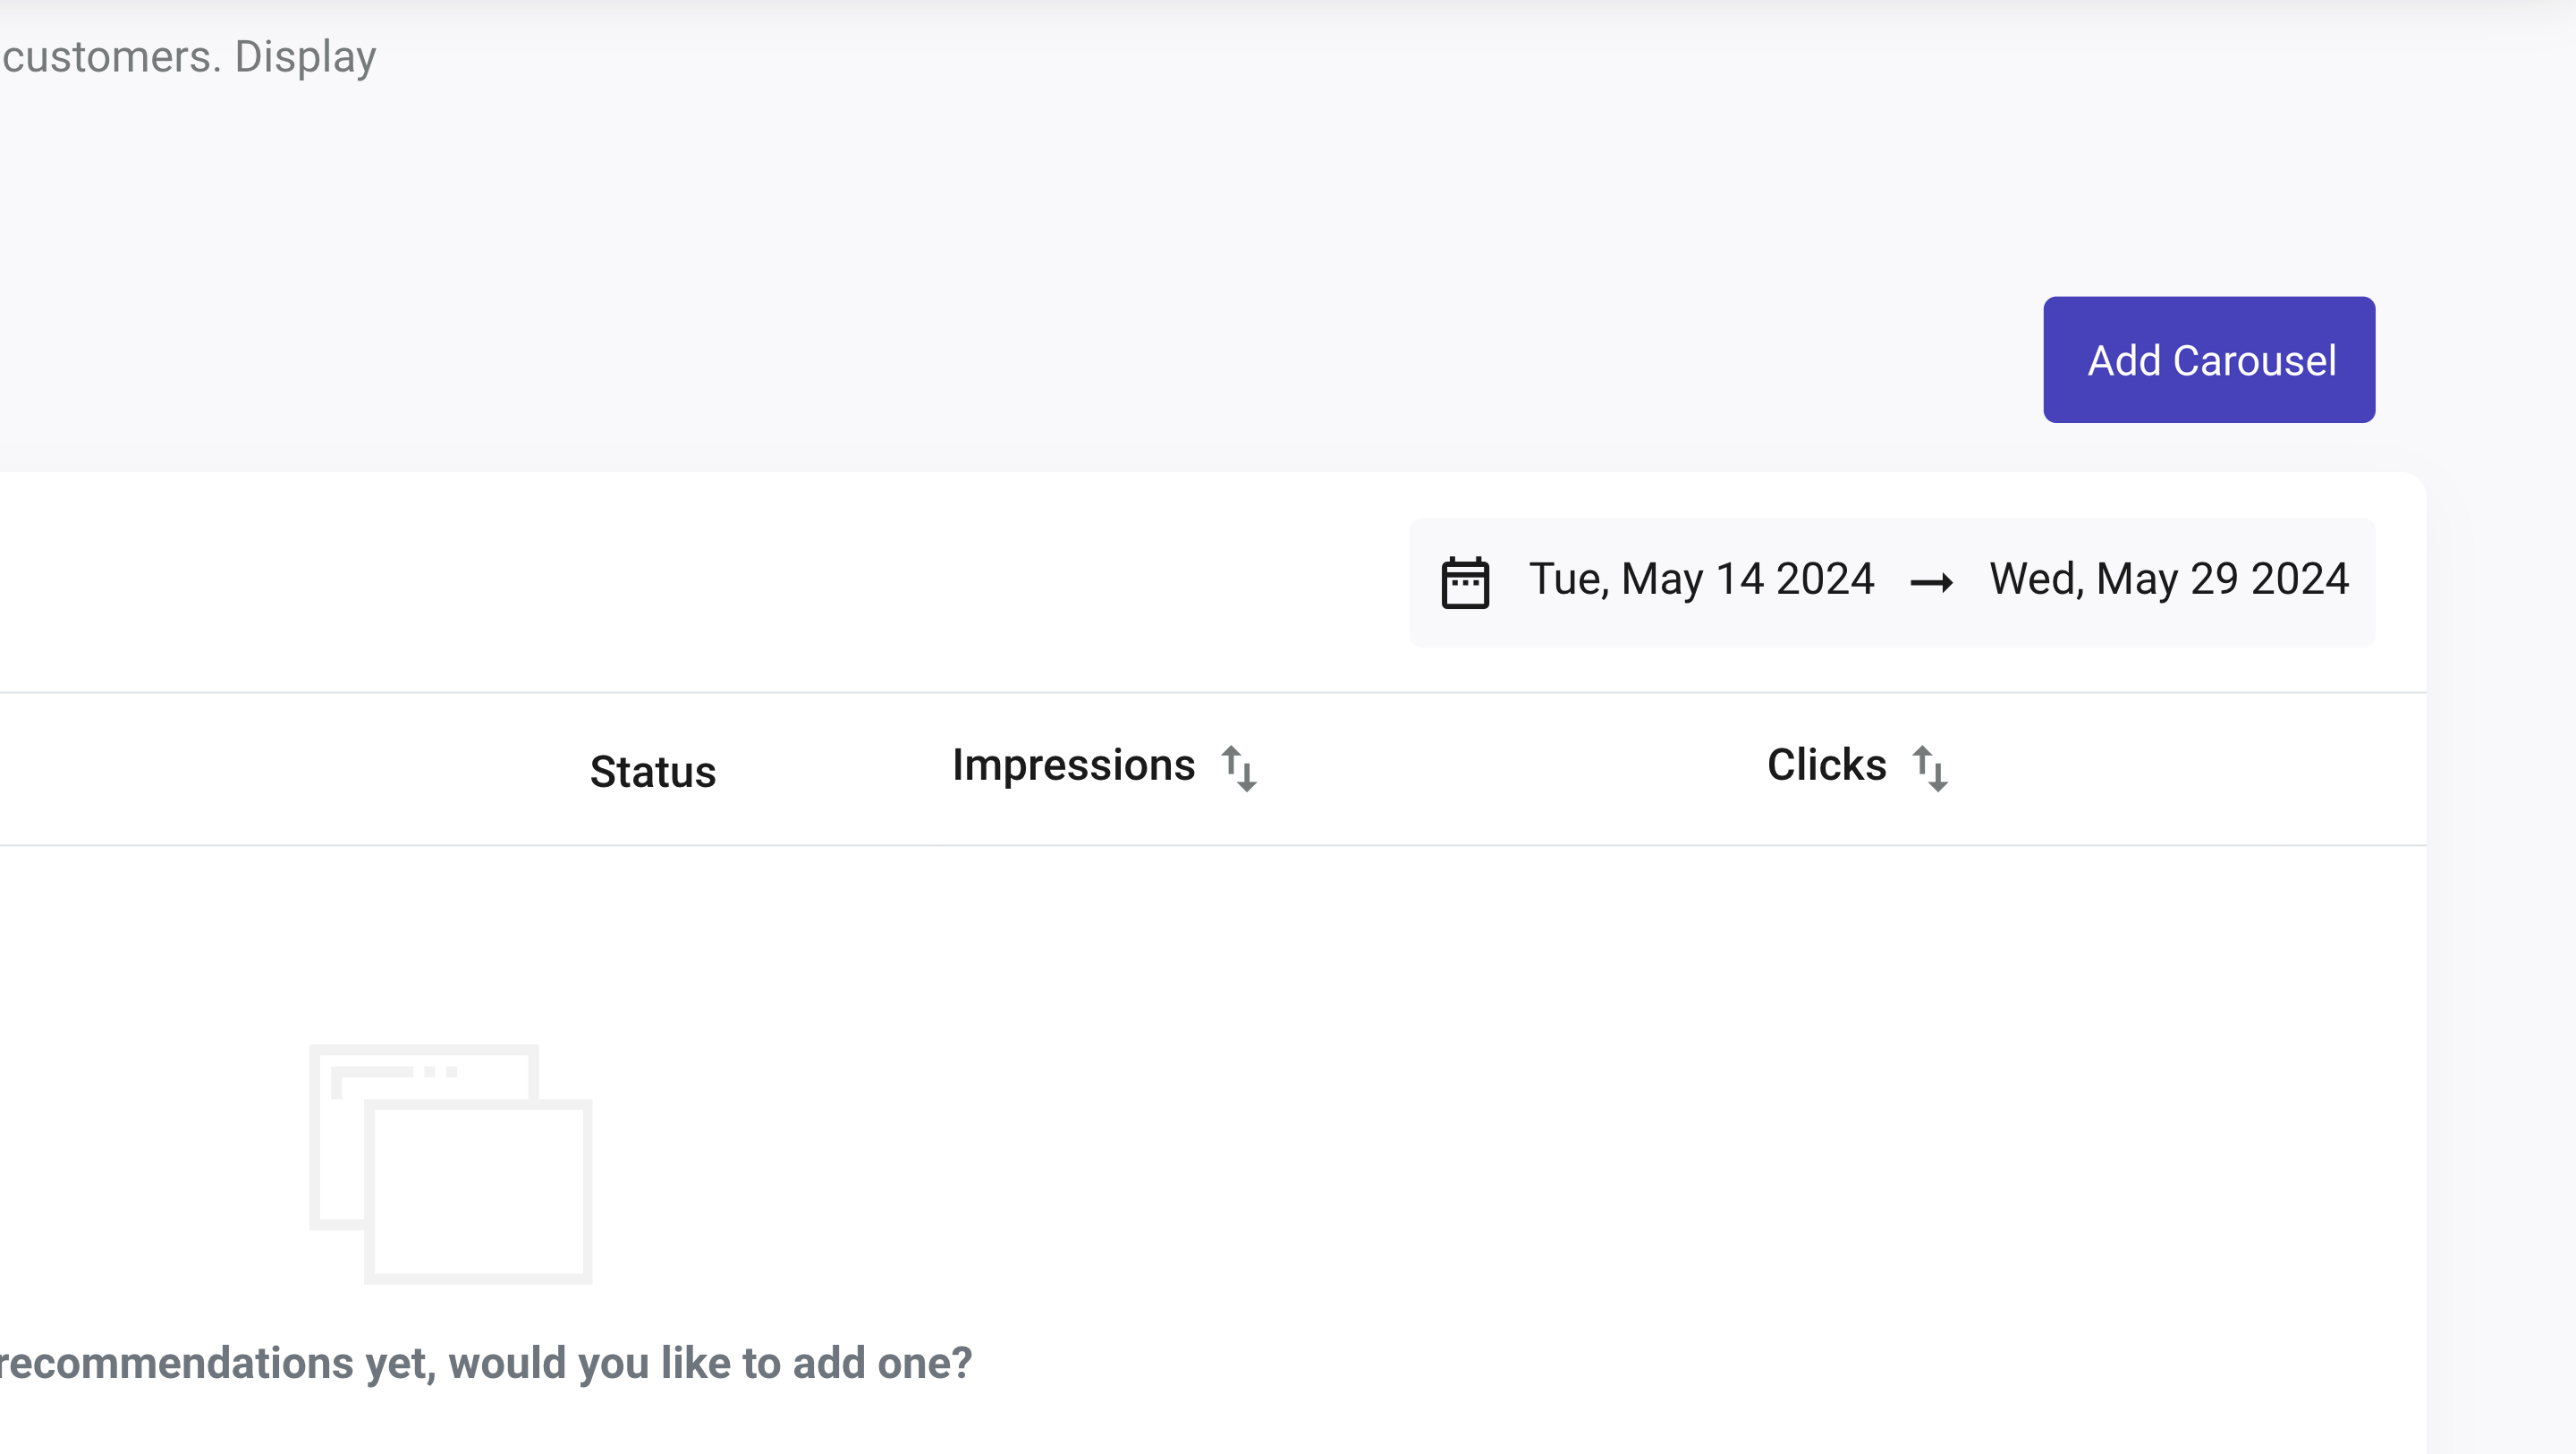
- To create a new carousel, click on Add carousel at the top-right side of the panel. From here, you have the power to add, delete, and save the changes to your new recommendation carousel.
- Add the CSS Selector to place the Carousel on your desired page.
- Select the Logic for your Carousel.
- Add Search Engines.
- Create Filters: filter the recommended products displayed (optional).
- Enable or Disable Fallback (optional).
Once the panel is open:
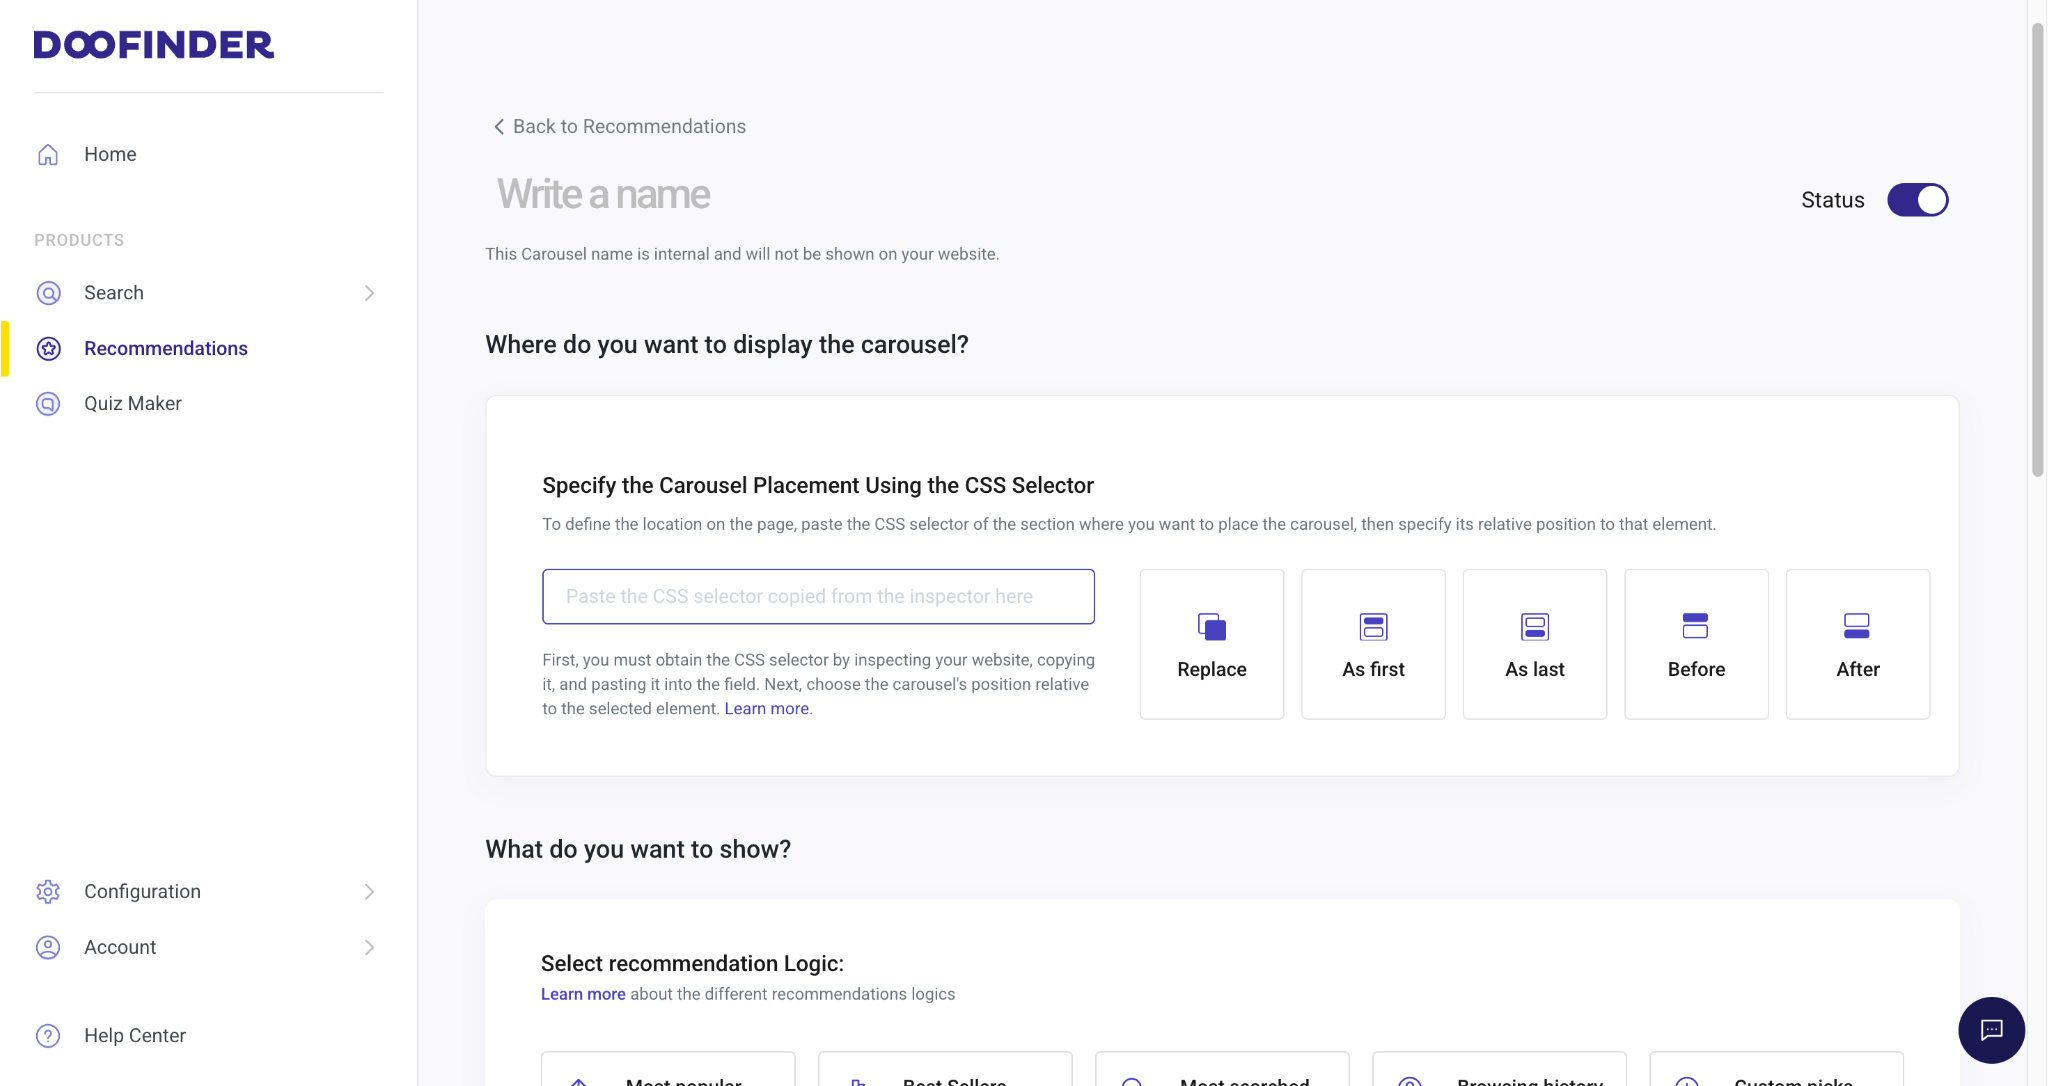
- Name the Carousel with your preferred internal name.
- Select the Status: either enable or disable the carousel.
- Specify the Carousel Placement using the CSS Selector and define the relative position of the carousel. If you need help finding the CSS selector to position the carousel, read CSS Selector for Recommendations Carousels.
- Input the CSS selector of the location on your website page.
- Select one of the options to decide whether you want to:
- Replace that CSS with the widget
- Place it At First or Last element of that CSS
- Place it Before or After that CSS
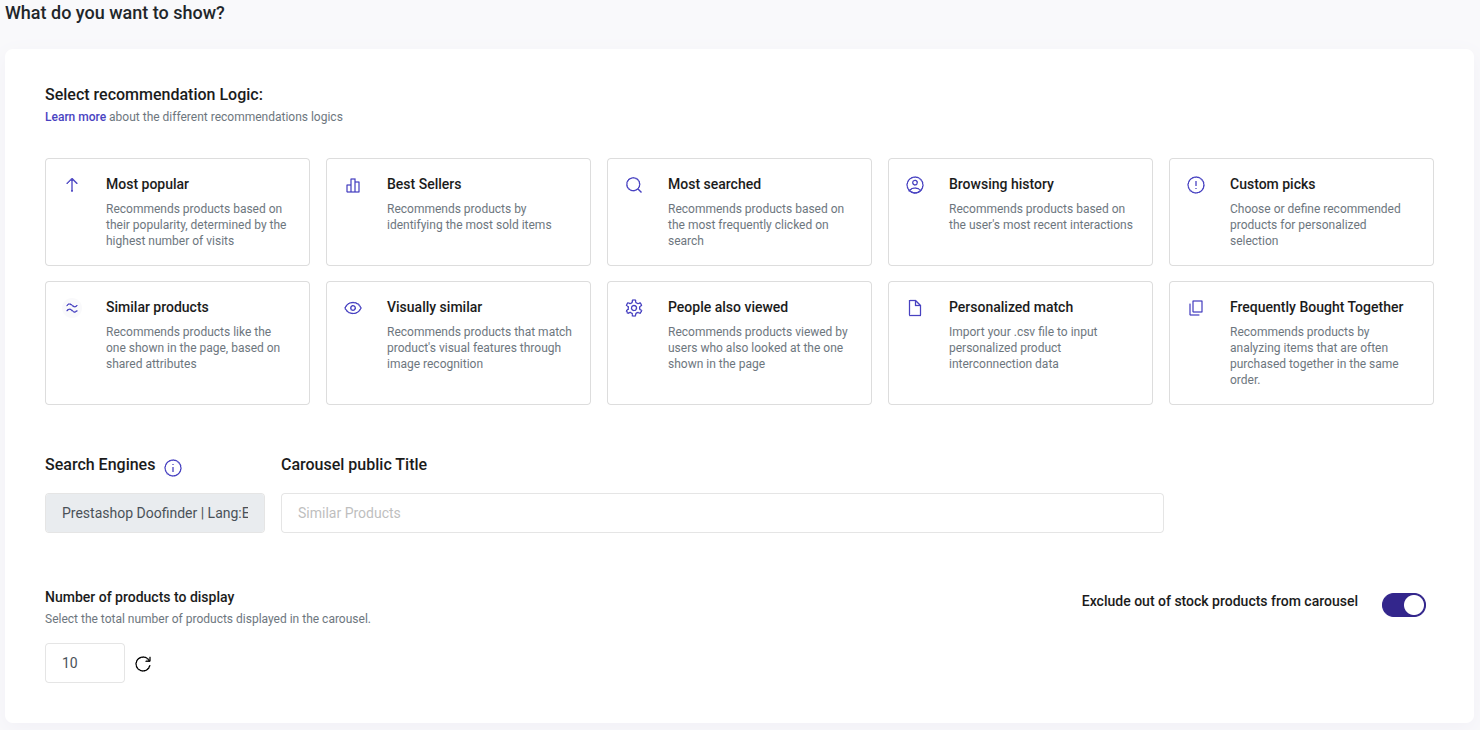
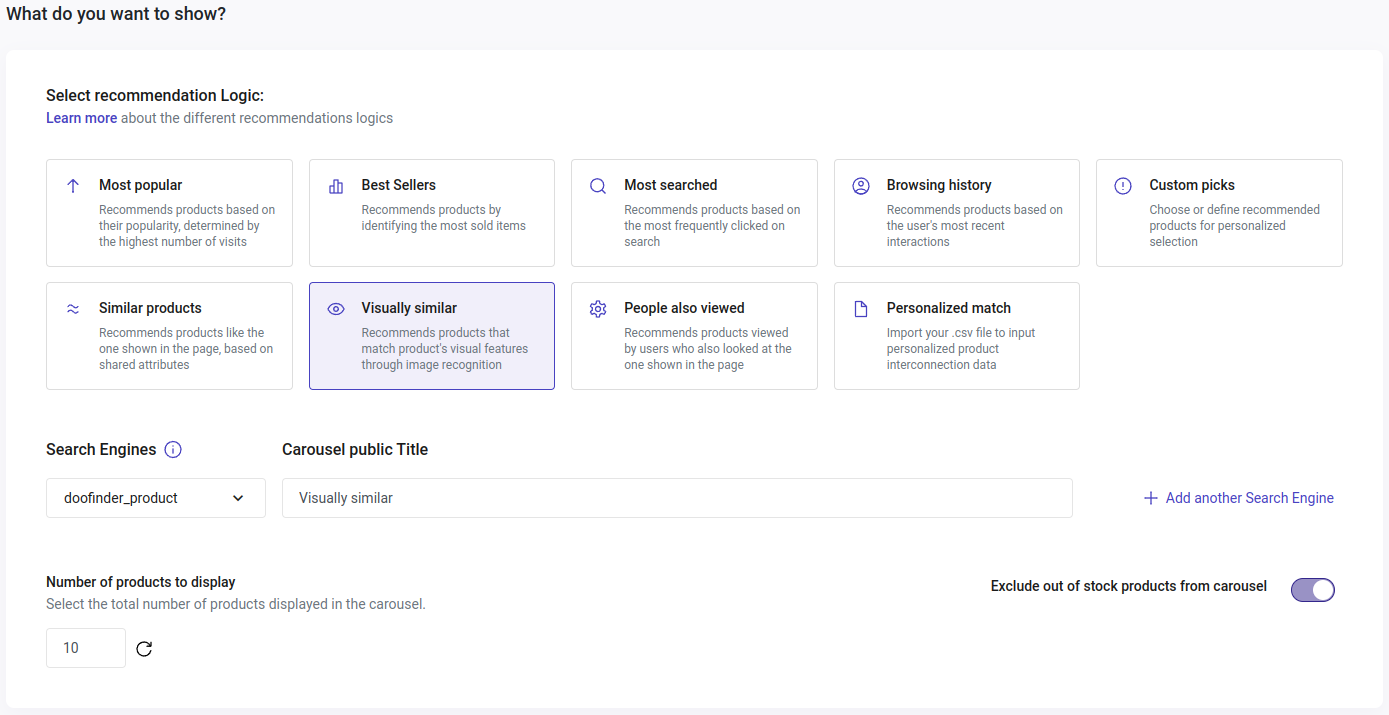
- Select a Logic for your carousel. Review each Logic here to find the perfect fit.
- Logics for all Pages: Most Popular, Best Sellers, Most Searched, Browsing History, and Custom Picks.
- Logics for Pages that show one single product: Similar Products, Visually Similar, Frequently Bought Together, People Also Viewed, and Personalized Match (these last two need training).
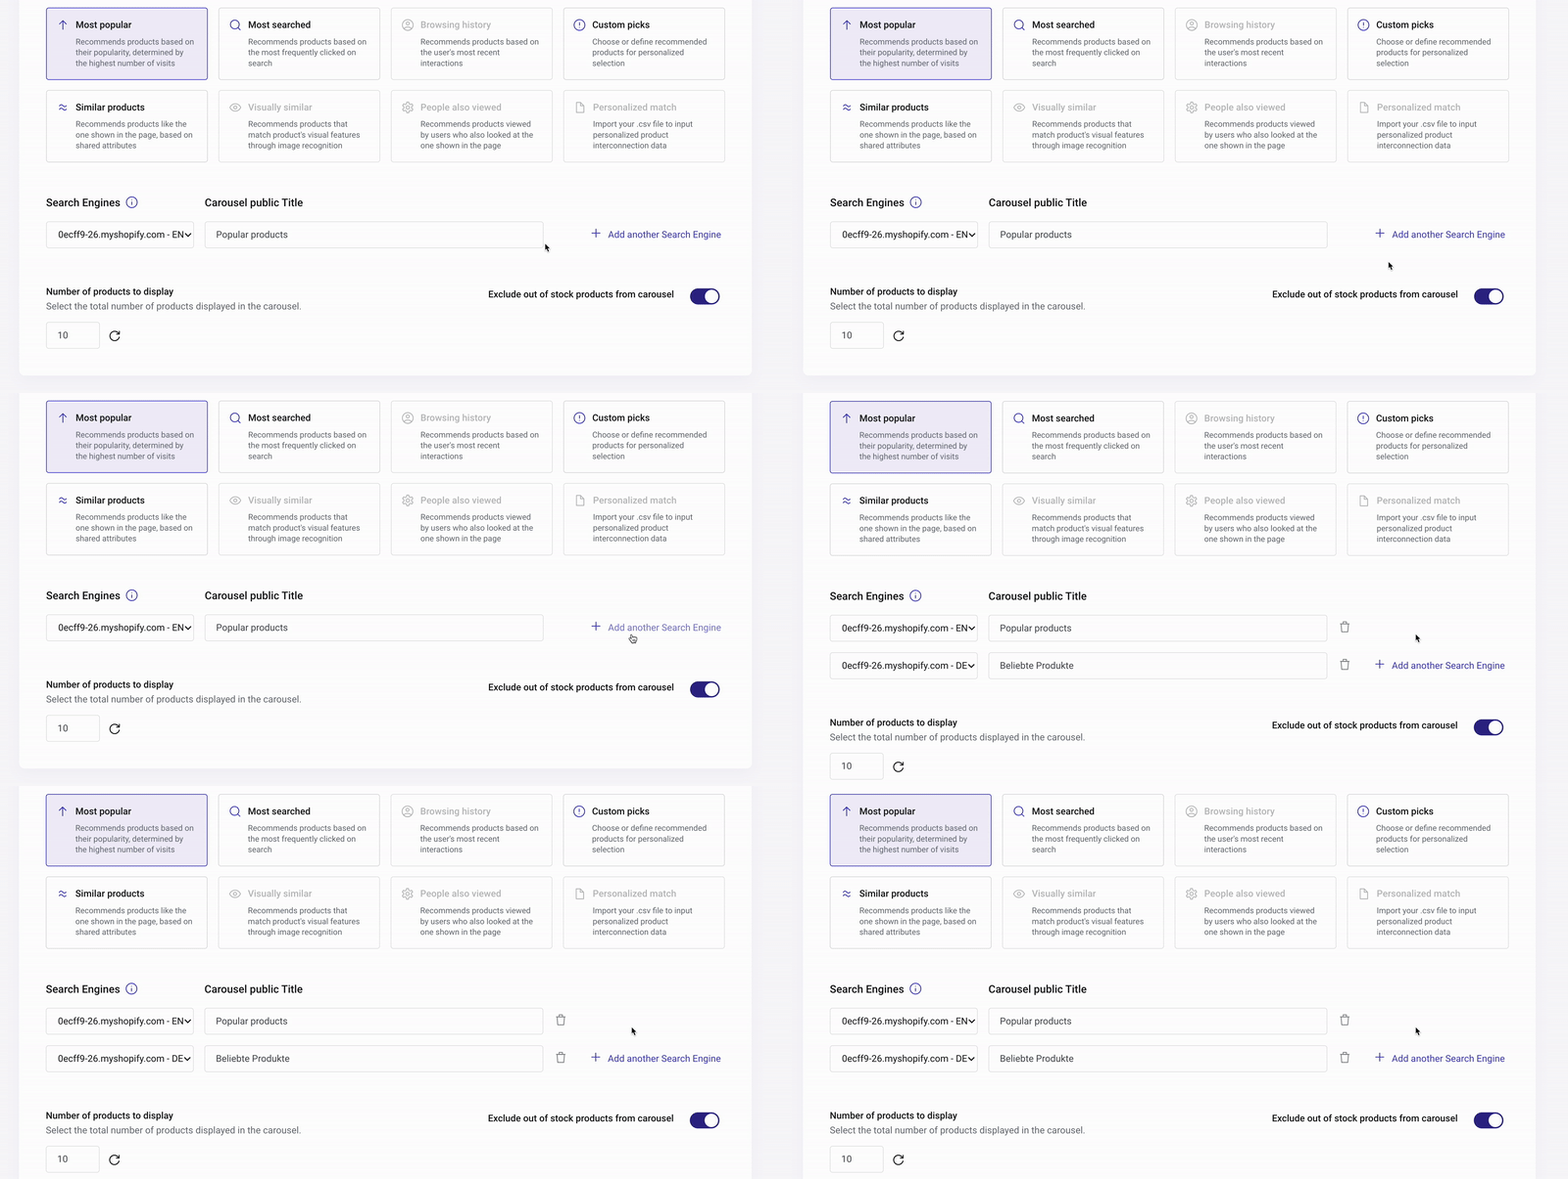
- Add Search Engines to your Carousel. Choose a public title for each Search Engine and add as many as you would like to show the carousel.
- Indicate the number of products you want to show in the carousel. By default, 10 products are displayed. You can increase up to 25, or decrease this number down to 5 to suit your needs.
- To include or exclude out-of-stock products on the carousel, enable or disable Exclude out of stock products from carousel button on the right side of the section.
To define the relative position of the carousel to the element choose between: Replace / At first / At least / Before / After.
The position is defined through two compulsory actions:
There is no need to create a new carousel in order to use a different Logic, change it directly under the desired carousel.
Note that some logics require training or previous requirements to show the desired results. Additionally, some logics work across all Pages, while others are designed for single Product Pages and Customized Pages.
By adding all desired Search Engines in this step, you can streamline the setup process and ensure everything is configured in one go.
By following these steps you will have created your Recommendations Carousel. To add an advanced touch to your carousel and leverage your recommendations, configure Filters and select Fallback if appropriate. Learn more on the Advanced Options section.
Learn by Example - Creating a Carousel
If you have followed the previous steps, this is how creating a carousel will look like:
Click on “Add carousel” to create one, fill all the fields, and select where to display it.
We add the “Similar” title, and leave the Status enabled, as we want to show our carousel from the moment we save it.
We paste the following CSS selector where we want our carousel to display after inspecting the page, in this case it is a carousel for a product page: #main .product-container.js-product-container.
And we choose for the widget to display by placing "As first" from the content on "#main .product-container.js-product-container".

Afterwards, we select our desired logic, which in this case is Visually Similar, and display it in one of our Search Engines: doofinder_product, with a maximum number of products to display of 10; without out-of-stock products.
We disable Filters and Enable Fallback, then click "Save":

This is how it looks like in the Admin Panel after its creation:

This is how it looks on our product page and with our configuration:

Now, the carousel shows 10 visually similar products to the one shown on the product page respecting our desired placement.

