Within your Admin Panel, you can manage your stores and search engines for any of your Doofinder products, including Search, Recommendations, Quiz maker, AI Assistant and Category Merchandising, as well as access Statistics, Account settings, Configuration, and much more.
Video last updated before 08-30-2025
Find below a quick overview of what you can find in each section and how to navigate the Admin Panel.
Navigation
Navigation is simple and intuitive. After logging in, you will find a left-side menu divided in two sections.
At the top of the left-side menu, you will find the Home section, which directs you to the homepage, followed by the sections for each of Doofinder's products: Search, Recommendations, and Quiz Maker. Within these sections, you can configure their features and unique functionalities.
At the bottom of the left-side menu, you will find the Configuration, Account, and Help Center sections. In the Configuration section, you can manage shared features such as Indices, Security and Store Settings, among others. The Account section includes all functionalities related to your subscription, including billing and team members management. The Help Center directory provides access to FAQs, a search bar for support documentation, and a contact page for reaching our Support team.
Additionally, you can access Configuration, Account, and Help Center from the top-right corner of the Admin Panel by clicking on the corresponding icons to navigate to the desired section.
Lastly, in the top bar of the Admin Panel, at the left-center, you will see the current Store you are working in. As you navigate through each section, this bar will indicate if a Search Engine or Layer is also being impacted. If you wish to configure a different Store, Search Engine, or Layer, you don't need to leave the section you're in, simply go to the top bar and click on the corresponding option to switch.
On the top bar, you will see all your Stores, Search Engines and Layers listed in alphabetical order. When you hover over any of them, you can copy the Store ID or Hash ID, view the Store, and set as favorite the Store and Search Engine of your choice. When you set a favorite, that Store and Search Engine will appear first in the dropdown menu. For Layers, the first one displayed appear is always the active one.
1. Home
The Home section keeps you up to date with Doofinder’s Assistant, stats, and the latest news about our products, so you will always know about the benefits of Doofinder and how to get the most out of it.
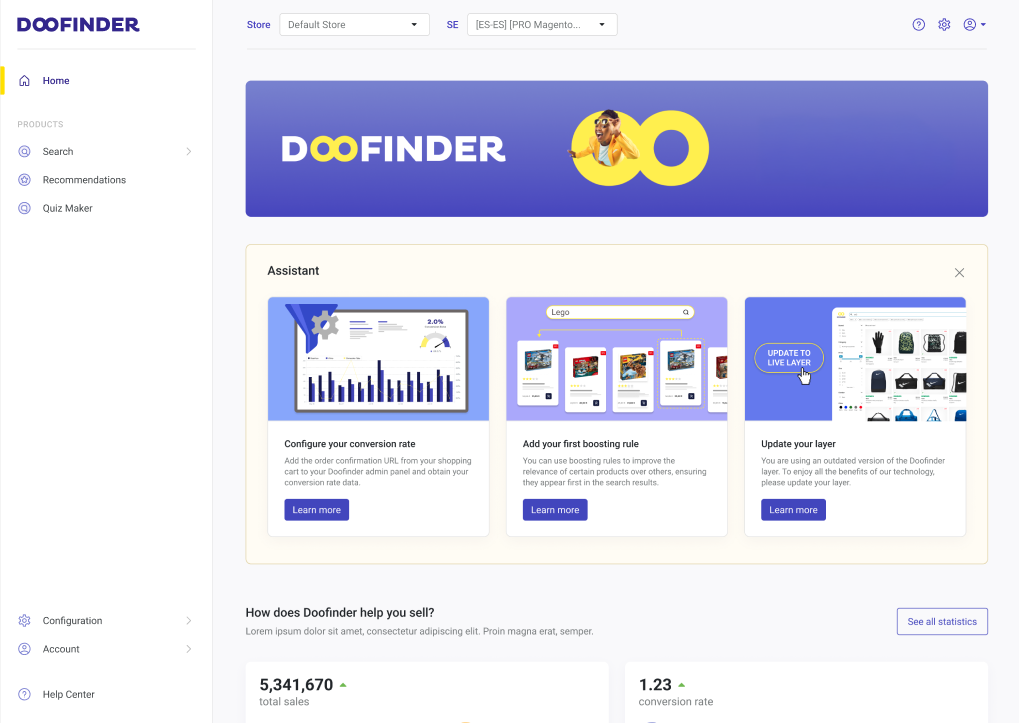
More details can be found in the Home article.
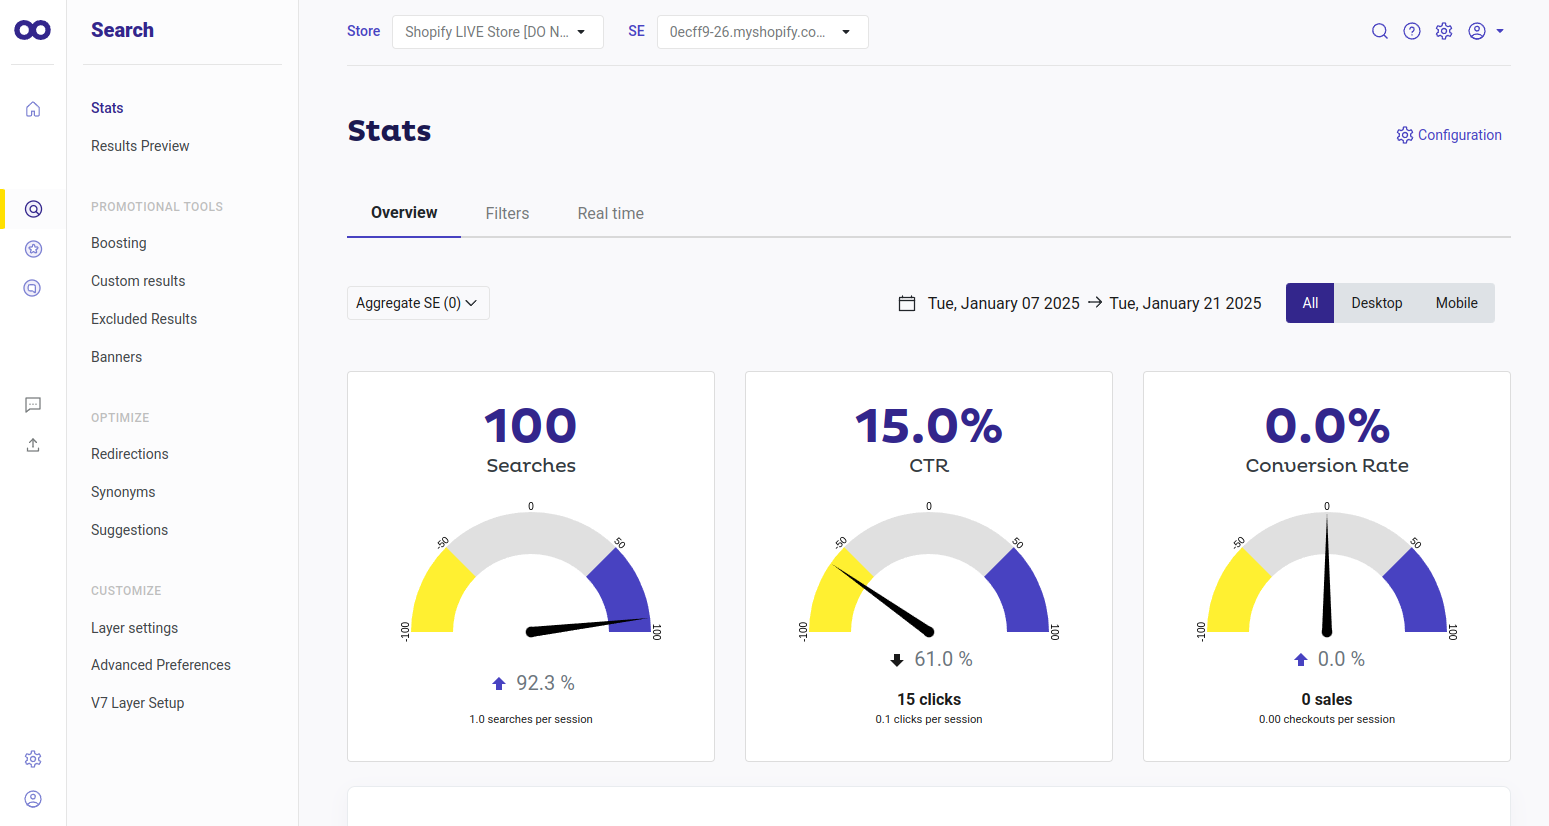
2. Search
Below “Products”, the first section you will find in the left-side menu is Search. In this section, you can create layers, customize them, consult your statistics in Stats, enhance your layer with Promotional Tools and Optimize functionalities, and check how those improvements impact search results on Results Preview (before, Playground).
If you need to know more in depth about any of these functionalities, take a look at the articles for each Search functionality:
- Stats
- Results Preview (before Playground)
Promotional Tools
- Boosting (before Dynamic re-ranking)
- Custom Results
- Banners (before Promotional Banners)
Optimize
Configure
3. Recommendations
In this section, you can choose your Recommendations carousels or create a new one to encourage cross-selling and upselling within your Store. Select your Logic, your Search Engines, which Pages to add your carousel, and use Filters for tailored Recommendations; or customize your carousel with our Advanced Configuration. All while monitoring your carousels from one place.
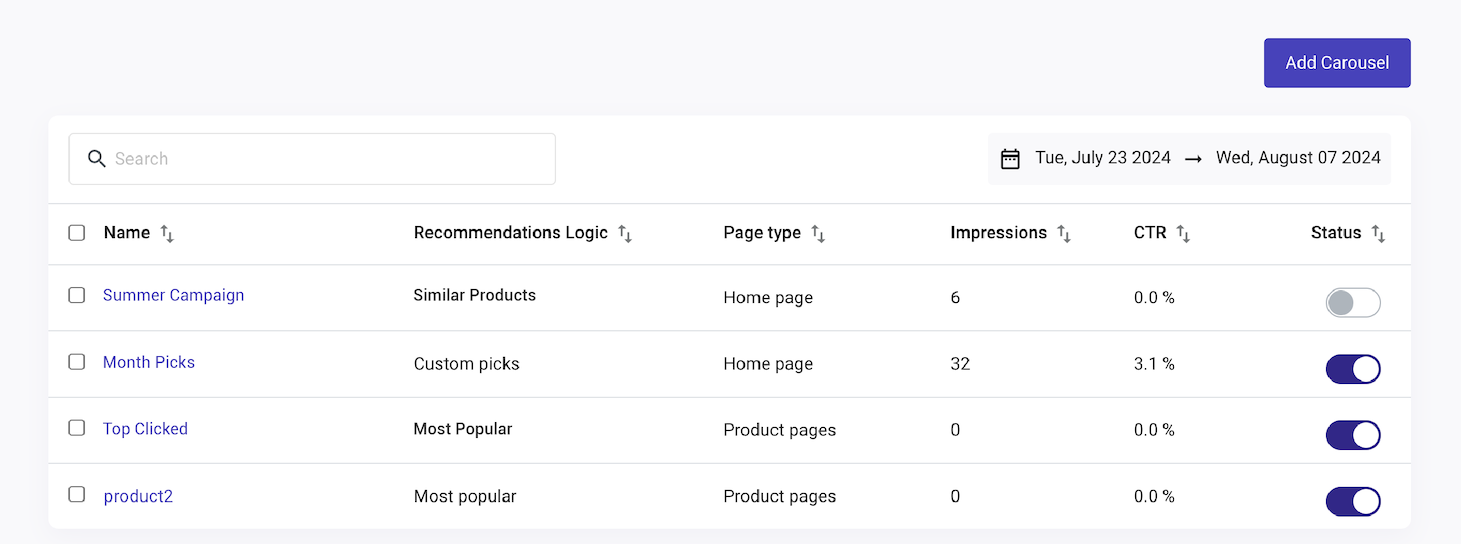
Visit our Recommendations section for more information.
4. Quiz maker
Use Quiz maker for customizable quizzes. Add unlimited questions, messages, and forms tailored to your business goals and customers preferences. It ensures accurate recommendations while enabling lead generation and providing performance tracking through the Admin Panel.
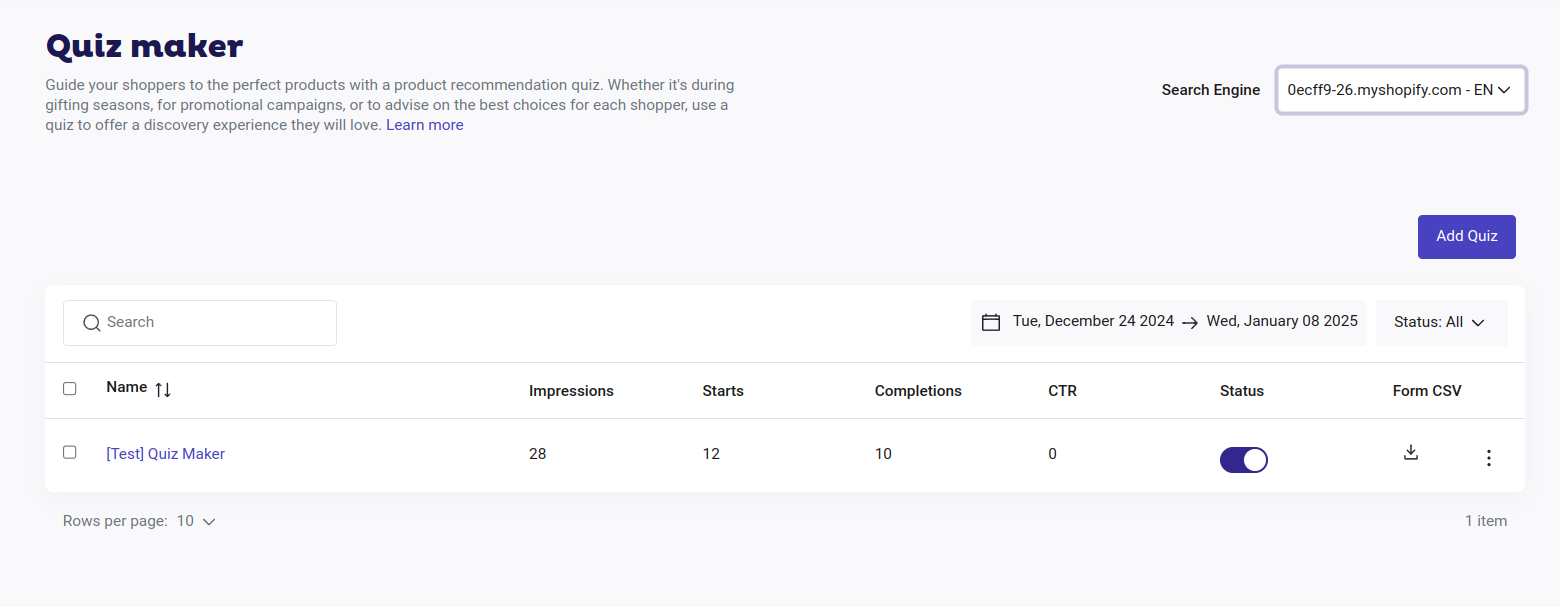
Introduce your customers to new products they might not have considered. Learn how in our Quiz maker section.
5. AI Assistant
In this section, you can configure and manage the AI Assistant, a conversational product discovery tool that understands natural language and guides users toward relevant products based on their needs. The assistant dialogues with customers, makes product comparison, and answers questions using the information from your product data feed.
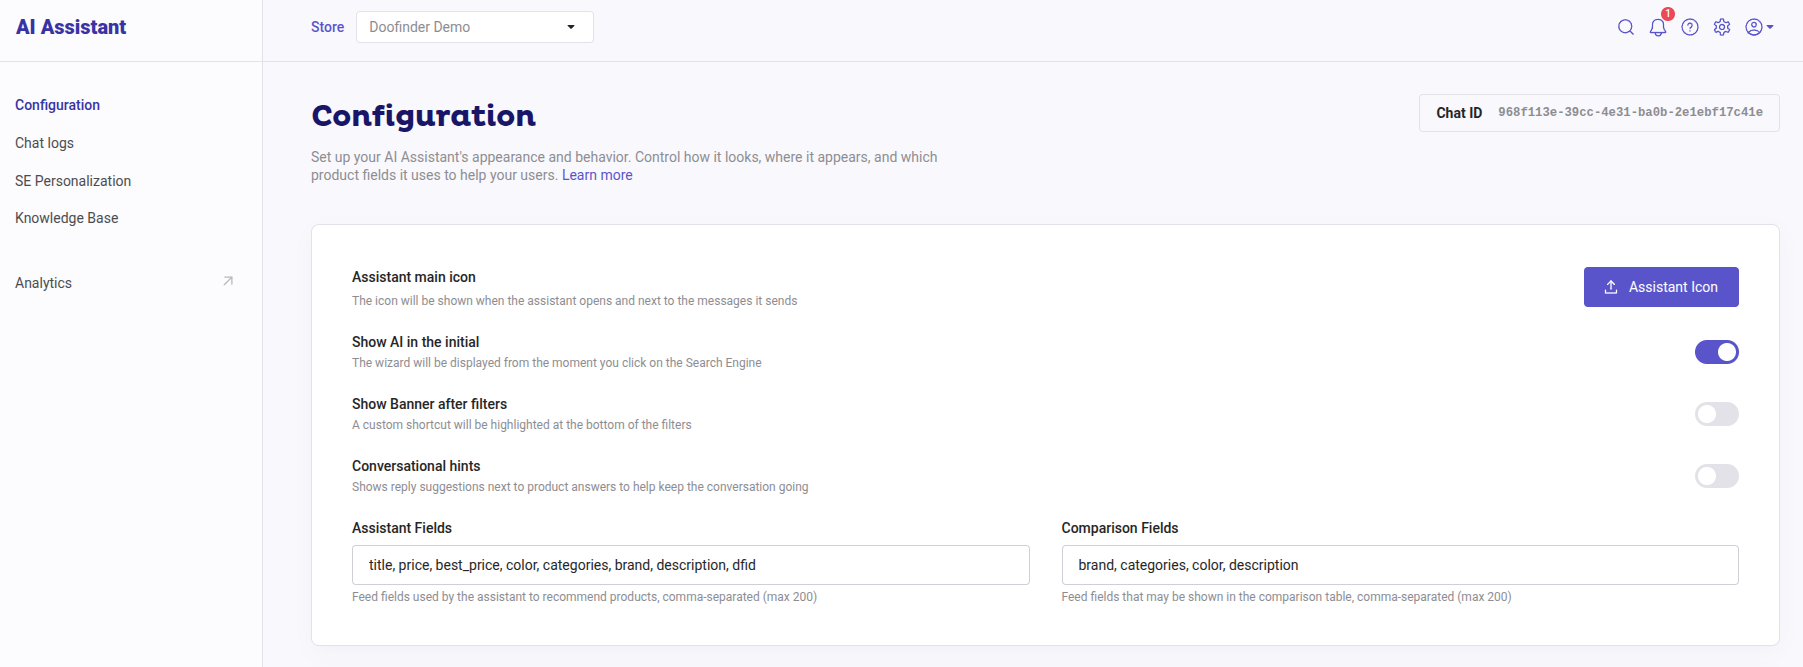
From this section you can:
-
Configure the assistant's behavior: control which feed fields the assistant uses, set a custom name, define introductory messages, and write a system prompt to shape how the assistant responds to customers.
-
Enable the Chat Bubble: display a pop up entry point to the assistant across all pages of your store (except checkout), with customizable colors, offset, and optional direct messaging.
-
Set up the Knowledge Base: upload additional store information, such as shipping policies, contact details, or FAQs, that the assistant can reference when answering customer questions not covered by the product data feed. This configuration isn't an extension of your data feed, product content should still be added to the data feed in order for correct responses.
-
Monitor performance: review chat logs filtered by date, device, and track key stats such as sessions, clicked products, purchase conversion rate, and average conversation duration.
See our AI Assistant full configuration steps and other important details.
6. Category Merchandising
In this section, you can configure and manage Category Merchandising, which lets you control how products are displayed on your store's category pages, in the same way search results are managed in Search. It transforms static category listings into dynamic, merchandisable experiences.
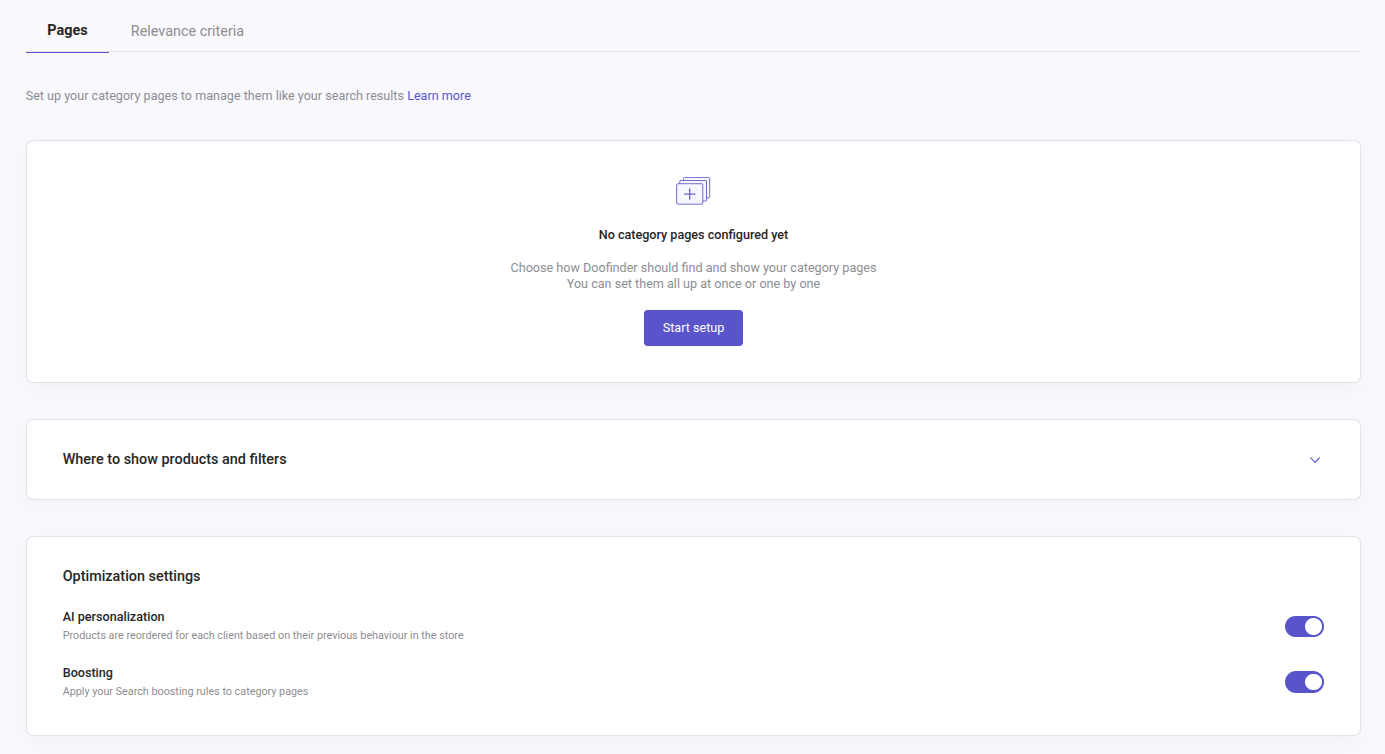
From this section you can:
-
Set up category pages: define which pages are category pages using URL patterns or specific URLs, configure the CSS selector that determines where results are injected, and specify the feed field that identifies categories.
-
Apply merchandising rules: use Boosting rules from Search and enable AI personalization so each shopper sees a category page tailored to their purchase probability.
-
Customize the display: adjust colors, product card options (availability badge, discount percentage, add-to-cart button), sorting options, and filters to match your store's look and feel.
-
Use the Visual Merchandiser: preview how your category pages look with current settings applied, and inspect individual product details directly from the panel.
Visit the Category Merchandising section for the complete information.
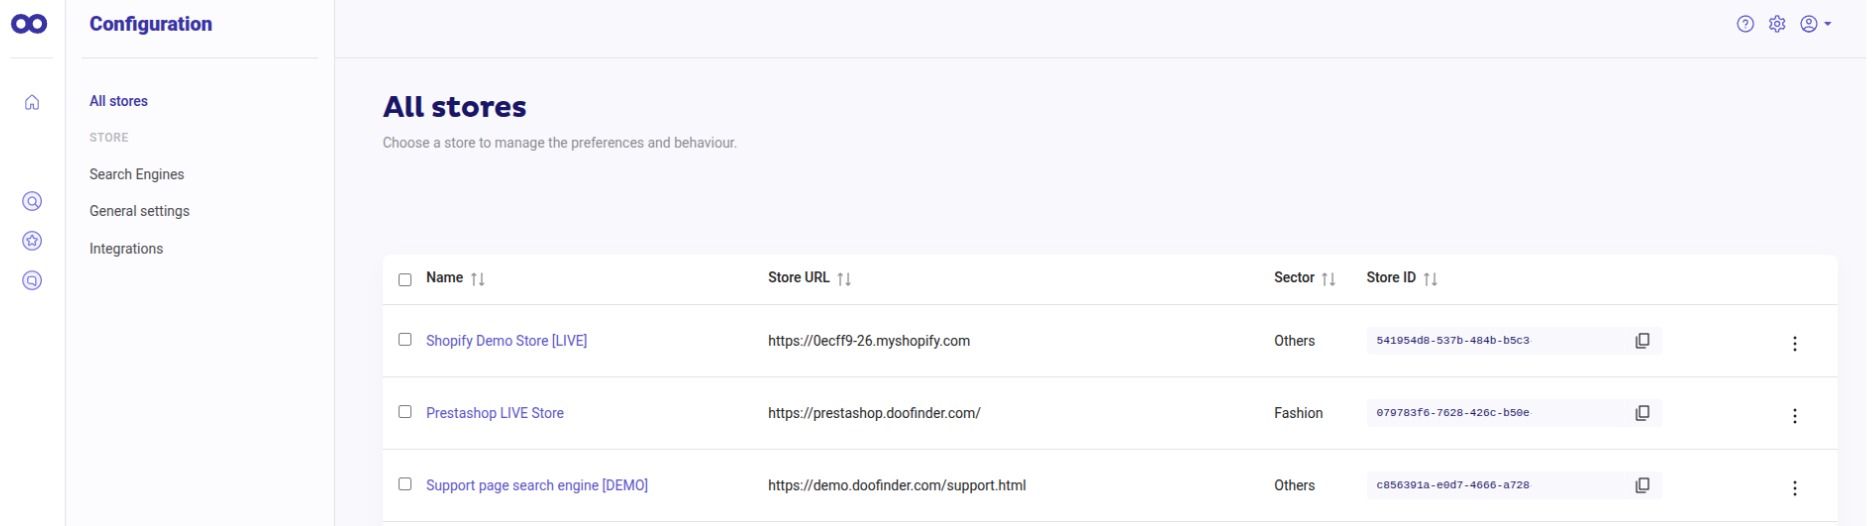
7. Configuration
In this section, you will find all the essential information related to your Store, Search Engines, Integrations, Indices, Security, and an overview of all your Search Engines per Store.
Configuration settings are organized into two main groups: All Stores and Stores, find details on each of them below:
- All Stores: includes all the Stores created in the Admin Panel.
-
Store: manage settings for each individual store. Inside a store, you’ll find:
-
Search Engines: manage all Search Engines connected to the store. From here, you can:
- By clicking on the three dotted menu:
- Index your feed in a Search Engine and view indexing status.
- Publish, unpublish, delete, or set a Search Engine as default.
- Edit the Search Engine.
- Go to Edit setup to adjust language, currency, the Search Engine name.
- By clicking on a Search Engine button "See indices":
- Go to Indices to manage multi-indices, sources, and configuration.
- By clicking on the three dotted menu:
-
Excluded Results: here you can exclude your product items from showing in any of the Doofinder products.
-
General Settings: includes details at Store level within three different tabs:
- Overview: find your Store Name, URL, Industry, cookie consent, Published Search Engines, and Installation script.
- Sales data: configure key pages for sales tracking.
- Security: manage Authorized domains and blocked IP's.
-
Integrations: add integrations with Doofinder, such as Google Analytics and Klaviyo.
-
For further guidance, refer to the Managing Data section for all indices and feed related information, and Getting Started section for your store configuration.
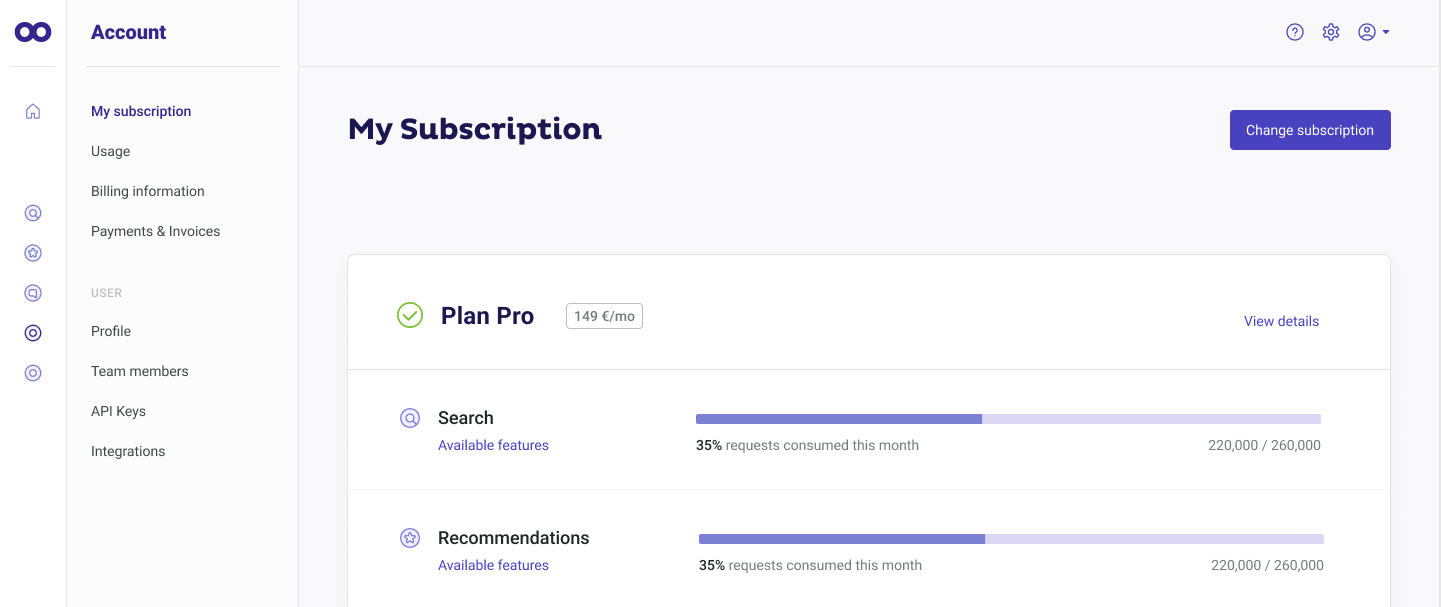
8. Account
In the Account panel you can access all the details related to your Profile, Plan, Billing, and more.
If you need to know more in depth about any of these sections, take a look at the articles for each Account functionality:
Under the User section you will find:
9. Notification System
The Notification System is an in-app notification bell at the top navigation bar.
It delivers timely, relevant information to you while actively managing your account. The notifications will inform of events like indexing failures or plan renewals, new features, etc. The system is organized into categories, such as “Insights”, which cover things like changes in top search terms, new AI synonyms, or about sales data. Finally, it provides a central place for users to review important updates at their convenience.
User Interaction
- Clicking on a notification will:
- Mark the notification as read.
- Redirect you to the relevant page within Doofinder to complete the corresponding action.
- Unread notifications will trigger a visual indicator (badge) on the notification bell, showing the number of unread messages.
- Automatic deletion will take place for messages older than 90 days, regardless of read state.
- Read notifications expiration: disappears 30 days after it has been read.
- Mark all as read: all messages will be tagged as opened.
- Notifications are user-specific:
- If multiple users share a store/account, notifications are tracked independently per user.
- Marking a notification as read does not affect visibility or read status for other users linked to the same store.
- Insight notification replacement logic (in order to prevent accumulation of redundant data):
- If a user has an unread notification and a new one of the exact same type is generated:
- The new notification will replace the previous unread one.
- If the older one was already read, it stays in the history as read.
- If a user has an unread notification and a new one of the exact same type is generated: