First-Time Installation - Shopware 5
First, make sure you have:
- A Shopware account (Mandatory).
- A DooFinder account.
- Get the DooFinder plugin from Shopware's official Extensions (Erweiterungen).
Our plugin is compatible with Shopware versions 5.5 and above. If you're using an older version and don’t plan to upgrade, we recommend keeping your current Doofinder plugin to ensure uninterrupted functionality.
First-time installation: If this is your first time installing the Shopware 5 Plugin, simply follow the step-by-step guide provided below for a smooth installation.
- To begin the installation process, first log into your Shopware 5 Account.
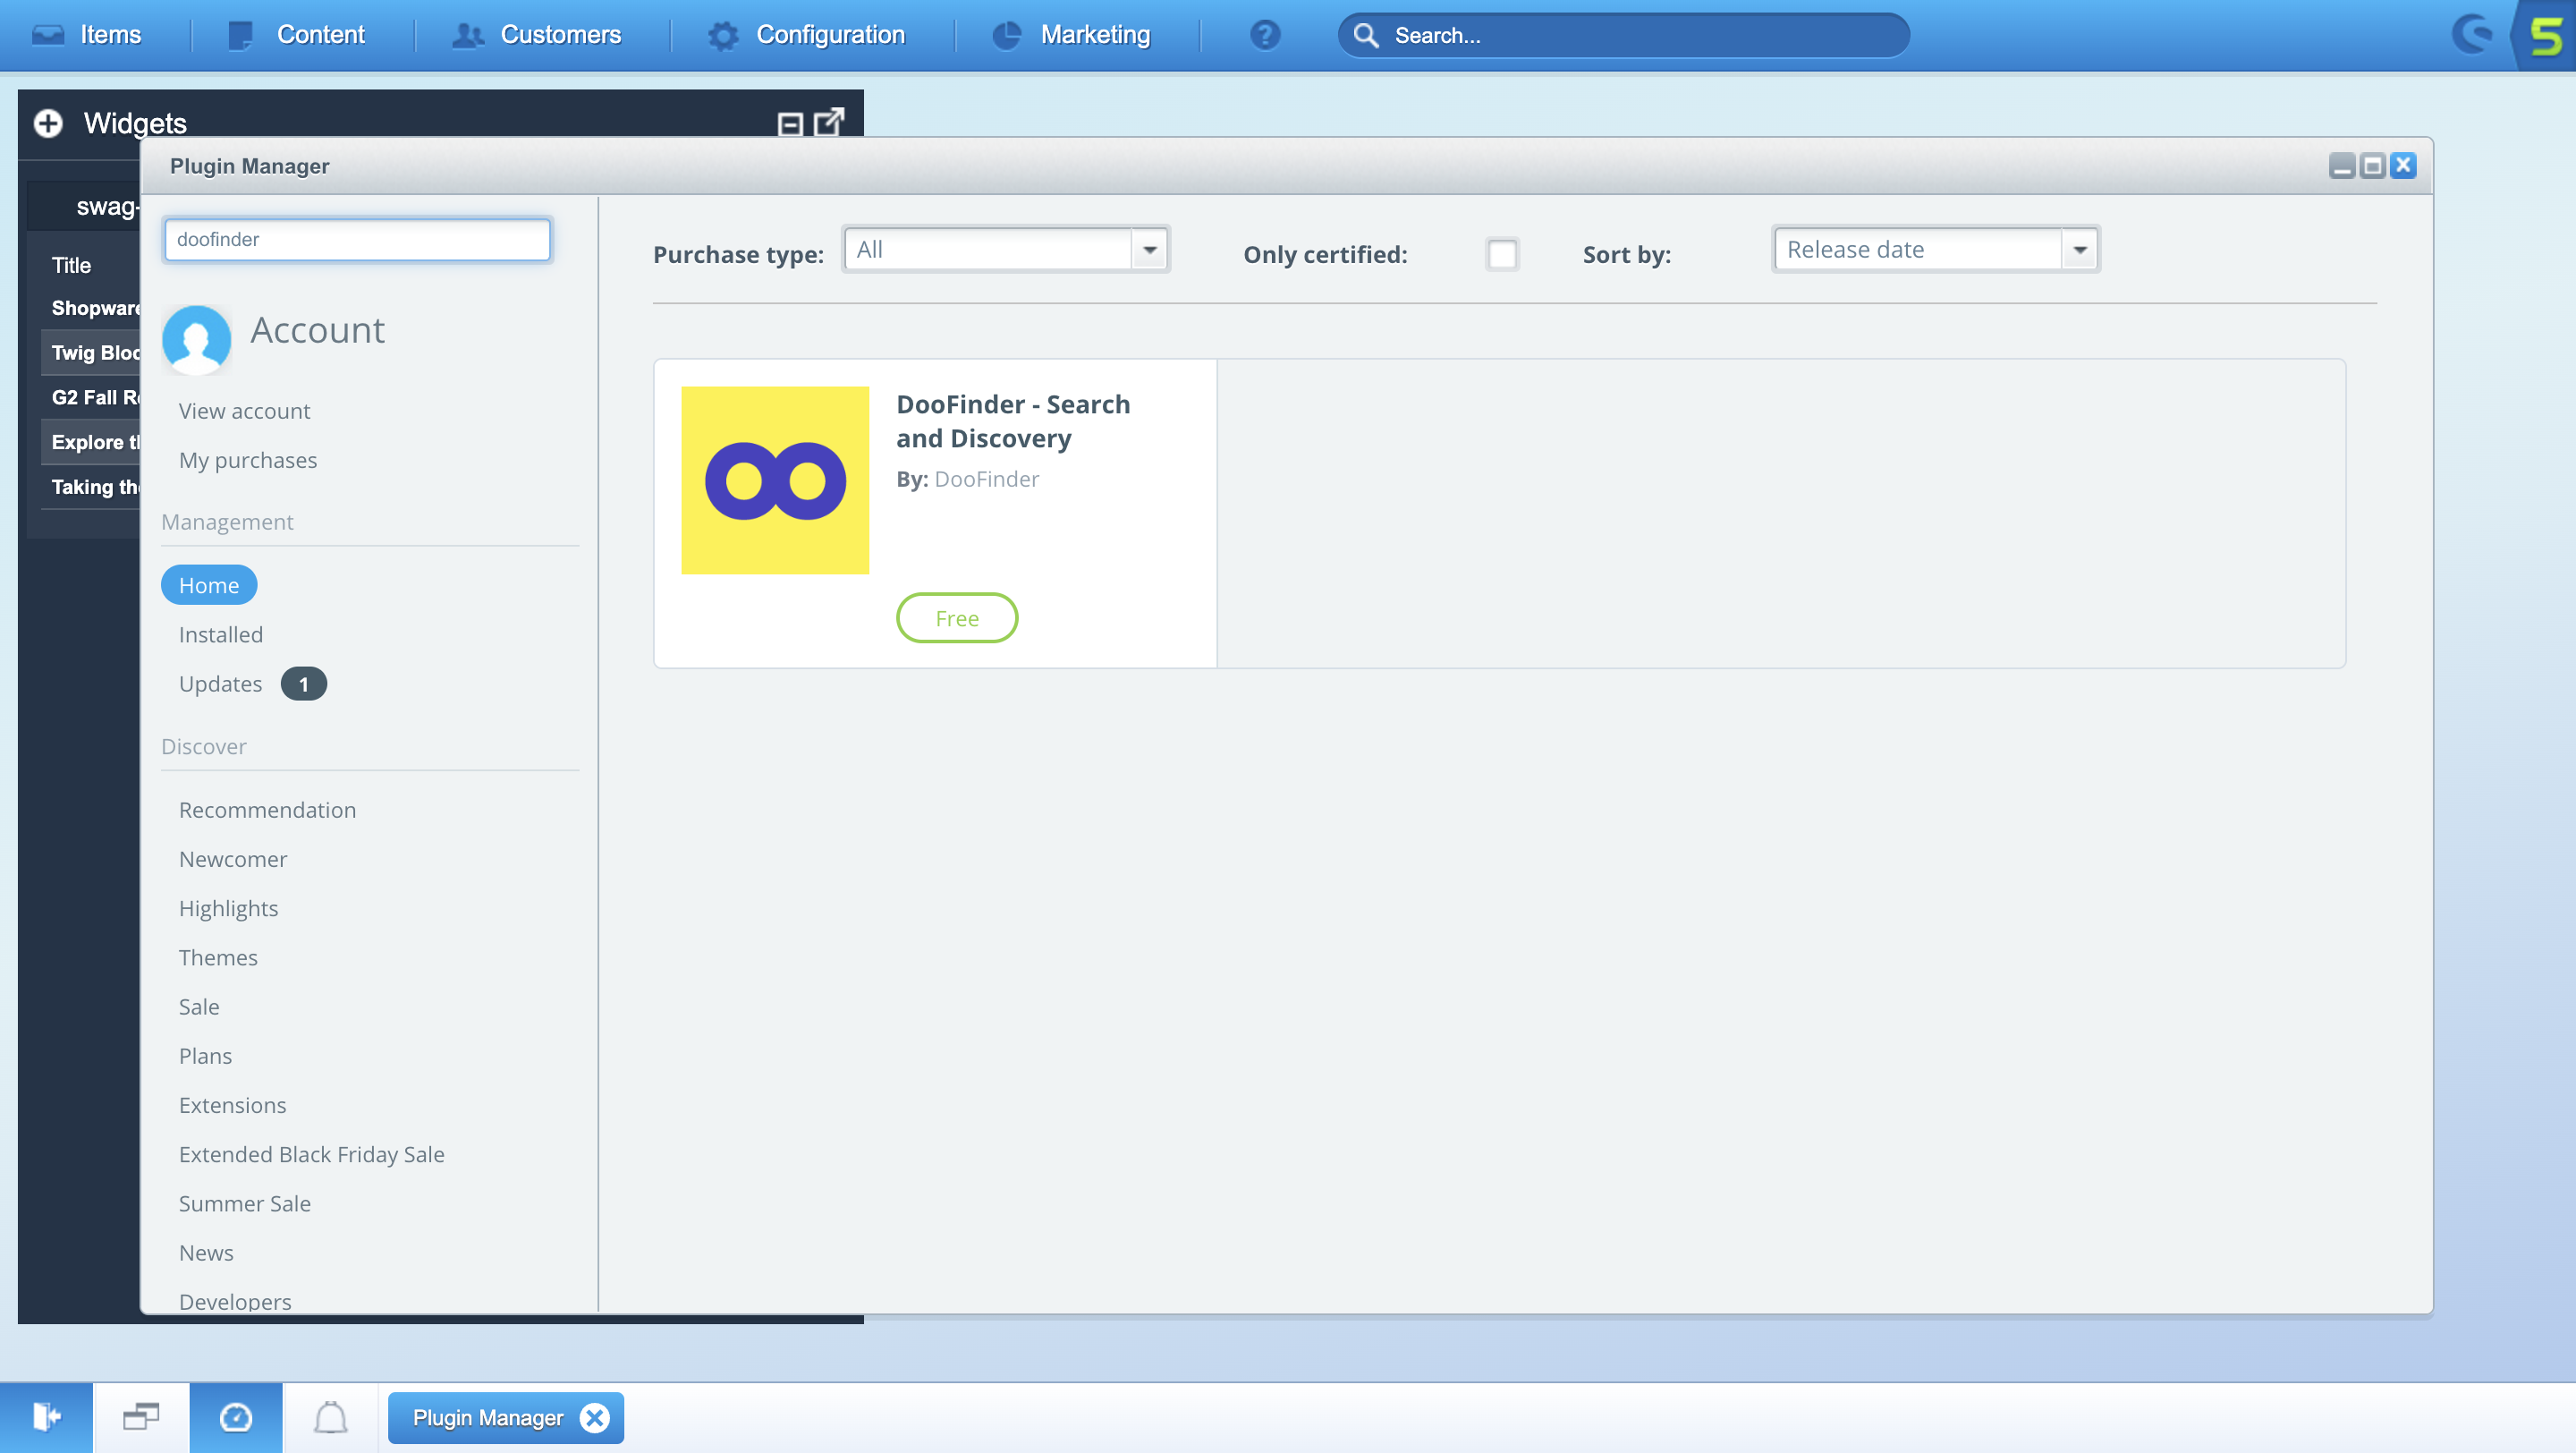
- You'll need to get the DooFinder plugin from Shopware's official Extensions (Erweiterungen).
- A pop-up window will appear. On the search bar, look for “DooFinder: Search and Discovery”.
- Click on the “free” button to download the plugin.
- Click on the corresponding Shopware version button to download the DooFinder plugin to your Shopware account. Click on “Install”.
- Clear cache
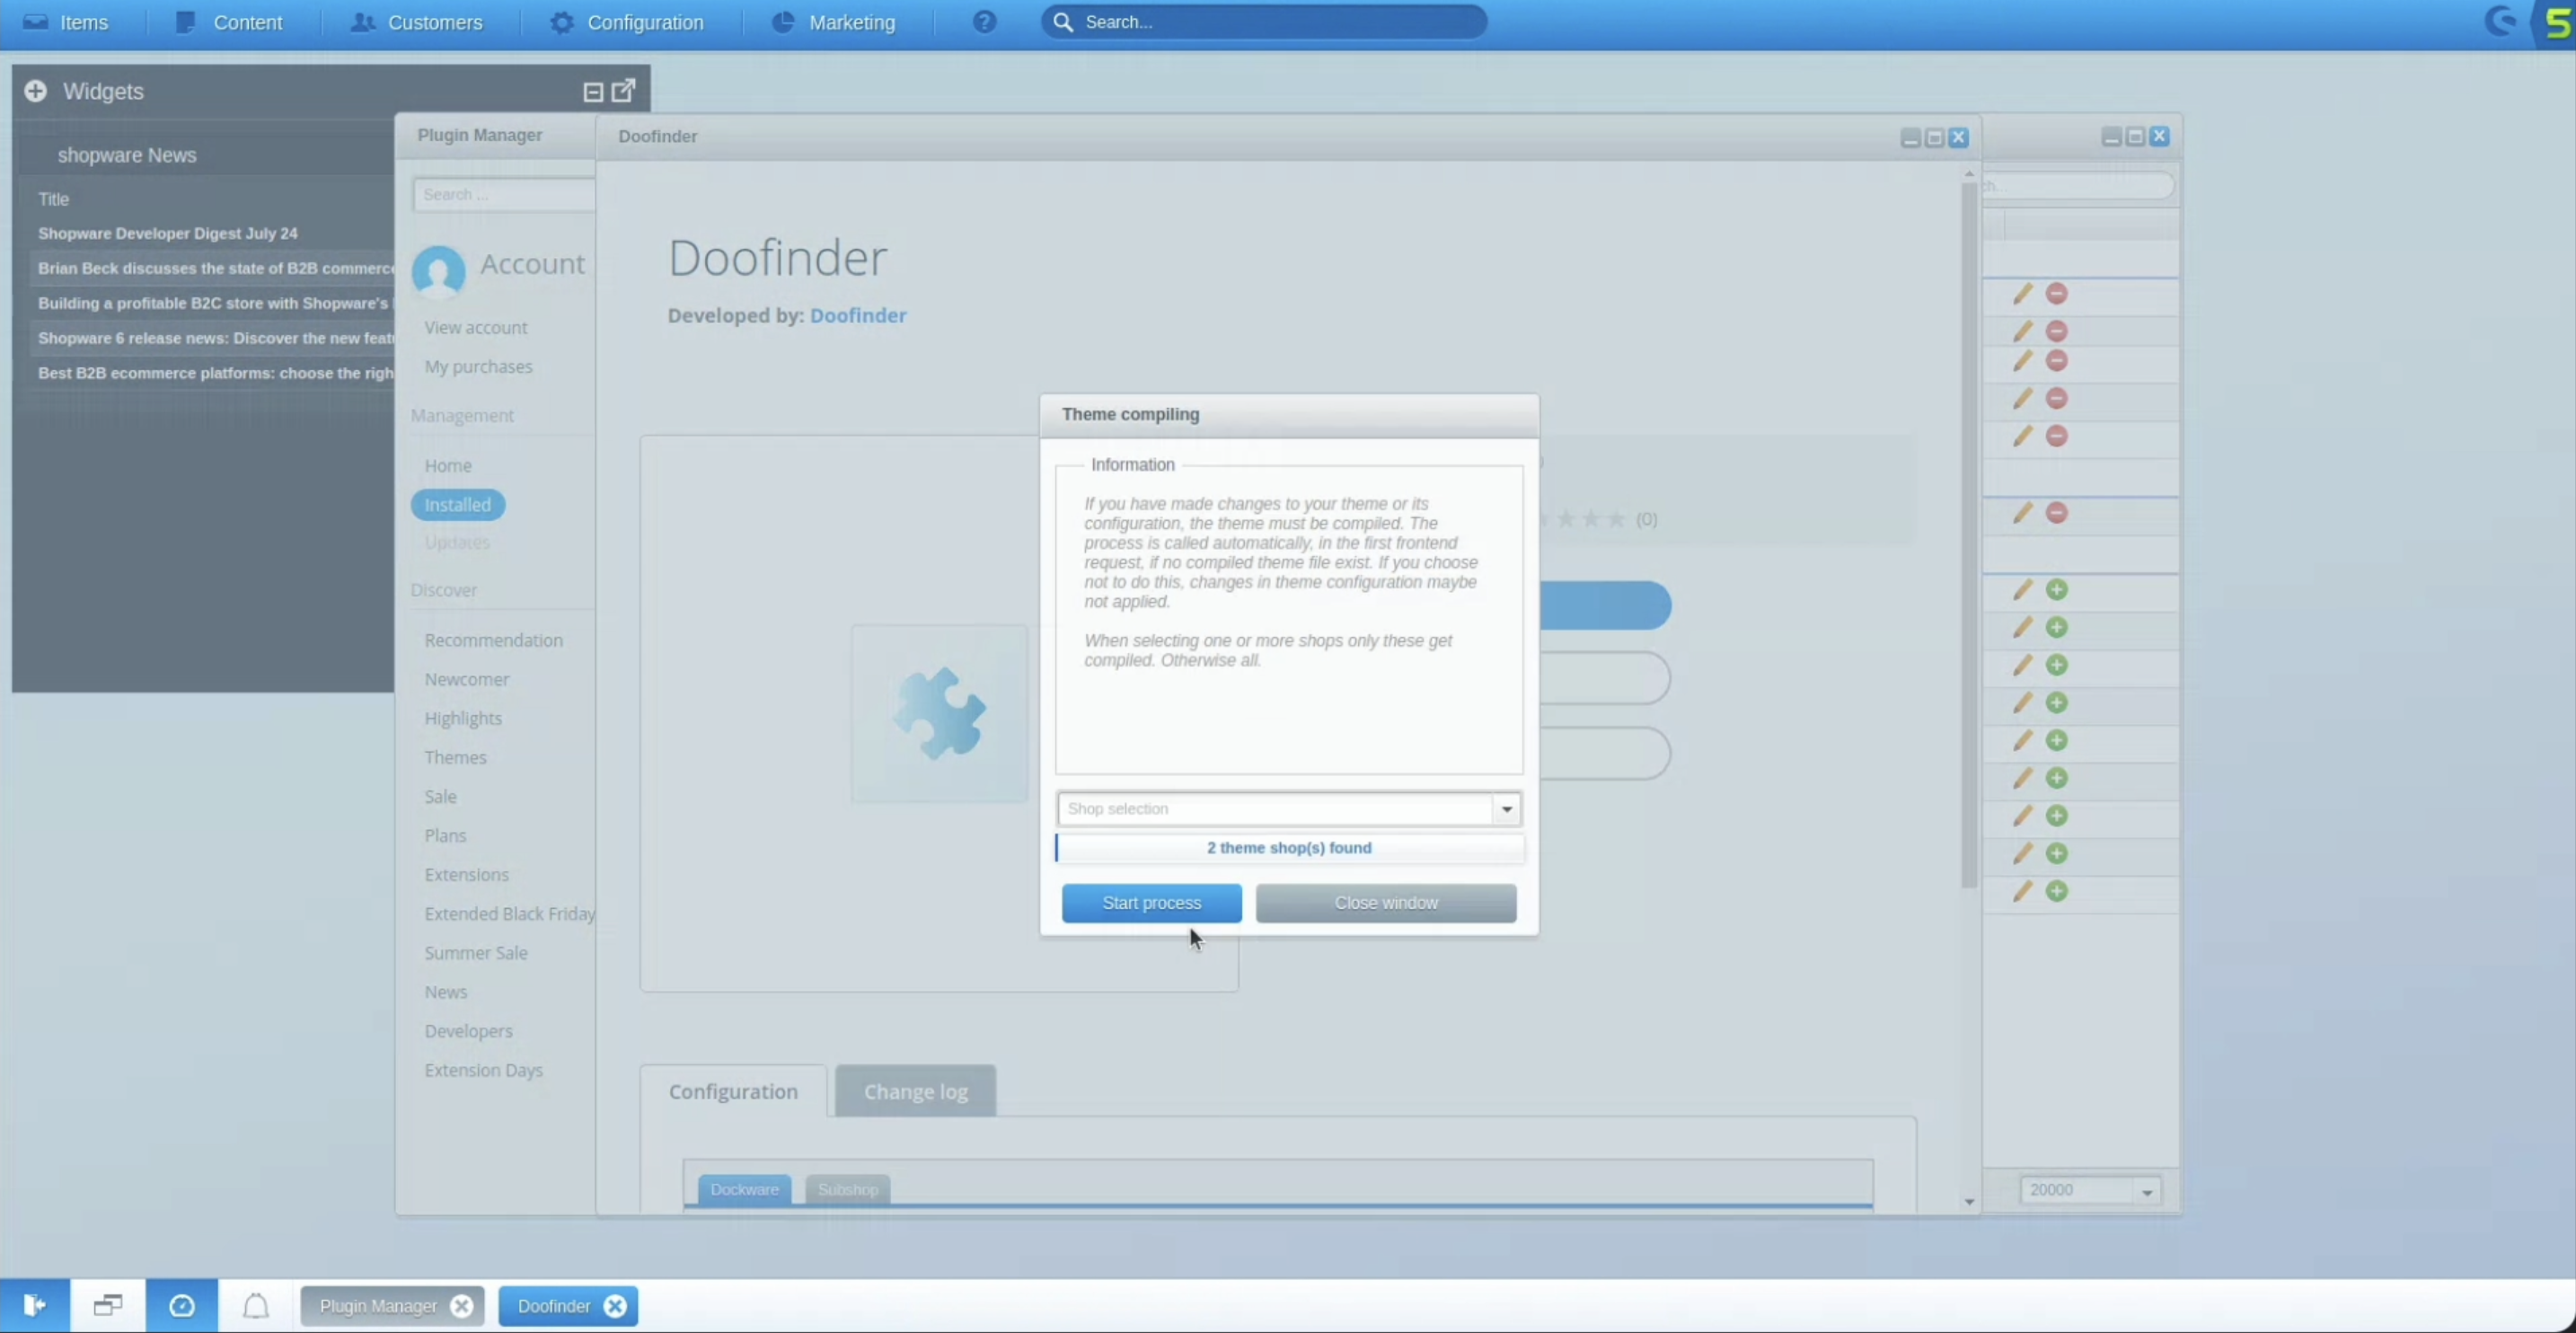
- Compile themes
- When the Theme Compiling pop-up appears click on “Start Process”.
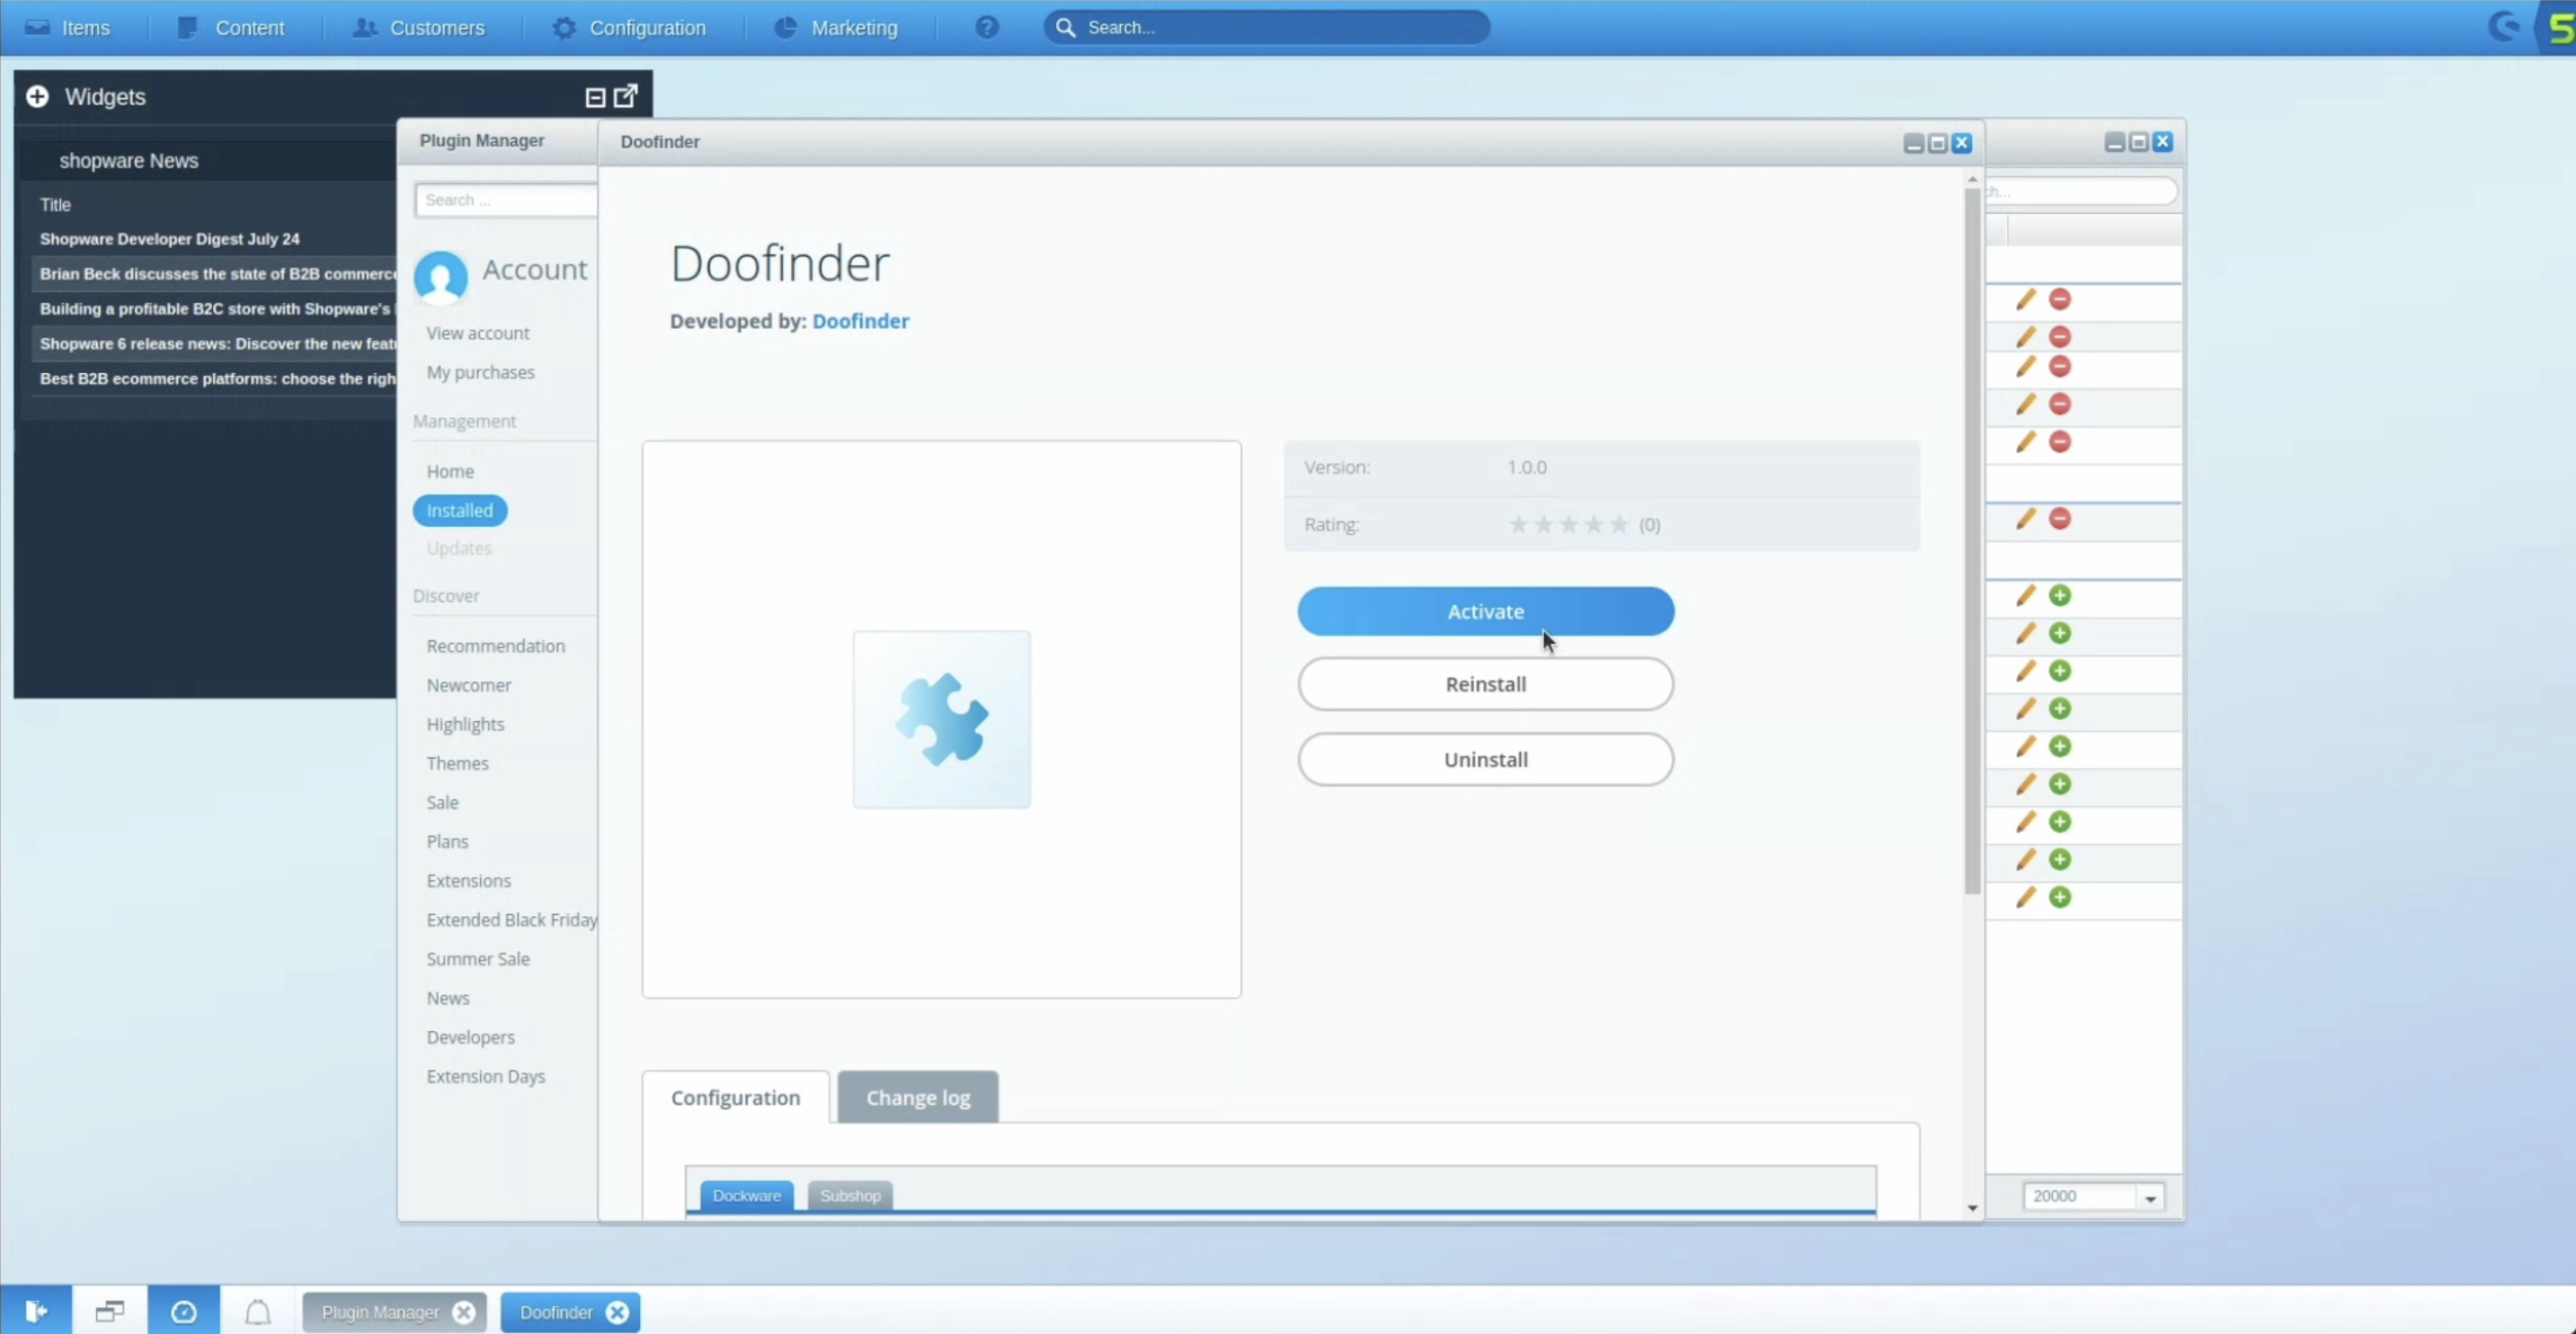
- Once completed and installed, after a few seconds, click the “Activate” button.
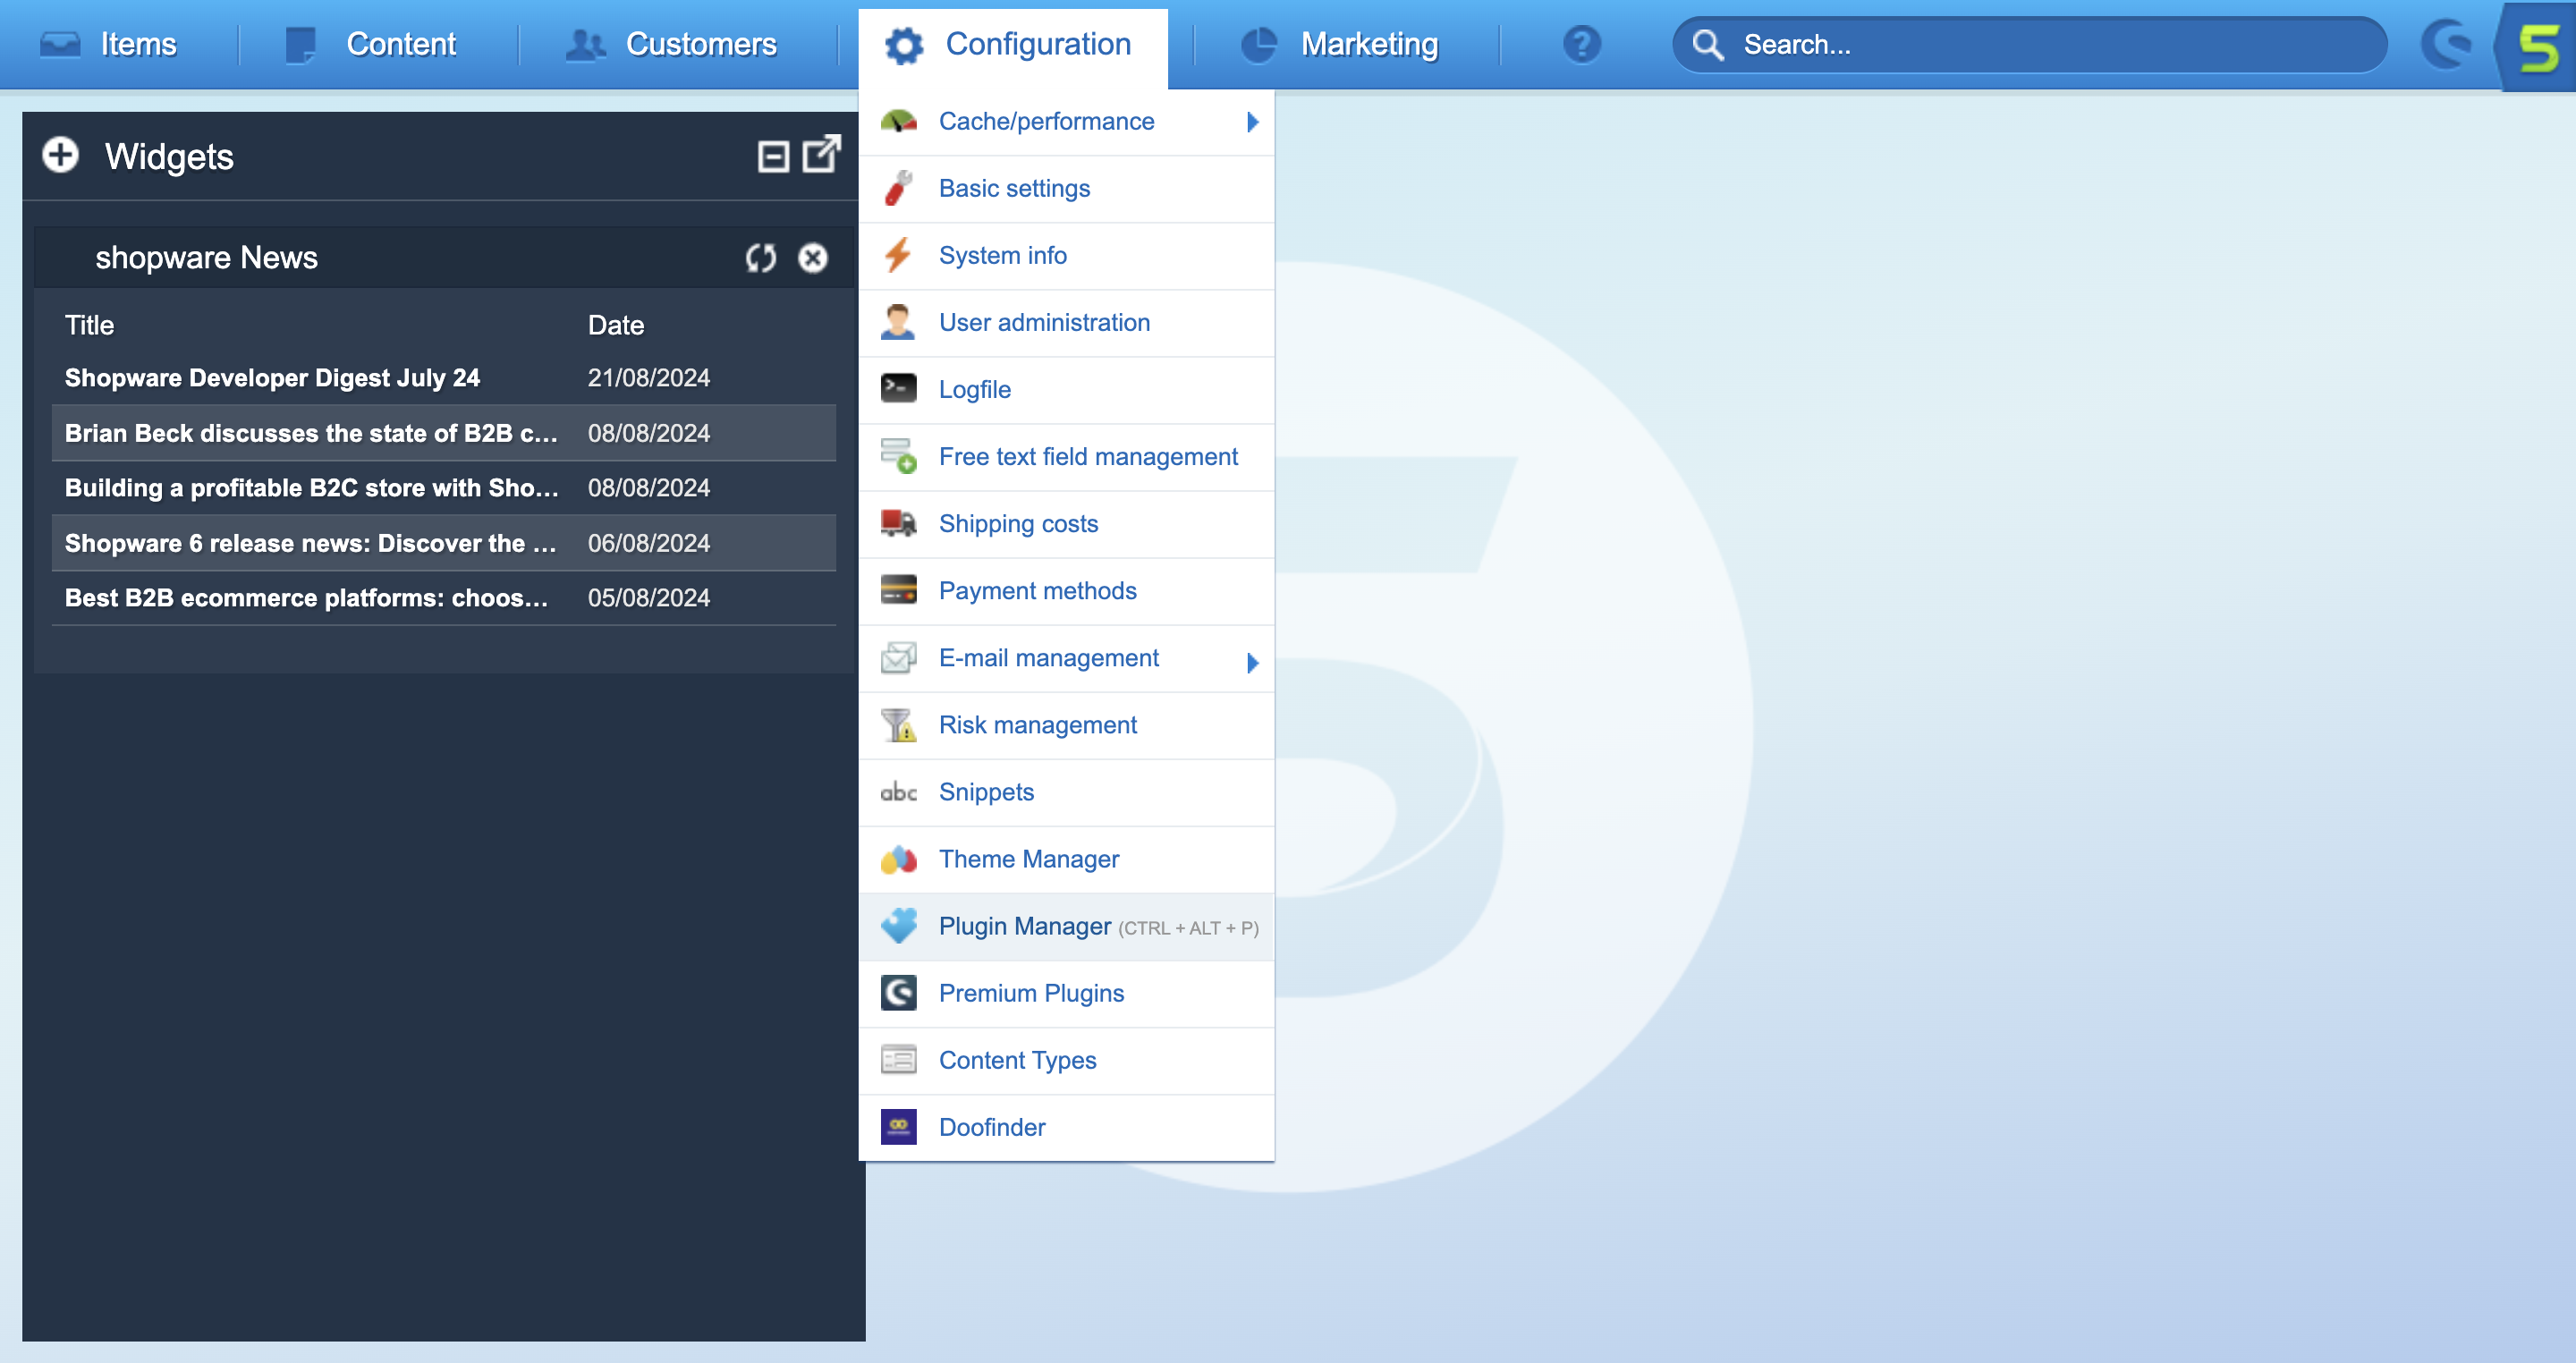
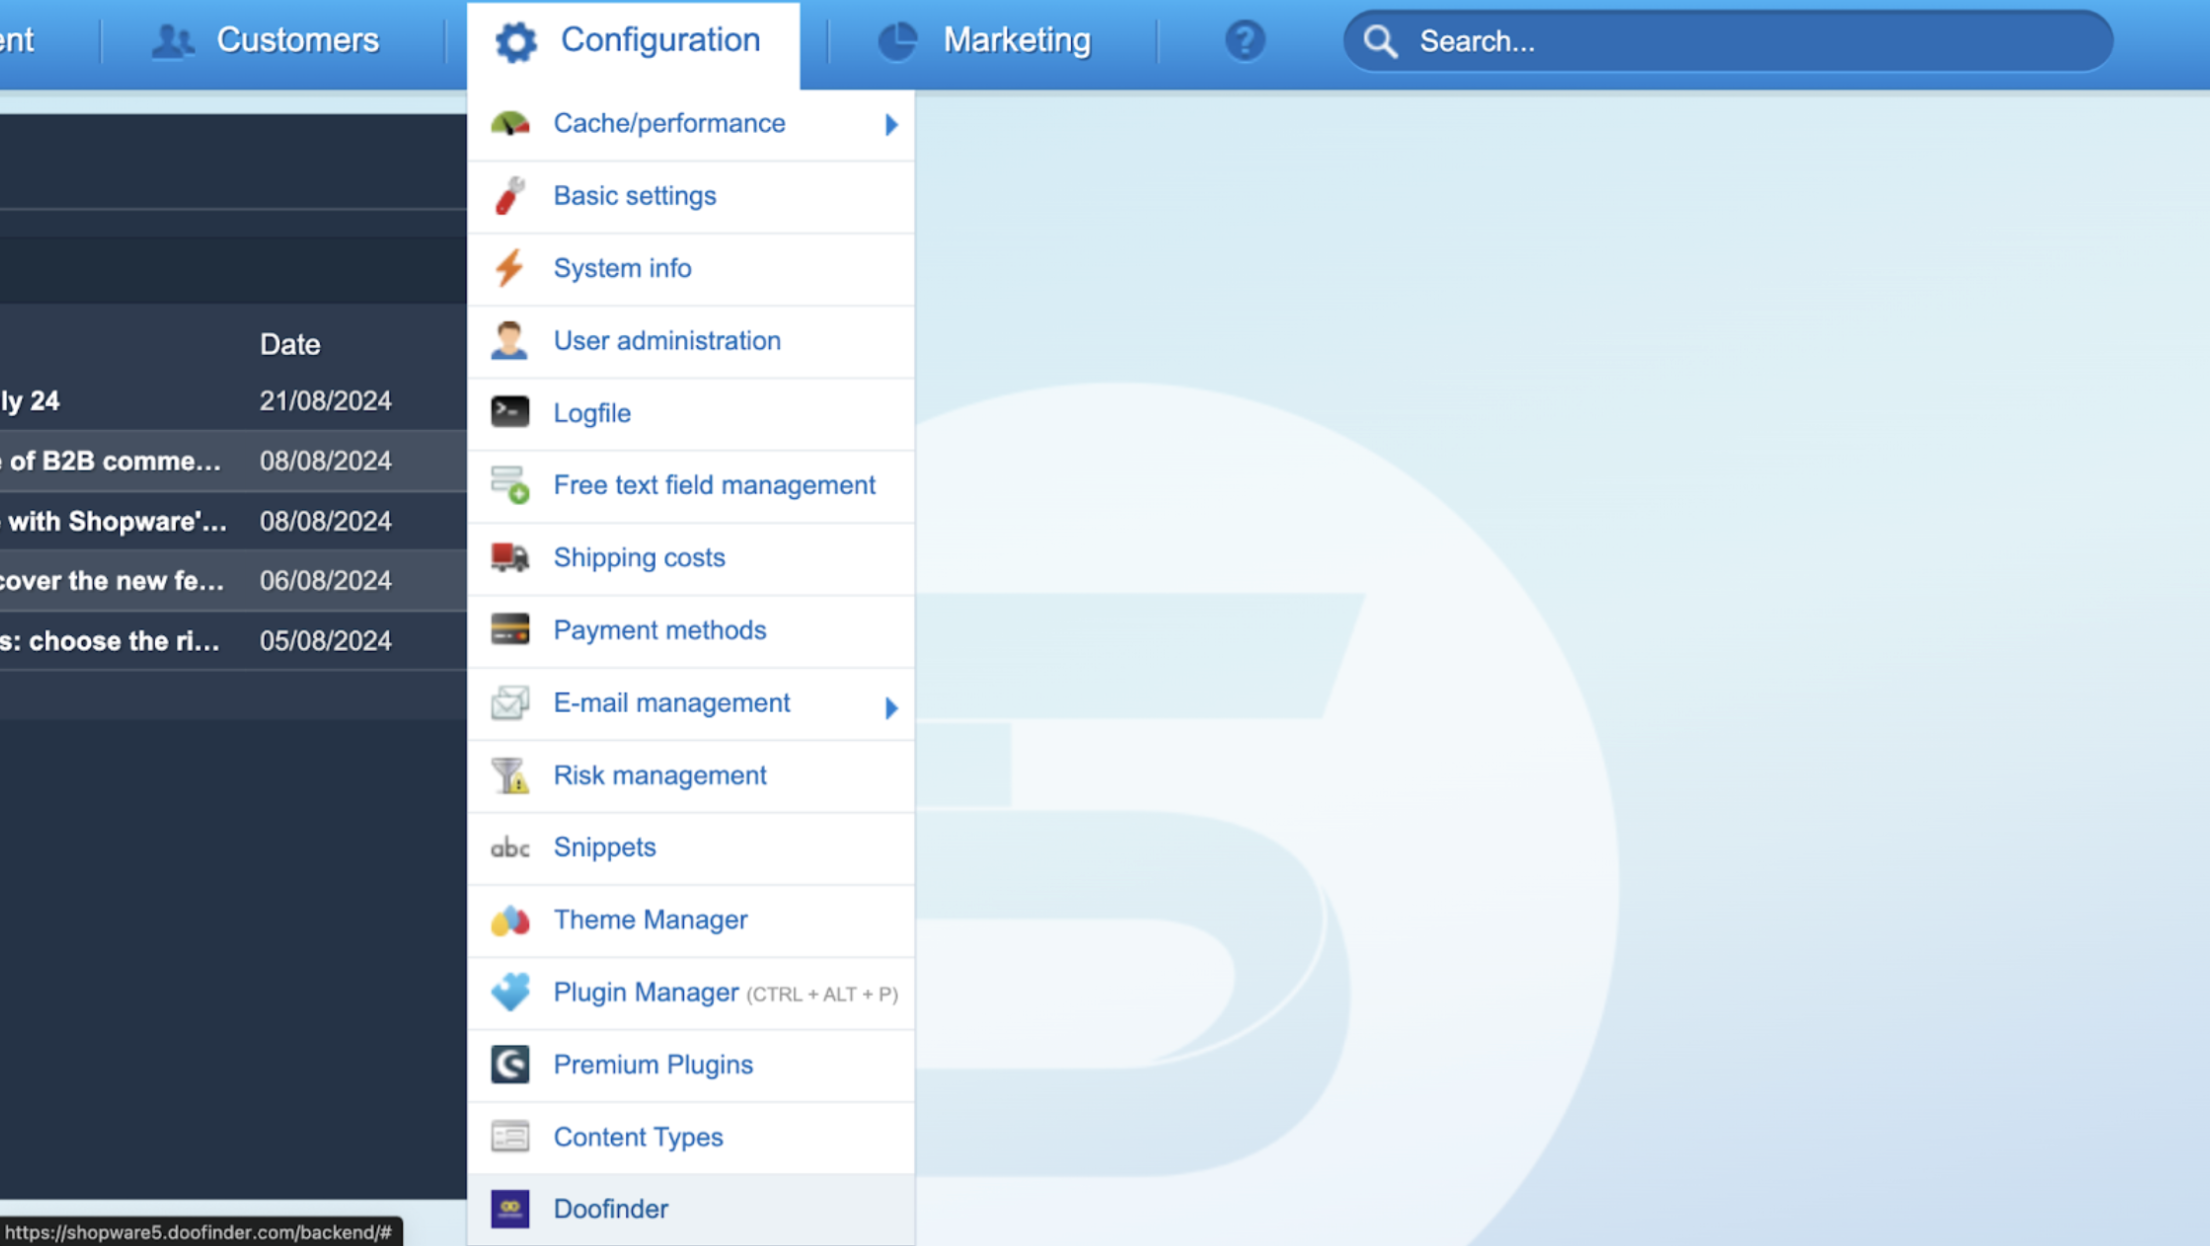
- To proceed, go to Configuration > DooFinder to enter the module’s configuration.
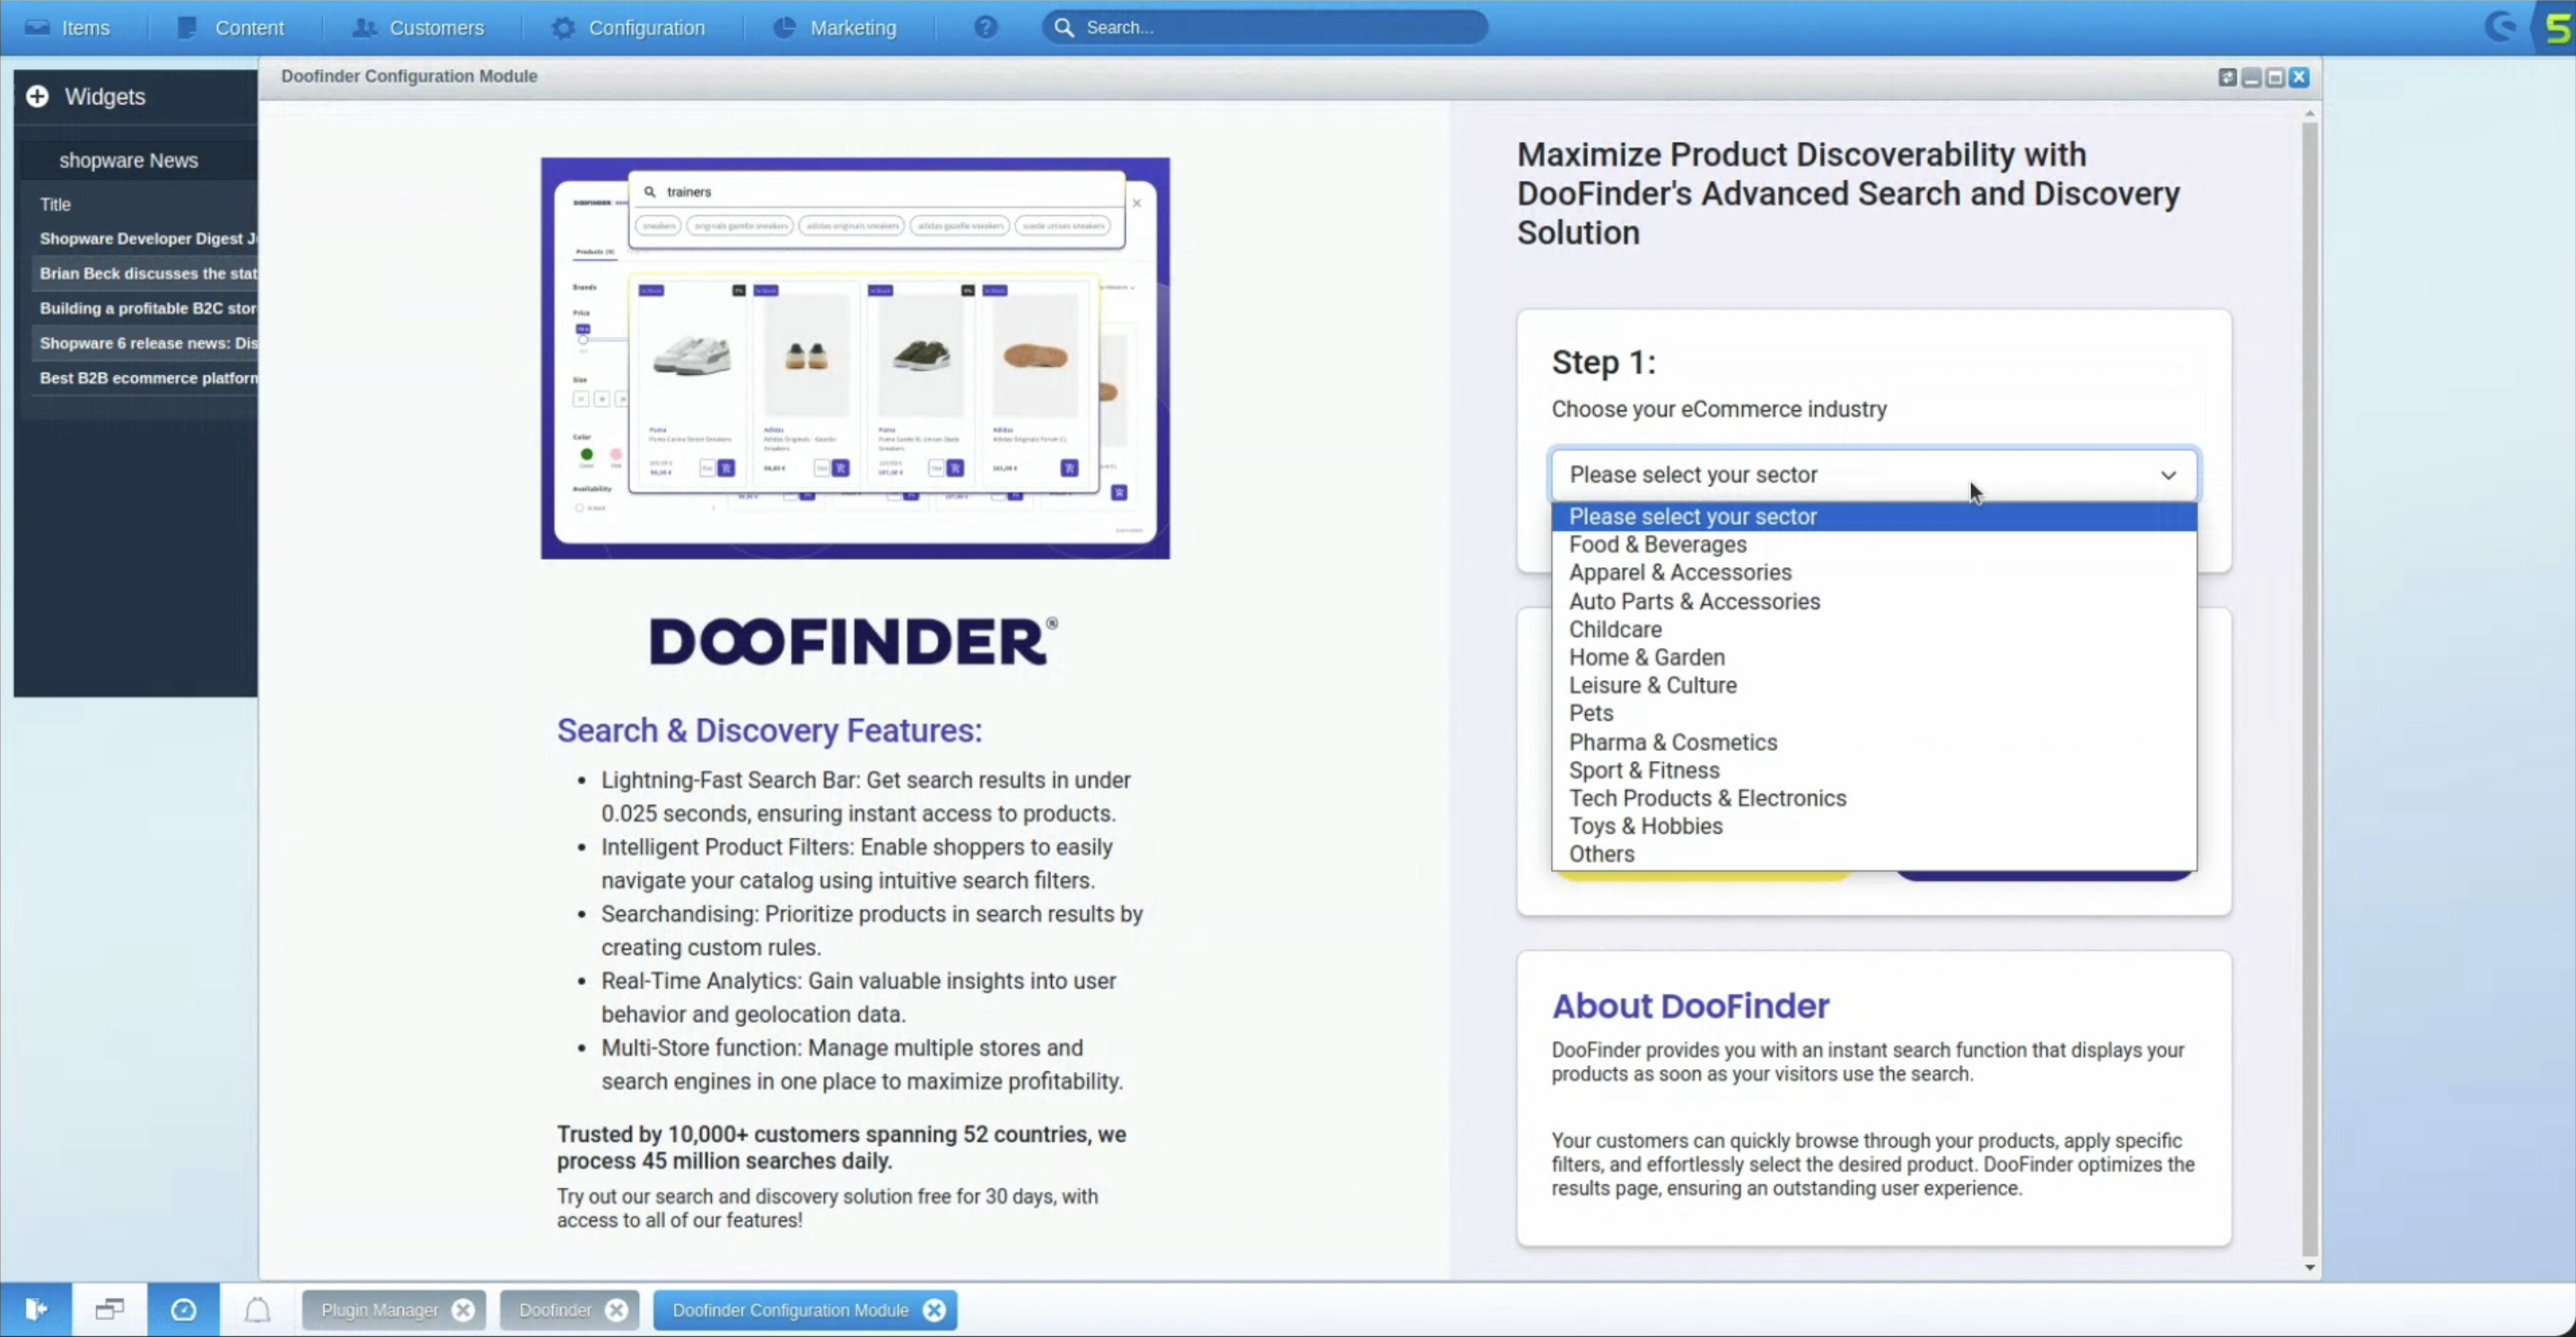
- On the pop-up window, please complete the instructions.
- Choose an eCommerce industry that matches your store.
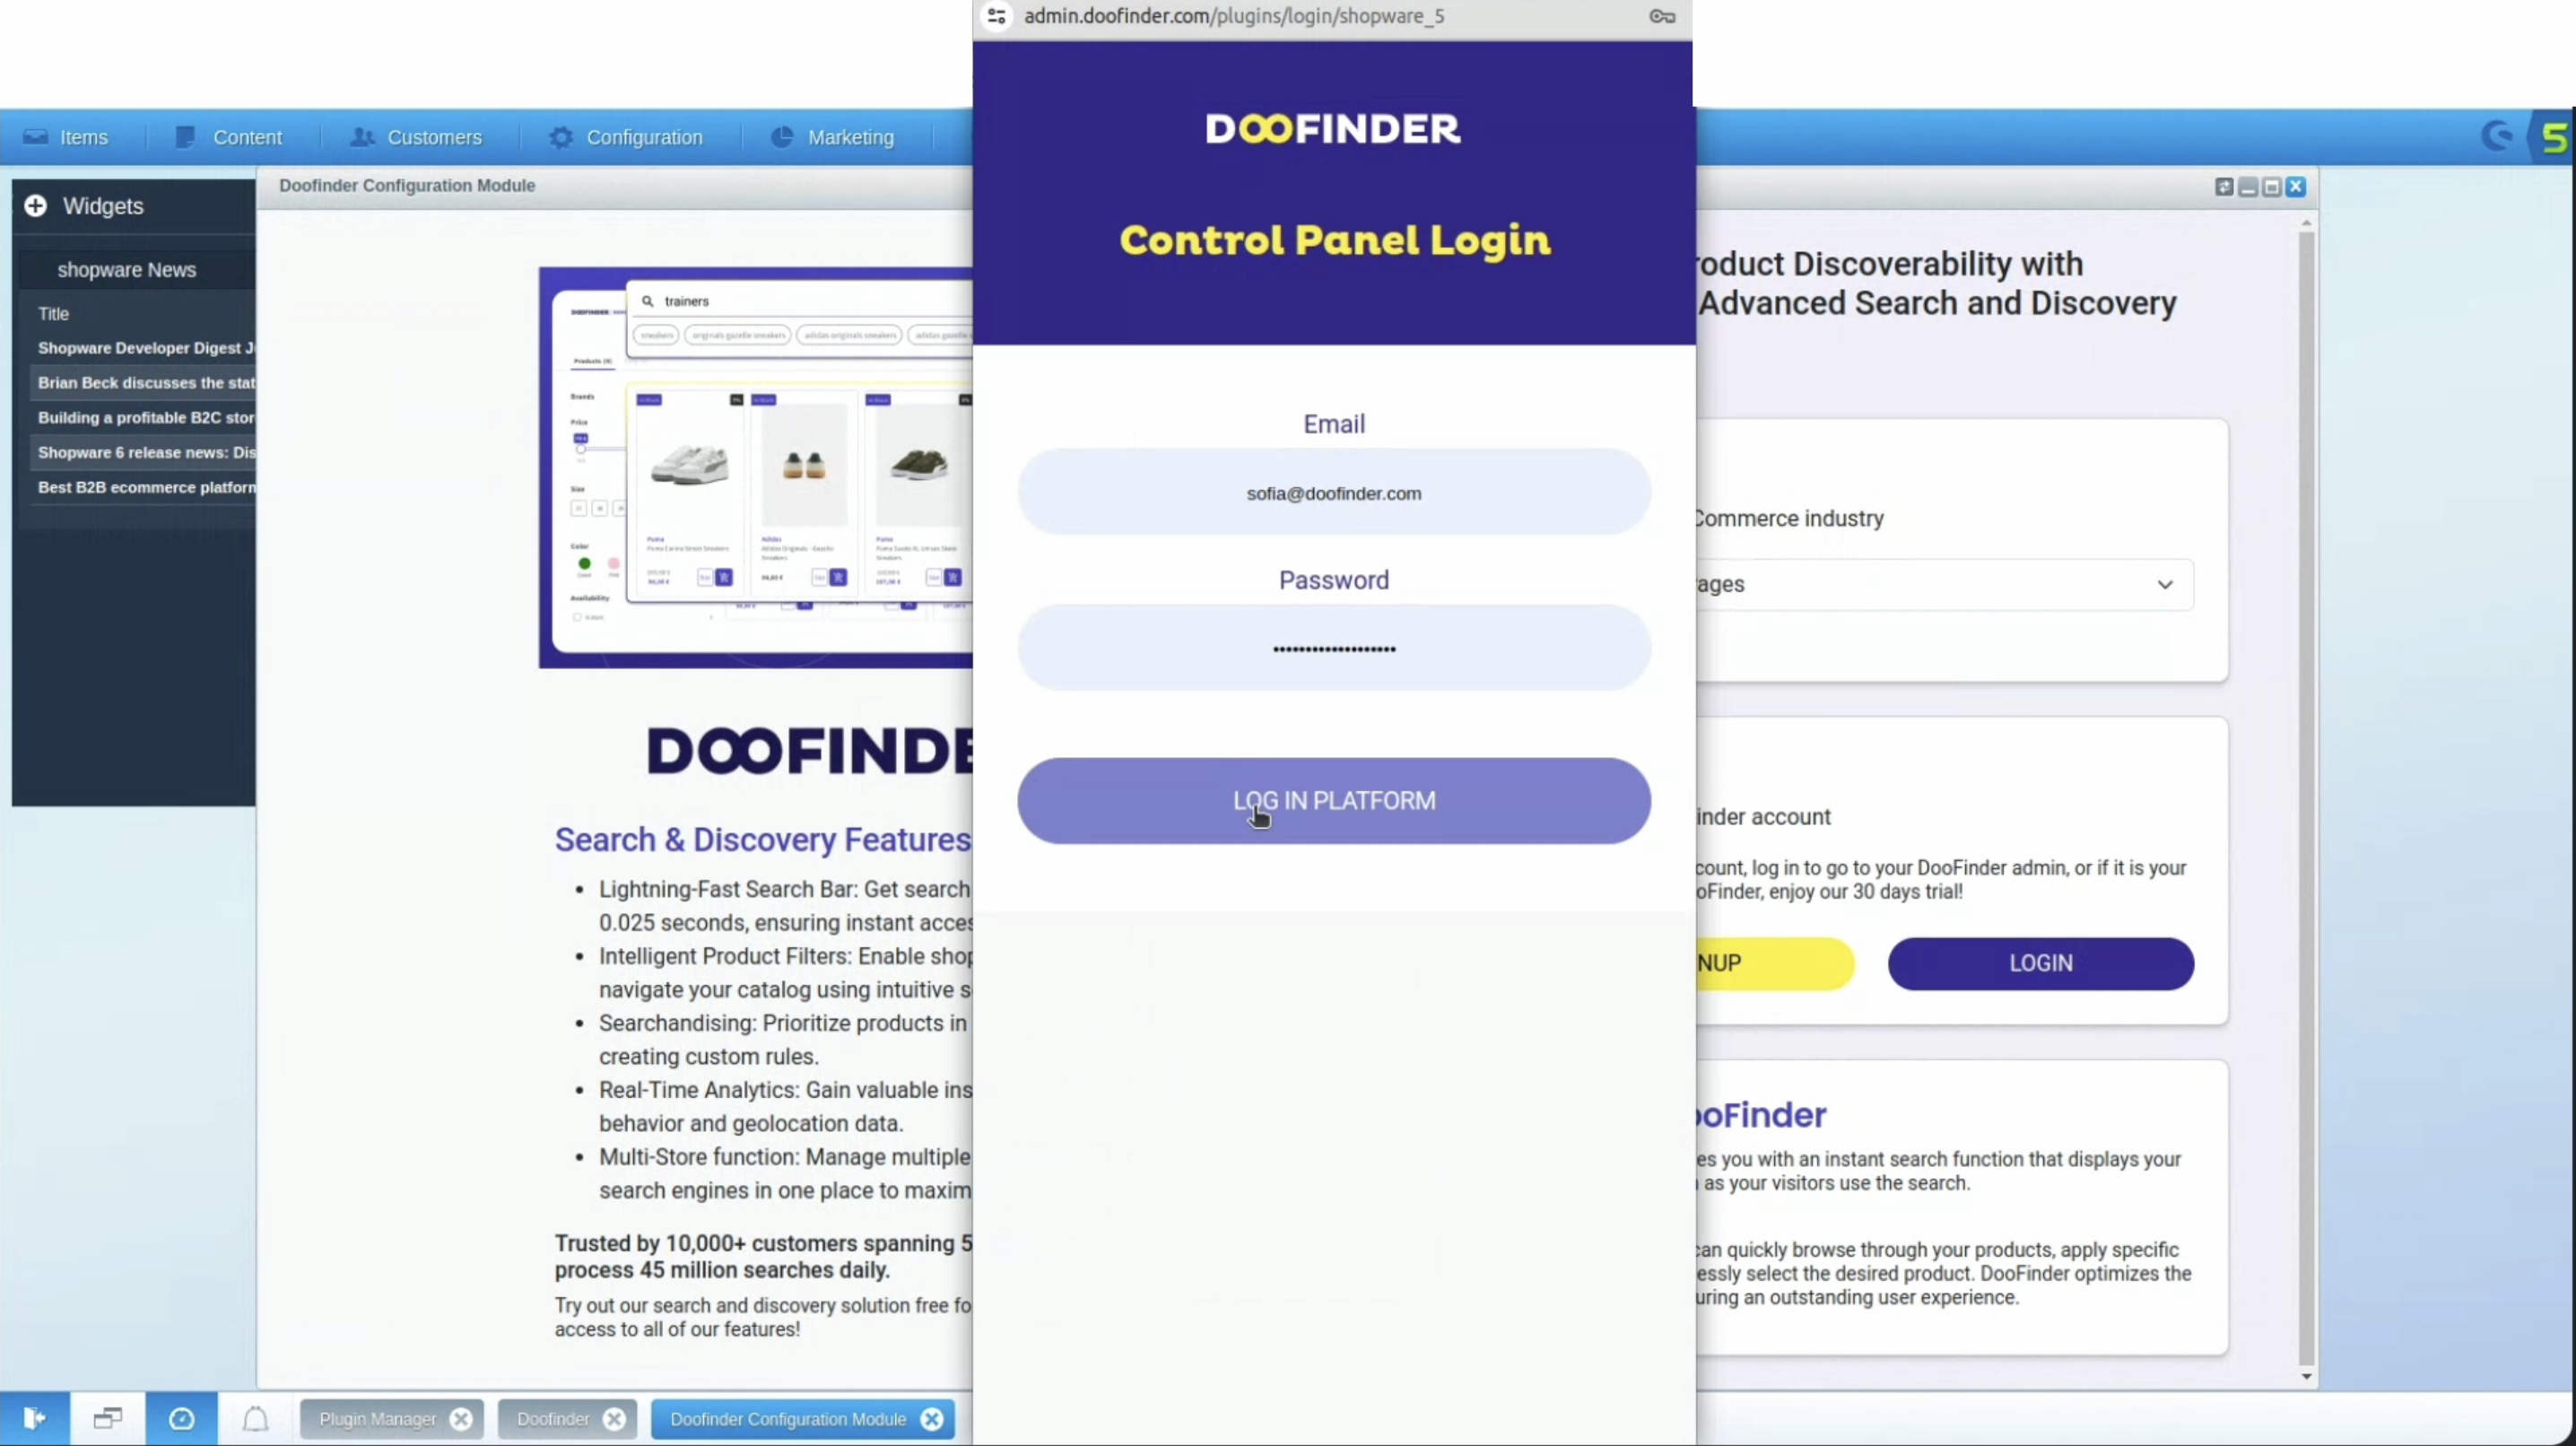
- Link your DooFinder account: If you already have a DooFinder account, press the "log in" button and enter your credentials. Otherwise, press the "sign up" button to create your DooFinder account.
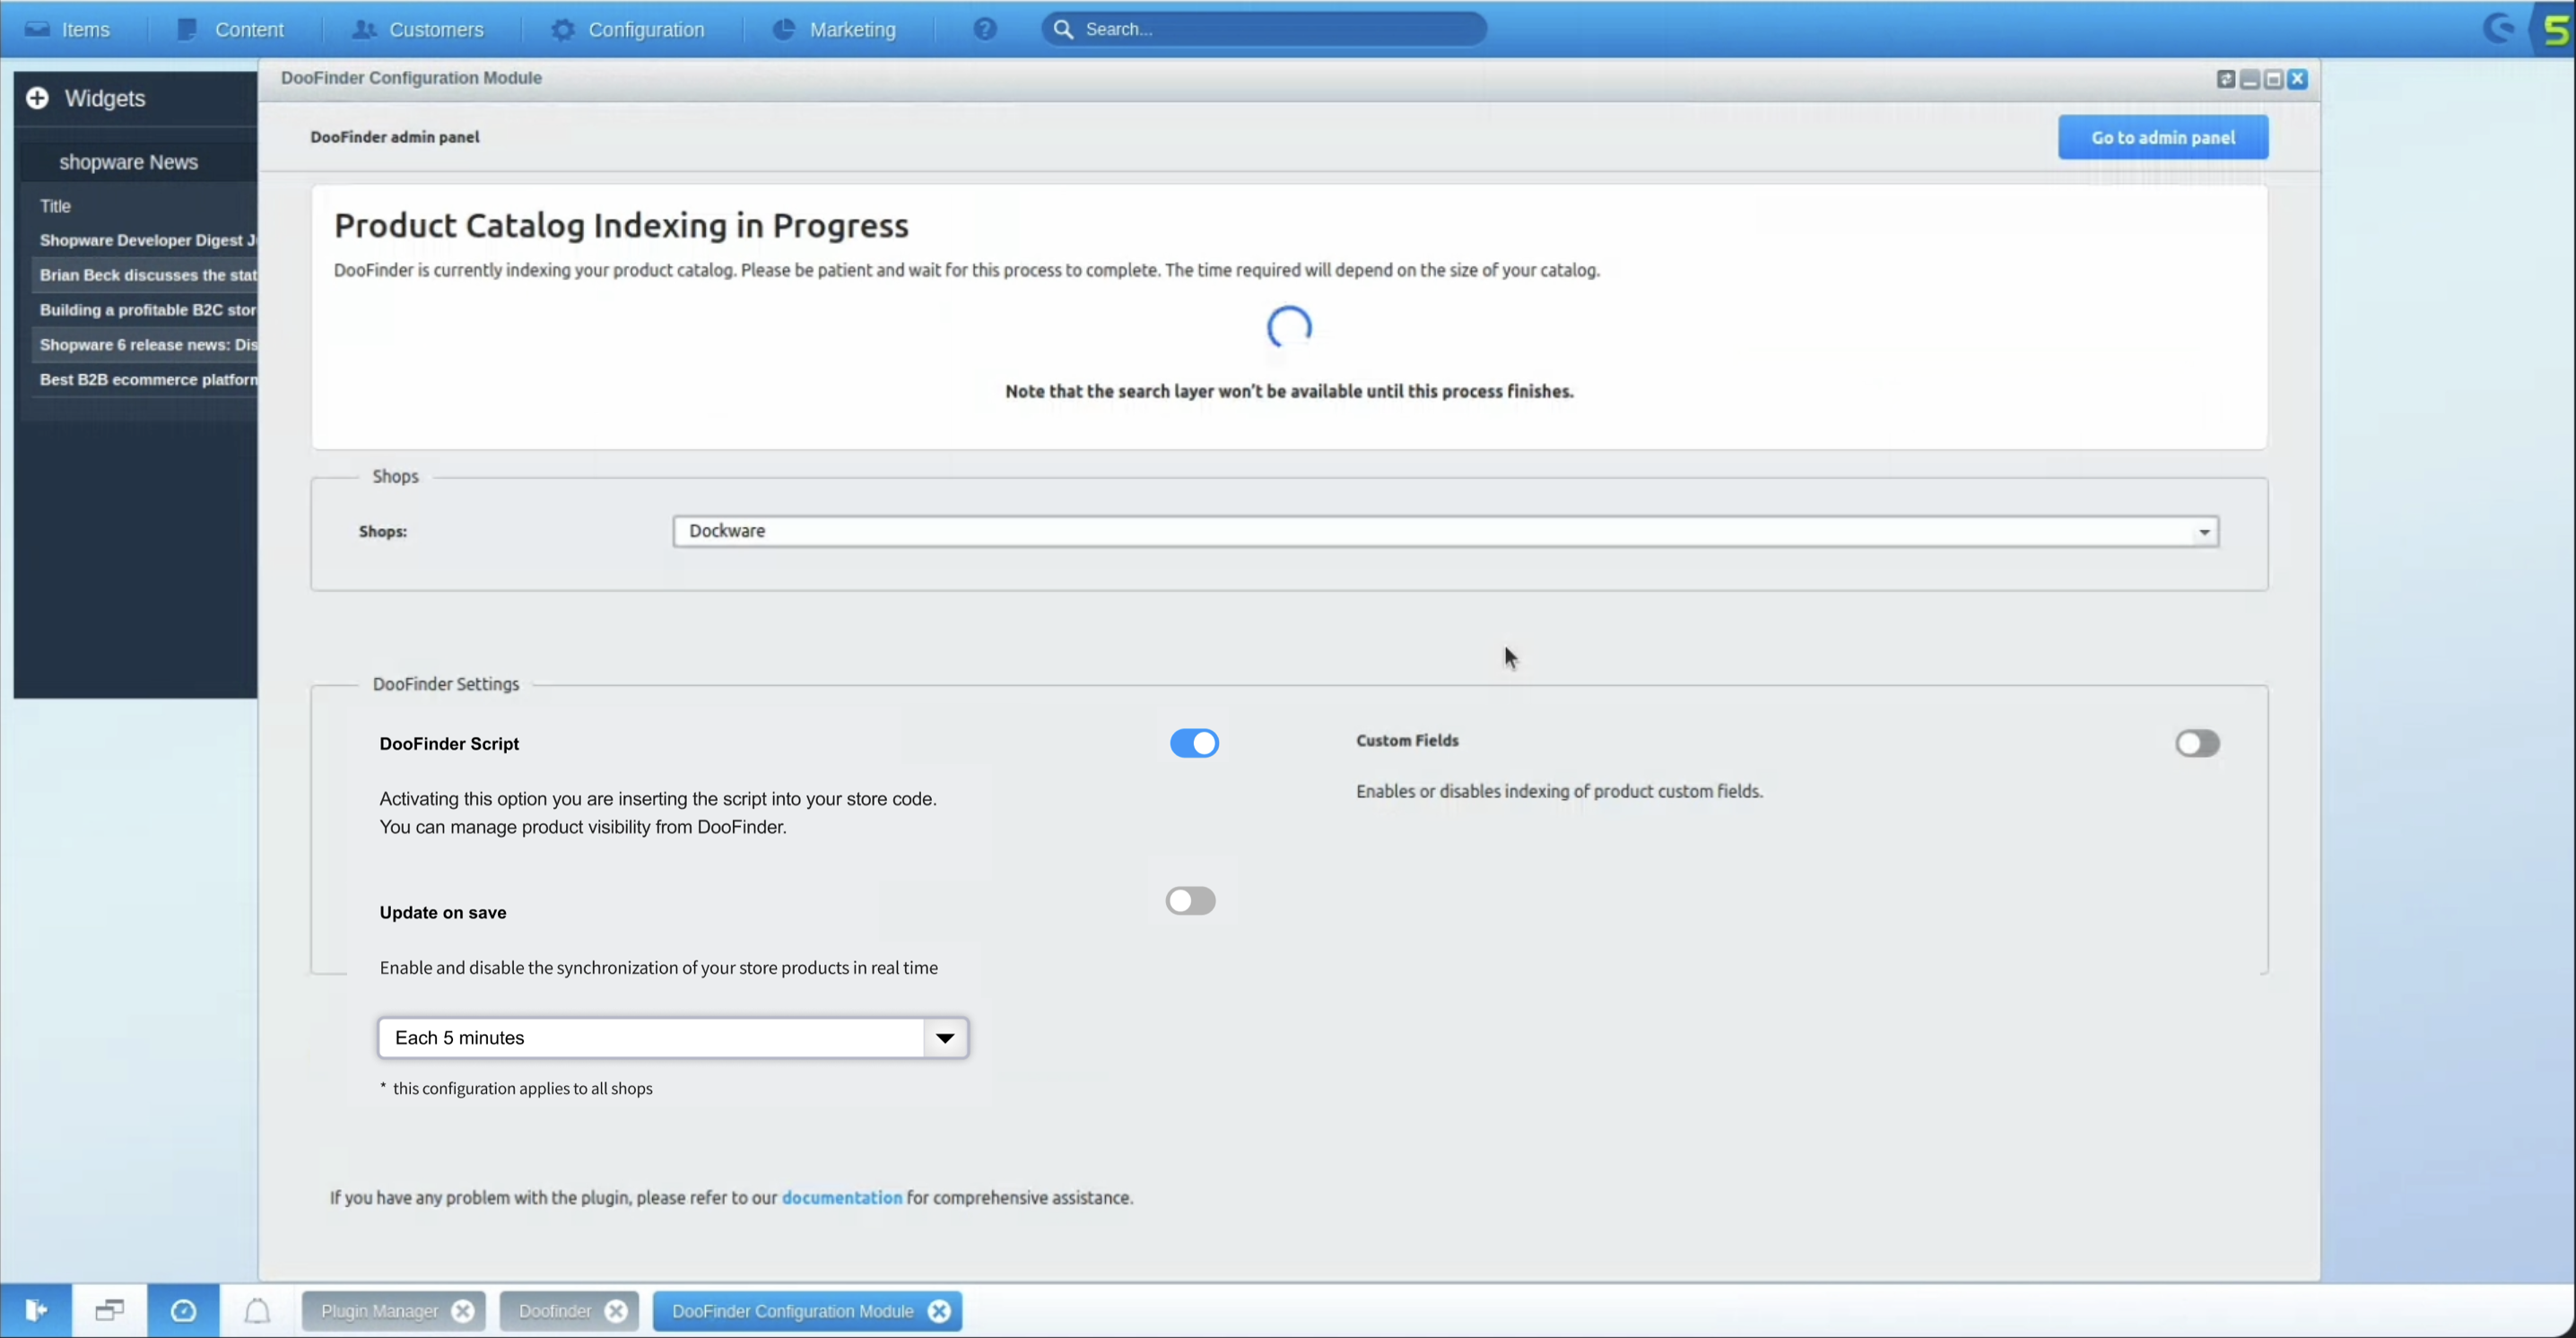
- Once done, the product catalog indexation process will begin and will start loading. The time required will depend on the size of your catalog.
To acquire it, go to Configuration > Plugin Manager. From here:

Two pop-up windows will appear next, and you need to select “Yes”:
Once indexed, you’re now ready to configure the module.
First-Time Installation - Post Installation - Shopware 5
The final step of the installation is to configure the plugin in your Shopware backend. To do this, simply go to Configuration > DooFinder.

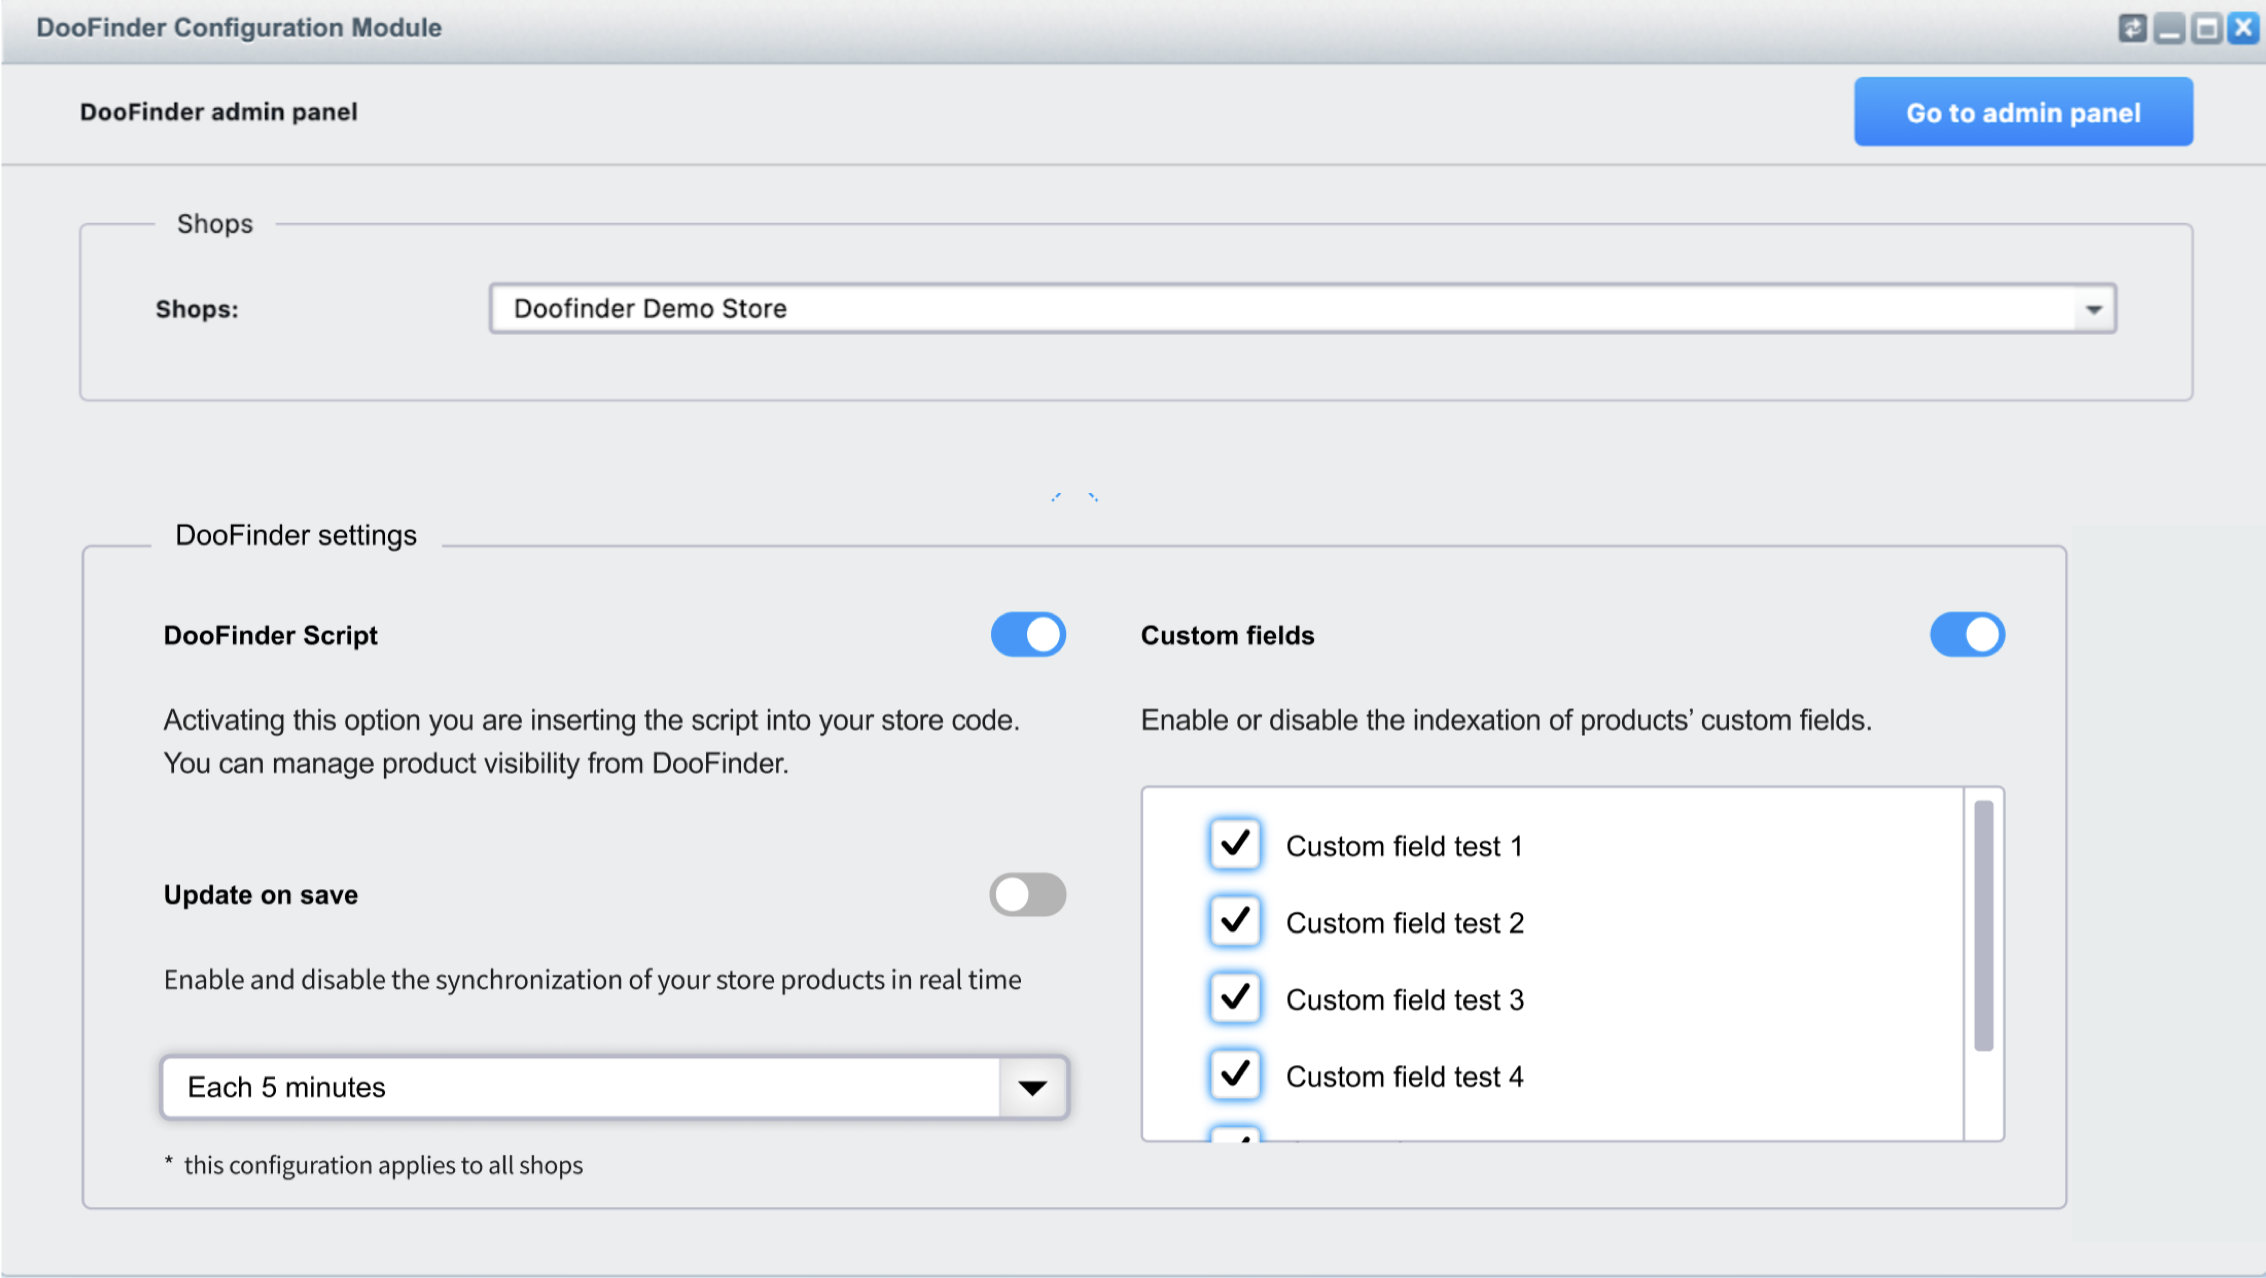
A new tab will appear. On this DooFinder Configuration Plugin tab, you’ll find Shops and DooFinder Settings. You can also go directly to your DooFinder Admin Panel by clicking on the “Go To Admin Panel” button from the top right corner of the screen.
-
Shops: Displays the list of stores in your Shopware account, allowing you to configure the DooFinder settings for each one. This allows you to make different configurations on each store. Each configuration is dependent on the selected store.
-
DooFinder Settings: Configure the functionalities of your DooFinder Shopware Plugin.
-
DooFinder Script: Activating this option you are inserting the script into your store code.You can manage product visibility from DooFinder.
-
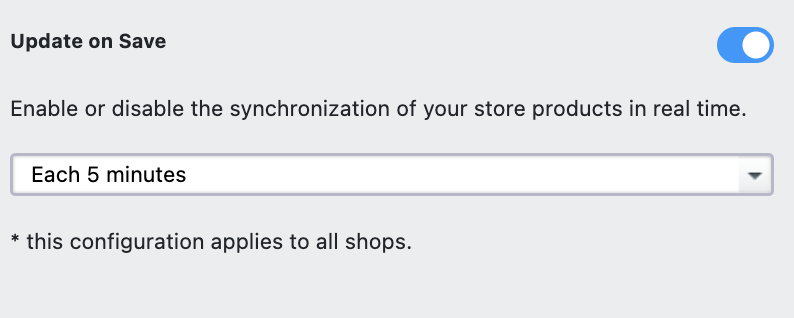
Update On Save: Enable or disable the synchronization of your store products in real-time. Here, you can select when to run this option. Remember, this configuration applies to all the Stores.
-
Custom Fields: here you can enable or disable indexing of product Custom Fields.
-
You are now ready to go.
If you're utilizing our deprecated Layer V7, kindly reach out to our Support Team for further assistance. If needed, simply log in to your DooFinder Admin Panel. Click on Help in the top blue bar, then select Contact our Support Team.
Plugin Transition - Shopware 5
Upgrading from an existing Plugin: If you already have a Shopware 5 Plugin installed (from a third-party provider), it is necessary to migrate to this latest version.
First, make sure you have:
- A Shopware account (mandatory).
- A DooFinder account.
- Get the DooFinder plugin from Shopware's official Extensions (Erweiterungen).
Start by installing the Doofinder plugin created by Doofinder. Once that's done, proceed to delete or uninstall the third-party plugin version. Follow the specific instructions outlined for upgrading to ensure a successful migration.
Now, follow the process below:
- To begin the migration process, you'll need to get the DooFinder plugin from Shopware's official Extensions (Erweiterungen) Marketplace.
- A pop-up window will appear. On the search bar, look for “Doofinder”.
- Click on the “free” button to download the plugin.
- Click on the corresponding Shopware version button to download the Doofinder plugin by Doofinder to your Shopware account. Click on “Install”.
- Clear cache
- Compile themes
- When the Theme Compiling pop-up appears, click on “Start Process”.
- Once completed and installed after a few seconds, now click on the “Activate” button.
- To proceed, go to Configuration > DooFinder to enter the module’s configuration.
- On the pop-up window, please complete the instructions.
- Choose an eCommerce industry that matches your store.
- Link your Doofinder account: If you have an account, log in to go to your DooFinder Admin Panel, or if it is your first time with DooFinder.
- Once done, the product catalog indexation process will begin and will start loading. The time required will depend on the size of your catalog.
- Once the indexation process is running, it’s time to deactivate Intedias’s Doofinder Plugin version on your Shopware admin.
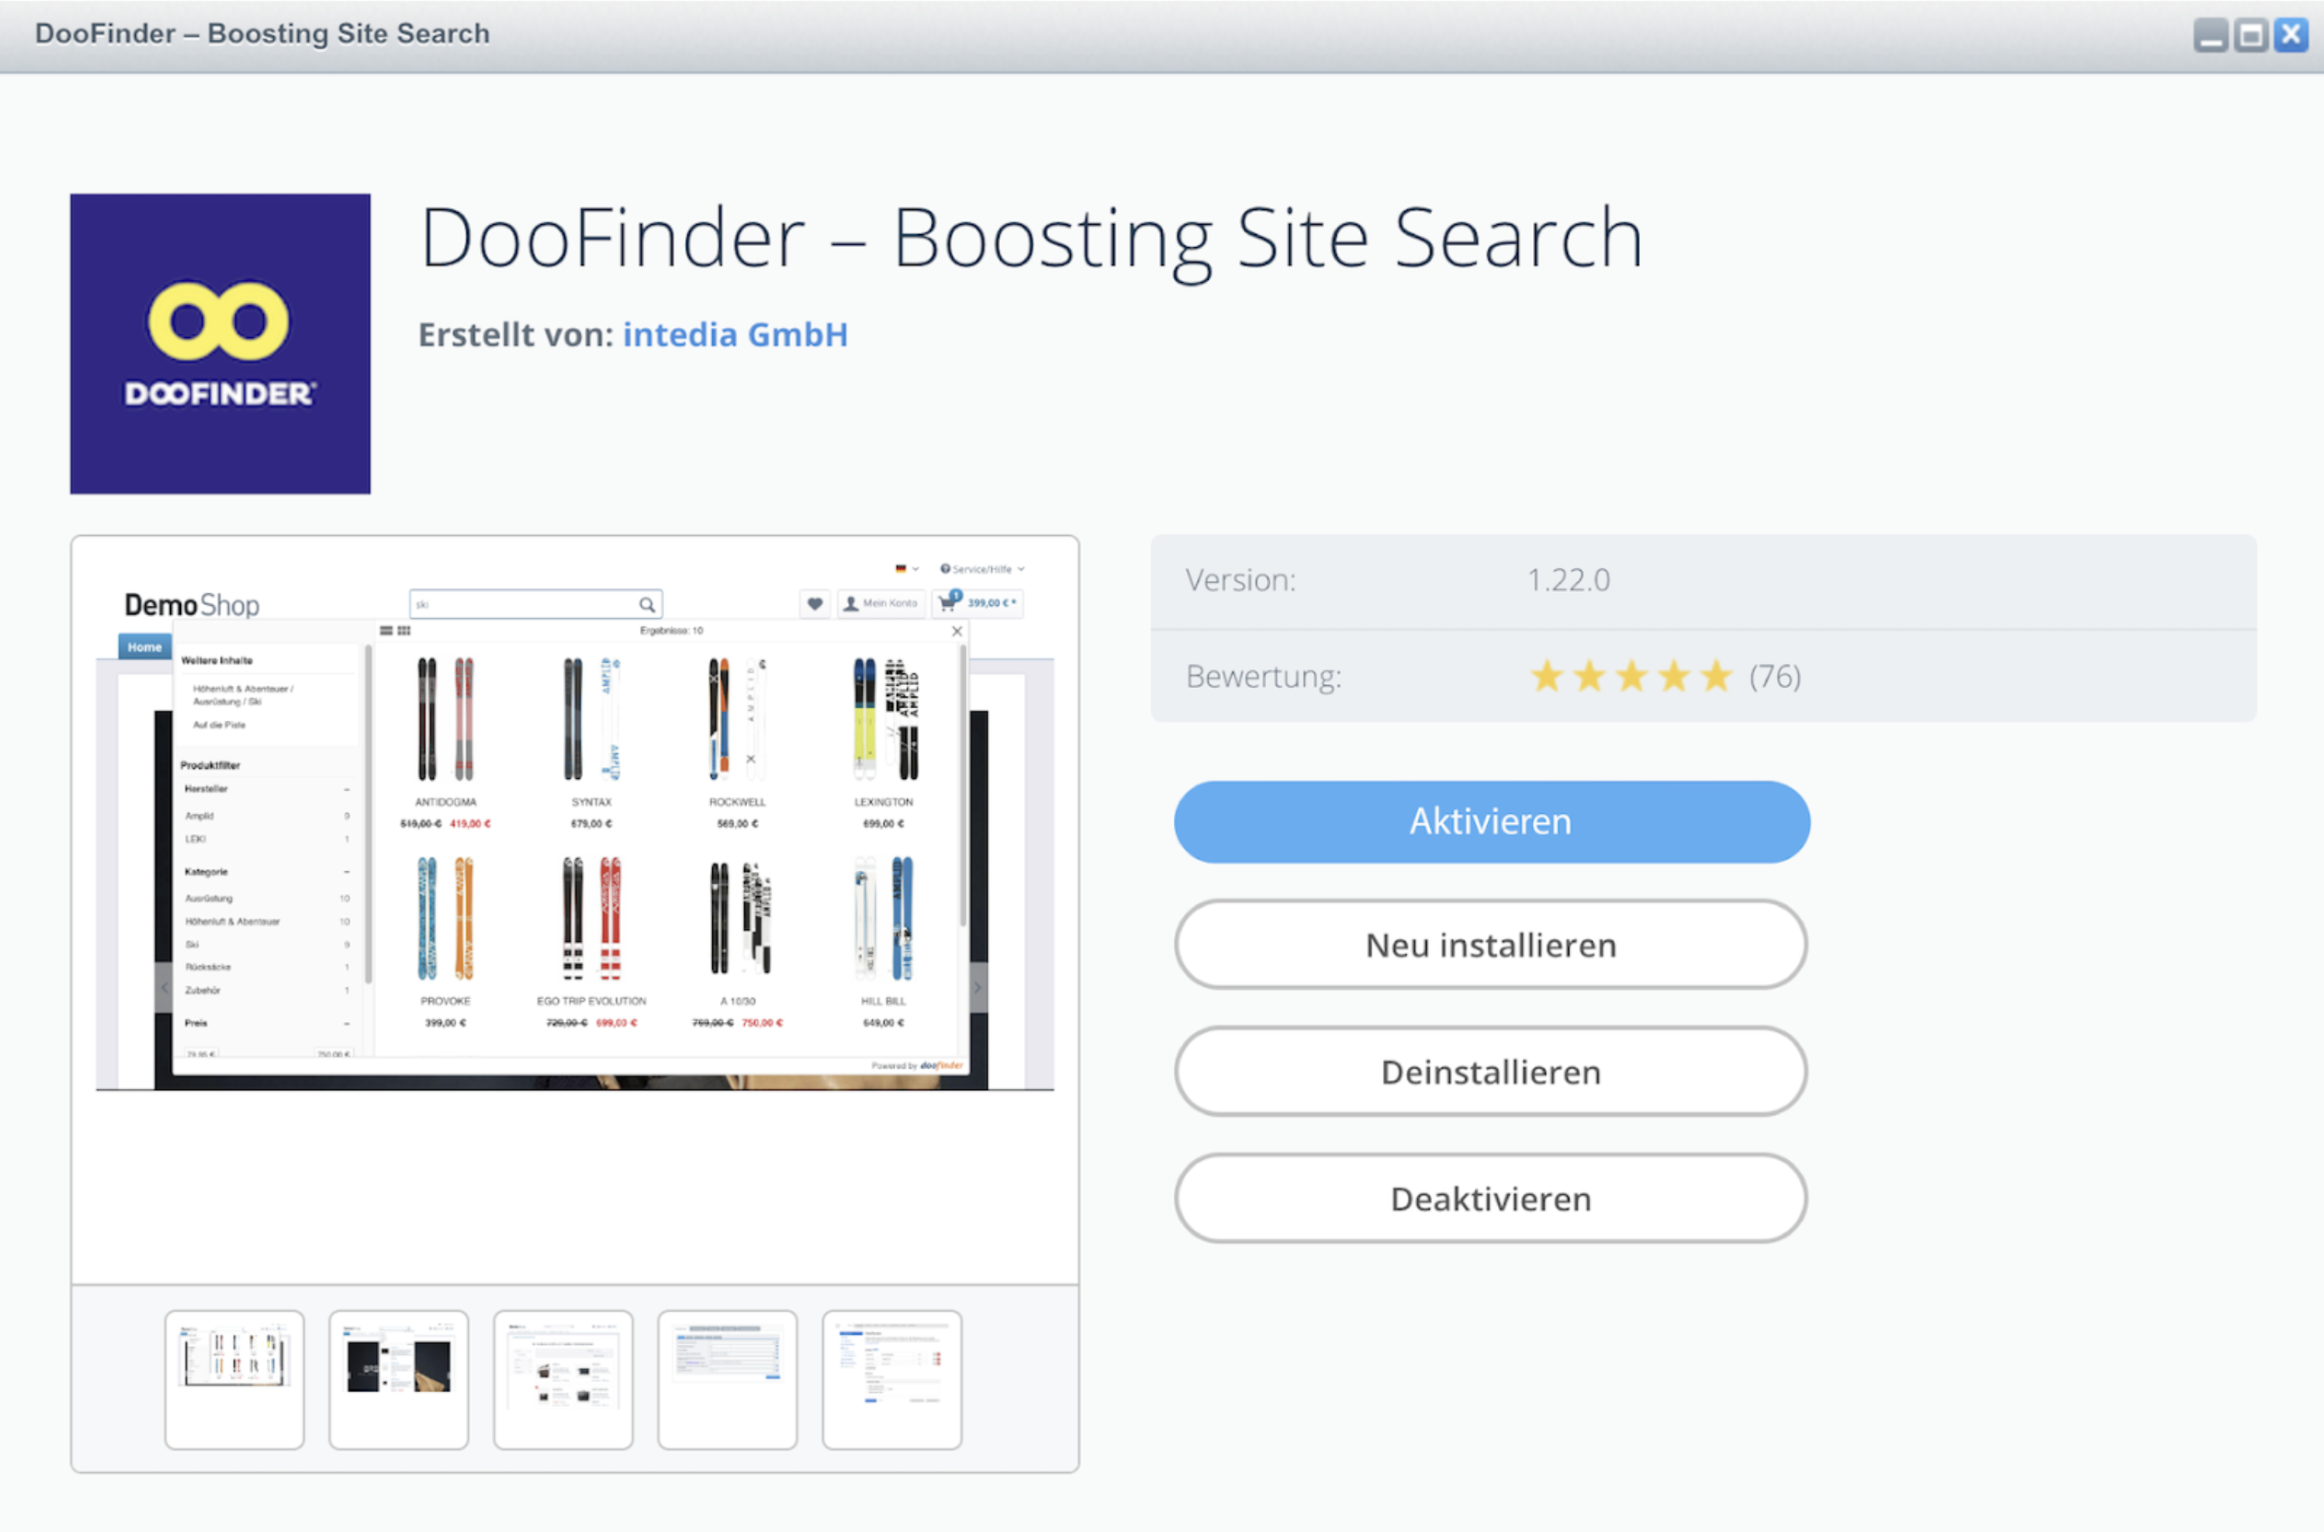
- First, replace the existing script: Go to your Shopware backend, Settings > Plugin Manager to uninstall and deactivate “Doofinder - Boosting Site Search” by Intedia plugin.
Caution:Please note that if any script customizations were made previously, these will need to be reimplemented after the plugin transition.
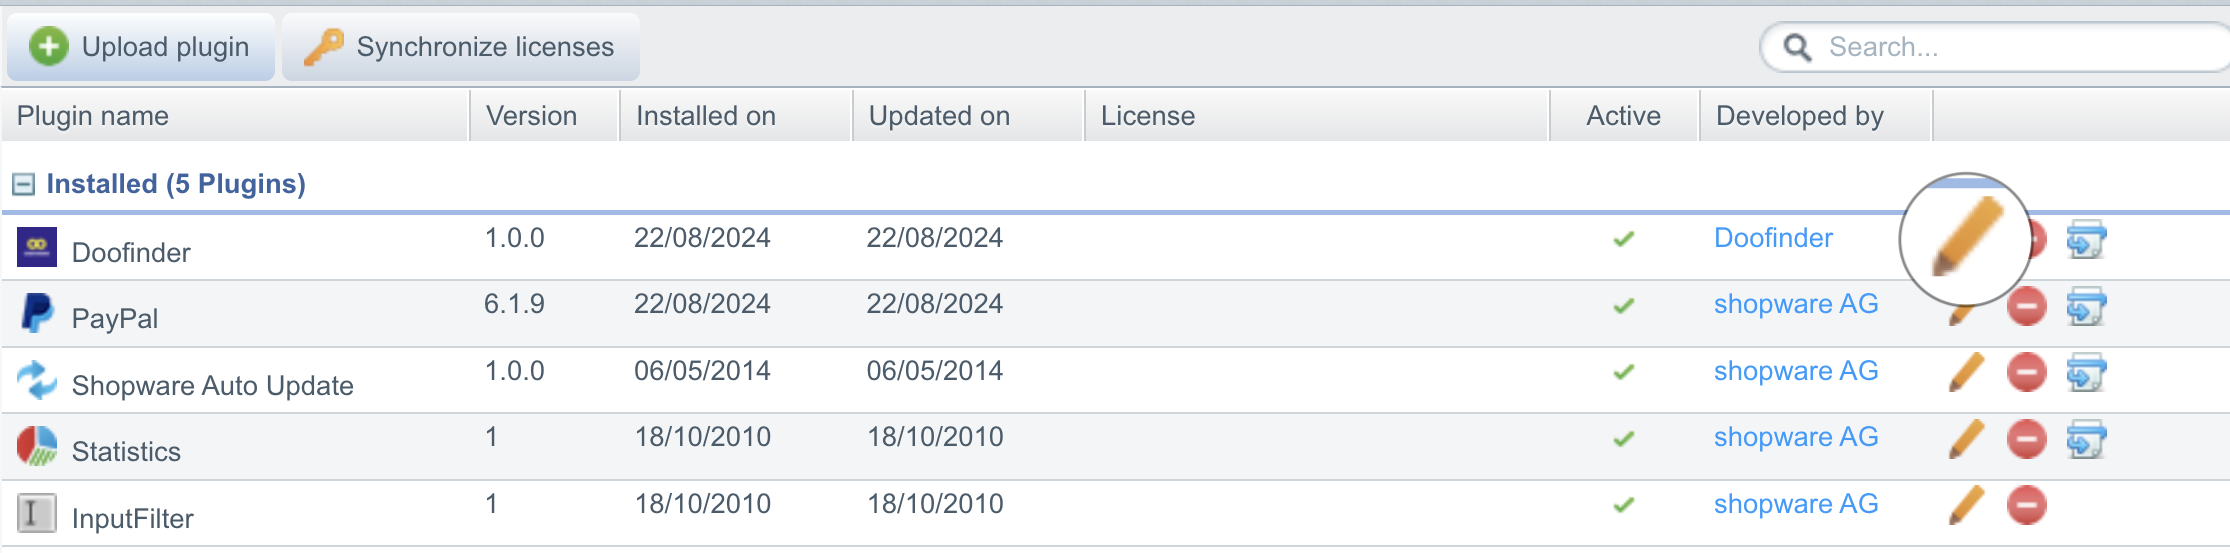
- Within the option's menu, the plugin can be found in Installed, Uninstalled, or Deactivated. Once found, click on the pencil icon.
- Click on “Unistall” to deinstall the plugin.
To acquire it, go to Configuration > Plugin Manager.
Two pop-up windows will appear next, and you need to select “Yes”:
Once finished, you are now ready to configure and utilize the DooFinder module.
Plugin Transition - Post Installation - Shopware 5
The final step of the installation is to configure the plugin in your Shopware backend. To do this, simply go to Configuration > DooFinder.
A new tab will appear. On this DooFinder Configuration Plugin tab, you’ll find Shops and DooFinder Settings. You can also go directly to your DooFinder Admin Panel by clicking on the “Go To Admin Panel” button from the top right corner of the screen.
-
Shops: Displays the list of stores in your Shopware account, allowing you to configure the DooFinder settings for each one. This allows you to make different configurations on each store. Each configuration is dependent on the selected store.
-
DooFinder Settings: Configure the functionalities of your DooFinder Shopware Plugin.
DooFinder Script: Activating this option you are inserting the script into your store code.You can manage product visibility from DooFinder.
-
Update On Save: Enable or disable the synchronization of your store products in real-time. Here, you can select when to run this option. Remember, this configuration applies to all the Stores.
-
Custom Fields: here you can enable or disable indexing of product Custom Fields.
You are now ready to go.
If you're utilizing our deprecated Layer V7, kindly reach out to our Support Team for further assistance. If needed, simply log in to your DooFinder Admin Panel. Click on Help in the top blue bar, then select Contact our Support Team.
Catalog Indexing
The module's Setup Wizard generates an access token to enable catalog indexing through Shopware’s API.
Once activated, Doofinder automatically reindexes your entire catalog daily. This process occurs by default when the automatic indexing option is enabled, ensuring your product data remains up to date.
Additionally, you can enable the "Update on Save" feature to synchronize catalog updates with Doofinder more frequently. This can be configured via Cron tasks to run at a minimum interval of every 5 minutes. Note that this feature relies on Shopware's Cron tasks, so it's essential to have Cron properly configured and running on your server for "Update on Save" to function correctly. The system utility Cron can be used to schedule programs to run automatically at predetermined intervals. In this case, you can choose between indexing your Catalog once a day, periodically, configuring a time interval between indexes, or scheduling specific timing (maximum six times a day).
To configure this:
- Go to your Shopware 5 backend panel > Configuration > DooFinder
- Find the “Update on Save” panel section
- Enable this option
- Choose how many times a day you would like your changes to be sent to DooFinder for indexation
Multicurrency In Shopware 5
Starting from January 16, 2025, new stores created in Doofinder will take advantage of the new multipricing functionality, which simplifies the structure by creating a single Search Engine for each store. This allows seamless handling of multiple prices across currencies or customer groups without the need to create separate Search Engines for each currency.
For stores created prior to this date, the reinstallation is required to benefit from the multiprice attribute and its functionalities.
Regulation Price
In Doofinder, we index the value of regulation_price, which is a reference price used to meet legal requirements in some regions. It represents the lowest price the product had in the last 30 days and is stored in the CalculatedPrice object. This price is shown to customers so shops comply with laws that require transparency about discounts and price reductions.
Behavior For Reinstallations
If a store already exists in Doofinder and the plugin is reinstalled, a new store will be created. The previous store configuration will not be reused, marking a change from the current behavior.
Module Update
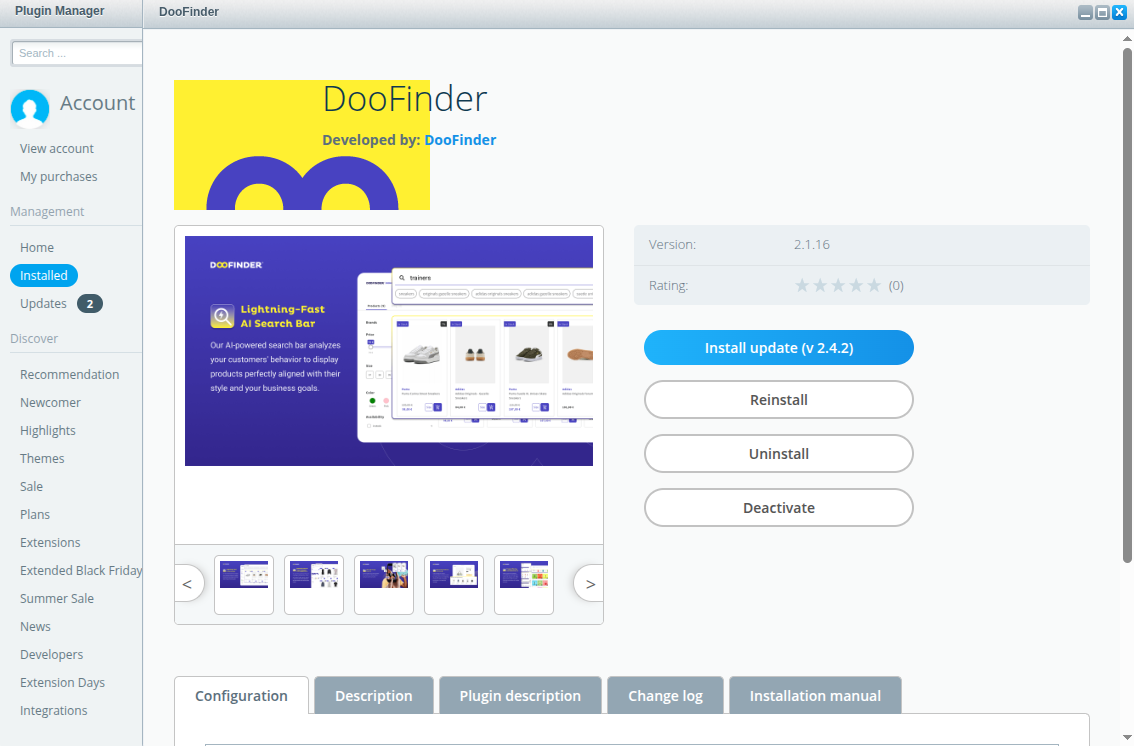
Doofinder has its own Module for the majority of platforms, which must be regularly updated in order to keep the functionalities working properly, and latest updates pull through. Although not mandatory, we recommend always keeping the modules up-to-date.
How Do I Update The Module?
In Shopware 5, to get the module updated, you must check it under the Shopware’s Store, see here!
Then check from your Shopware admin, under Configuration > Plugin Manager > look for Doofinder and compare if the versions are the same, and update it accordingly: