First-Time Installation - Shopware 6
If installation or configuration errors occur with the module, please ensure that your Shopware version updated. Notice you should update to the latest release within your current version branch. If you're using Shopware 6.6, you must update to version 6.6.10.15. If 6.7 you must update to version 6.7.8.1. Additionally, if using version 6.5, Shopware has released a plugin that resolves some security issues. We recommend updating your store installations to the current version as soon as possible.
First, make sure you have:
- A Shopware account (Mandatory).
- A DooFinder account.
- Get the DooFinder plugin from Shopware's official Extensions (Erweiterungen).
First-time installation: If this is your first time installing the Shopware 6 Plugin, simply follow the step-by-step guide provided above for a smooth installation.
- To begin the installation process, first log into your Shopware 6 account.
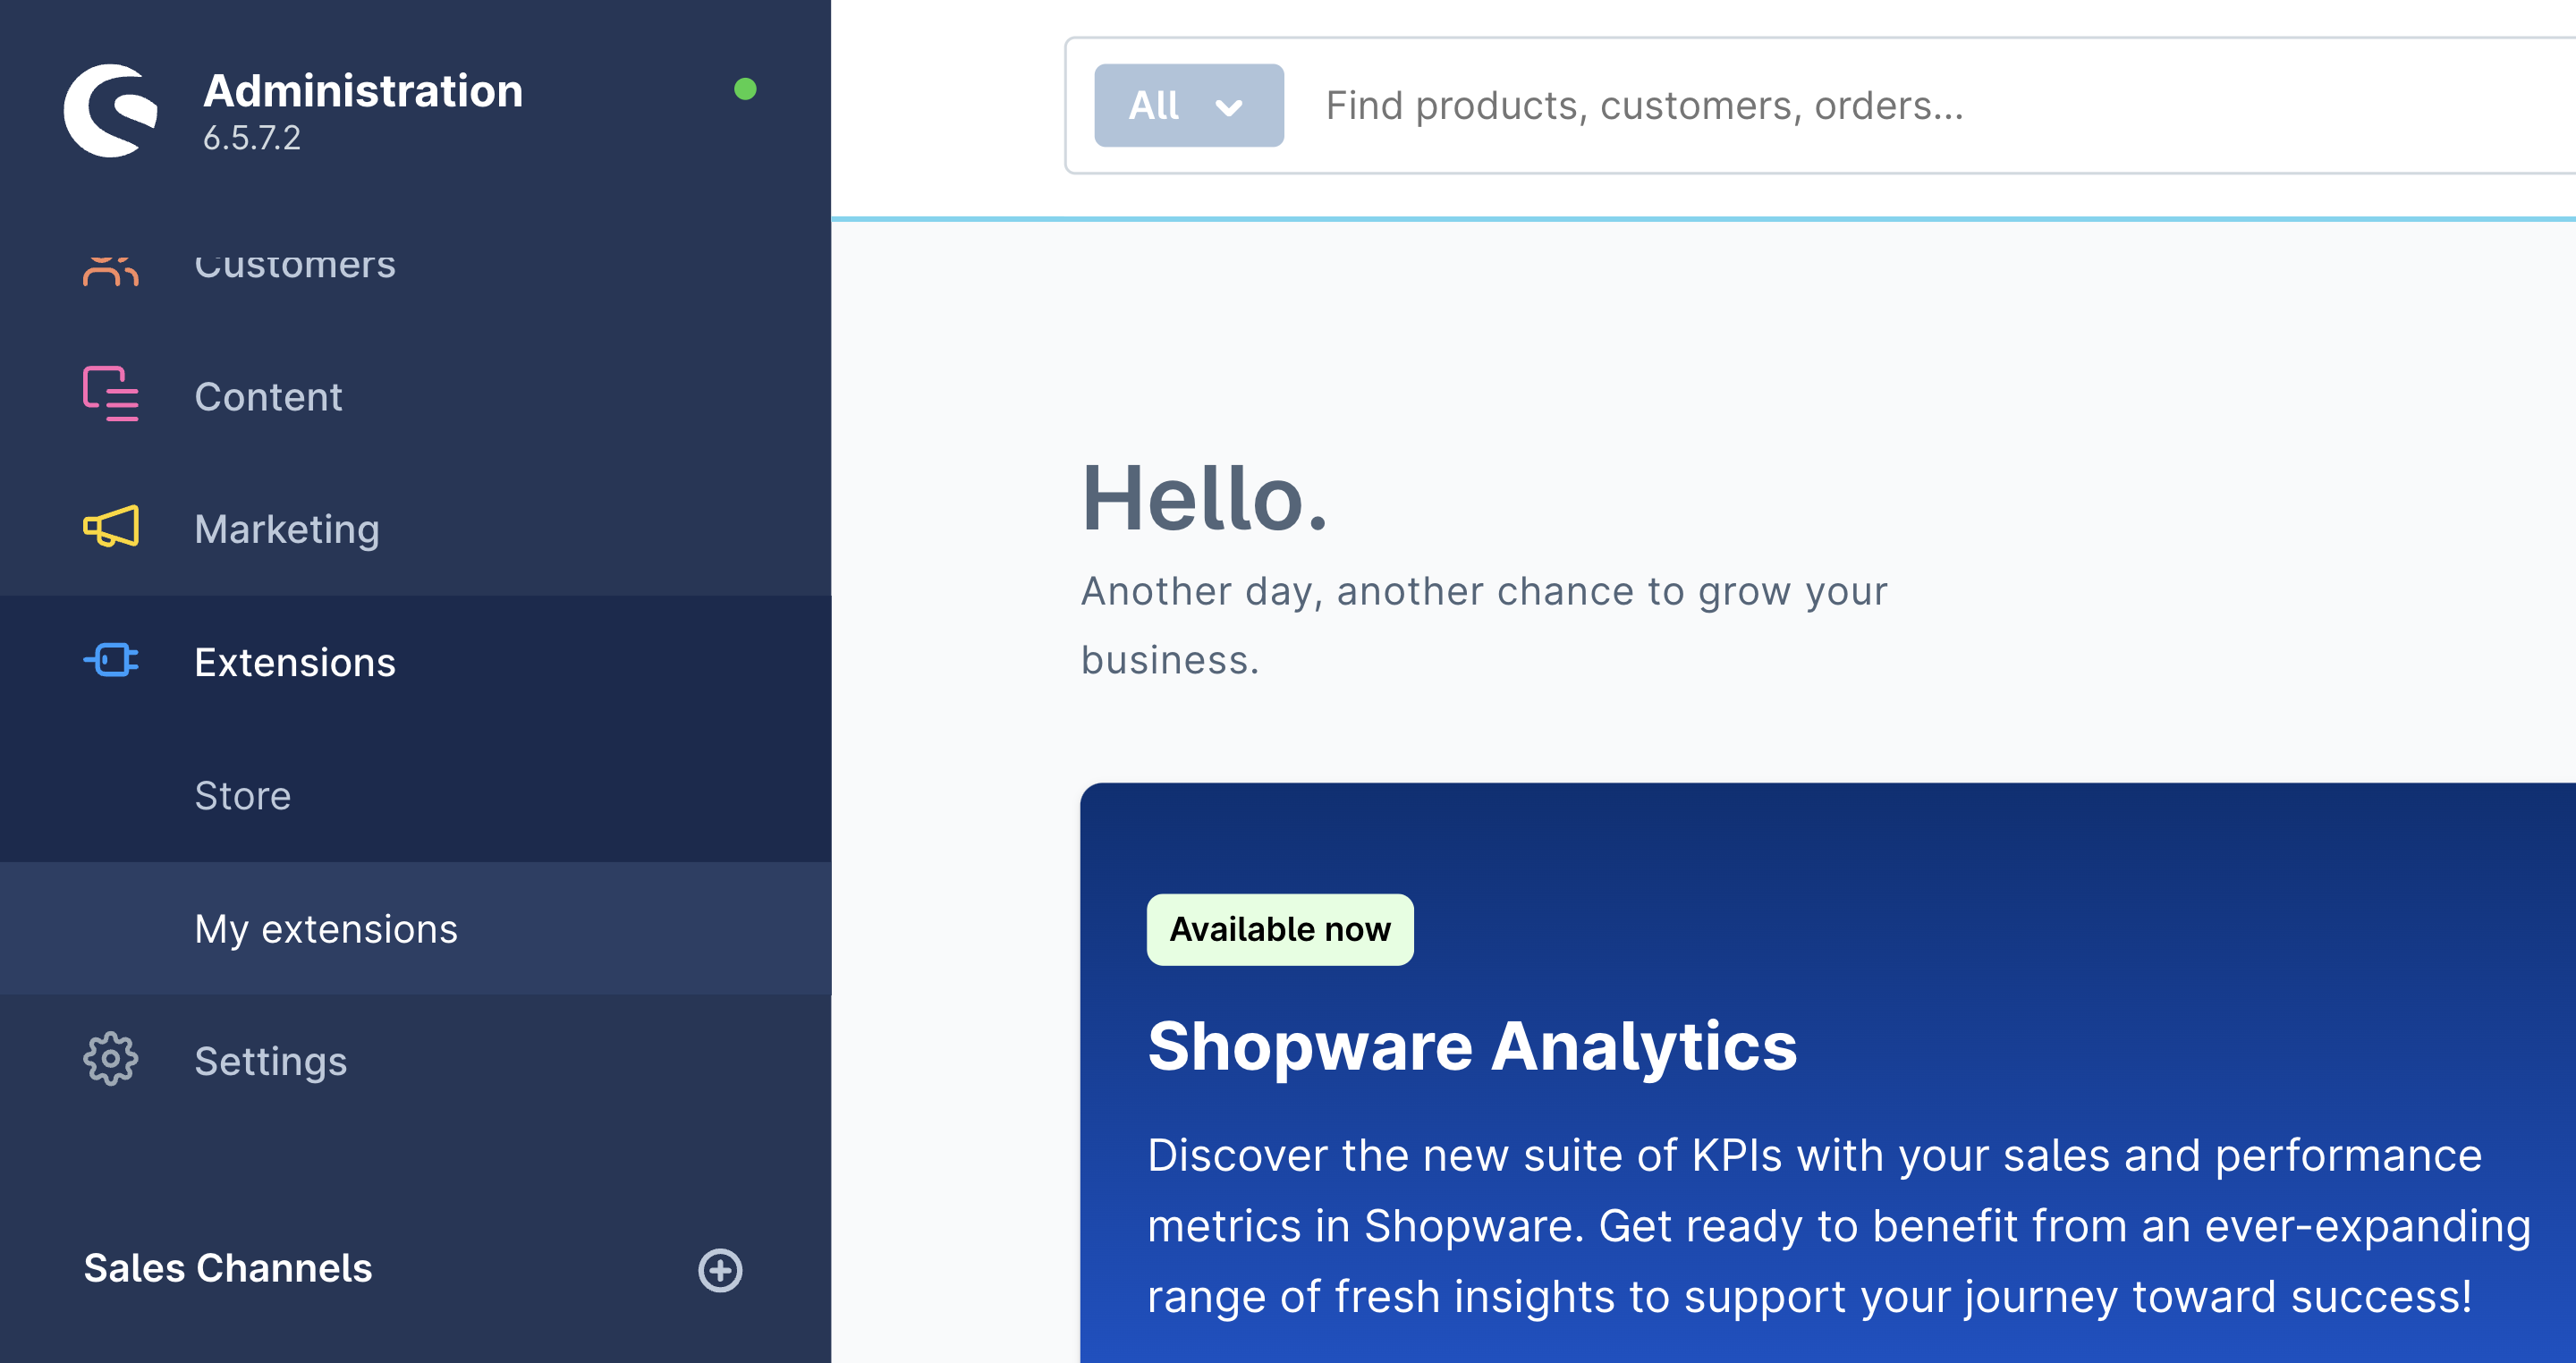
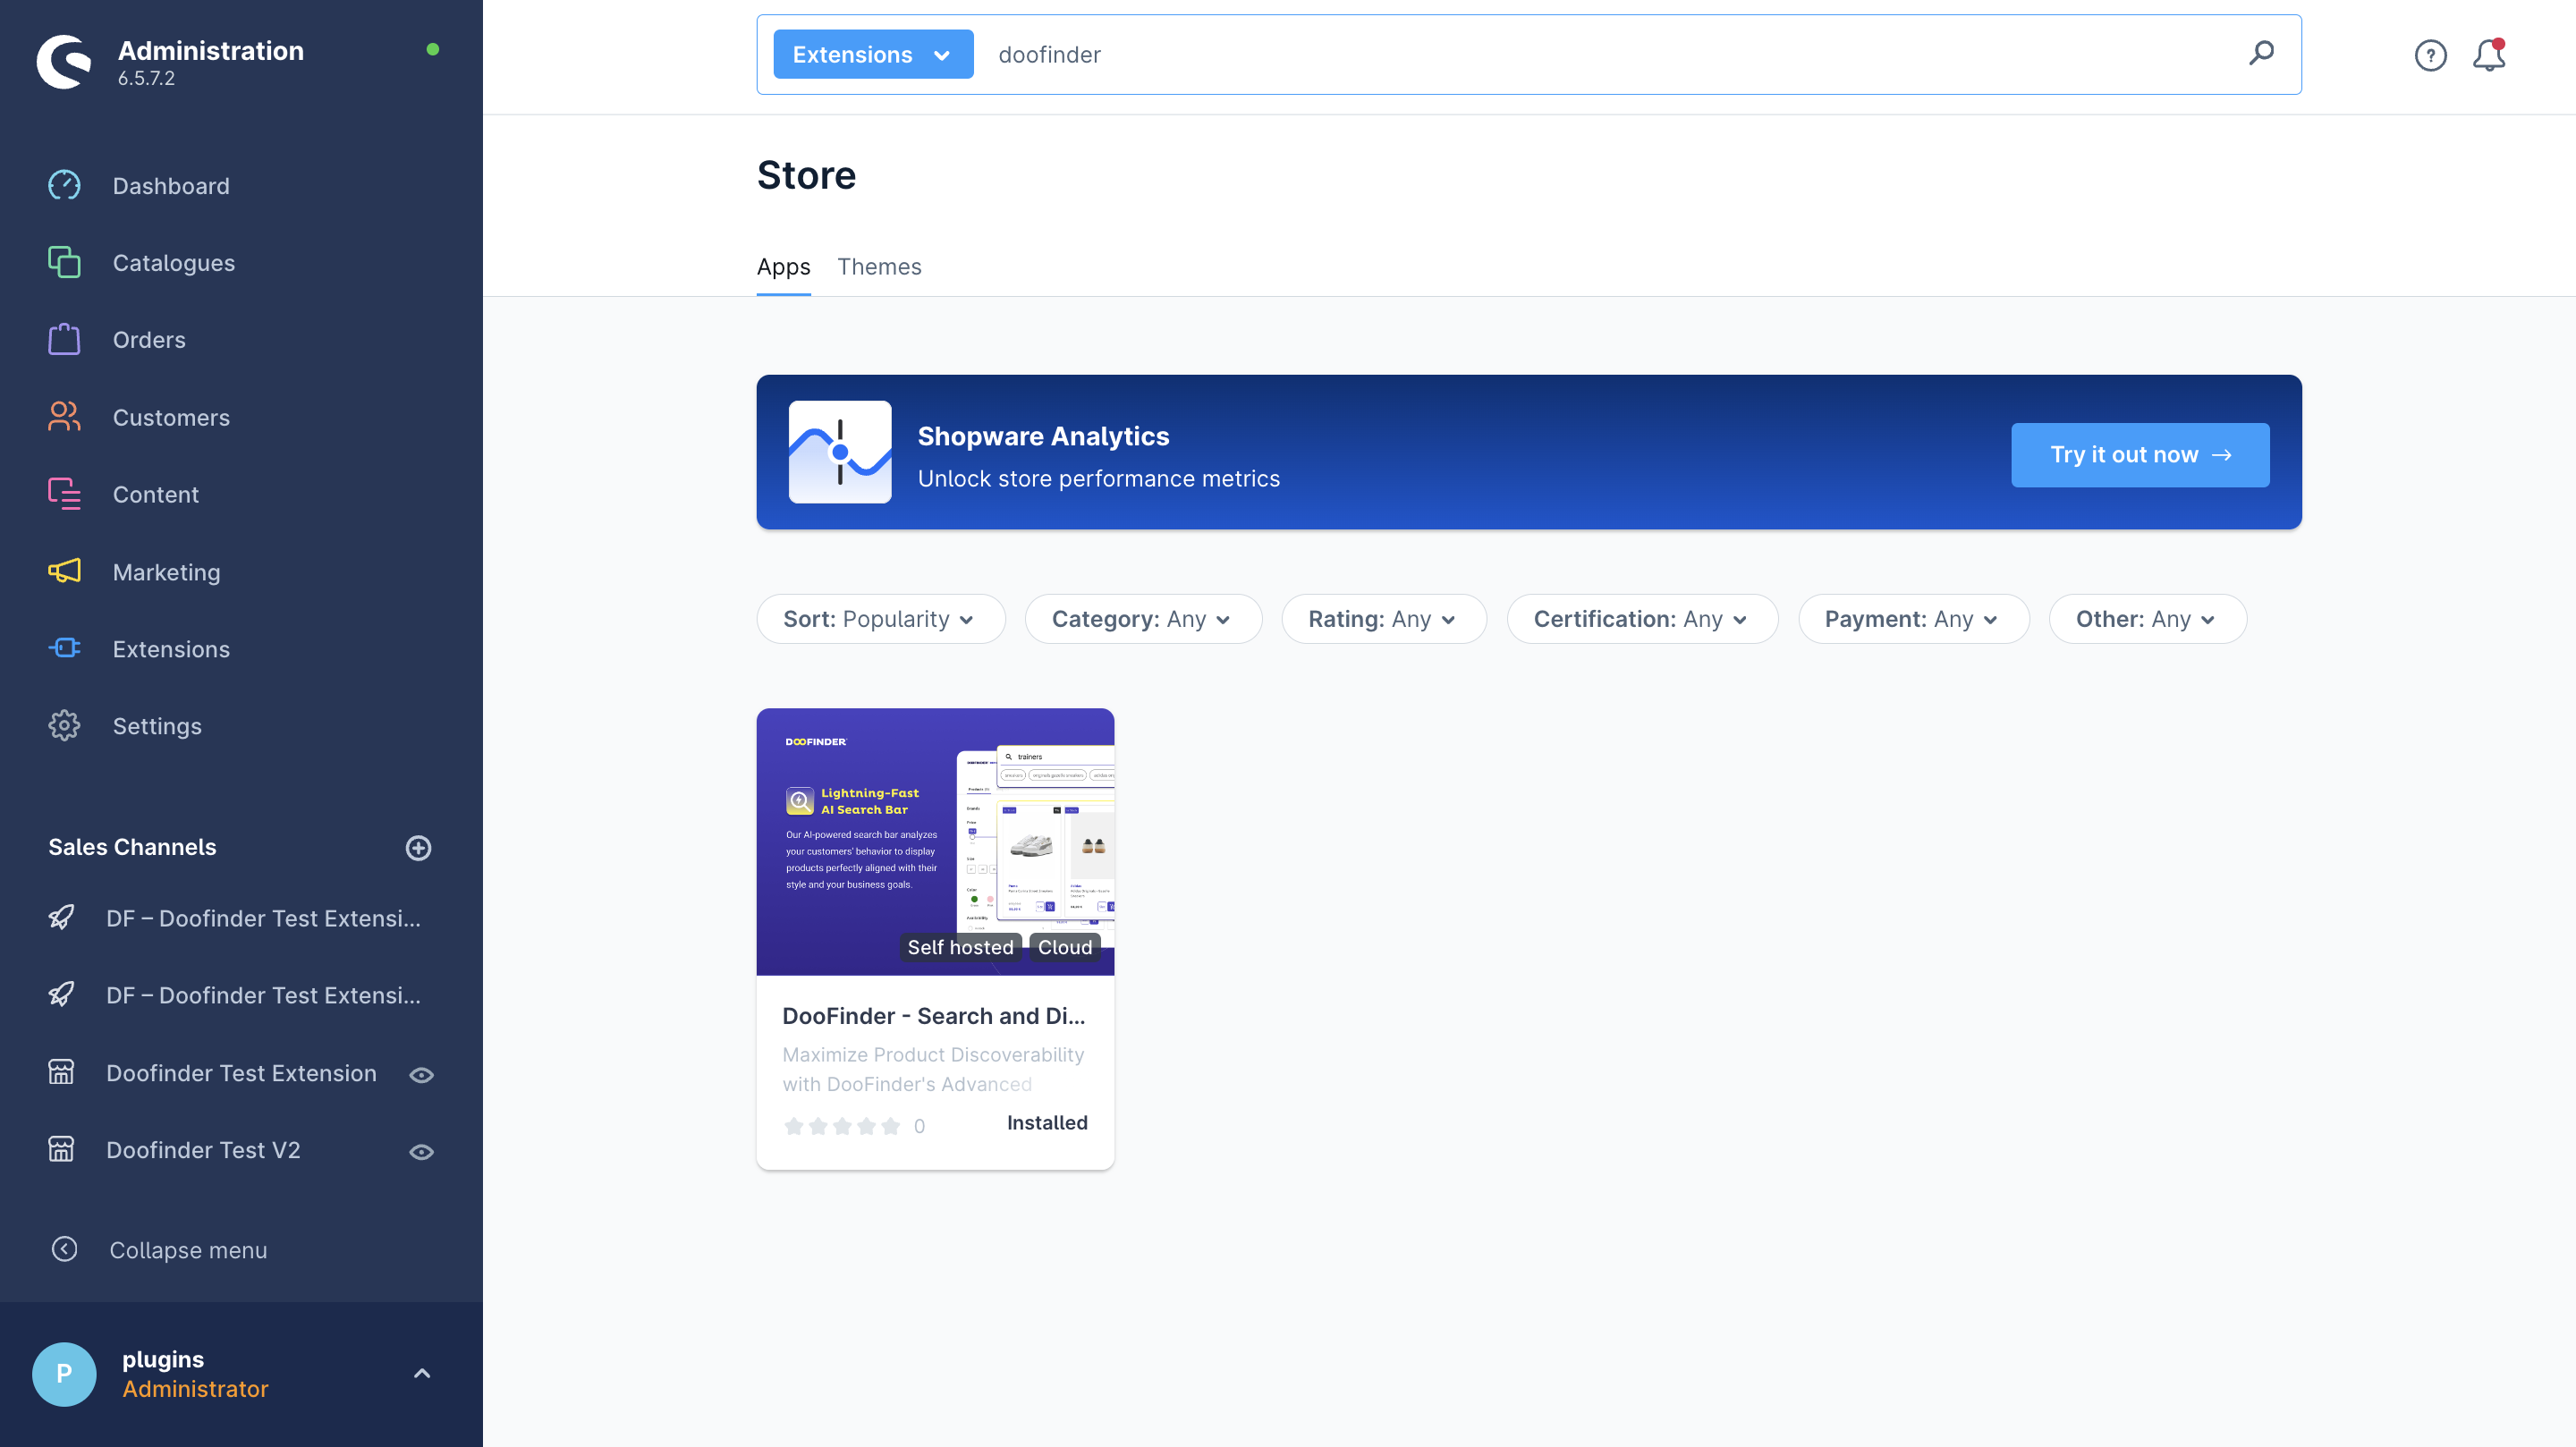
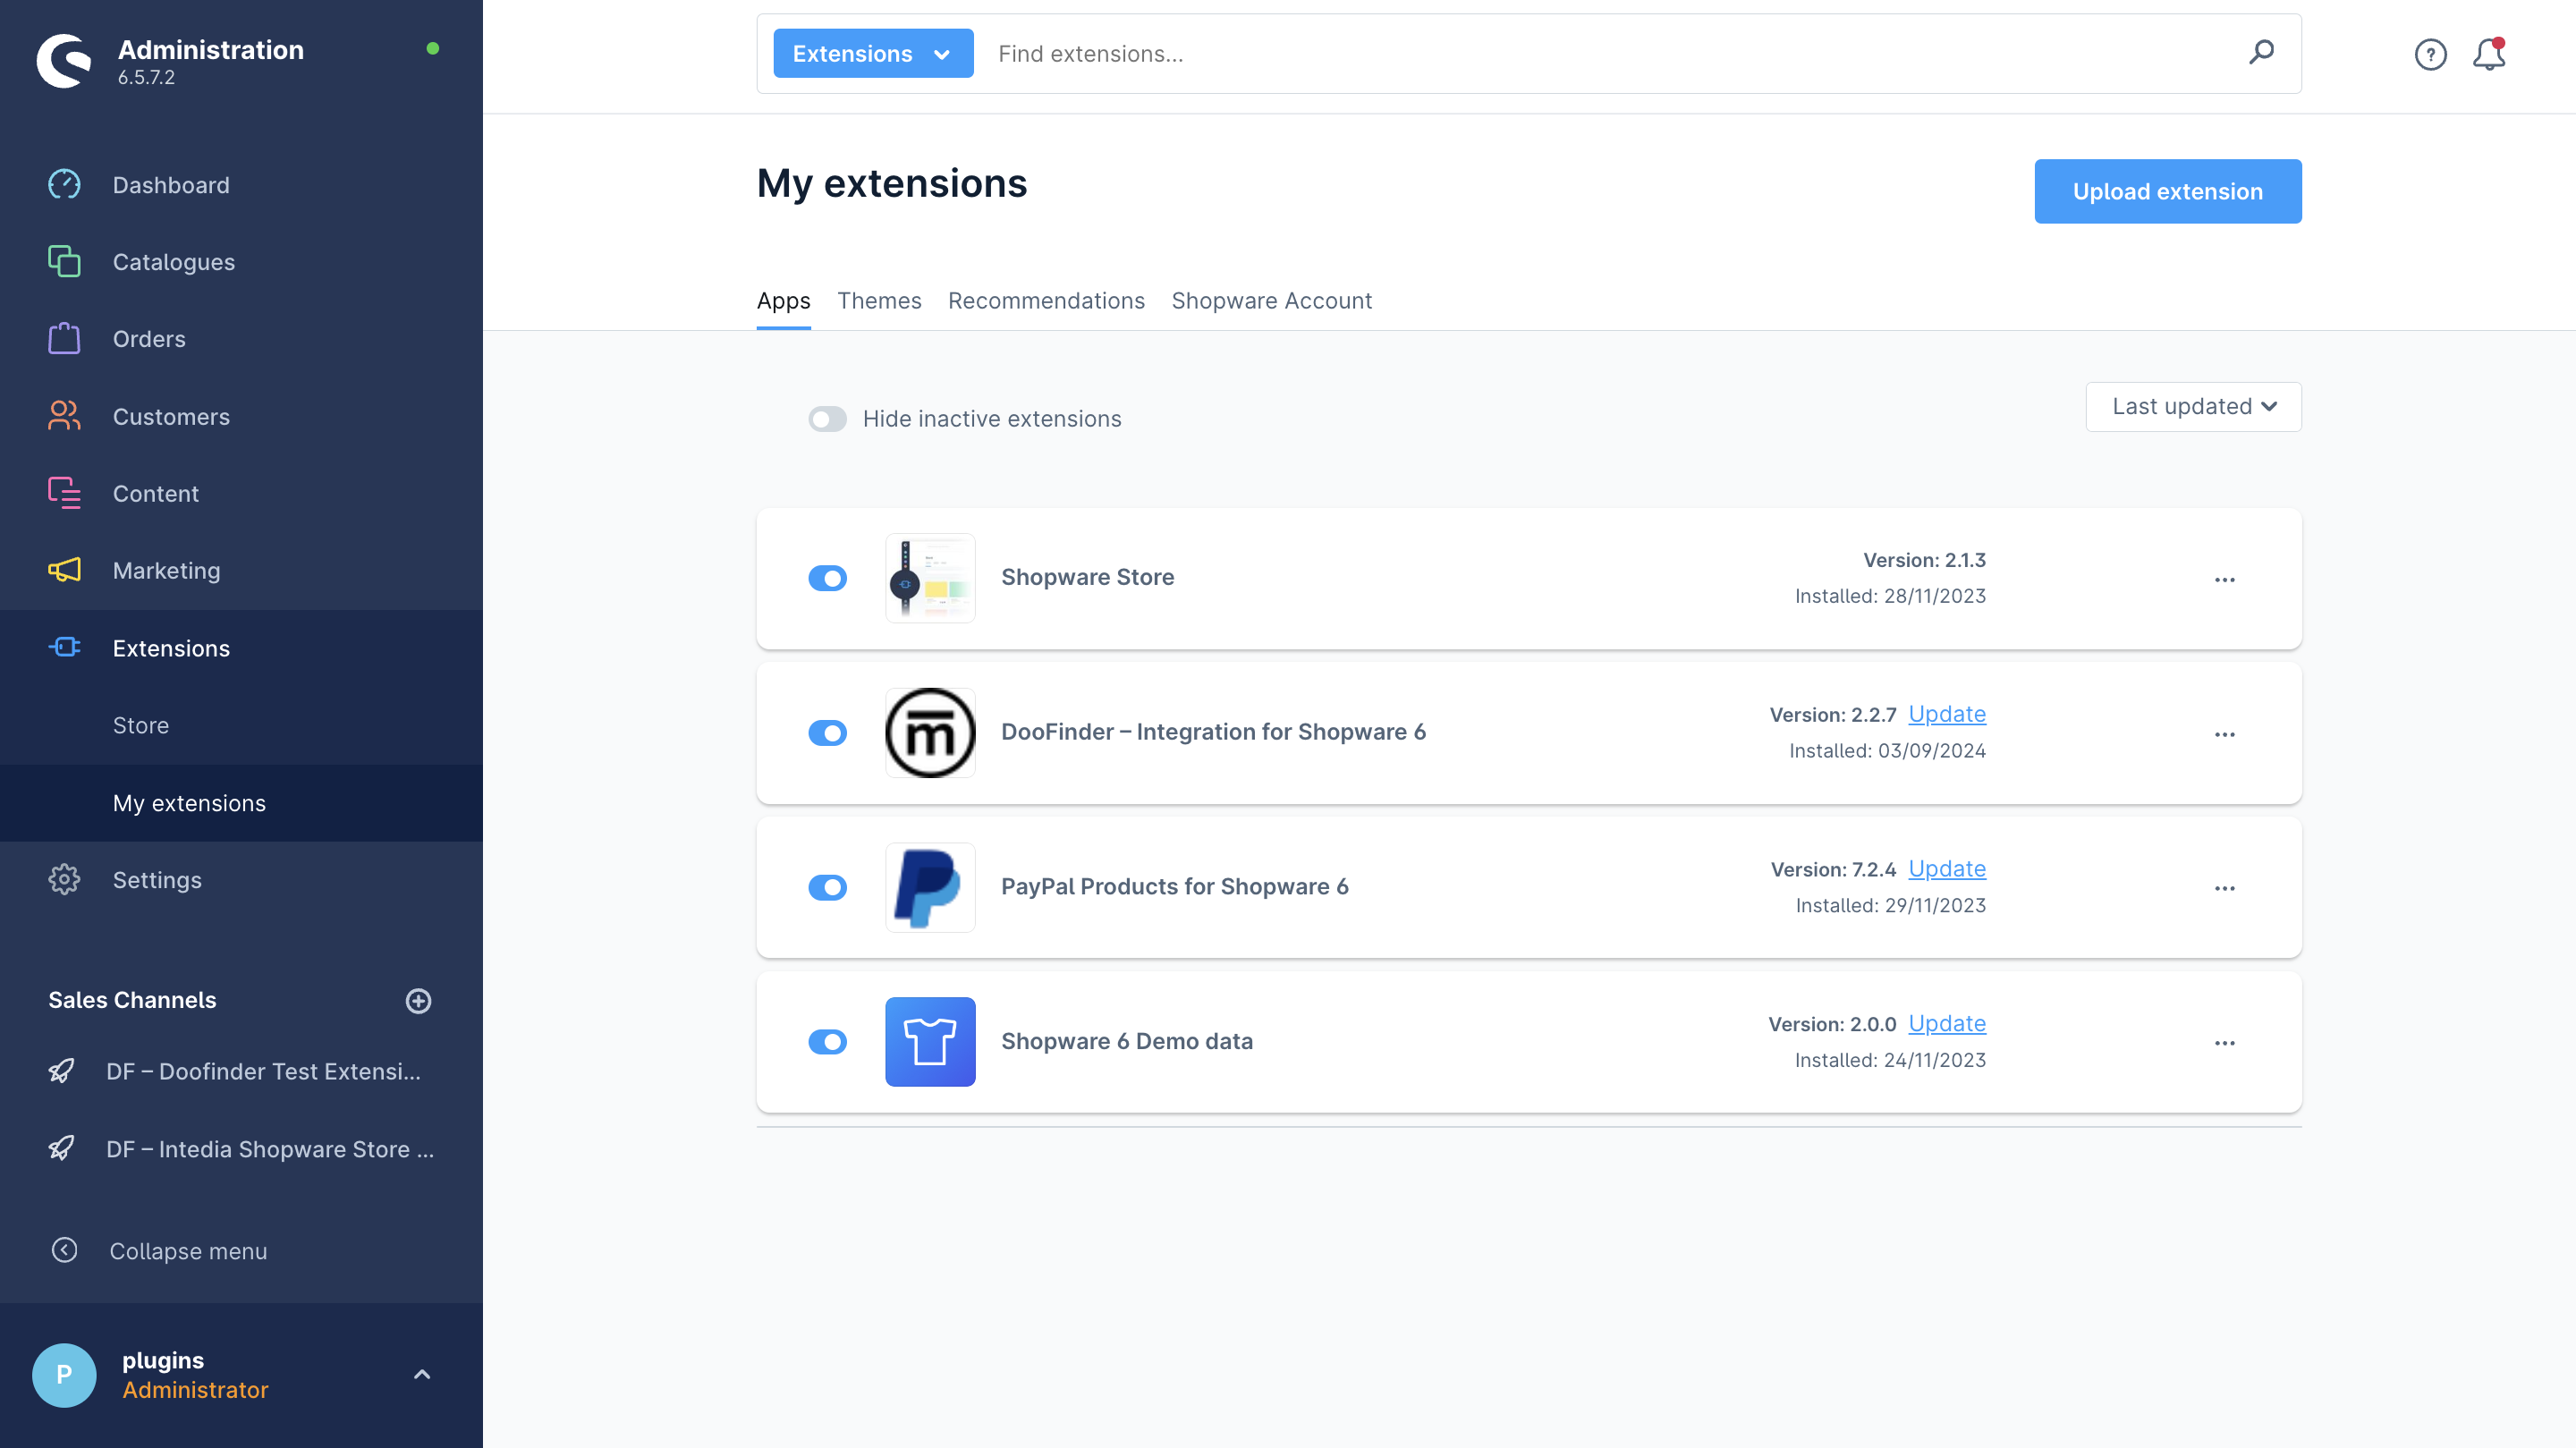
- You’ll need to install the DooFinder’s official plugin. On the side menu, click on Extensions (Erweiterungen) > Store.
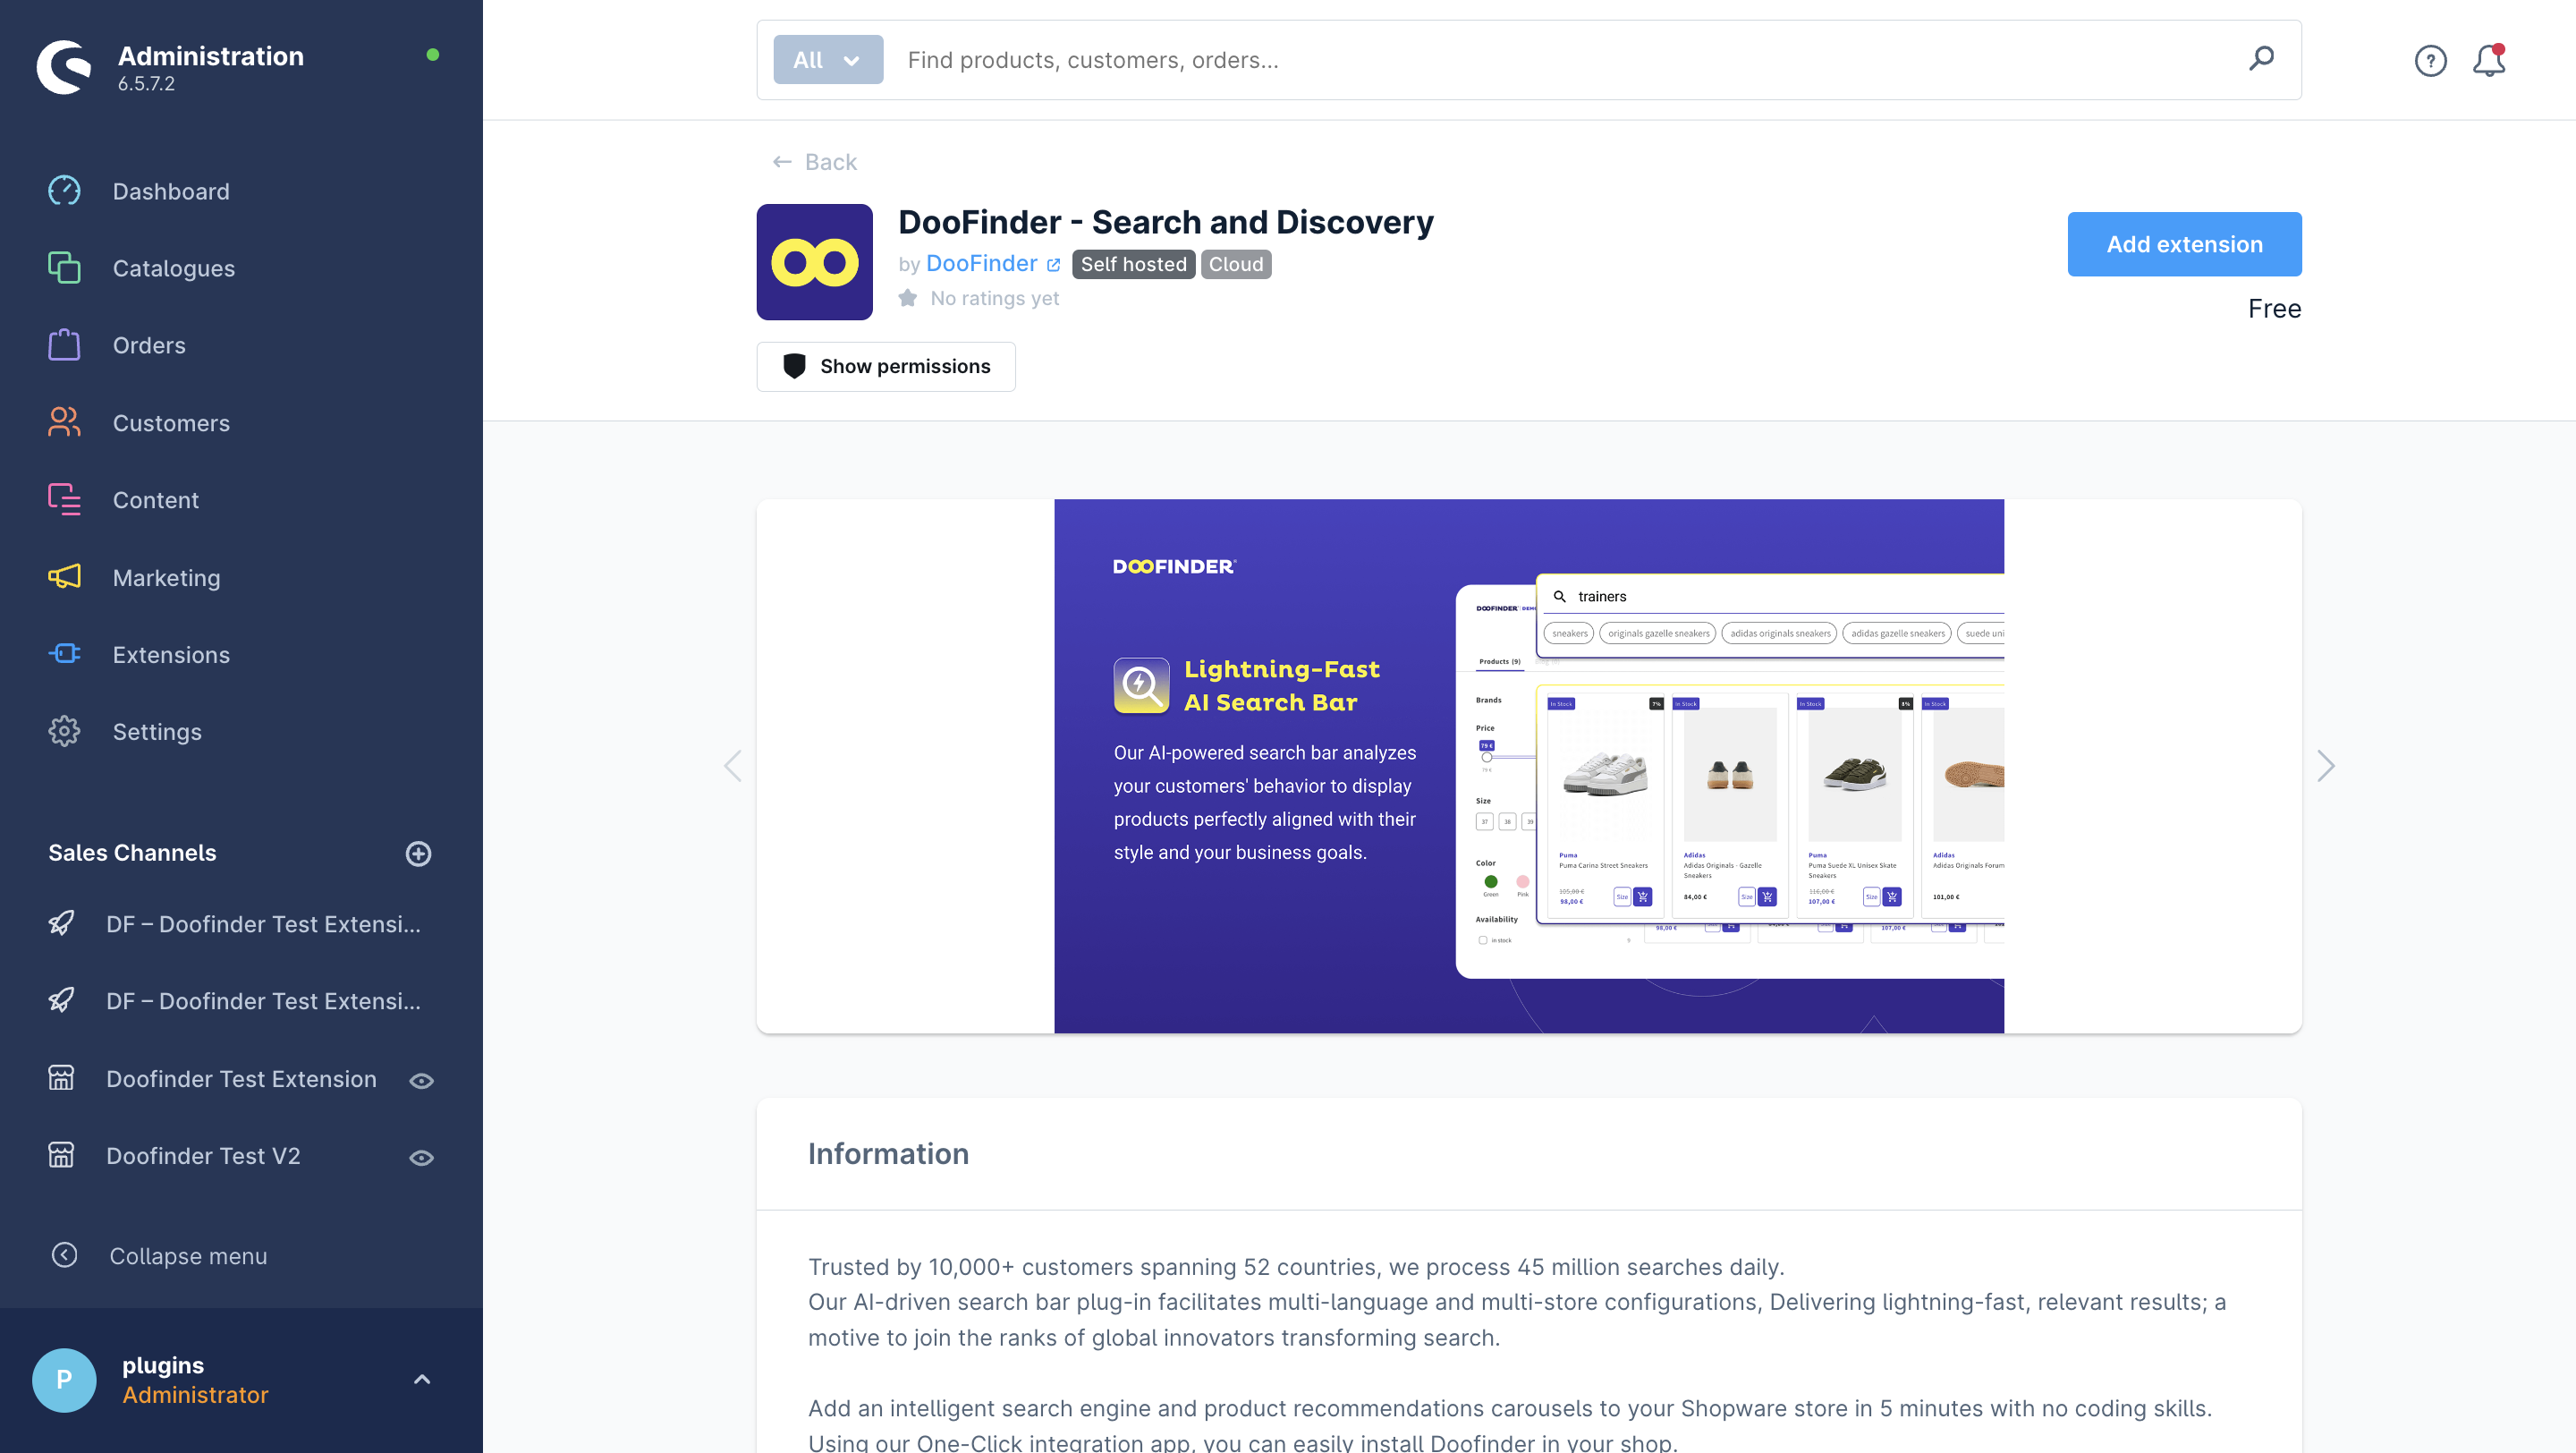
- Look for “DooFinder” on the top search bar to find the extension on the Shopware 6 official Marketplace.
- Click on the Add Extension button to open it and begin the installation.
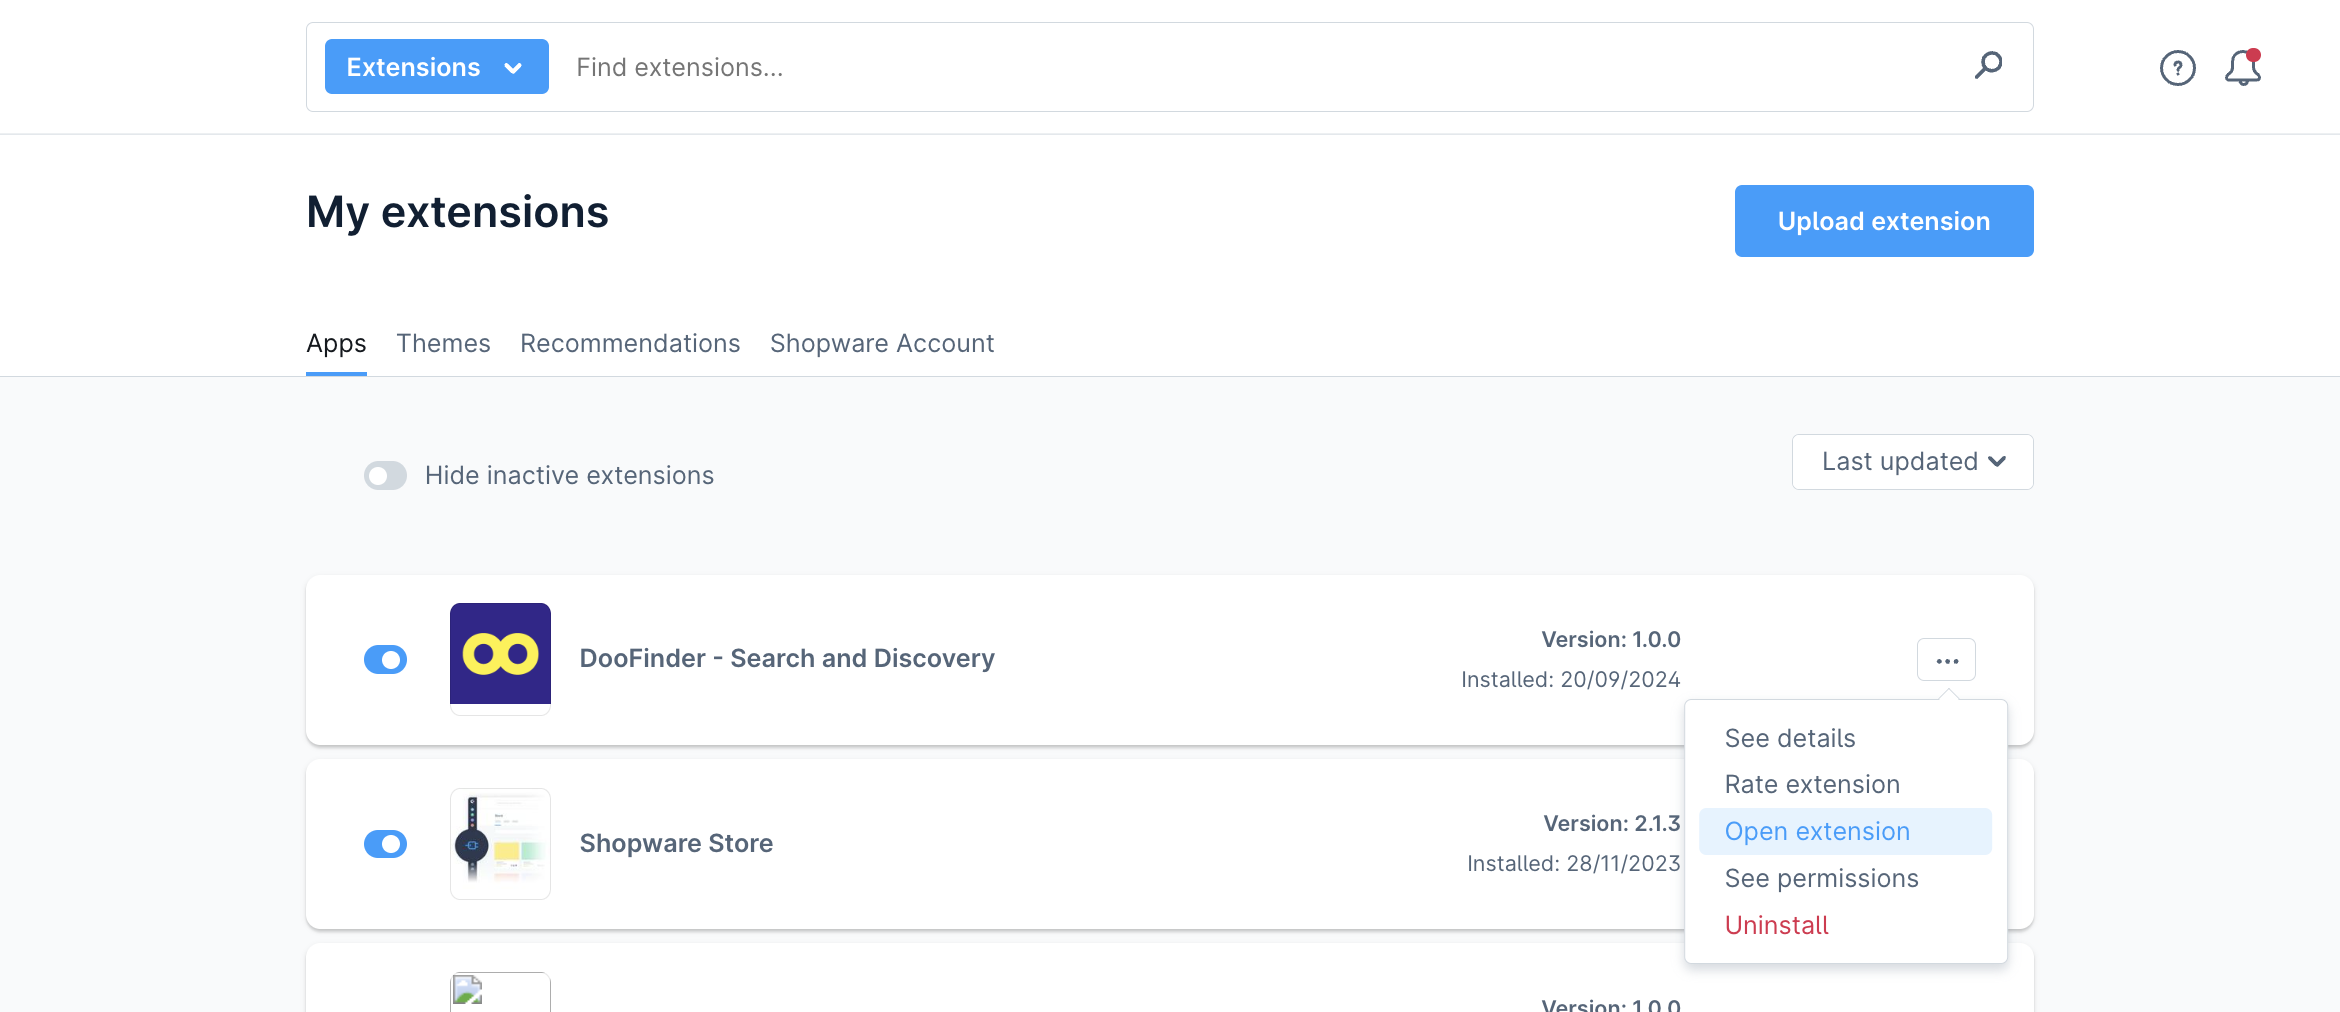
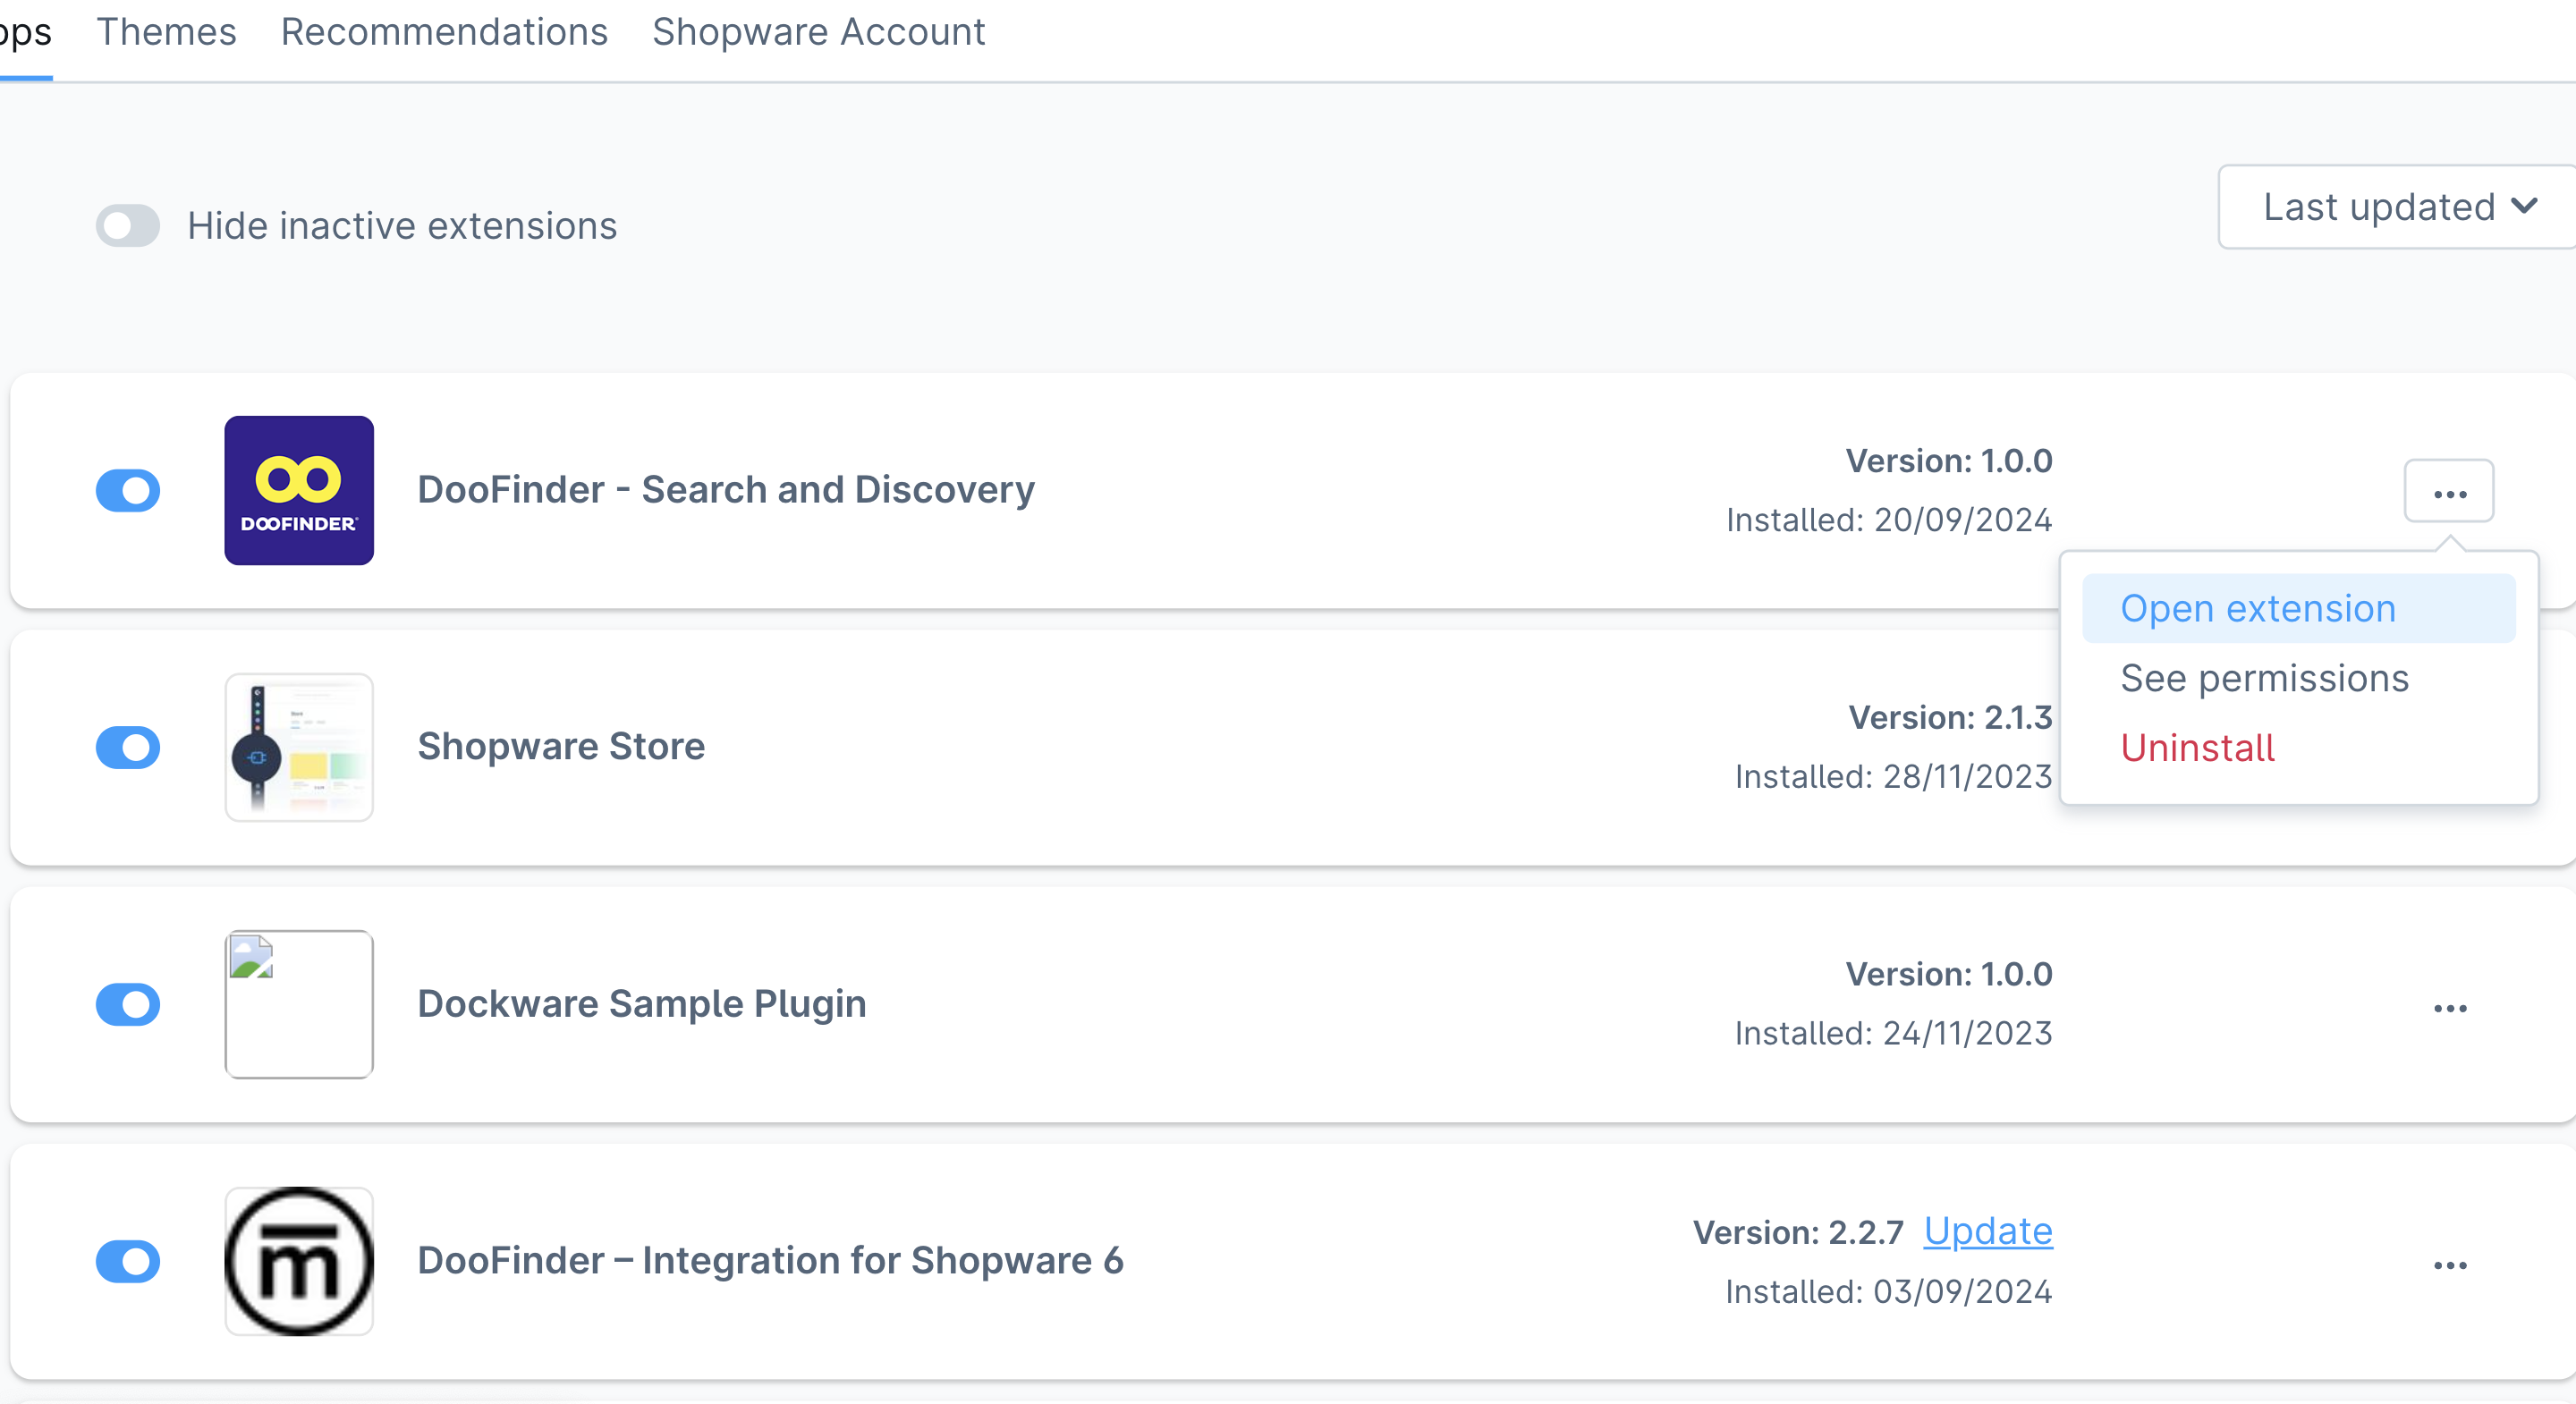
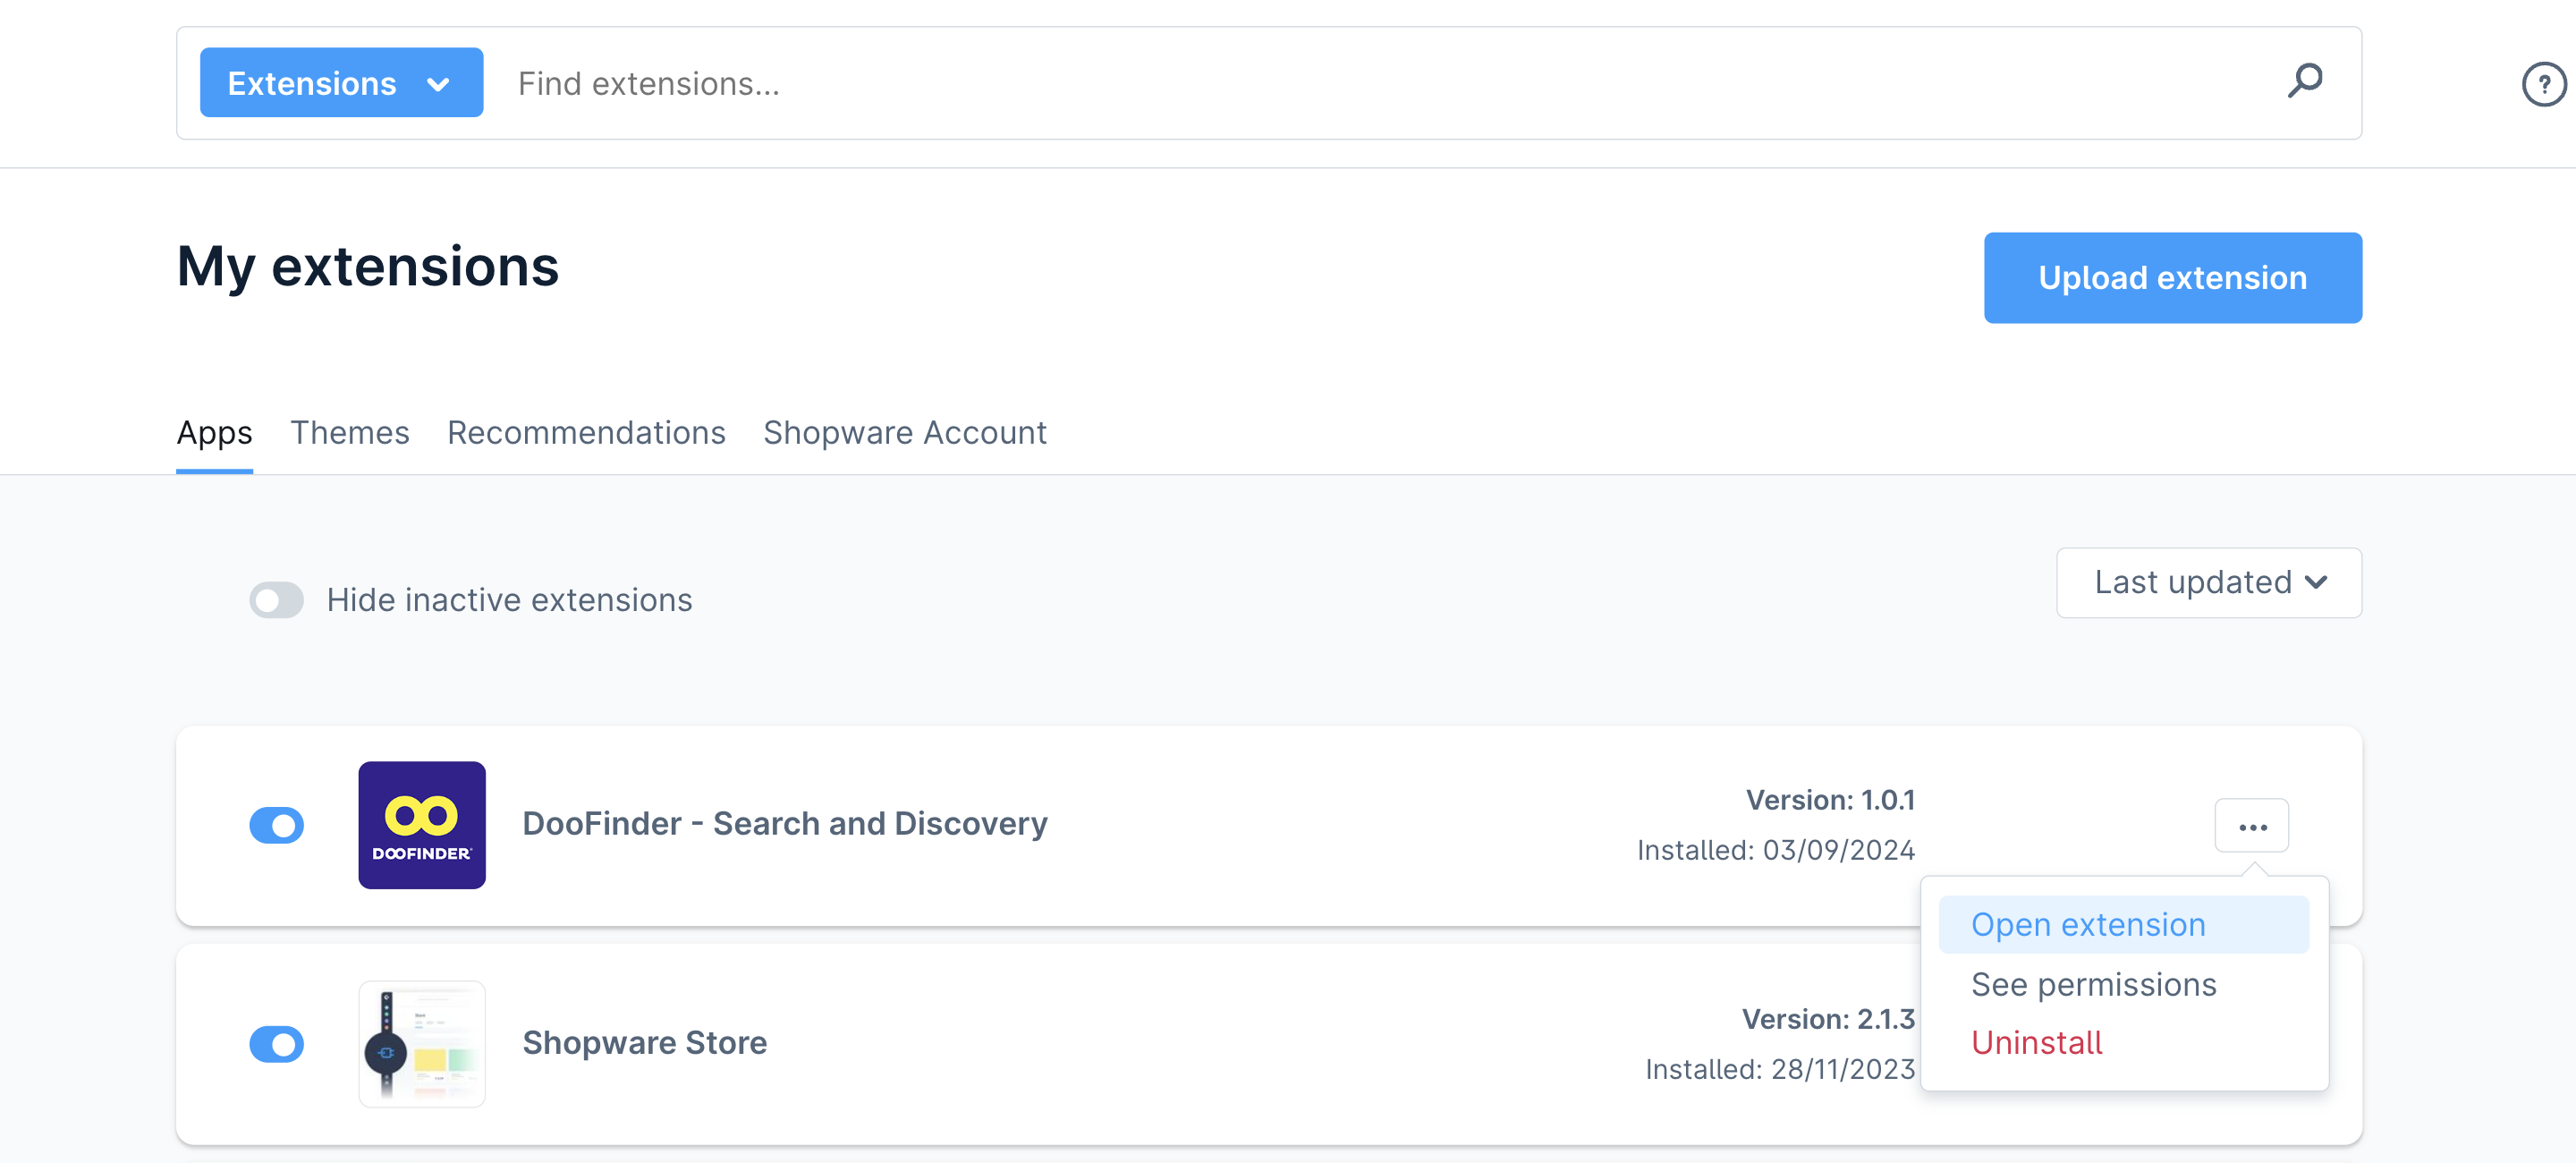
- Once the panel indicates that you can now open the extension, please go to the left menu in your Shopware account > Extensions > My Extensions.
- Find “Doofinder” by Doofinder and click on the three dots and click “Open Extension”.
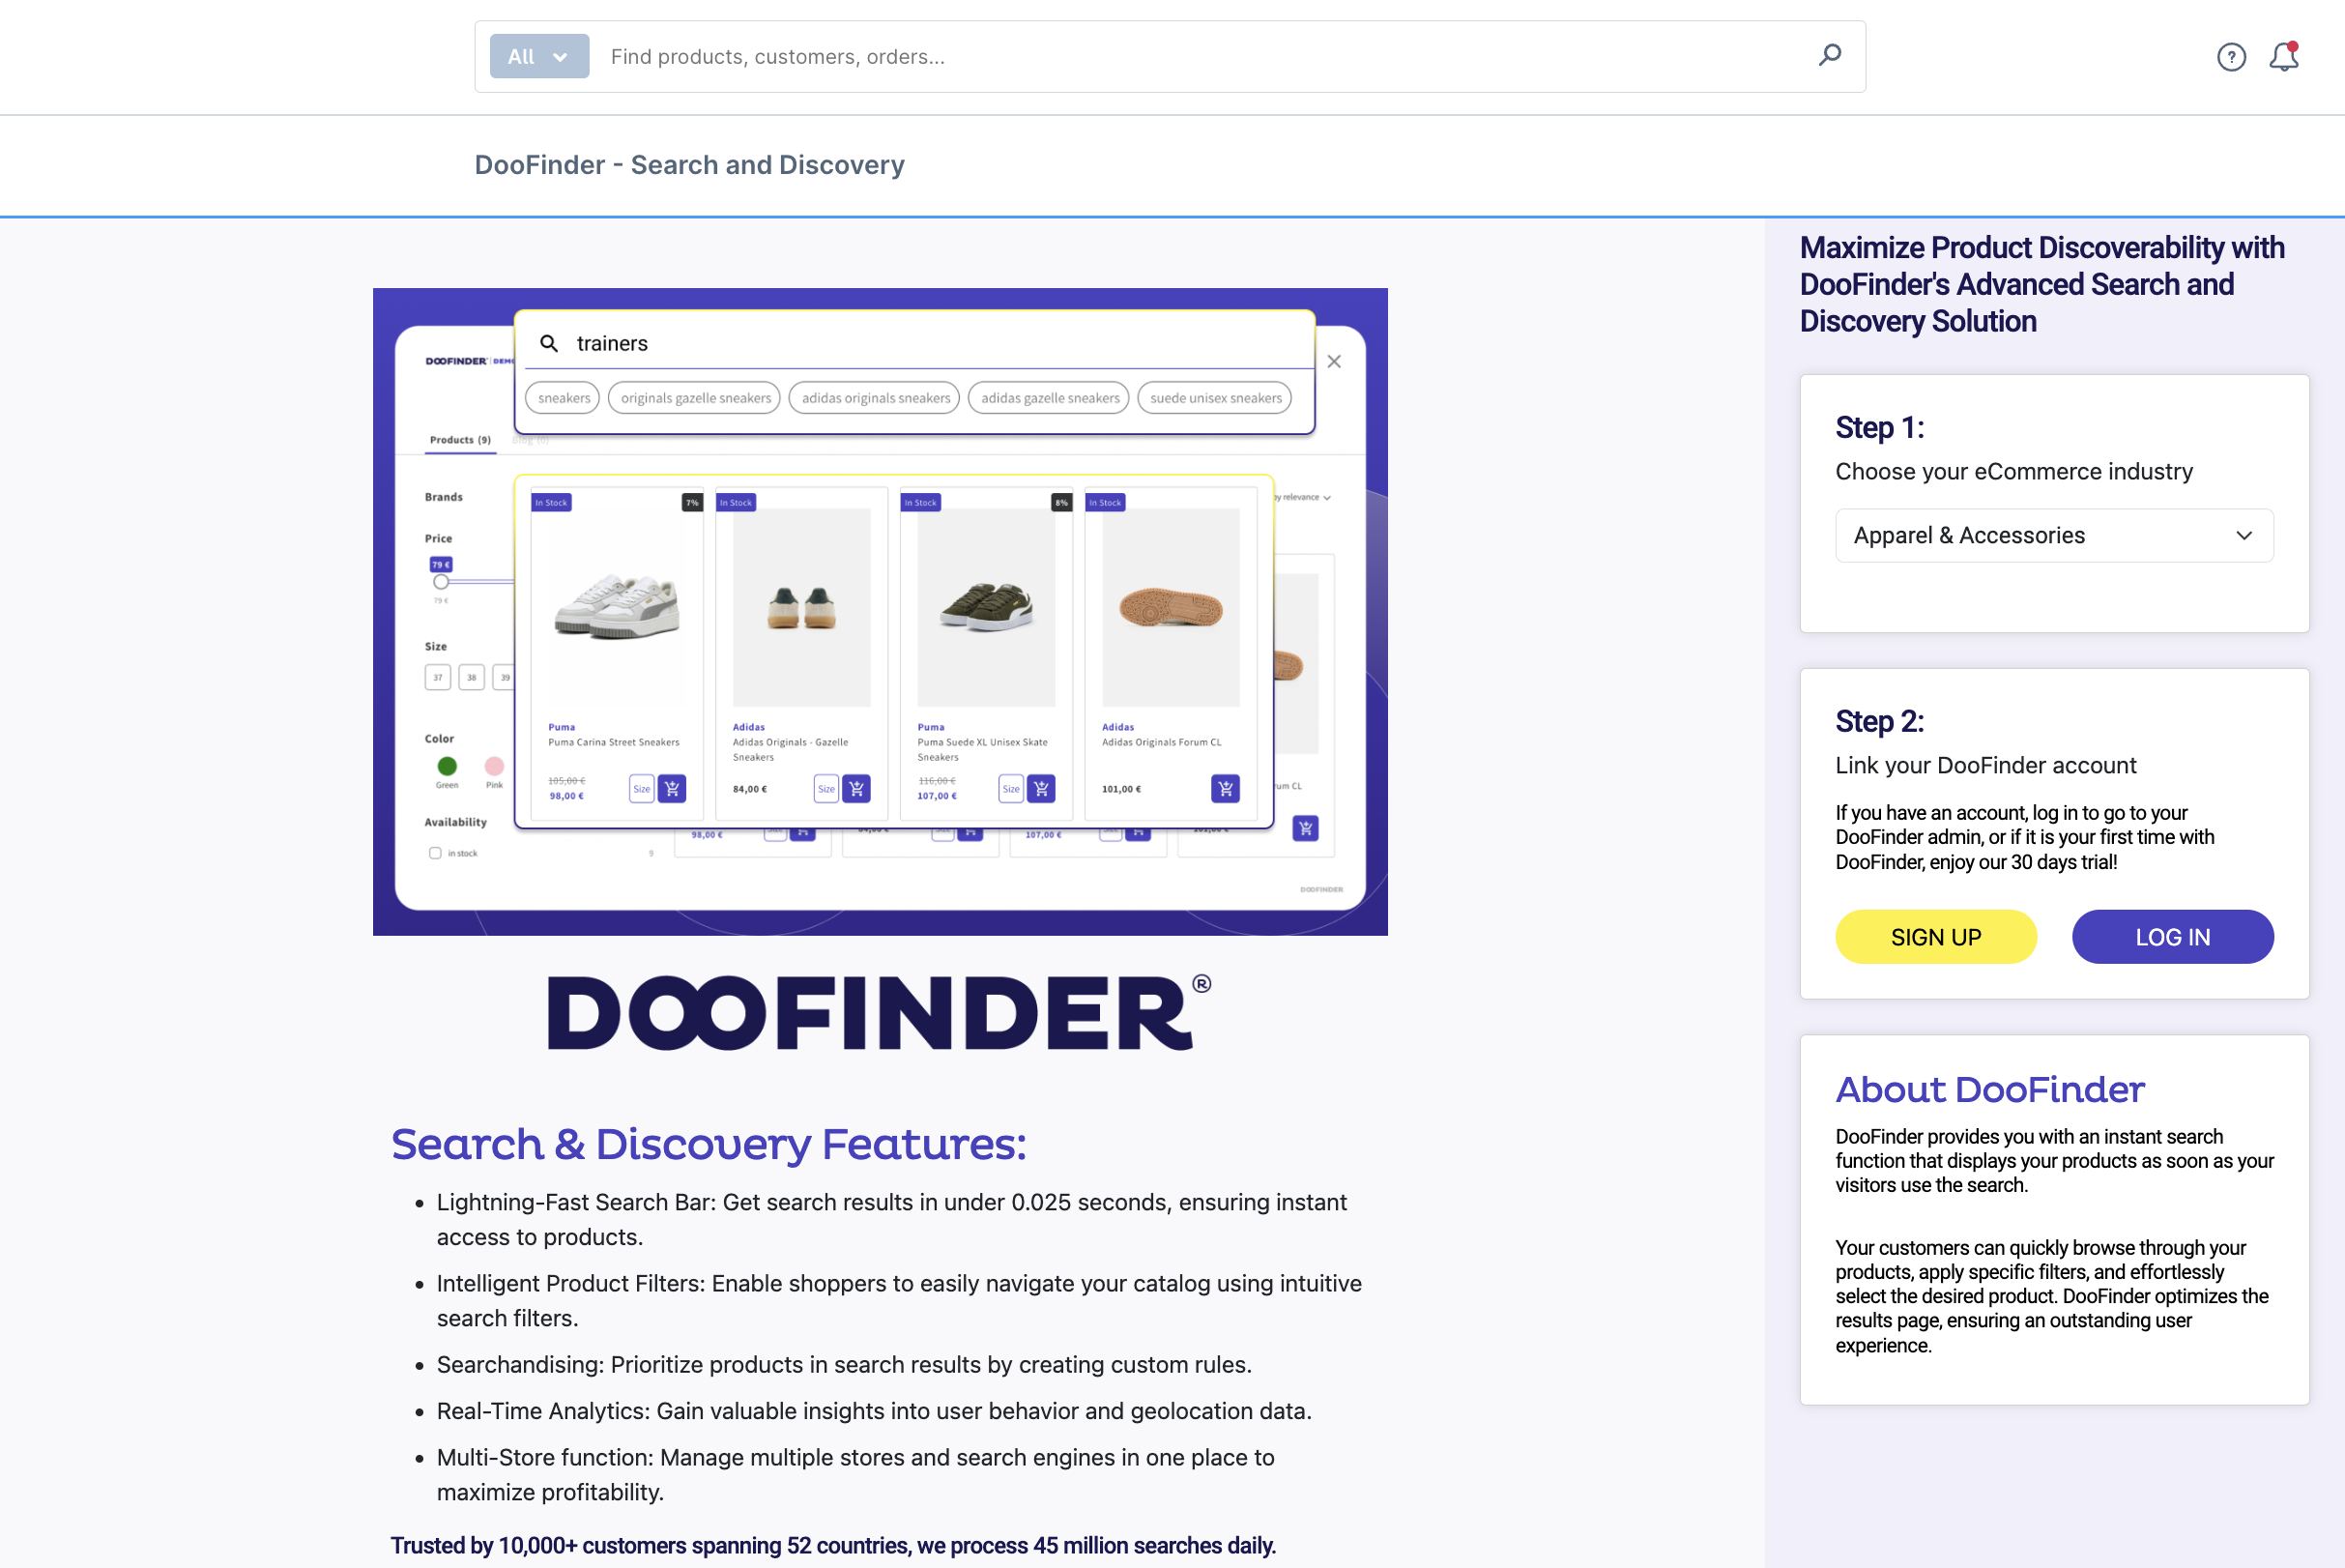
- Now, follow the instructions shown on the screen. On the pop-up window, please complete the instructions.
- Choose an eCommerce industry that matches your store.
- Link your DooFinder account: If you already have a Doofinder account, press the "log in" button and enter your credentials. Otherwise, press the "sign up" button to create your Doofinder account.
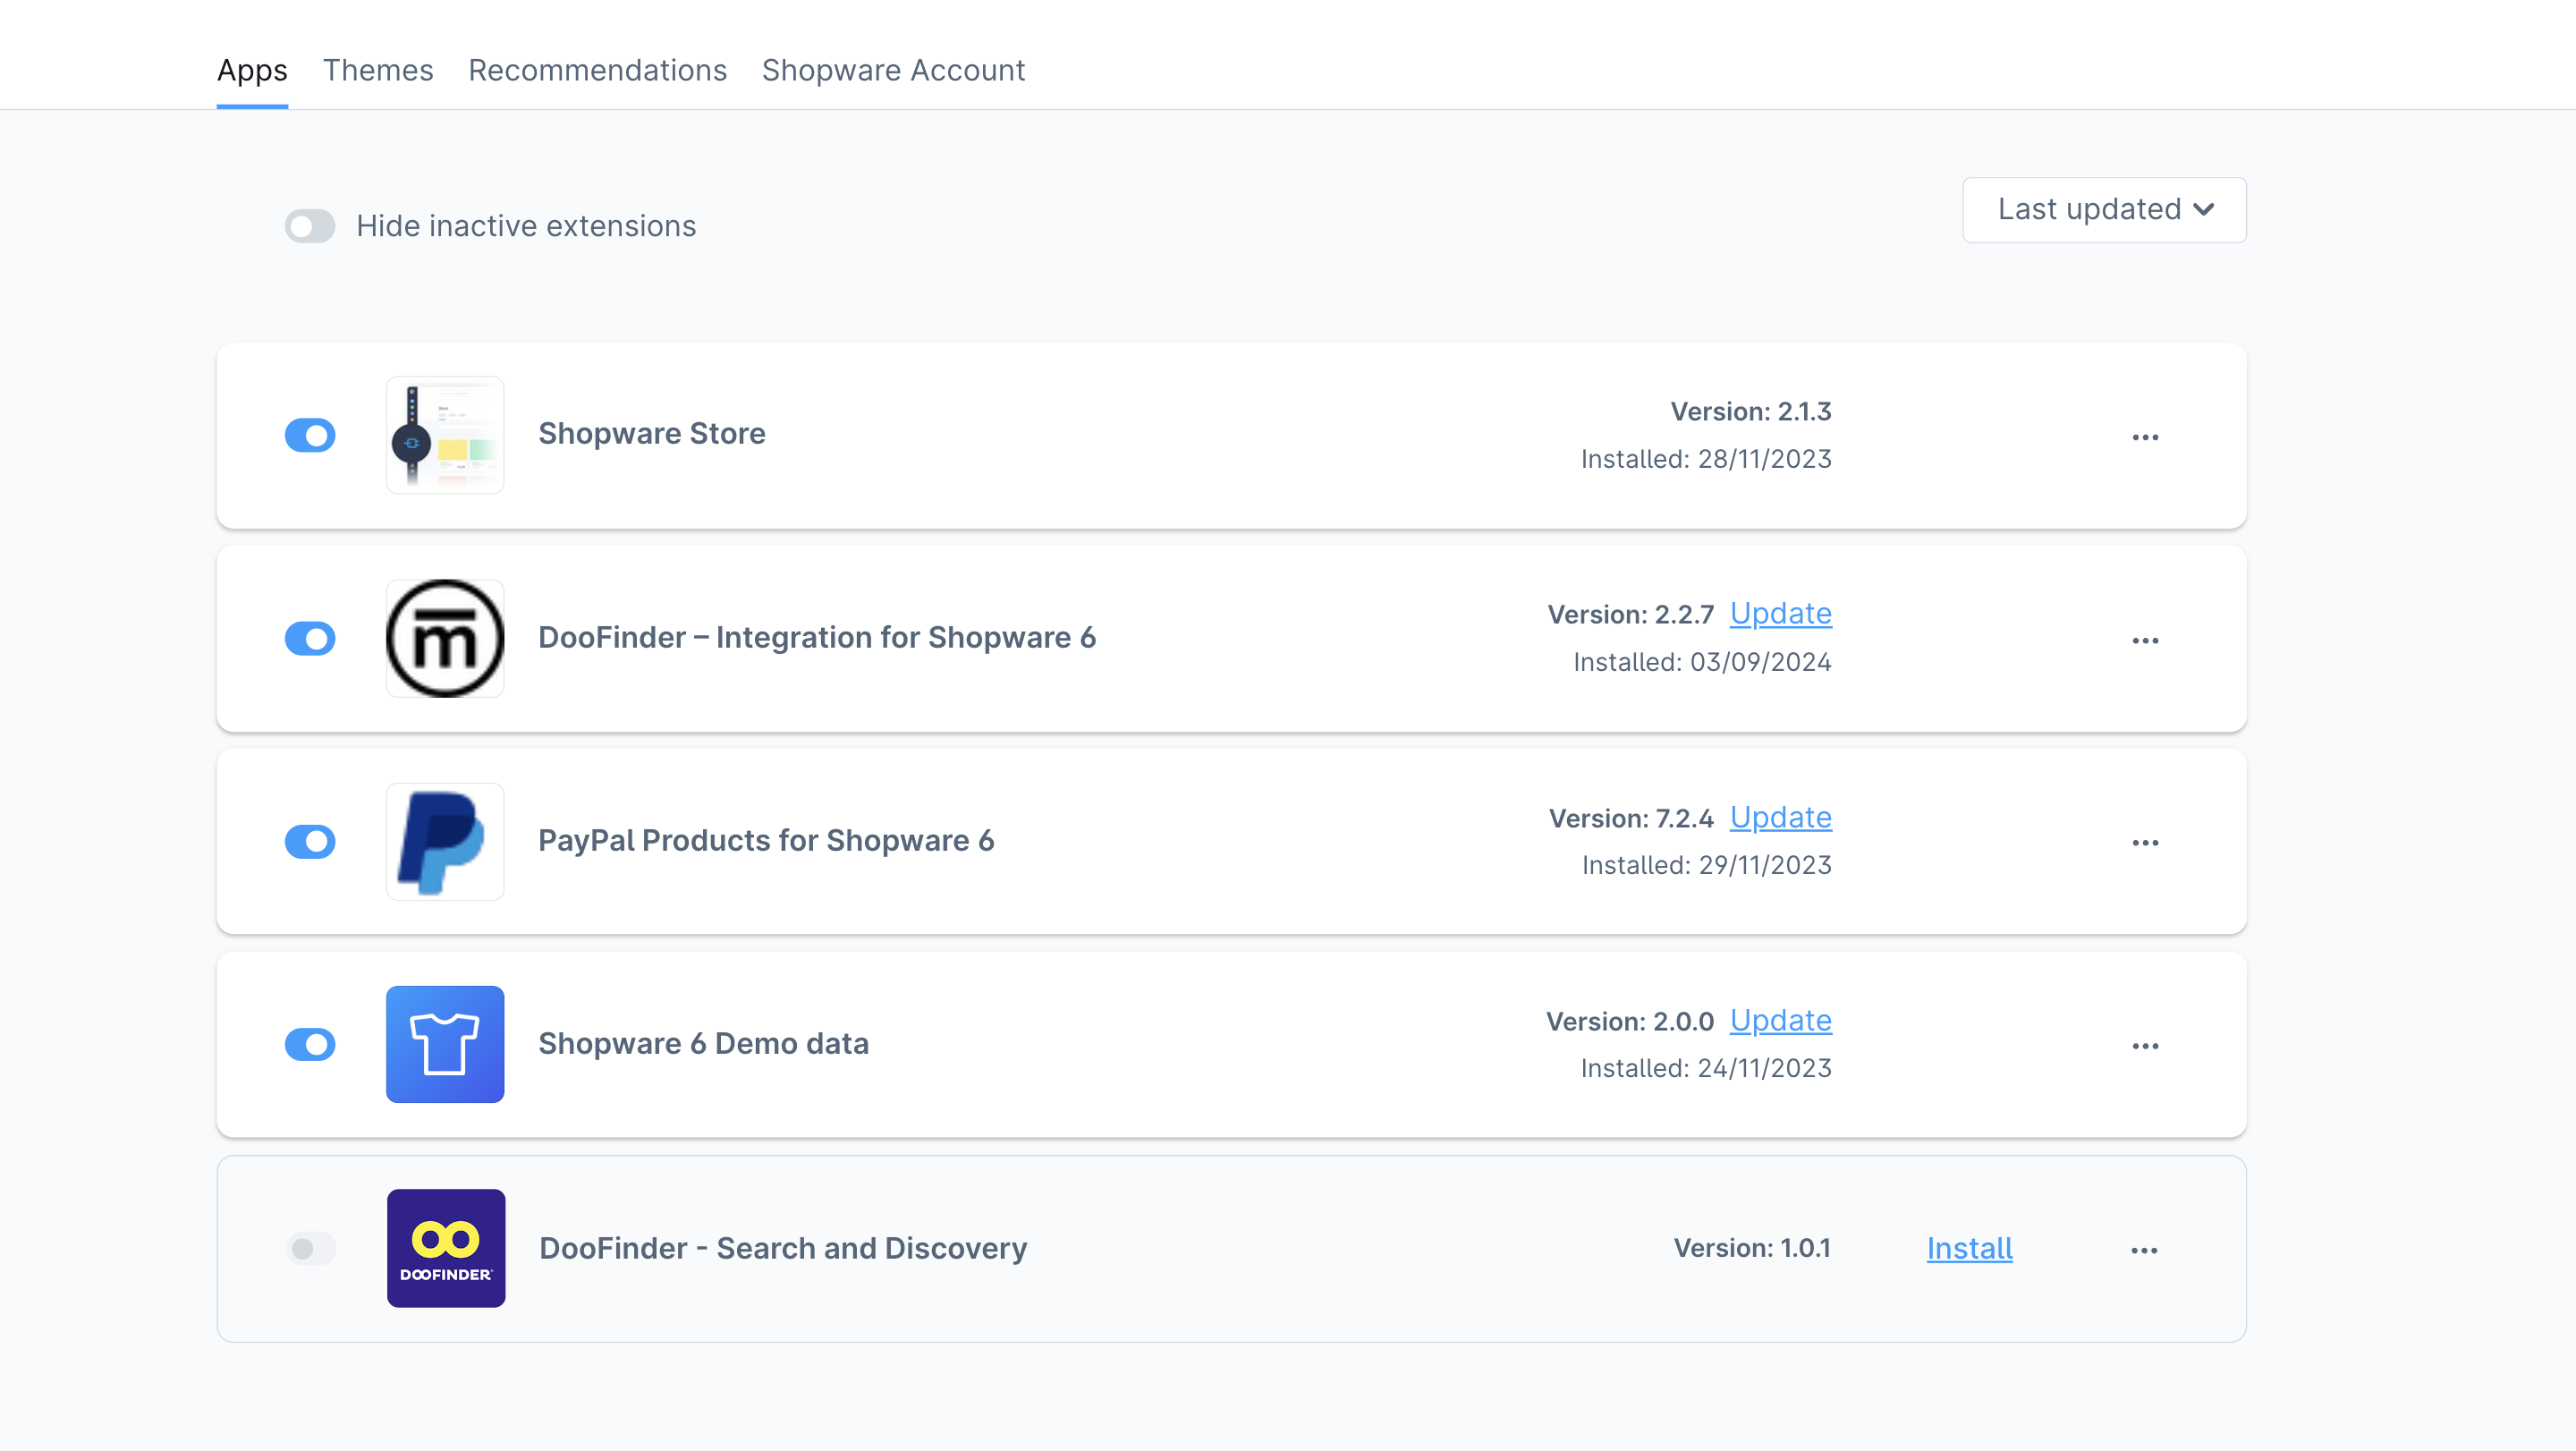
- Once logged in on your DooFinder account, go to the module in your Shopware account > Extensions > My Extensions.
- You’ll find the new Doofinder extension available on the “My Extensions” list. Click on the “Install” button. Please, be patient and wait for the page to load. This activation might take a few moments for Shopware. Make sure the page is fully loaded. Then, continue.
- Wait for the app to install and, once installed, open DooFinder’s plugin from the left-side menu or simply click on the three dots to “Open Extension”.
- Click on Extensions > “DooFinder” to open the plugin settings configuration.
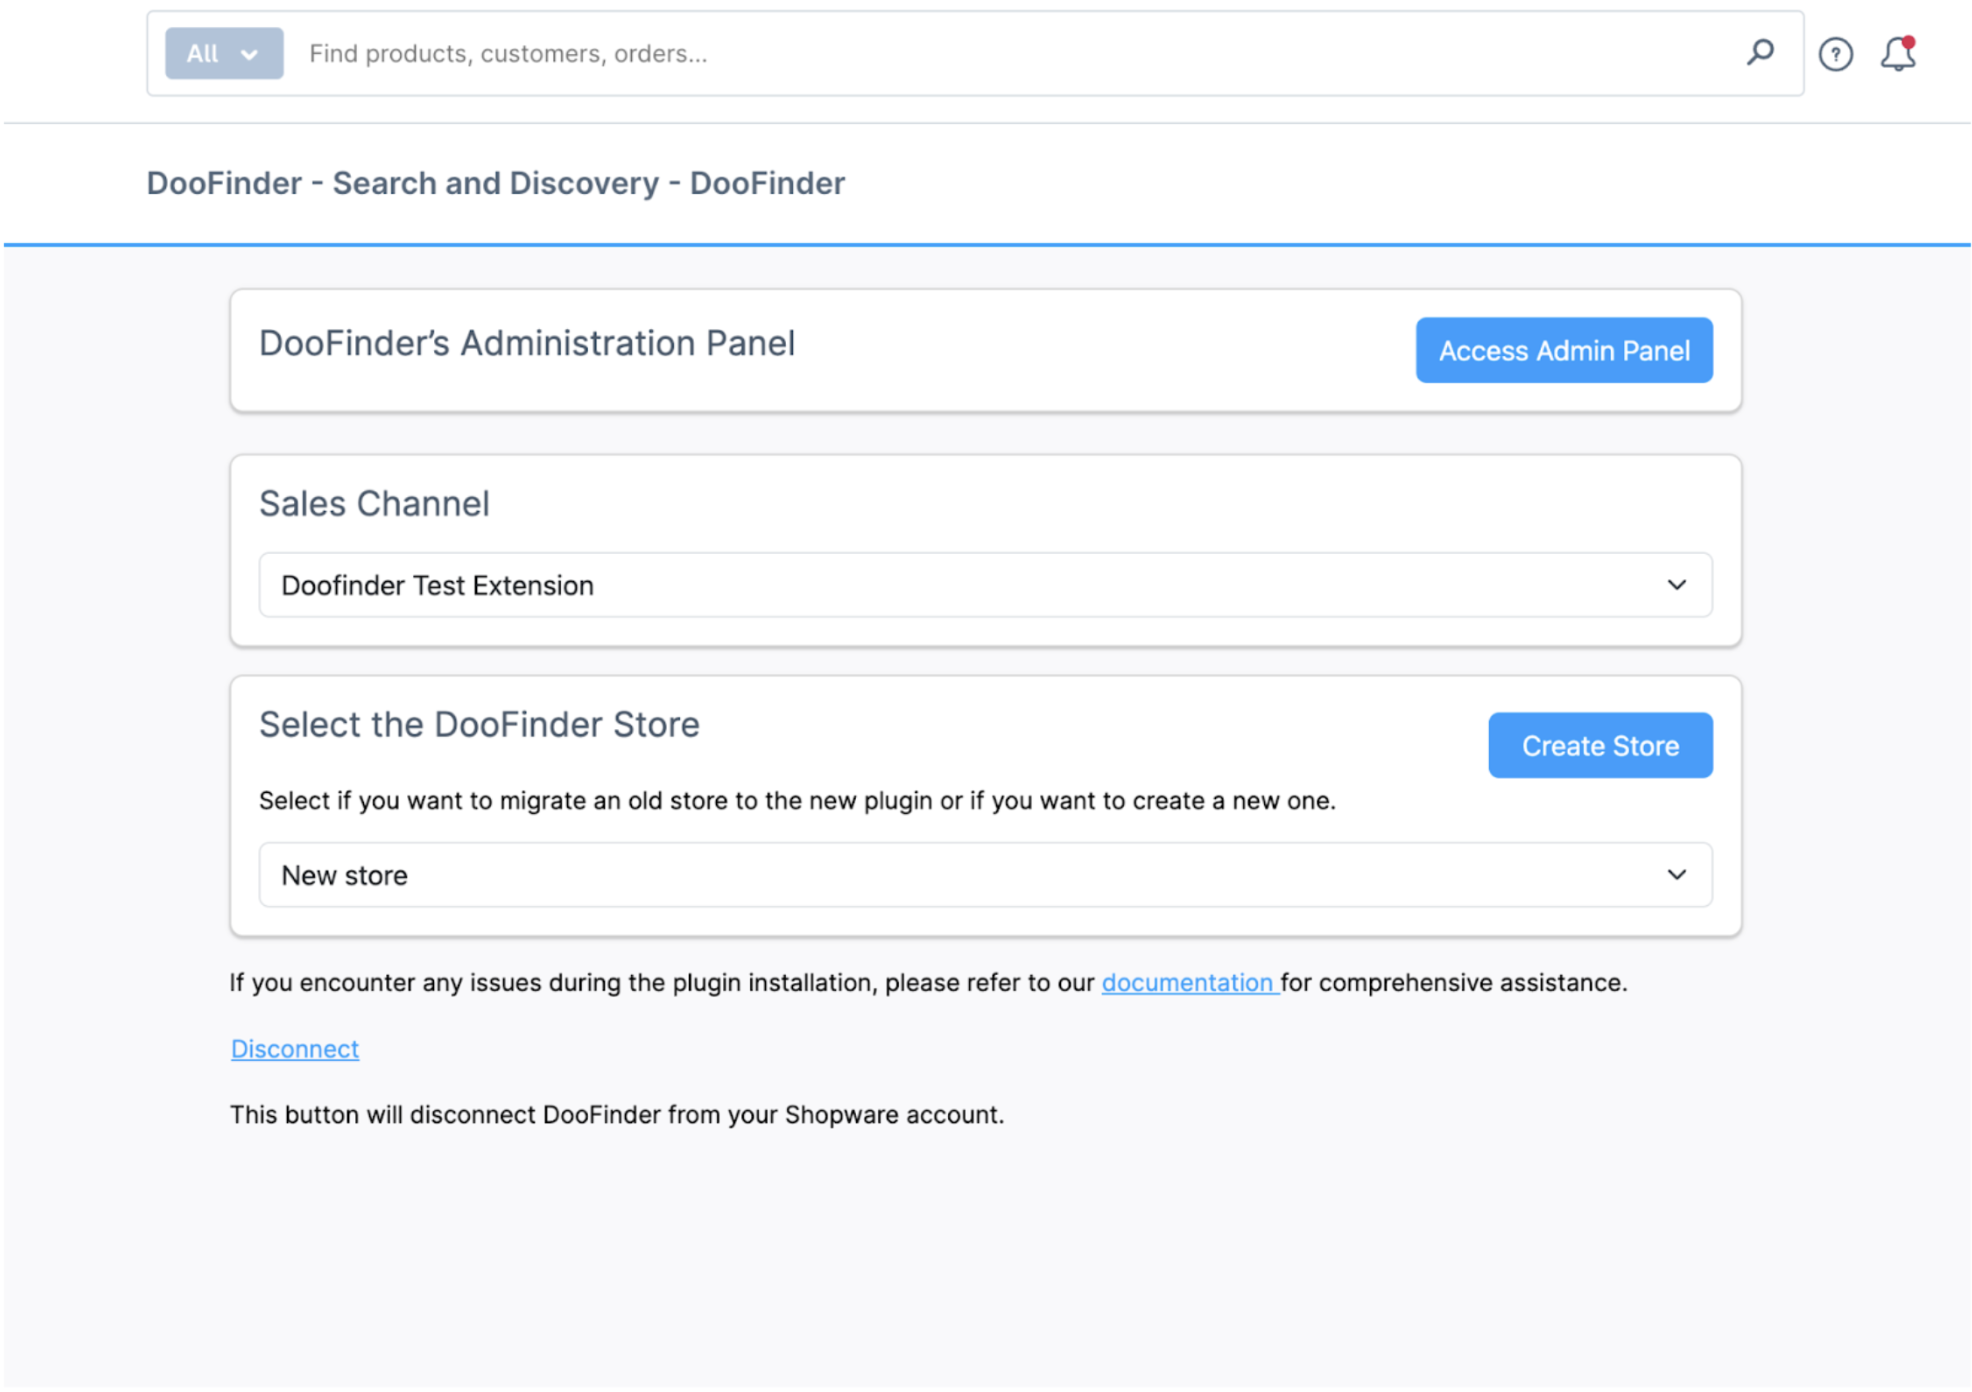
- Go to the module in your Shopware account > Extensions > Doofinder Search and Discovery, you’ll be able to see:
- DooFinder Administration Panel: direct access to your DooFinder Admin Panel.
- Sales Channel: find more information about Shopware’s sales channels here.
- Now, click on “Create Store” to create a new store that will later be visible on your DooFinder Admin Panel and will allow DooFinder to start a new indexation process. Now, if you already have your sales channels in Shopware, your Stores will be created automatically in your Doofinder Admin Panel. The plugin will automatically create the same number of stores as the one configured on your sales channels on Shopware.
- Once created, wait for the Product Catalog Indexation process to load.
- Click on the button “Access Admin Panel” to go back to your DooFinder Admin Panel, and find the new store created. On the top bar, search for the Store dropdown menu, and click on the name of your store.
- Once inside the new store, Go to Configuration > Search Engines > click on "See indices" > Indices > Check the indexation process.
- Once loaded, you’ll find that the Shopware Site Key indexation is successfully created. This will ensure that the plugin is successfully installed.

Warning: It is essential to log in with the owner of the Doofinder account; otherwise, the stores may not be recognized.
Once installed, enable the toggle and make sure to wait for the page to load. This activation might take a few moments for Shopware. Make sure the page is fully loaded. Then, continue.
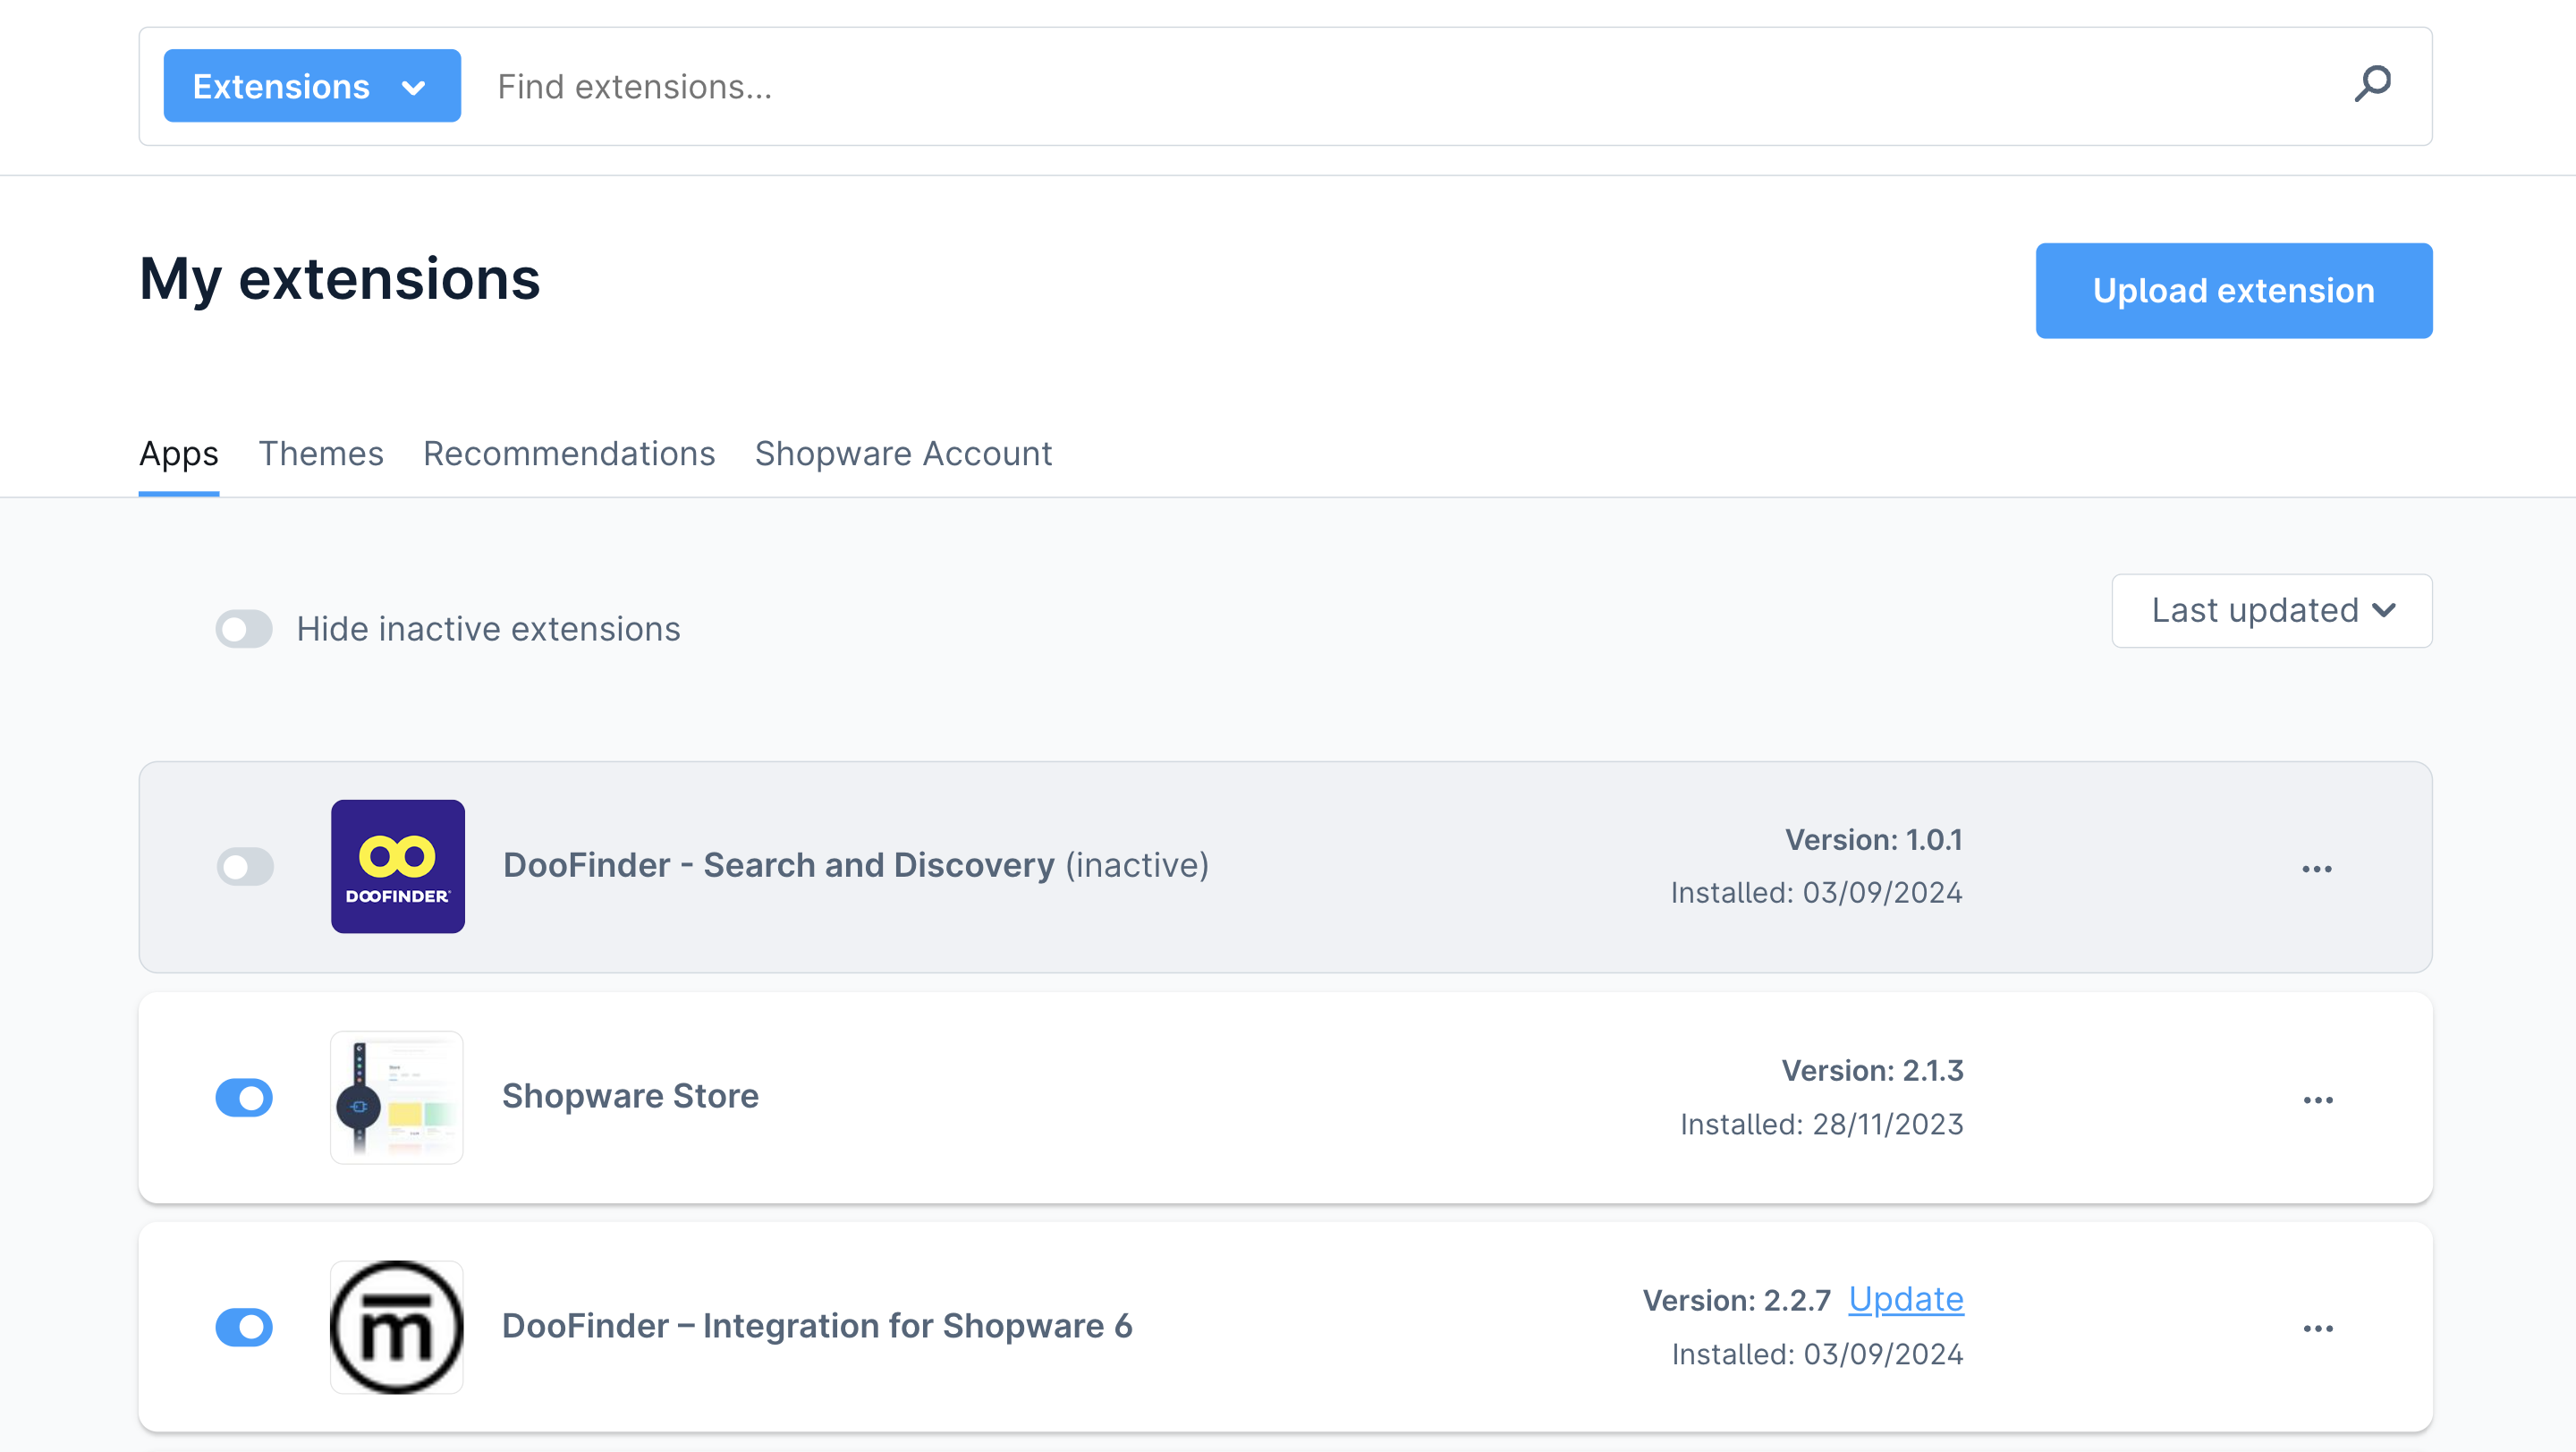
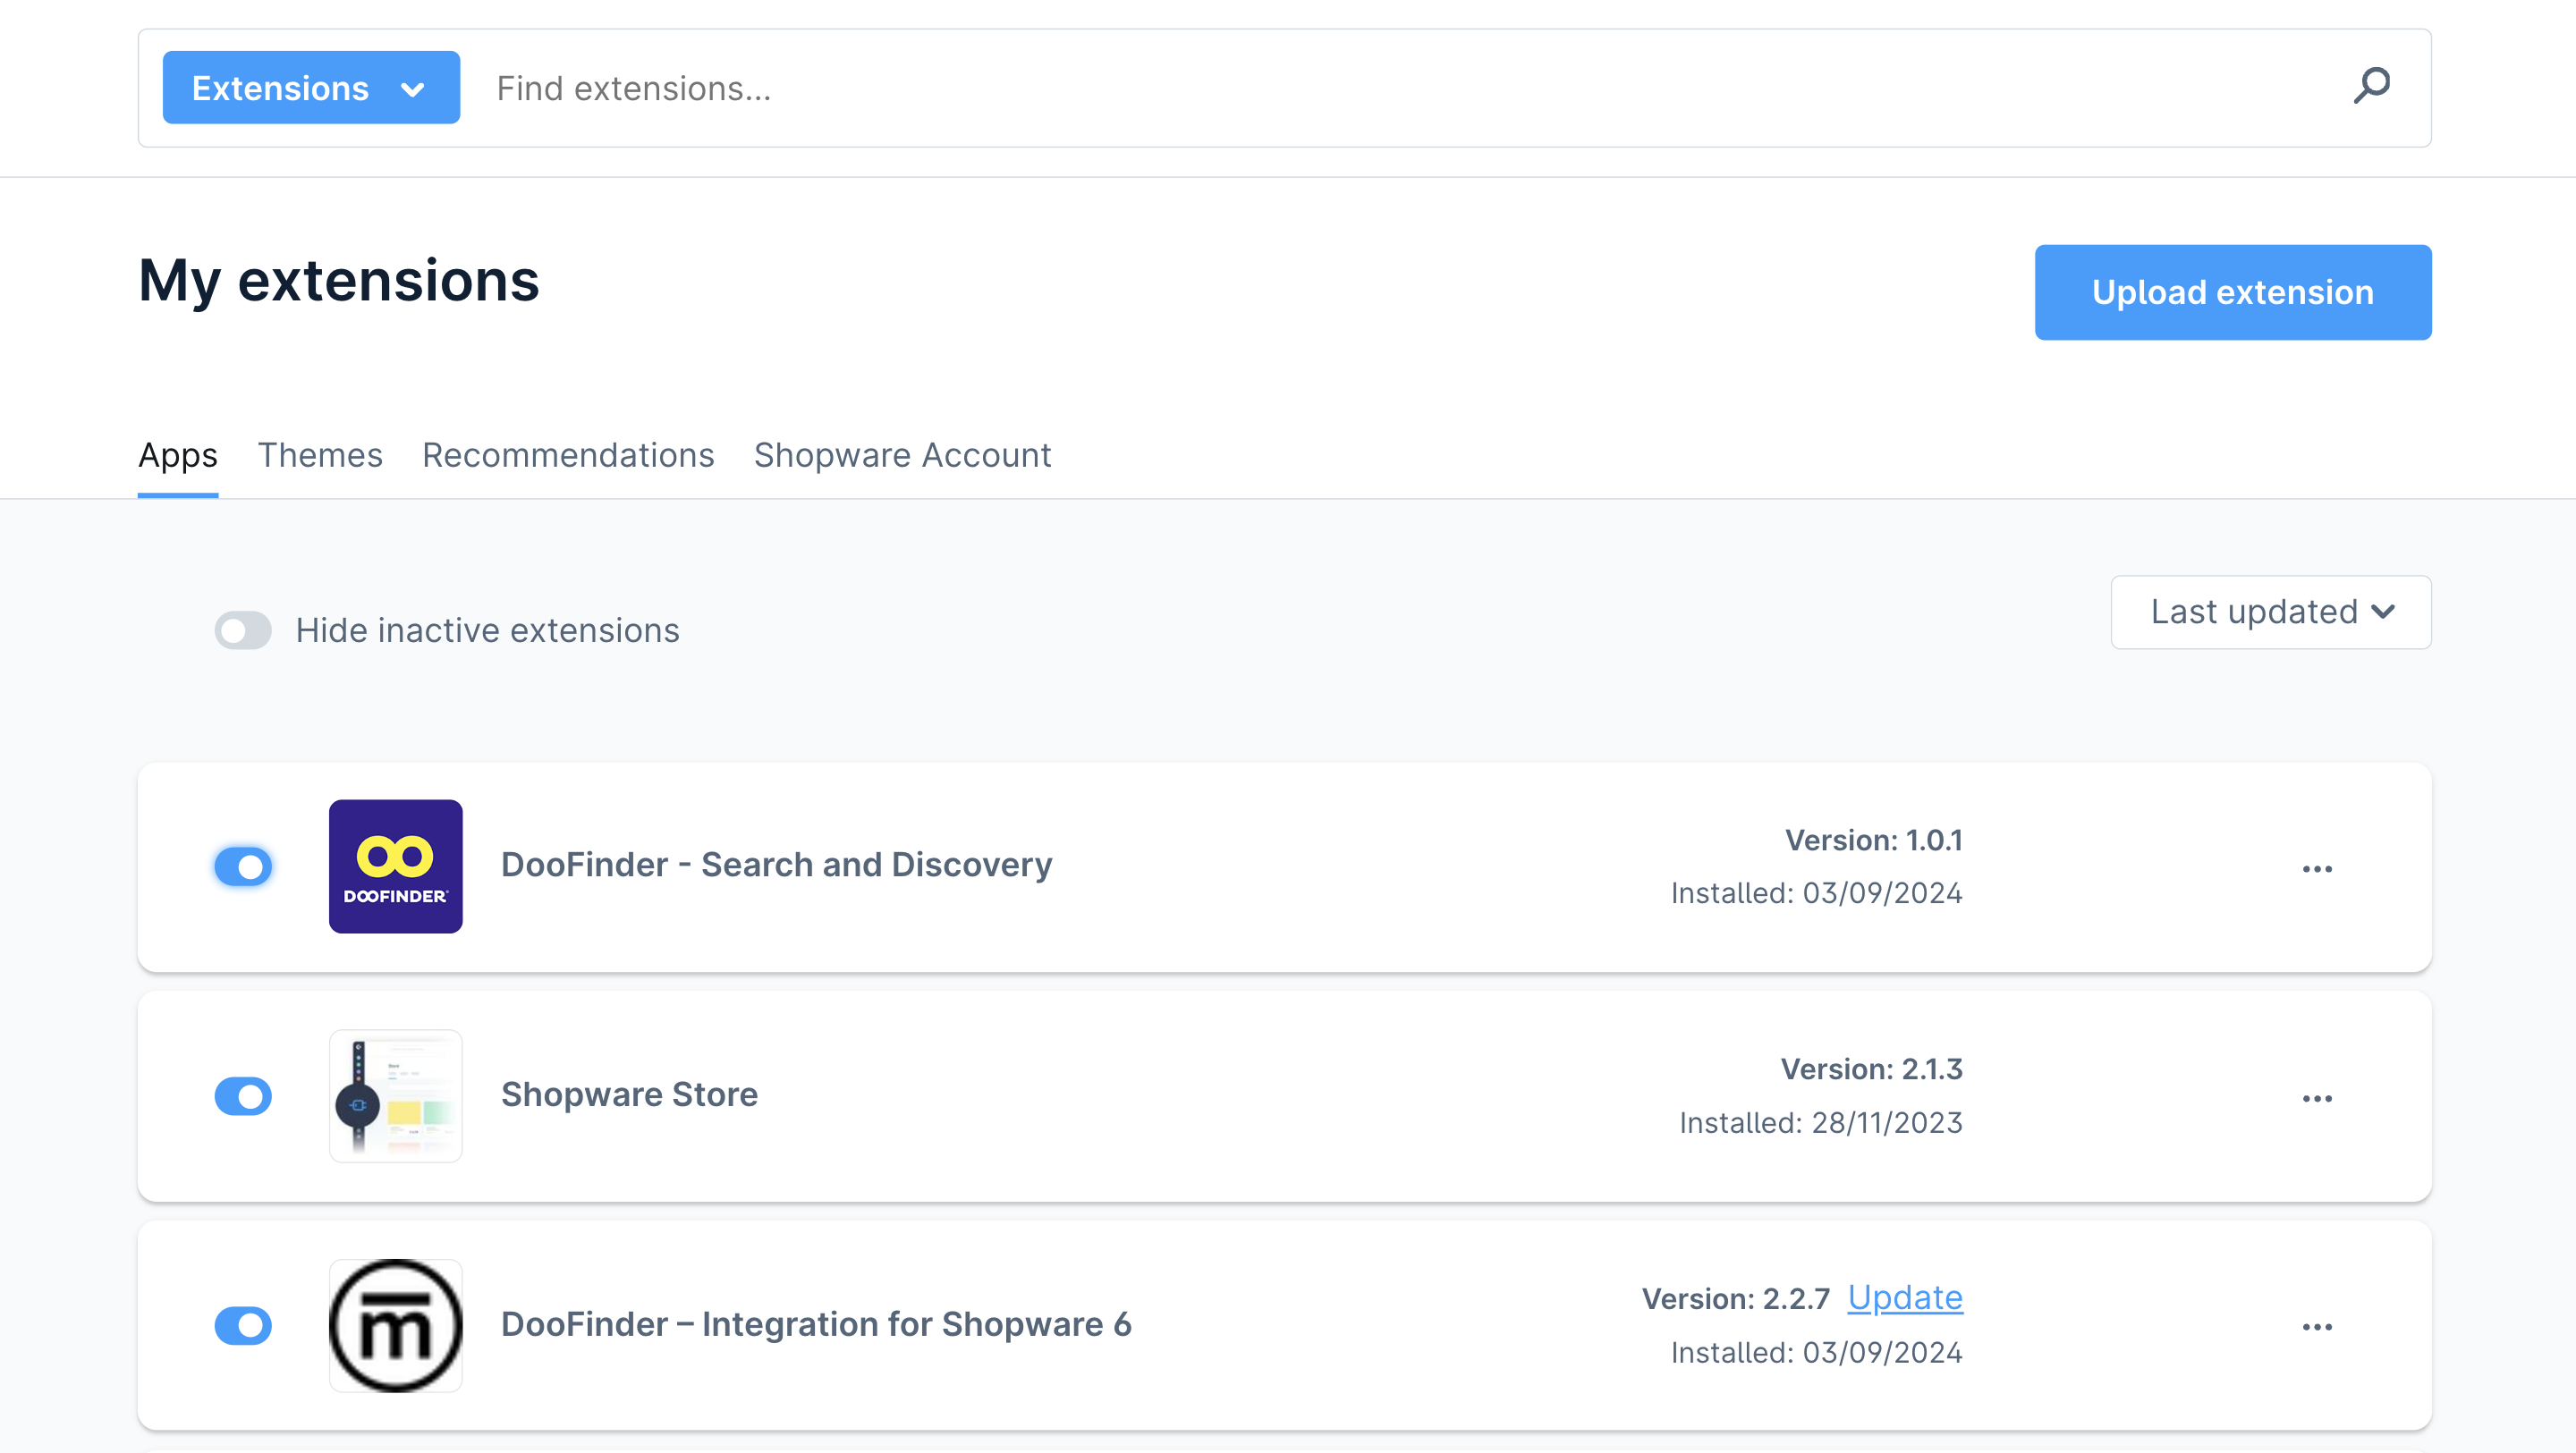
Now, “DooFinder” is available and visible on the Extensions menu.

First-Time Installation - Post Installation - Shopware 6
This installation's last step is configuring the plugin in your Shopware backend. To do this, simply go to Extensions > DooFinder on the left-side menu. Or under Extensions > My Extensions > find the DooFinder plugin and click on the three dots to “Open Extension”. From here, you can also Uninstall it if needed.
On this screen you’ll find:
-
DooFinder Administration Panel: direct access to your DooFinder Admin Panel.
-
Sales Channel: find more information about Shopware's sales channels here.
-
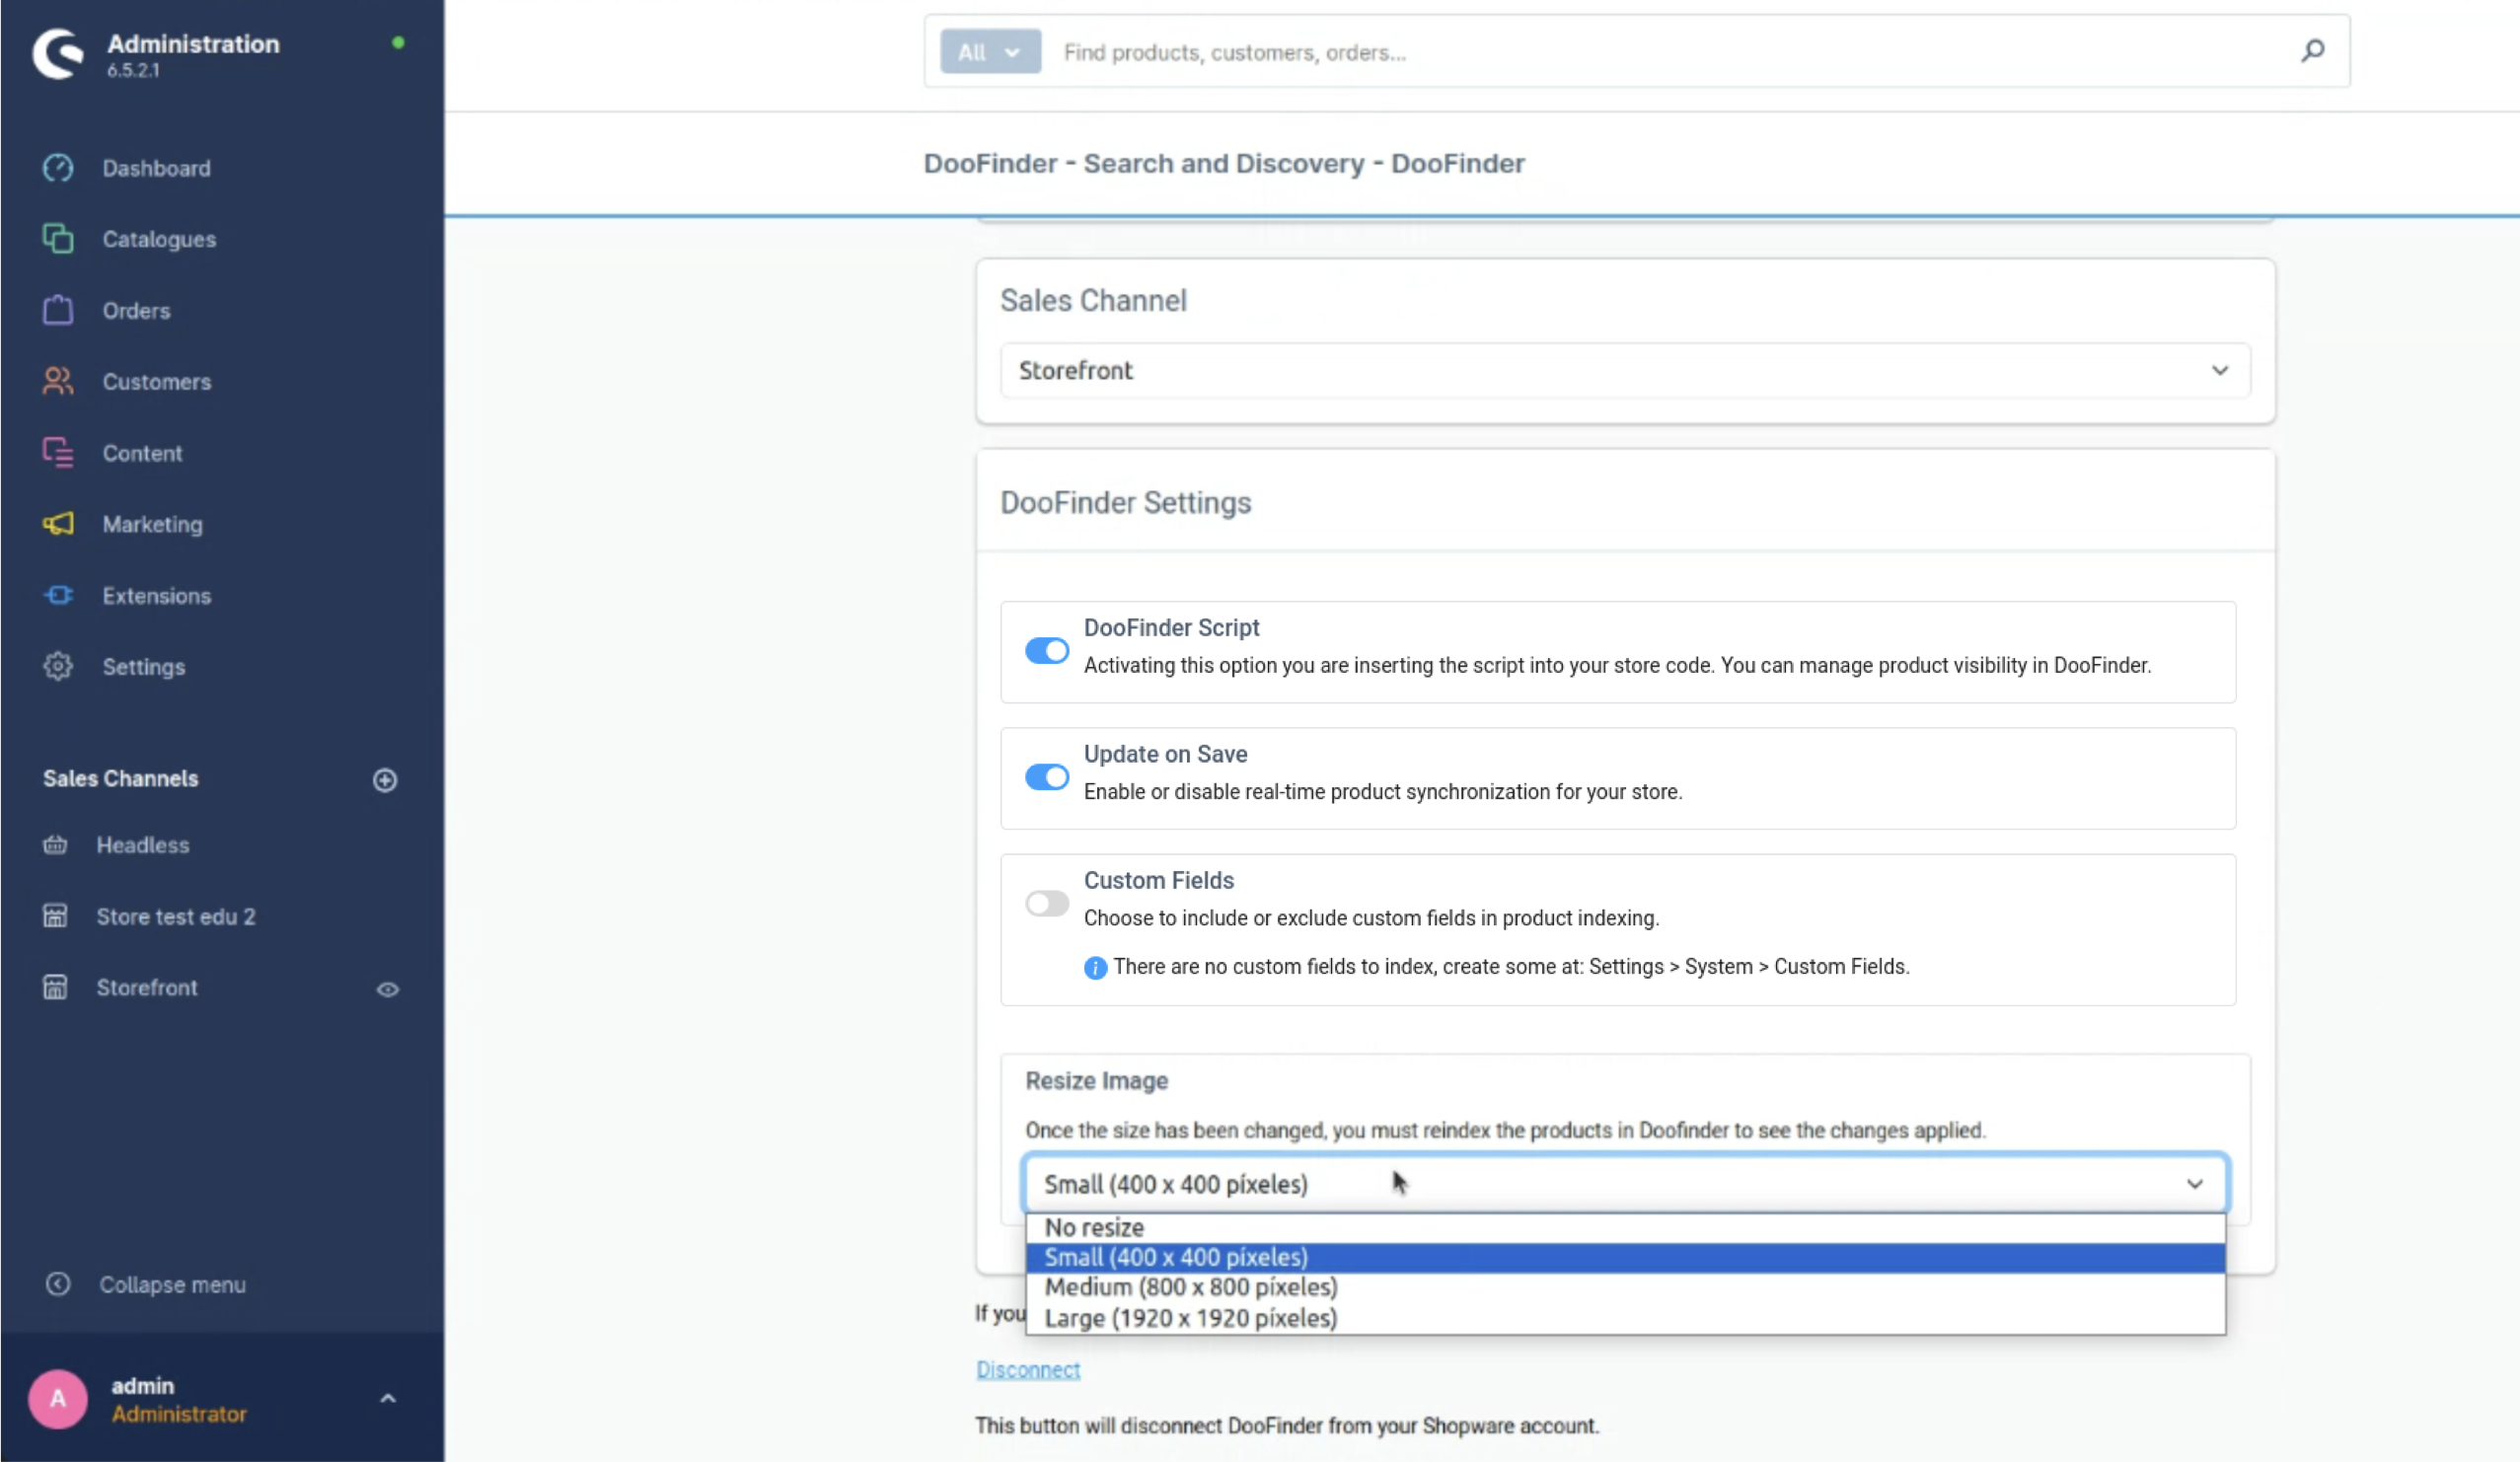
DooFinder Settings:
-
DooFinder Script: Activating this option you are inserting the script into your store code. You can manage product visibility from Admin Panel.
-
Update On Save: Enable or disable real-time product synchronization for your store.
-
Custom Fields: Choose to include or exclude custom fields in product indexing.
-
-
Rasterize Image: Select the size of the image to display on the layer or recommendations carousel. Once the size has been chosen, you must reindex the products in Doofinder. Keep in mind that once the size has been changed, you must reindex the products in Doofinder to see the changes.
Plugin Transition - Shopware 6
First, make sure you have:
- A Shopware account (mandatory).
- A Doofinder account.
Transitioning from an existing Plugin:
If you already have a Shopware 6 plugin installed, it’s likely from a third-party provider and will no longer receive support or updates. Since we’ve released an official DooFinder plugin, it’s necessary to transition to this latest version.
To ensure a smooth transition, please keep the third-party plugin installed while installing the Doofinder plugin. The third-party plugin should only be uninstalled as the final step.
With this official plugin, you’ll gain access to direct support from Doofinder and benefit from new features.
- To begin the installation process, first log into your Shopware 6 account.
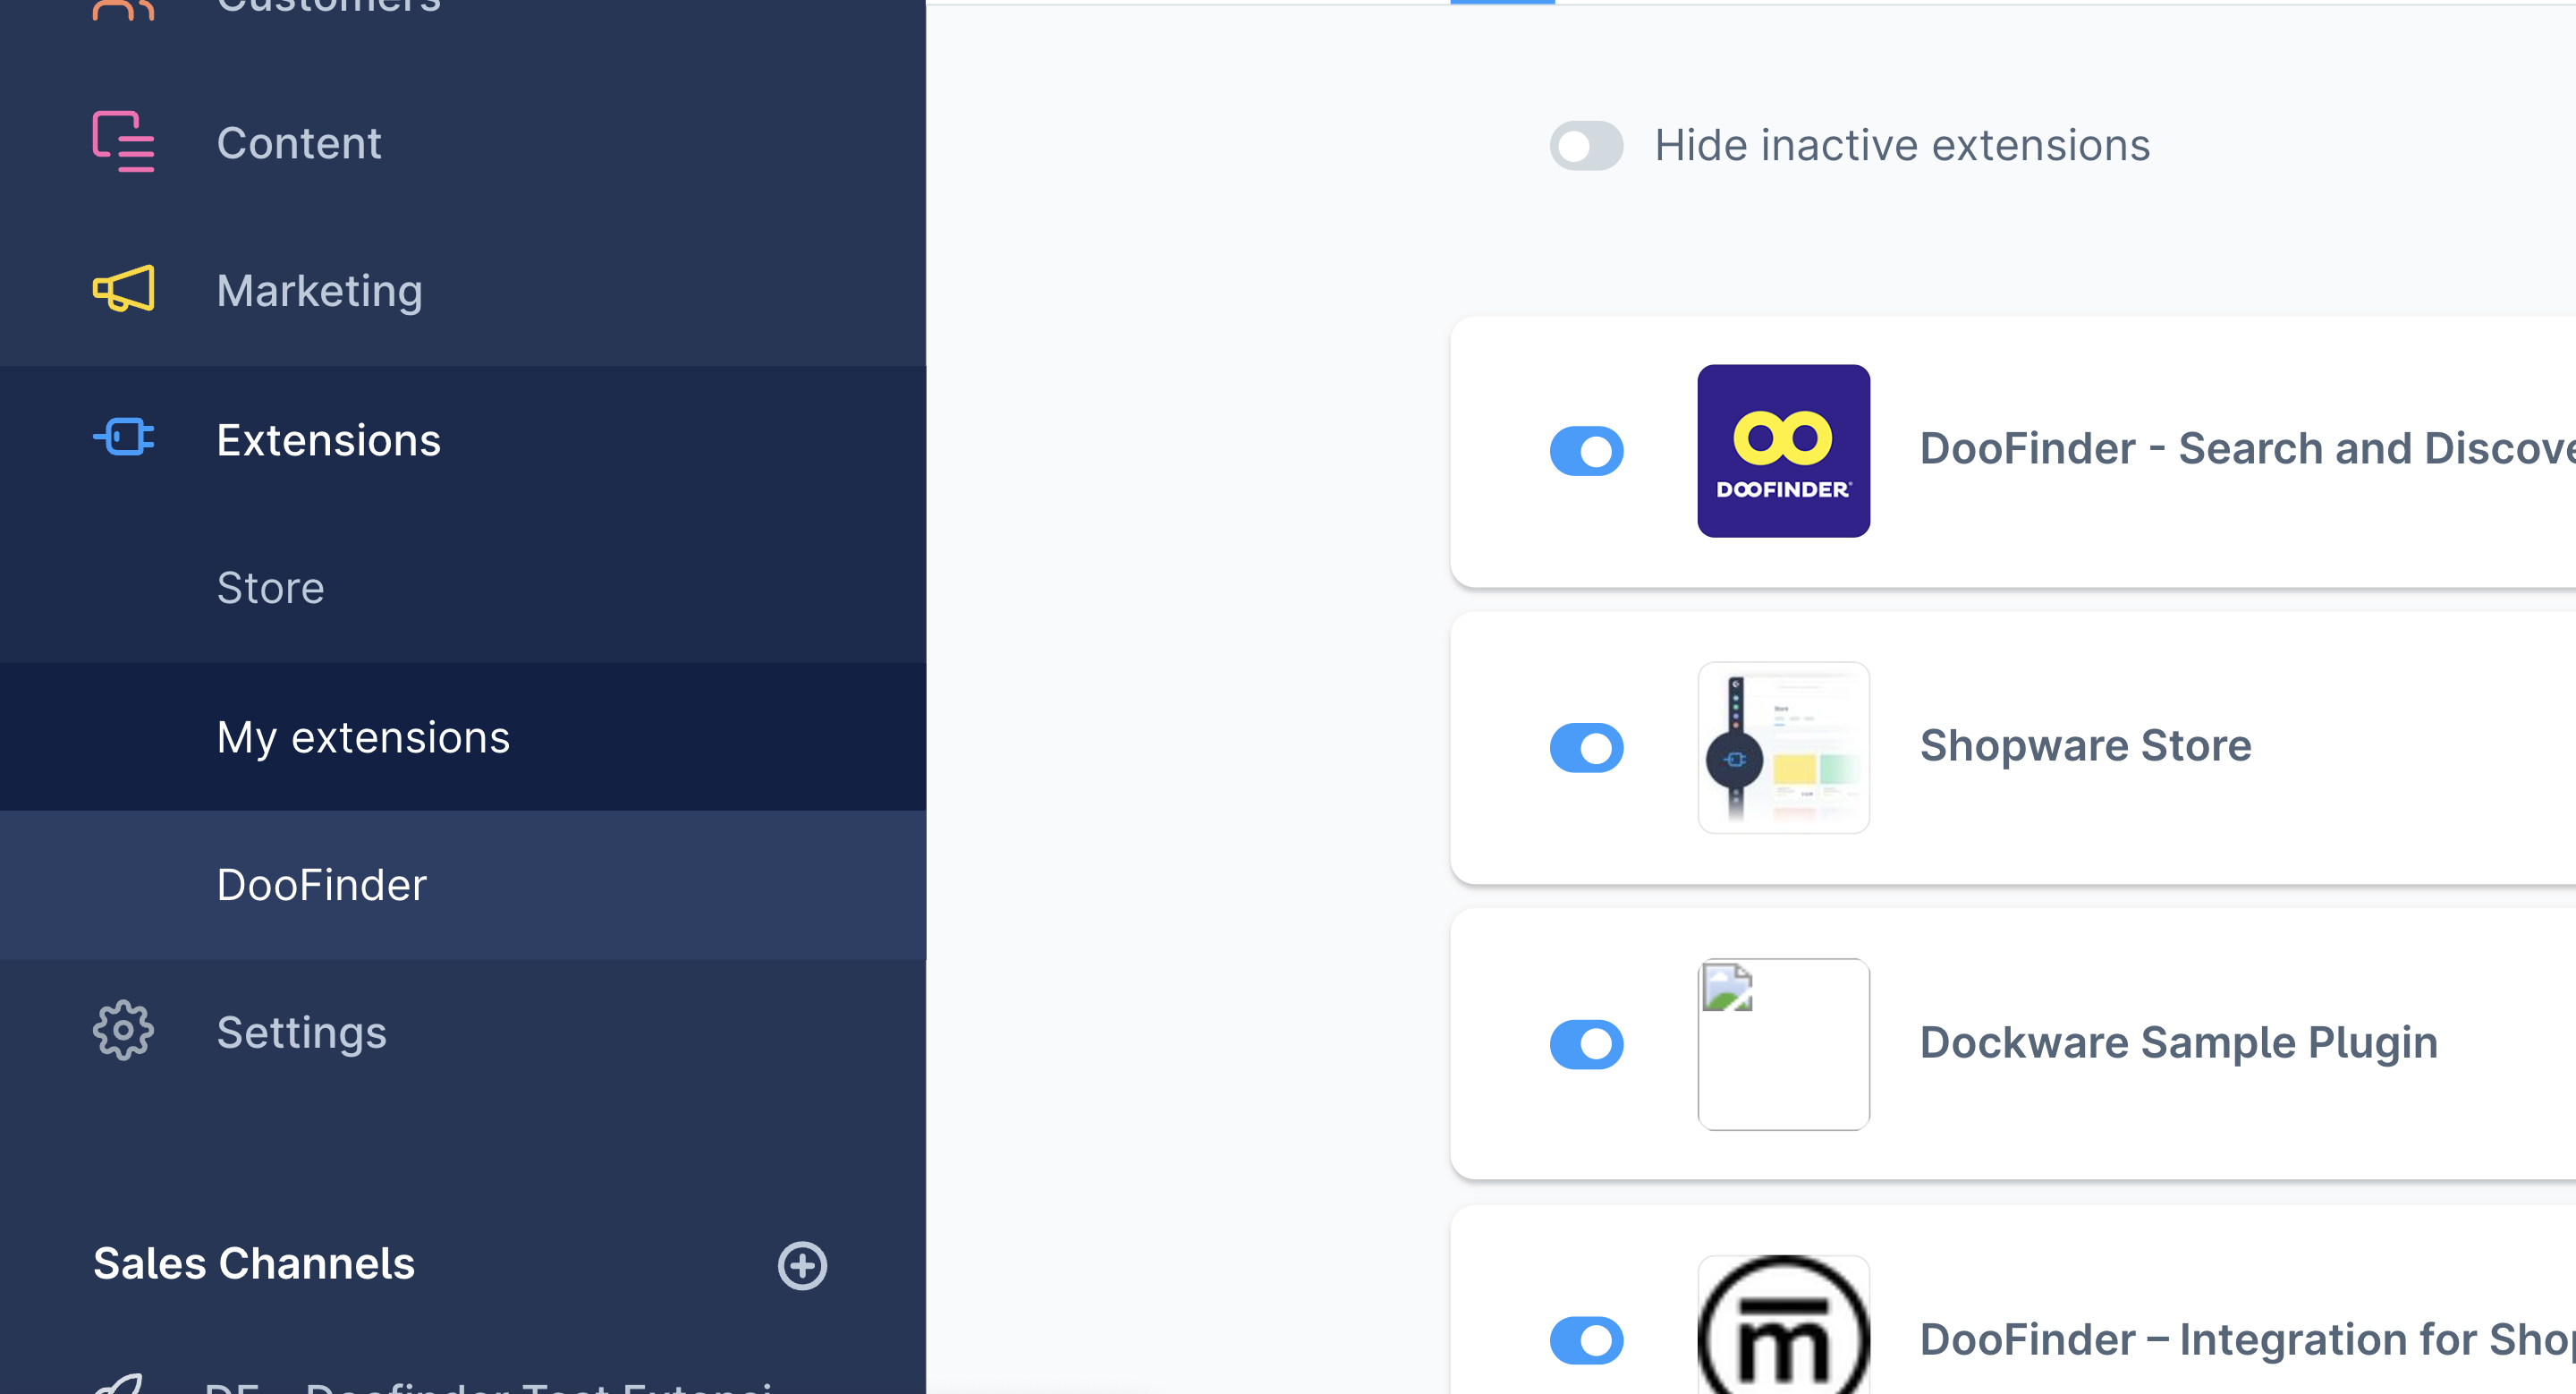
- Go to Extensions > My Extensions. You’ll see the DooFinder by Intedia plugin installed as shown in the image:
- Look for “DooFinder” on the top search bar to find the extension on the Shopware 6 official Marketplace.
- Click on the “Add Extension” to open it and begin the installation.
- Once the panel indicates that you can now open the extension, please go to the left menu in your Shopware account > Extensions > My Extensions.
- Find “Doofinder” by Doofinder and click on the three dots and click “Open Extension”.
- Now, follow the instructions shown on the screen. On the pop-up window, please complete the instructions.
- Choose an eCommerce industry that matches your store.
- Link your DooFinder account: If you already have a Doofinder account, press the "log in" button and enter your credentials. Otherwise, press the "sign up" button to create your Doofinder account.
- Once logged in on your DooFinder account, go to the module in your Shopware account > Extensions > My Extensions.
- You’ll find the new Doofinder extension available on the “My Extensions” list. Click on the “Install” button. Please, be patient and wait for the page to load. This activation might take a few moments for Shopware. Make sure the page is fully loaded. Then, continue.
- Wait for the app to install and, once installed, open DooFinder’s plugin from the left-side menu or simply click on the three dots to “Open Extension”.
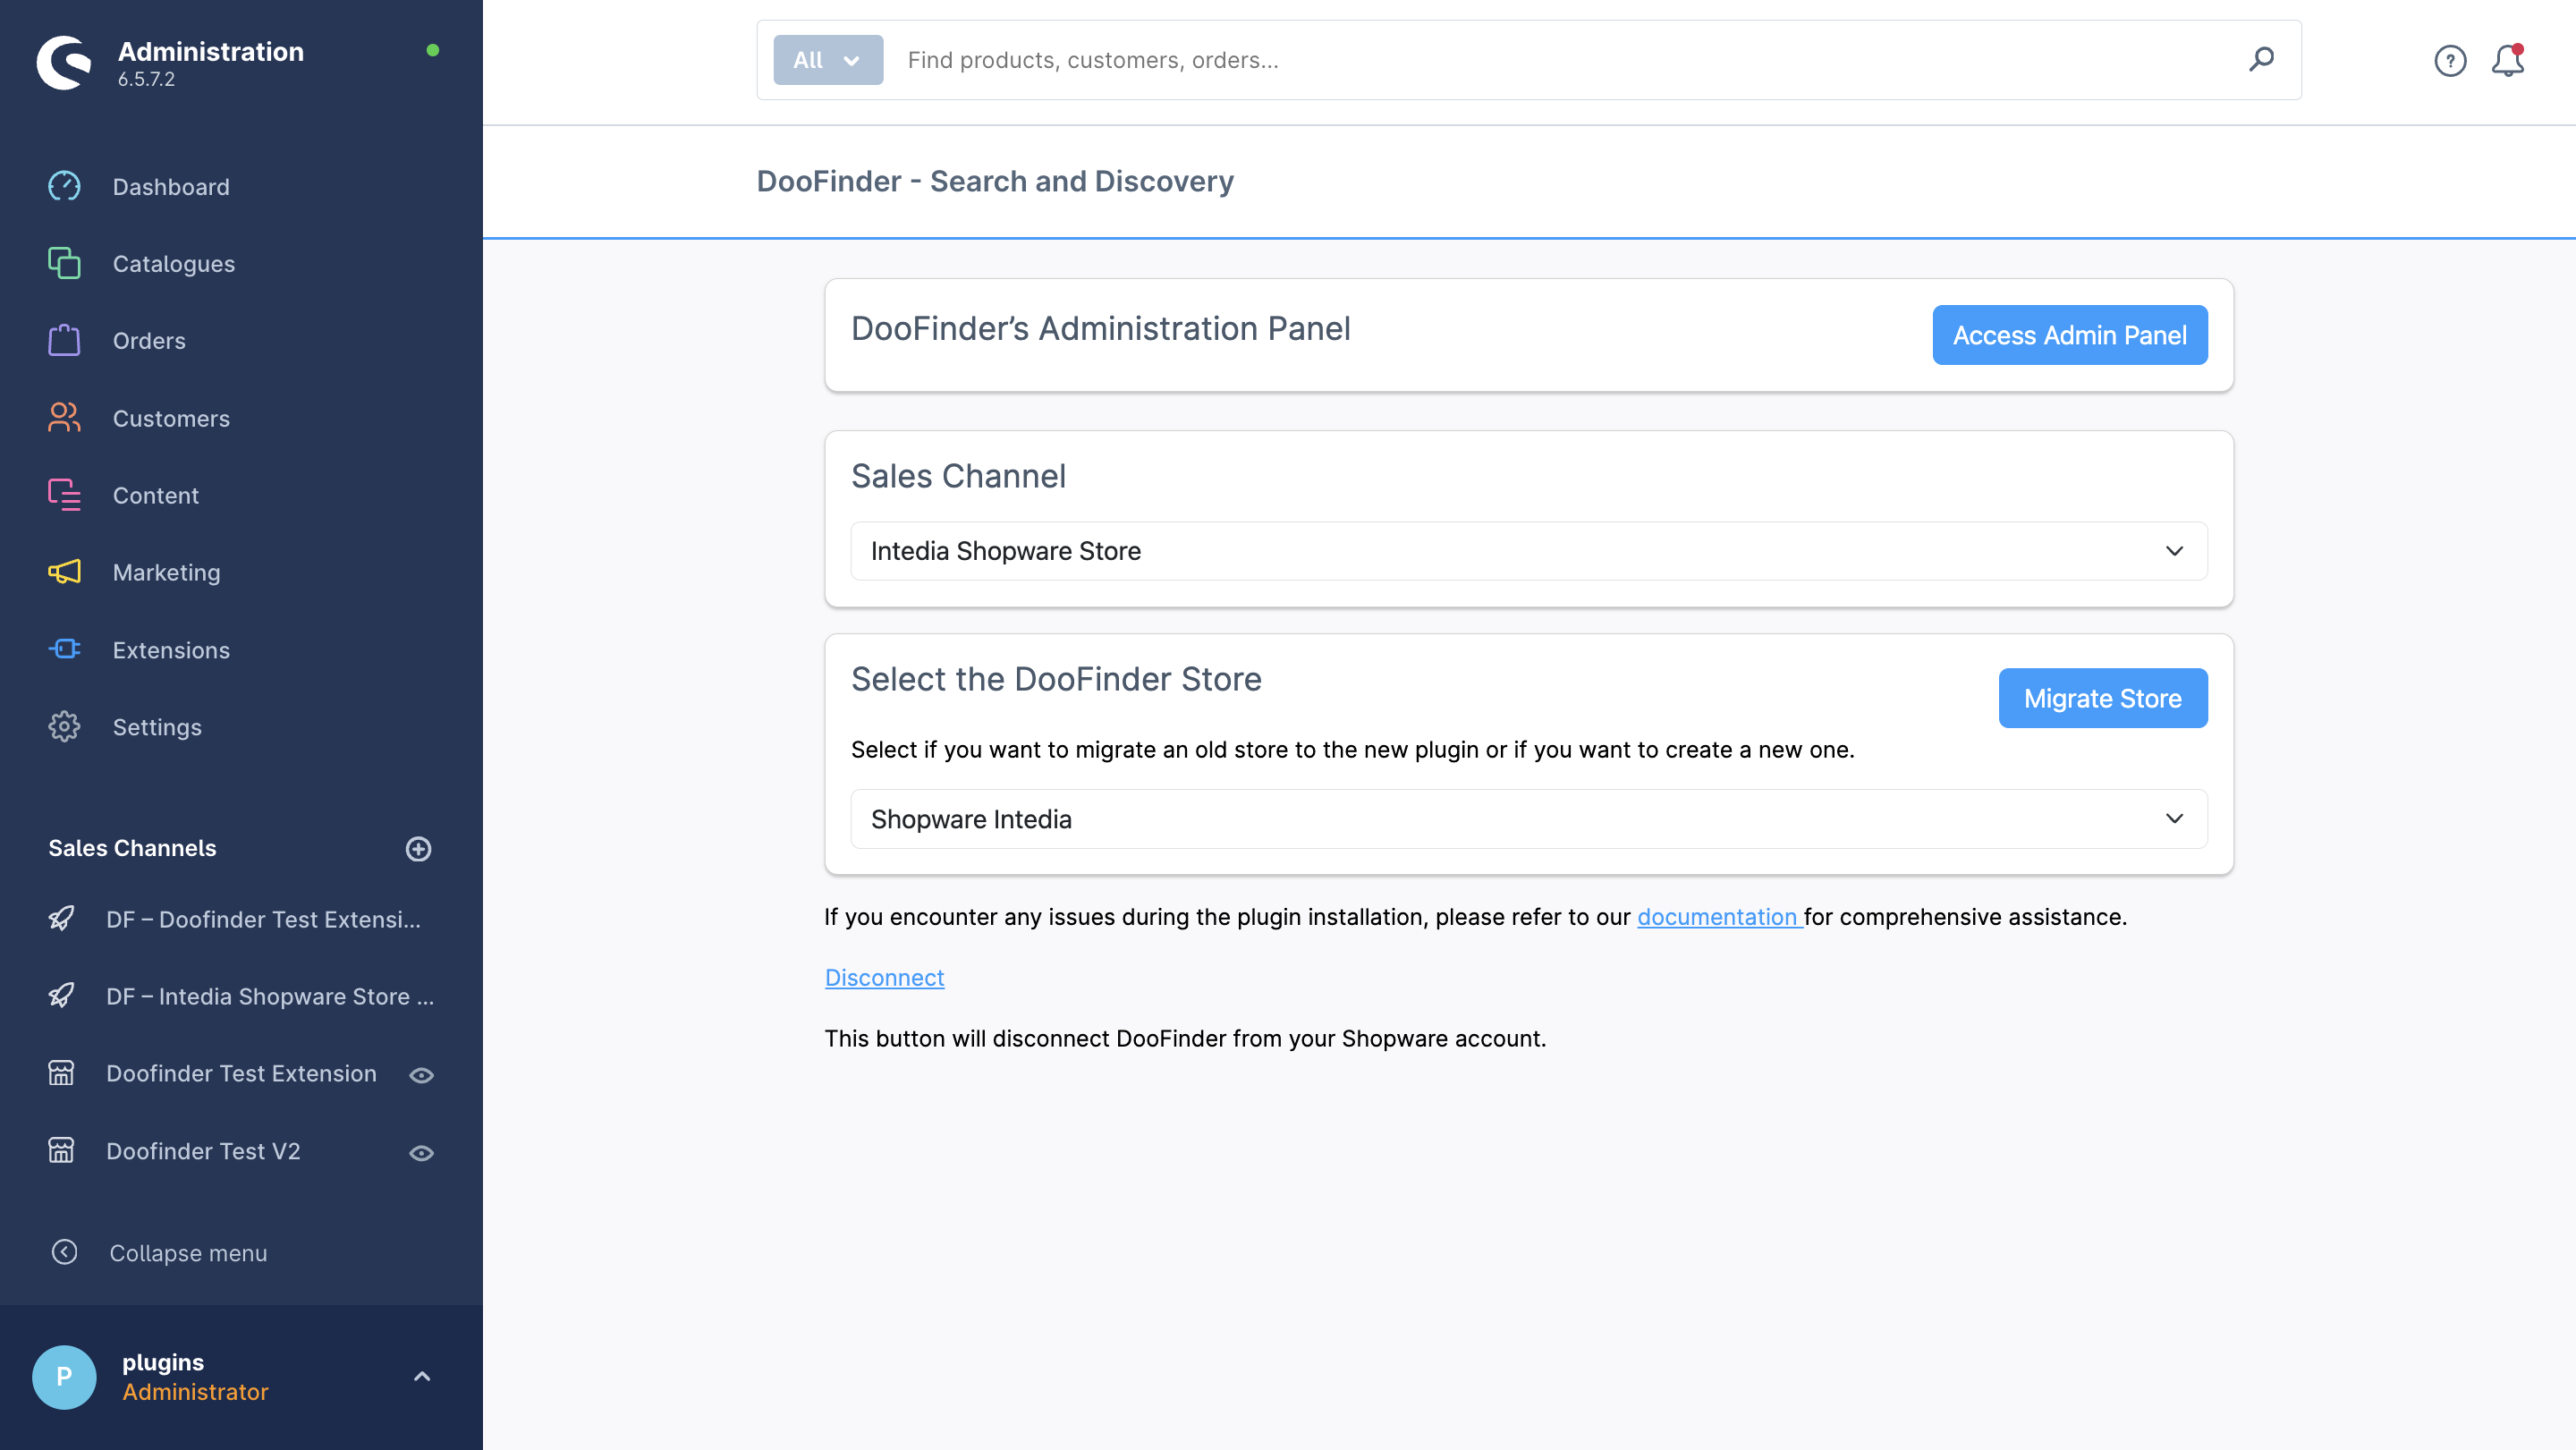
- Once inside, the module will open and you’ll be able to see:
- Doofinder Administration Panel: direct access to your DooFinder Admin Panel.
- Sales Channel: find more information about Shopware’s sales channels here.
- Select the DooFinder Store: select the DooFinder store where you want the migration to begin. Remember to migrate each store one by one.
- Go back to your Doofinder Admin Panel. If you check on your DooFinder Admin Panel, you’ll be able to see your current Store with its index feed as “Indexing with URL”.
- Go back to your Shopware 6 backend to the DooFinder Plugin configuration, and now click on “Migrate Store”.
- Once clicked and migrated, wait for the Product Catalog Indexation process to load.
- Once finished, check if the Indexation is correctly done and migrated. To ensure this, go to your DooFinder Admin Panel > Configuration > Serach Engines > select a Search Engine > Indices and you’ll now see “Shopware Site Key” as the indexation data form in your Store.
- To proceed with the migration, you need to uninstall the DooFinder Plugin by Intedia. To do so, go to Extensions > My Extensions > find the DooFinder Plugin by Intedia.
- Click on the three dots and select “Uninstall”.
You’ll now need to install the DooFinder’s official plugin. On the side menu, click on Extensions (Erweiterungen) > Store.
Warning:It is essential to log in with the owner of the Doofinder account; otherwise, the stores may not be recognized.
Once installed, enable the toggle and make sure to wait for the page to load. This activation might take a few moments for Shopware. Make sure the page is fully loaded. Then, continue.
Now, “DooFinder” is available and visible on the Extensions menu.
If the following message is shown on this step, please wait a few seconds and reload the page. Then, continue normally. Remember to use the same URL as configured in your site. For more information, click here.


Plugin Transition - Post Installation - Shopware 6
This installation's last step is configuring the plugin in your Shopware backend To do this, simply go to Extensions > DooFinder.
You can also access this screen under Extensions > My Extensions > find the DooFinder plugin and click on the three dots to “Open Extension”. From here, you can also Unistall if needed.
On this screen, you’ll find:
-
DooFinder Administration Panel: direct access to your DooFinder Admin Panel.
-
Sales Channel: find more information about Shopware's sales channels here.
-
DooFinder Settings:
-
DooFinder Script: Activating this option you are inserting the script into your store code. You can manage product visibility from Admin Panel.
-
Update On Save: Enable or disable real-time product synchronization for your store.
-
Custom Fields: Choose to include or exclude custom fields in product indexing.
-
-
Rasterize Image: Select the size of the image to display on the layer or recommendations carousel. Once the size has been chosen, you must reindex the products in Doofinder. Keep in mind that once the size has been changed, you must reindex the products in Doofinder to see the changes.
Multicurrency In Shopware 6
Starting from February 11, 2025, new stores created in Doofinder will take advantage of the new multipricing functionality, which simplifies the structure by creating a single Search Engine for each store. This allows seamless handling of multiple prices across currencies or customer groups without the need to create separate Search Engines for each currency.
For stores created prior to this date, the reinstallation is required to benefit from the multiprice attribute and its functionalities.
Regulation Price
In Doofinder, we index the value of regulation_price, which is a reference price used to meet legal requirements in some regions. It represents the lowest price the product had in the last 30 days and is stored in the CalculatedPrice object. This price is shown to customers so shops comply with laws that require transparency about discounts and price reductions.
Layer
If you’ve already contracted Search, the fullscreen Live Layer will be enabled by default, on desktop and mobile. If you want to create a new Layer, see this document Create a Layer.
Also, in your DooFinder Admin Panel, under Configuration > Search Engines > select the 3 dots next to the search engine right side > Edit setup, you can check the Search Engine language, and in the configuration of your layer in Layer Settings you can check if the CSS selector of your Layer is correctly placed.
Update On Save
-
What Update on Save does?
When Update on Save is enabled in the Doofinder Shopware 6 plugin, any product created, modified, or deleted in your Shopware admin is automatically synchronized with your Doofinder index. This keeps your search results aligned with your catalog without requiring a full reindex.
A full indexation also does the same, however, only when triggered (manually or during your configured indexing options).
You can enable or disable the update on save in Shopware under Extensions > Doofinder Search and Discovery > Update On Save.
-
How updates are processed:
Async batch updates to Doofinder: saving a product doesn't trigger an immediate API call. Instead, changes are queued per sales channel and sent in batches of 100, or after 1 minute, whichever comes first. This will keep the admin saves fast and will handle bulk operations (e.g. ERP/PIM imports).
The 100-item threshold and 1-minute window apply per sales channel and they do not interfere with each other.
-
Multiple Sales Channel
The Doofinder plugin creates one Doofinder Store per Shopware sales channel. Each Store maintains its own independent Update on Save queue and applies the batching logic described above on its own schedule.
If your Shopware installation uses multiple sales channels, each channel will trigger its own indexing operations when products in that channel are modified. Adding new sales channels increases the total indexing workload equivalently with the number of channels.
-
Recommended configuration for large catalogs
For stores with large catalogs or frequent bulk update operations, we recommend running update on Save together with a scheduled full reindex as a complementary safety mechanism.
To configure this combination:
- In your Shopware admin, ensure Update on Save is enabled in Extensions > Doofinder Search and Discovery.
- In your Doofinder Admin Panel, go to Configuration > Search Engines, select your search engine, then click See indices > Indices > Configuration > Automatic Indexing.
- Choose a frequency for the scheduled indexings, normally for large catalogs a daily overnight reindex is enough.
If your Shopware installation has multiple sales channels, repeat step 2 for each Doofinder Store in your Admin Panel. Each search engine has its own indexing configuration.
Finally, if your store receives bulk catalog updates from an external system (such as ERP) always at pre-determined times, schedule the full reindex to happen shortly after.
Module Update
Doofinder has its own Module for the majority of platforms, which must be regularly updated in order to keep the functionalities working properly, and latest updates pull through. Although not mandatory, we recommend always keeping the modules up-to-date.
How Do I Update The Module?
In Shopware 6, to get the module updated, you must check it under the Shopware’s Store, see here!
Then check from your Shopware admin, under Extensions (Erweiterungen) > Store > Apps > look for Doofinder and compare if the versions are the same, and update it accordingly: