The Doofinder plugin can be used on your Wordpress site for blog post search and/or on your WooCommerce site for product search. Depending on your site, Doofinder will set up your store to index one or the other. If you are using both, all of your content will be indexed.
Let's say you have WooCommerce installed and you enable Doofinder. Your product catalog will be indexed by default, and you will be able to add the index of your blog later on from our Admin Panel. If you are only using Wordpress, a post index will be created for you instead.
If you are already using both (Wordpress and WooCommerce), all your content will be indexed and you can separate them by setting a Multi-Index Layer on the results screen.
Our plugin works both ways, products and posts. To learn more about how to create additional indices, visit this link.
Installation
To install and activate Doofinder in your Store, follow these steps:
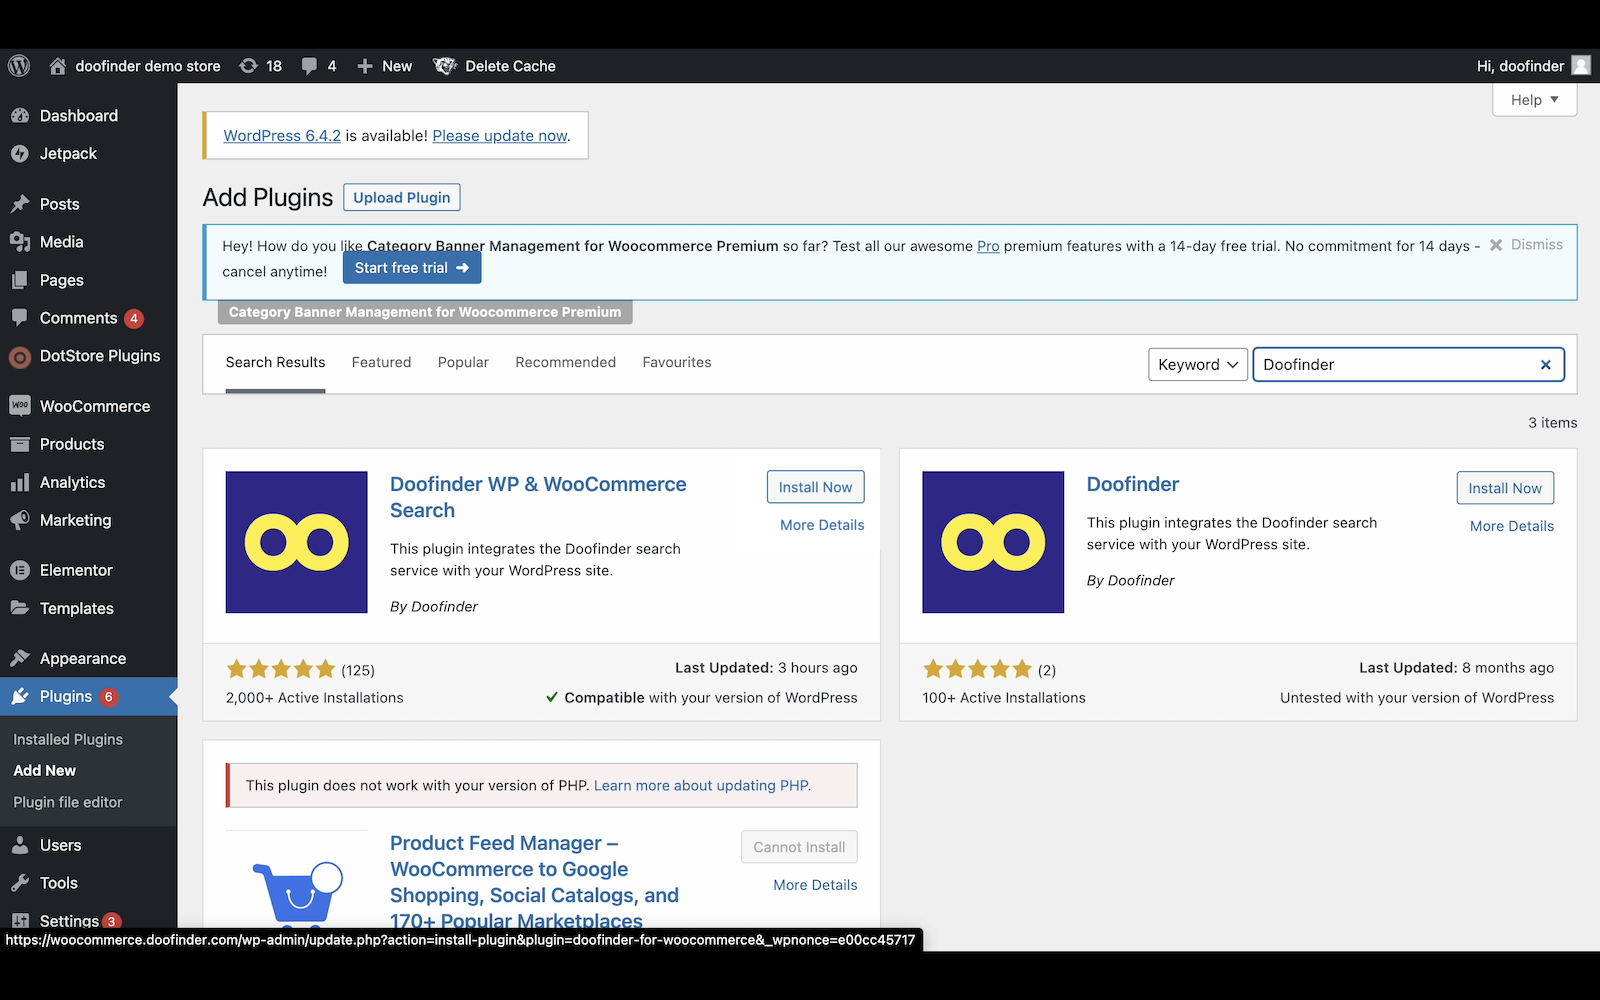
- Go to Plugins > Add New and type doofinder in the search box and click on "Install Now" in the Doofinder WP & WooCommerce Search option.
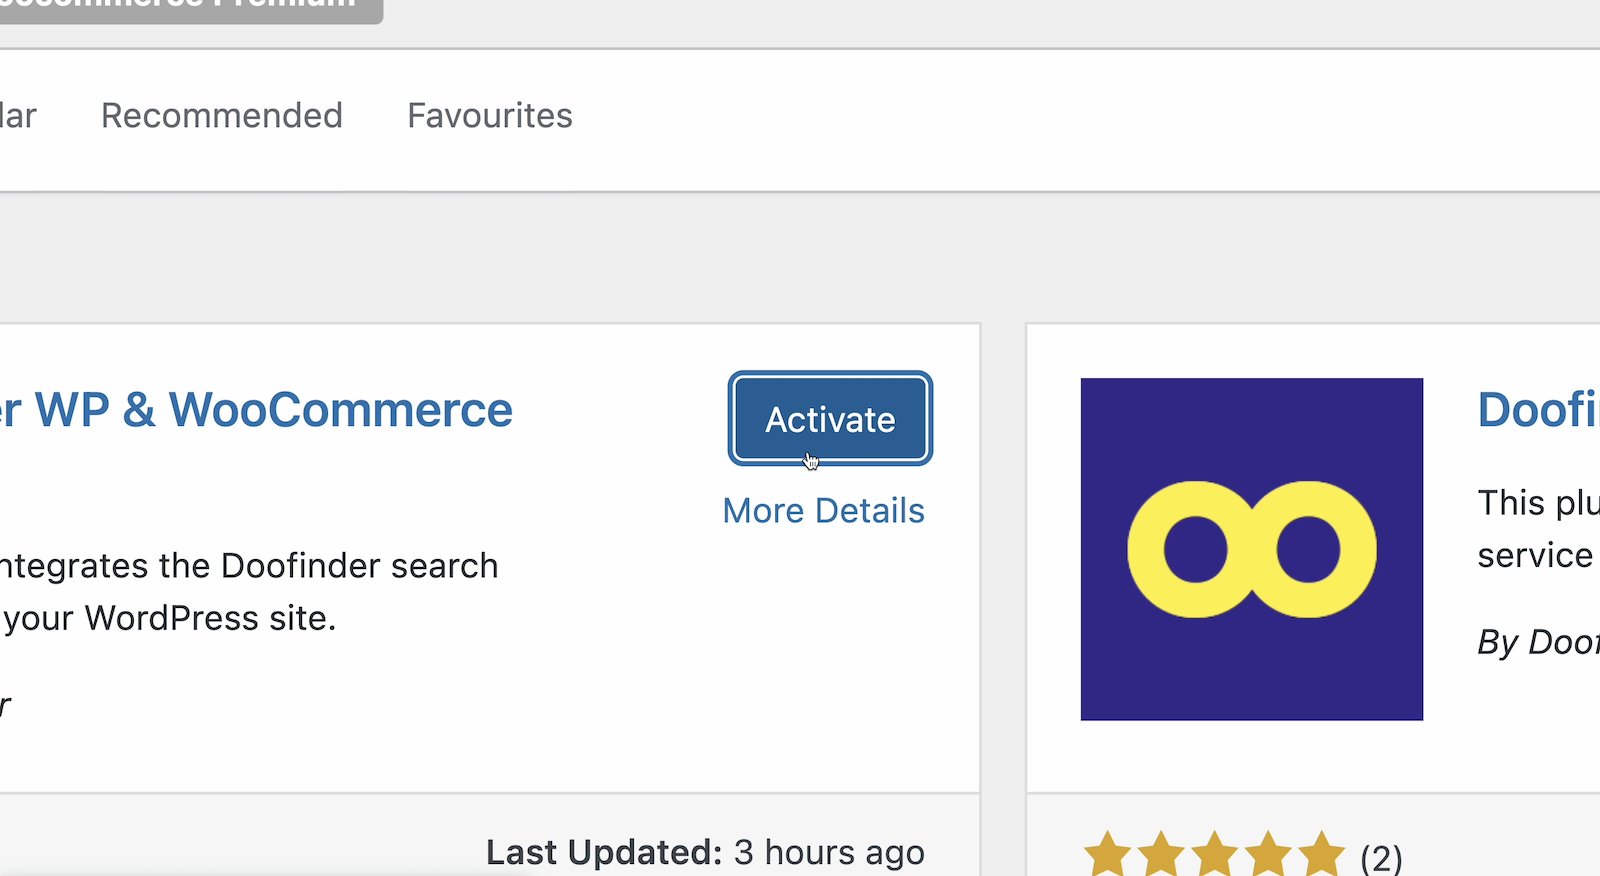
- Next, click on "Activate" to activate the plugin.
- Go to Plugins > Installed Plugins and find your newly installed Doofinder plugin. Click on the "Run Setup Wizard" button to start the configuration.
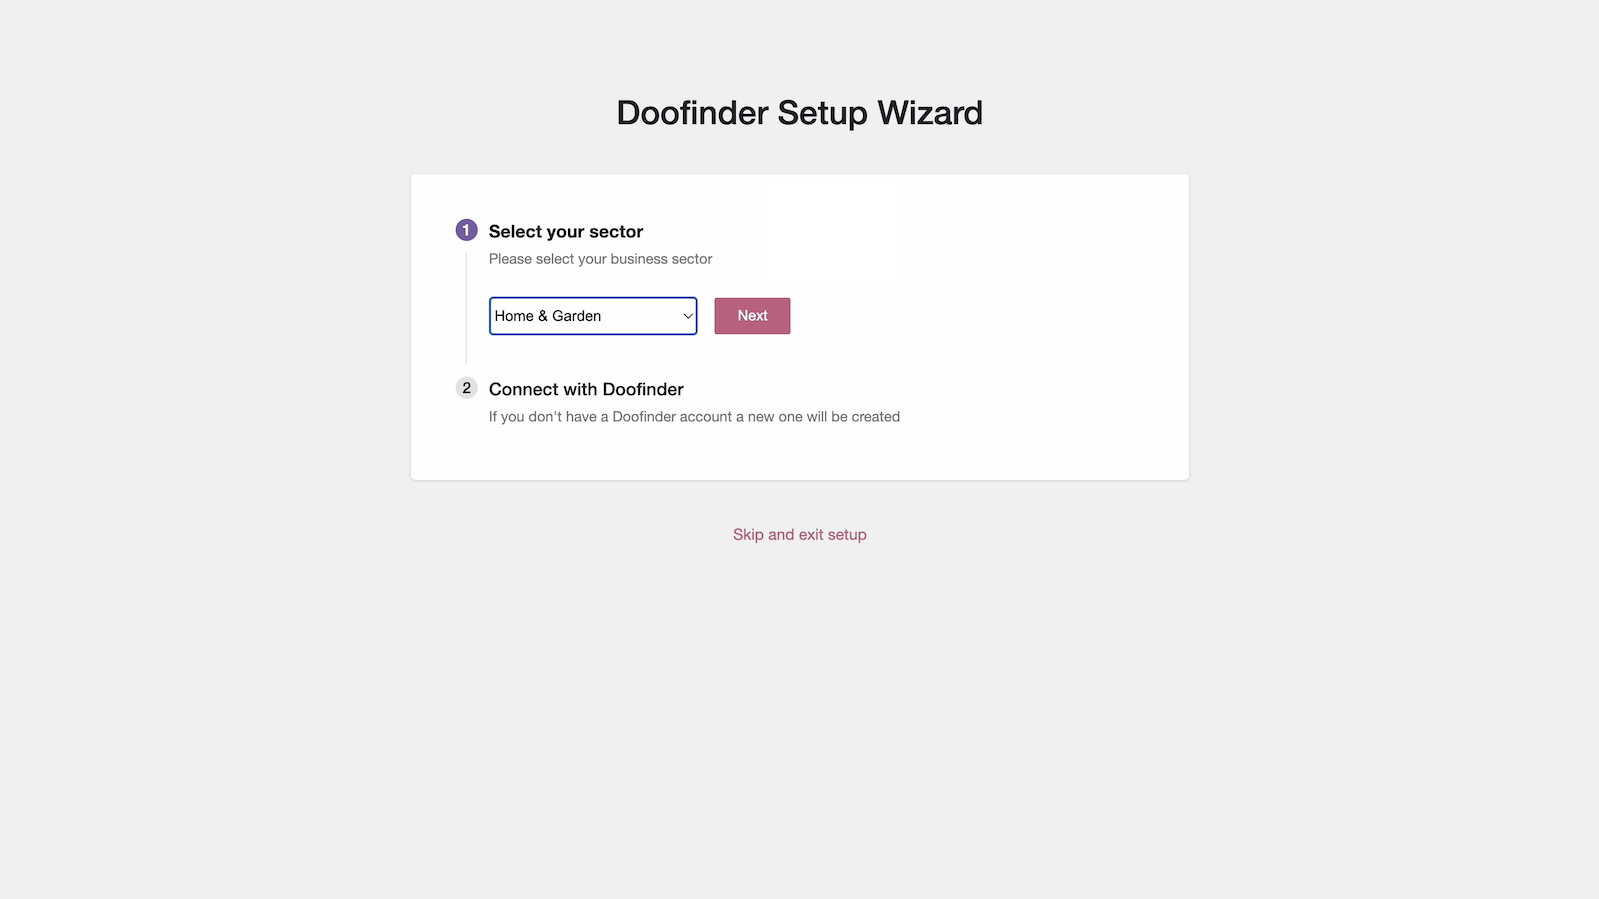
- Now follow these two simple steps to complete the installation process.
- Step 1: Choose your business sector from the dropdown menu and click on "Next".
- Step 2: Log in with an existing account or sign up and we'll create one for you.

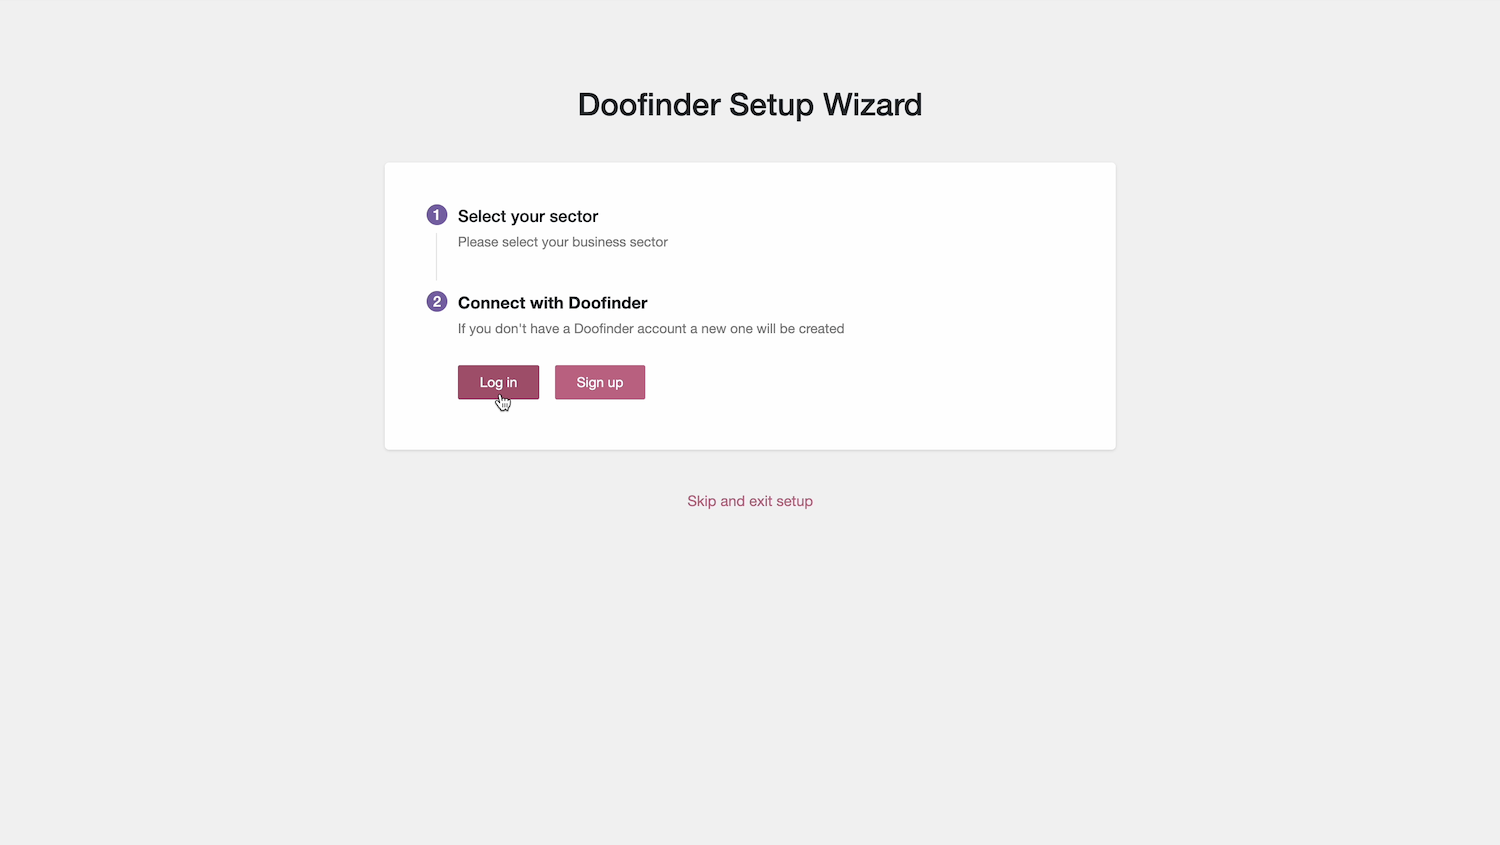
Follow the login/registration flow and once done, the Index, Search Engines and Layer will be created automatically. Simply wait for the wizard to finish the configuration.
Post-Installation
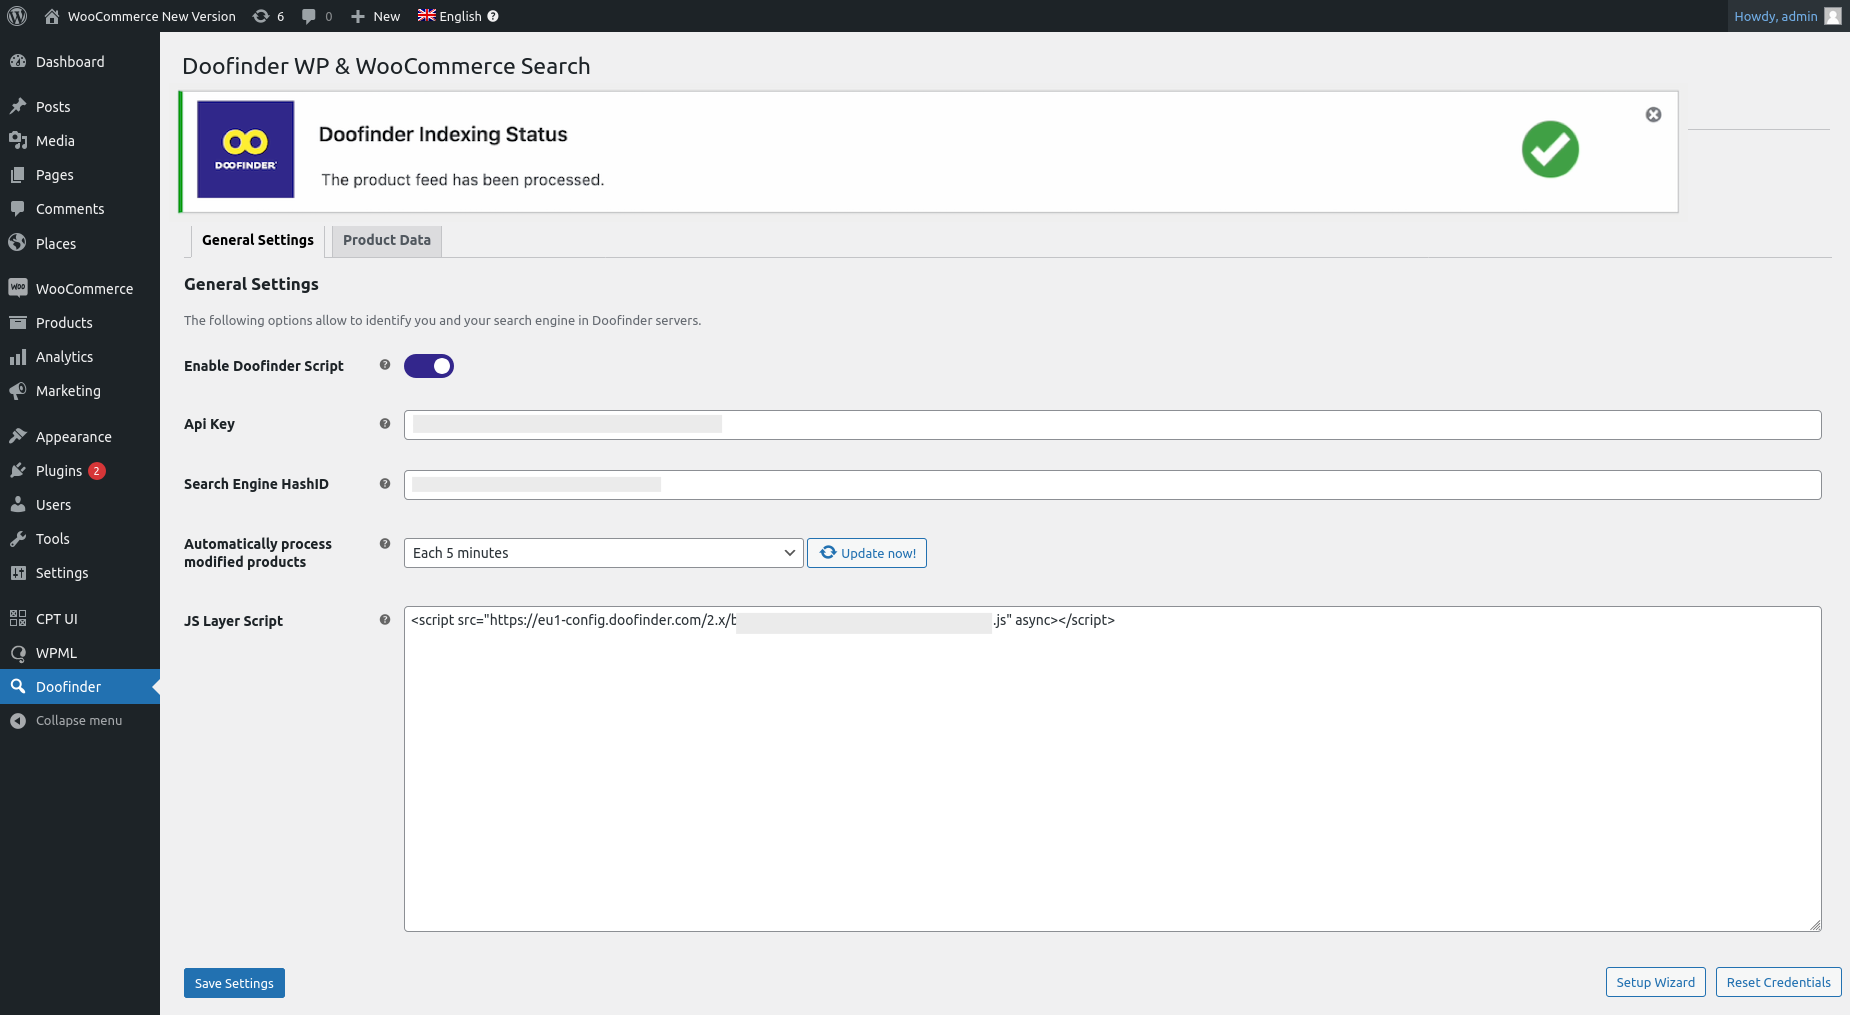
Once installed, you will be redirected to your Doofinder Settings. From here you can check you indexing status at the top of the screen, enable/disable the search Layer and set the intervals for the update on save option under General Settings.
-
Doofinder Script: Activating this option you are inserting the script into your store code.
-
API Key: It can be found in the Doofinder Admin Panel > Account > API Keys.
-
Search Engine Hash ID: Search Engine's Hash ID can be found in the Doofinder Admin Panel. Click on Configuration > Store Search Engines, you will see your Search Engines and the Hash ID will be visible below the name of your Search Engine.
-
Update on save: Select the time interval in which you want your information to be updated.
-
JS Layer Script: That is your Doofinder installation script.
Once the indexing task is finished, your layer will be enabled. You can also check your indexing status in your Doofinder Admin Panel by going to Configuration > Indices.
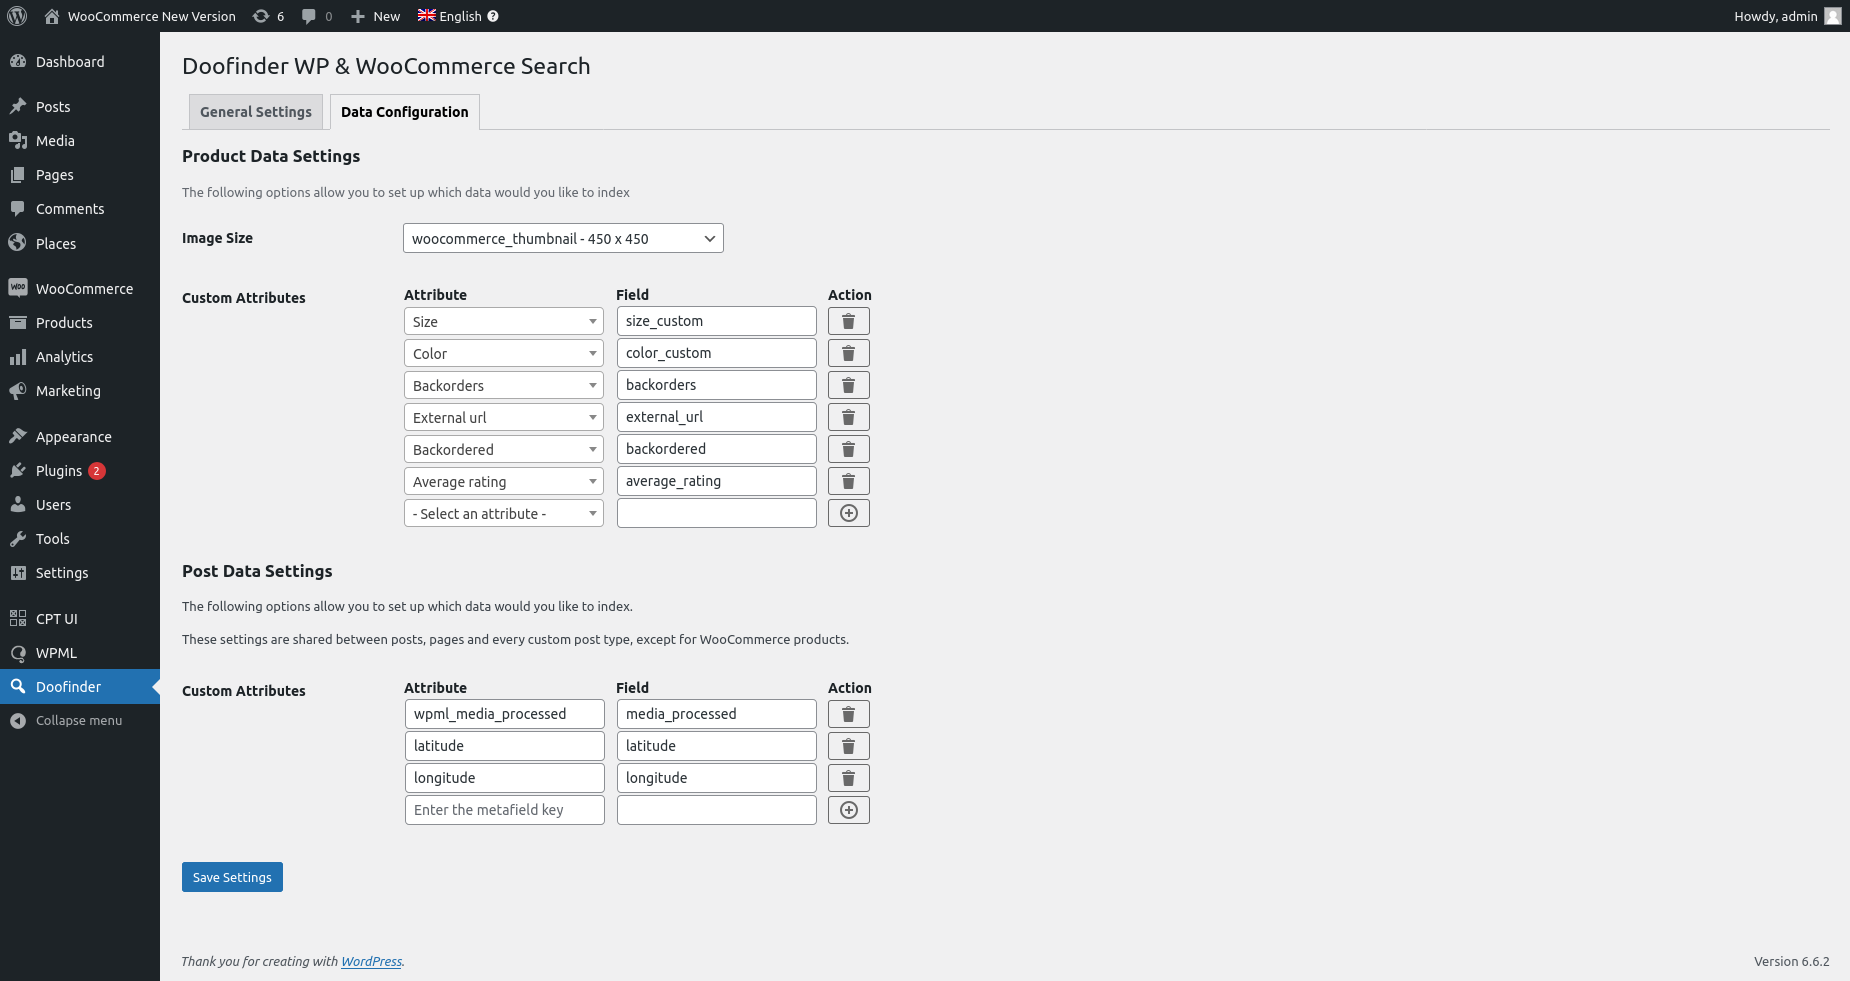
Under the "Data Configuration” tab you will be able to configure the set up of the data you would like to index. You’ll find an option under "Product Data Settings" to configure the Image Size and Custom Attributes. And, another section to configure Post Data Settings.
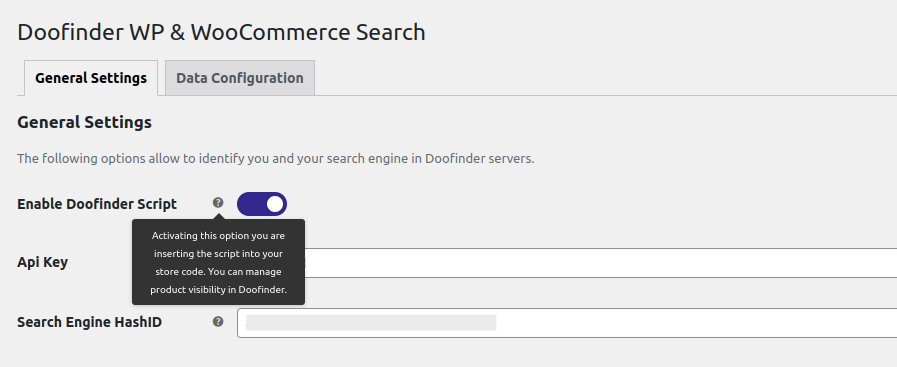
Doofinder Script
The script is generated automatically during the installation process. Make sure that you enable the Doofinder Script option. Activating this option you are inserting the script into your store code. You can manage product visibility from your Admin Panel.
Search Engine
The Search Engine is automatically created.
Layer
A Fullscreen Live Layer will be generated and activated by default. To create a new layer or customize it, check these articles Create a Layer and the Appearance section on the Configure your Layer article.
Create Additional Indices
When using the Woocommerce plugin you can automatically enable different Multi-Indices, such as:
- Posts
- Product Categories
- Custom indices, examples:
- Blog & Articles
- Website pages
- Global Styles
- Pages
Refer here to learn how to create additional indices.
Attributes Included in The Feed
Product Profit Margin
Doofinder indexes the Product Profit Margin, the attribute responsible for showing product profitability. This mimics the process of physical retail stores allowing you to manage profit margins at the product or brand level when deciding how and which products to promote or offer.
How is it done? We calculate both percentage margin (df_calculated_margin_percentage) and absolute profit per unit (df_calculated_profit_per_unit).
How can you use it? Configure boosting rules to prioritize higher-margin products in the search results.
Stock Quantity
Doofinder indexes the product stock quantity apart from the availability information. This means that we’re indexing the numerical value of the available stock of your products, at both variant and parent product levels, allowing you to use this information on the store.
How to use it? The stock quantity can be used in the boosting rules, relevance criteria or any other merchandising configuration.
Update on save: when stock changes and the platform uses update on save, only the affected products are indexed. This avoids a full reindex, reduces system load, and makes the new stock levels visible almost instantly.
Plugin update might be required to use this feature.
Woocommerce WPML
The Doofinder module of Woocommerce only supports multilingual stores through WPML (WordPress Multilingual Plugin). We do not support any other third party language plugin, such as translation tools.
If you are using WPML, you are all set! The setup wizard will automatically create designated search engines for every each language.
If you are not using WPML, you can still work with multiple languages, but it requires a manual setup. You will need to export a separate product data feed for each additional language (apart from your main one) and configure a search engine for each language individually. Here you can find our documentation regarding the Product Data Feed.
Indexing Custom Taxonomies
- Ensure custom taxonomies are activated.
- Assign terms to products
- e.g., Brand > HP, Series > LaserJet.
- Upgrade the module and clear cache.
- Finally, reindex in Doofinder by clicking in process now!
If everything was followed correctly, your custom taxonomies (brands, series, models) will appear as searchable and filterable product attributes in Doofinder.
Module Update
Doofinder has its own Module for the majority of platforms, which must be regularly updated in order to keep the functionalities working properly, and latest updates pull through. Although not mandatory, we recommend always keeping the modules up-to-date.
How Do I Update The Module?
In Woocommerce, directly from the module, you can have it updated.
Go to your WooCommerce admin > Plugins > Installed Plugins > look for Doofinder > Update it!
Example:

You can update it manually or configure it to be automatic in Woocommerce!