Previous Requirements
- Active Live Layer
- Single Script Installation
- If your account was created before 15/06/2024, please update your Script or the latest version of your Plugin.
Recommendations Panel
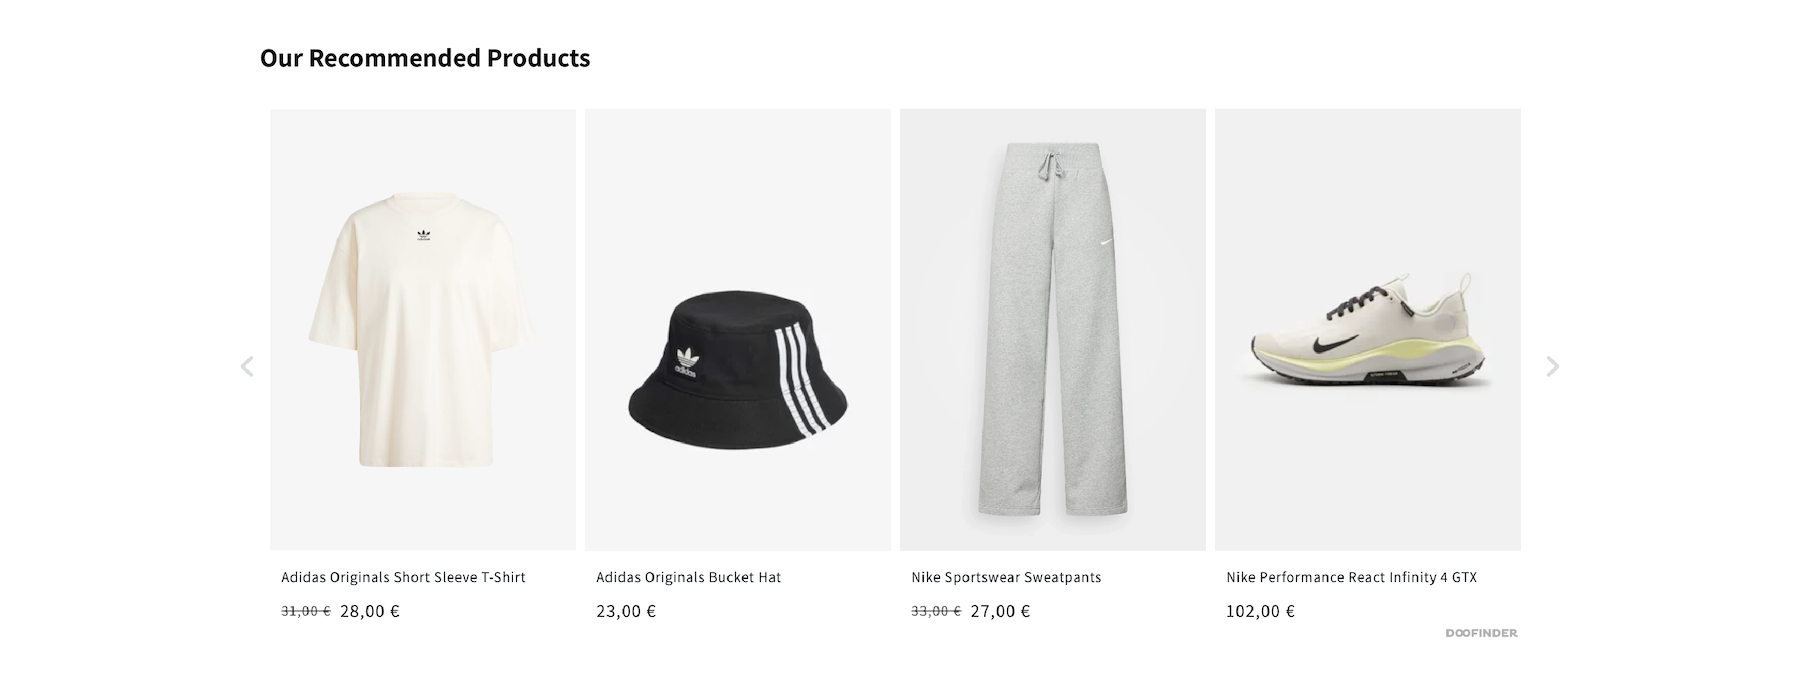
You can use product Recommendations to encourage cross-selling and upselling within your store with personalized product carousels. Leverage logic to deliver tailored recommendations to your customers and scale your sales effortlessly.
To find Recommendations on your Admin Panel, please go to “Recommendations” on the left-side menu.
These are the simplified steps for configuring a Carrousel. Dive into the article to find out more about them:
- Add Carrousel.
- Select on which Page you want to display the Carrousel.
- Add the CSS Selector to place the Carrousel.
- Select Logic for your Carrousel.
- Add Search Engines.
- Create Filters: filter the recommended products displayed.
- Enable or Disable Fallback.
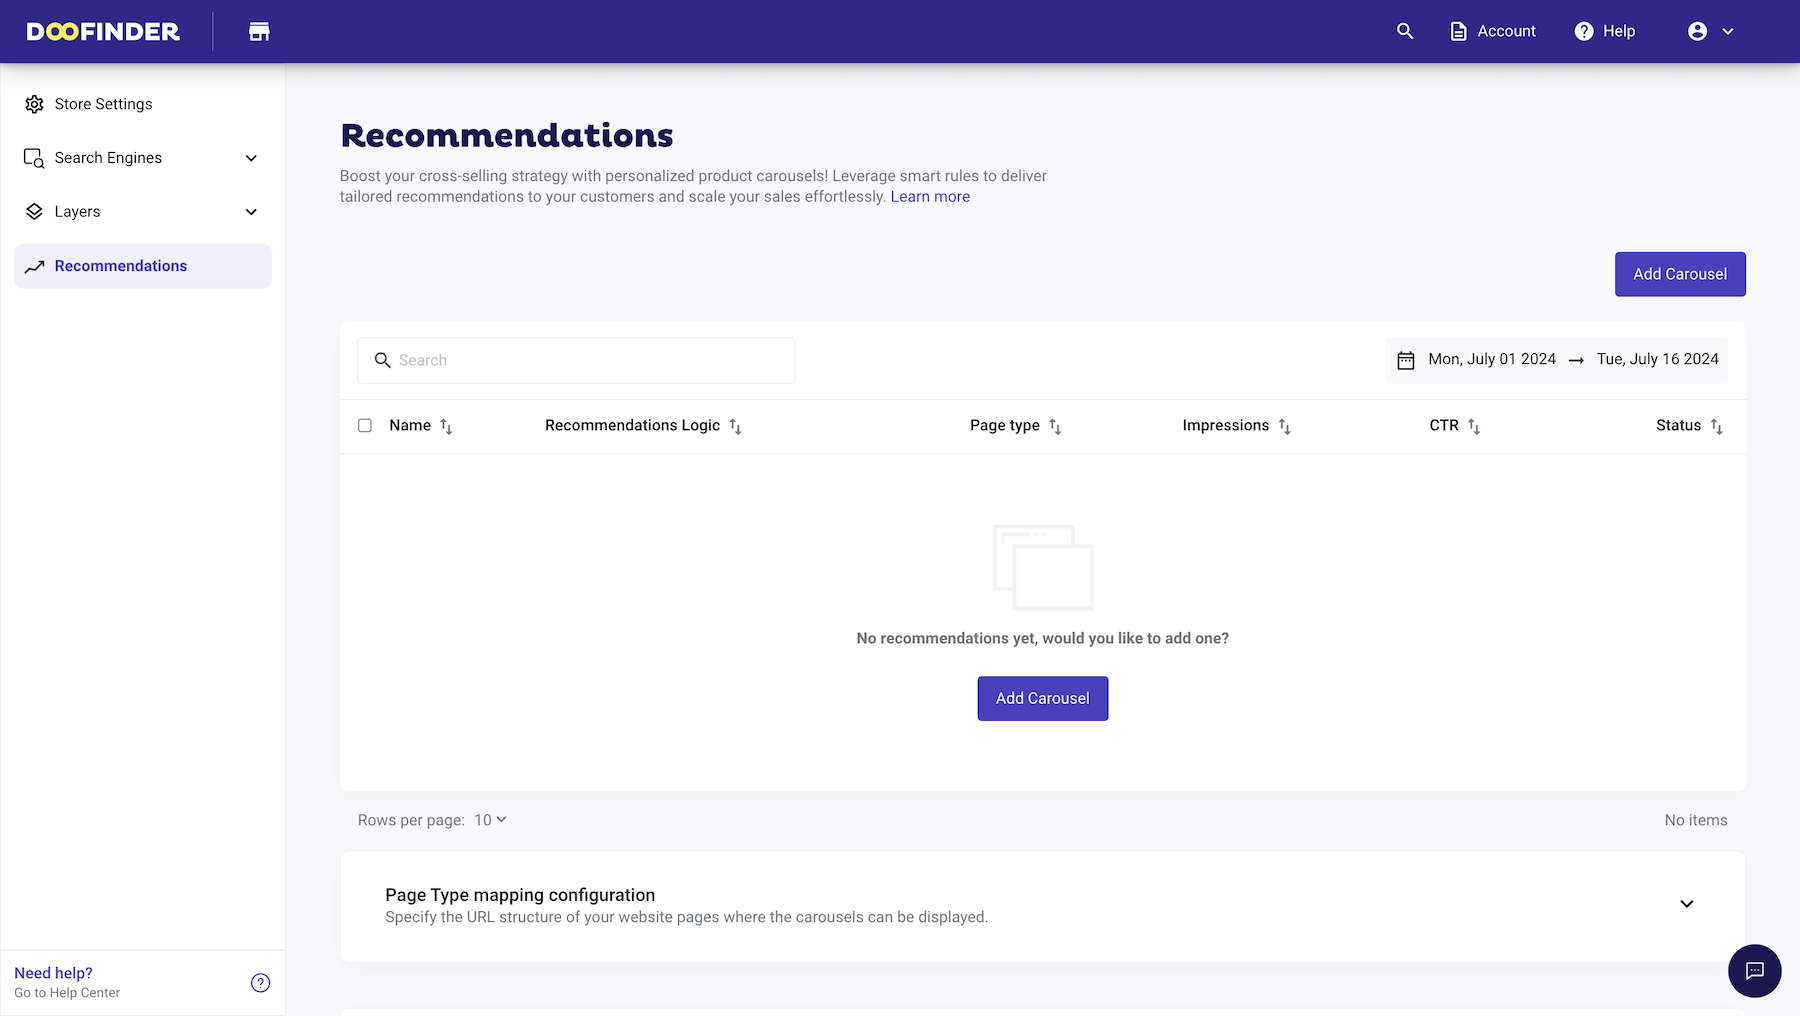
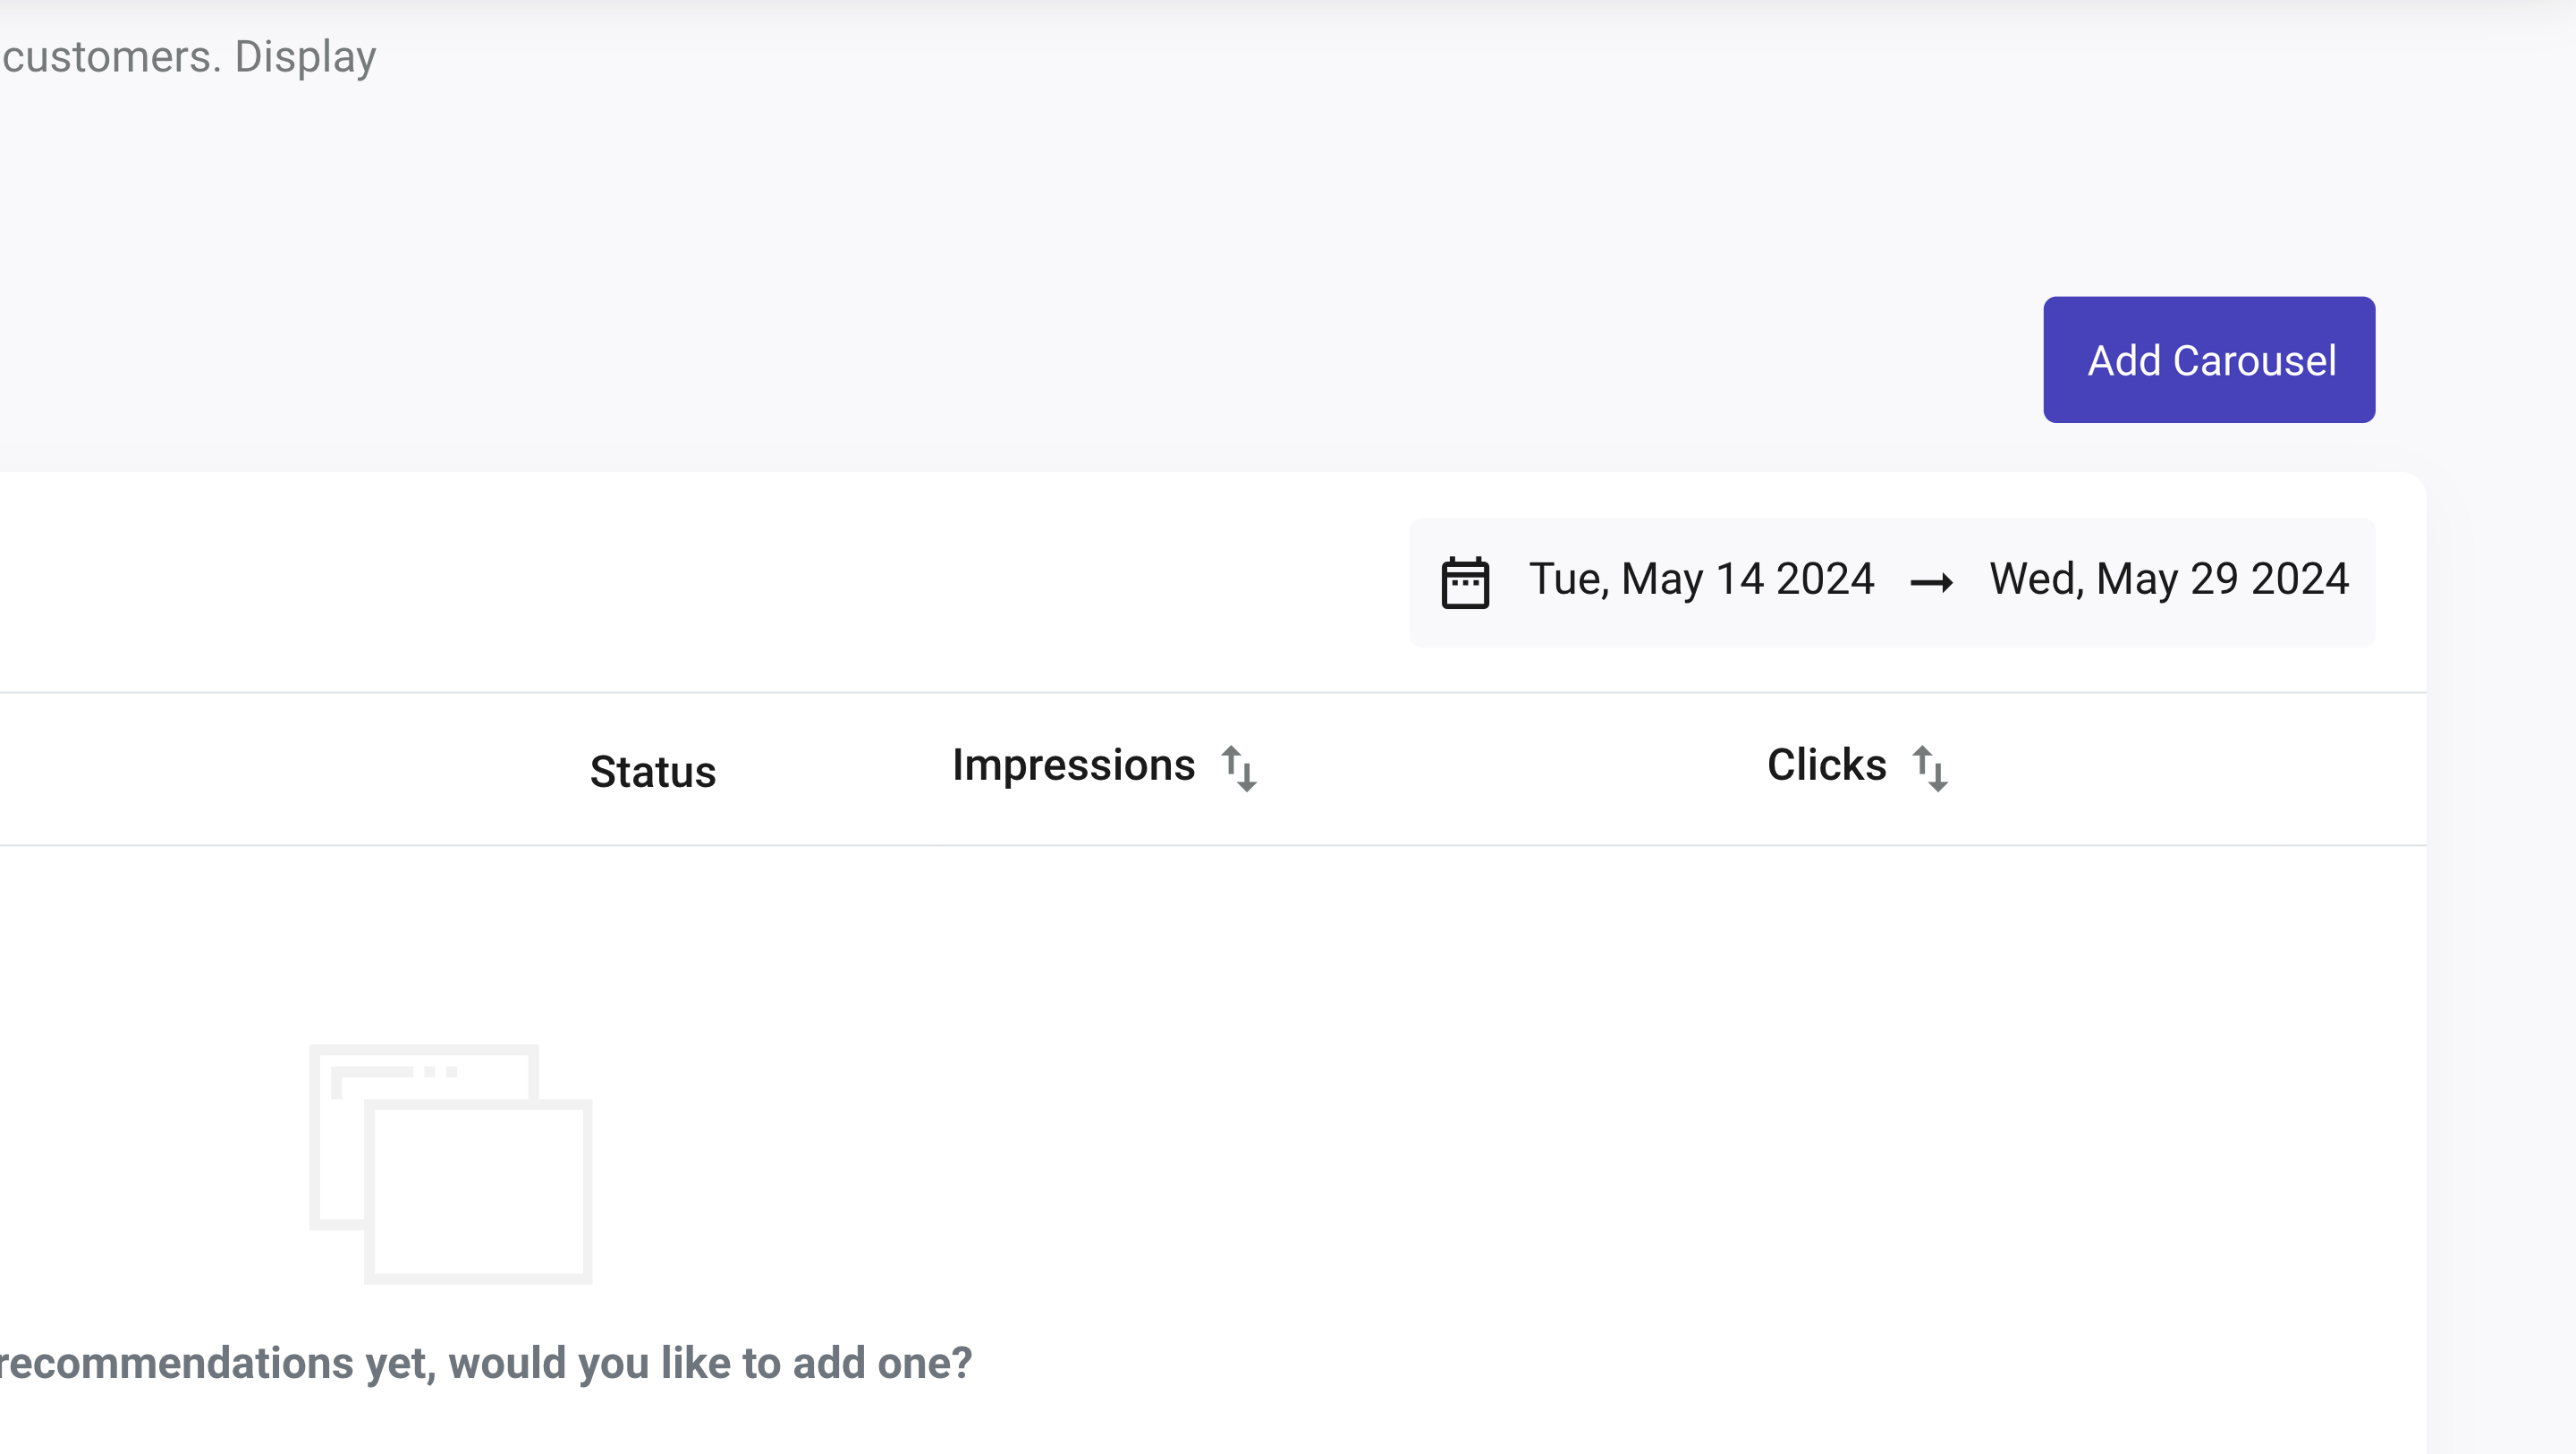
You’ll find a button called “Add Carousel” inside the panel. Here, you can add and configure a new carousel and start configuring your first Recommendation. If you have previously added a recommendation, the panel will show all the recommendations that have been configured previously.
The following sections will be visible on the board:
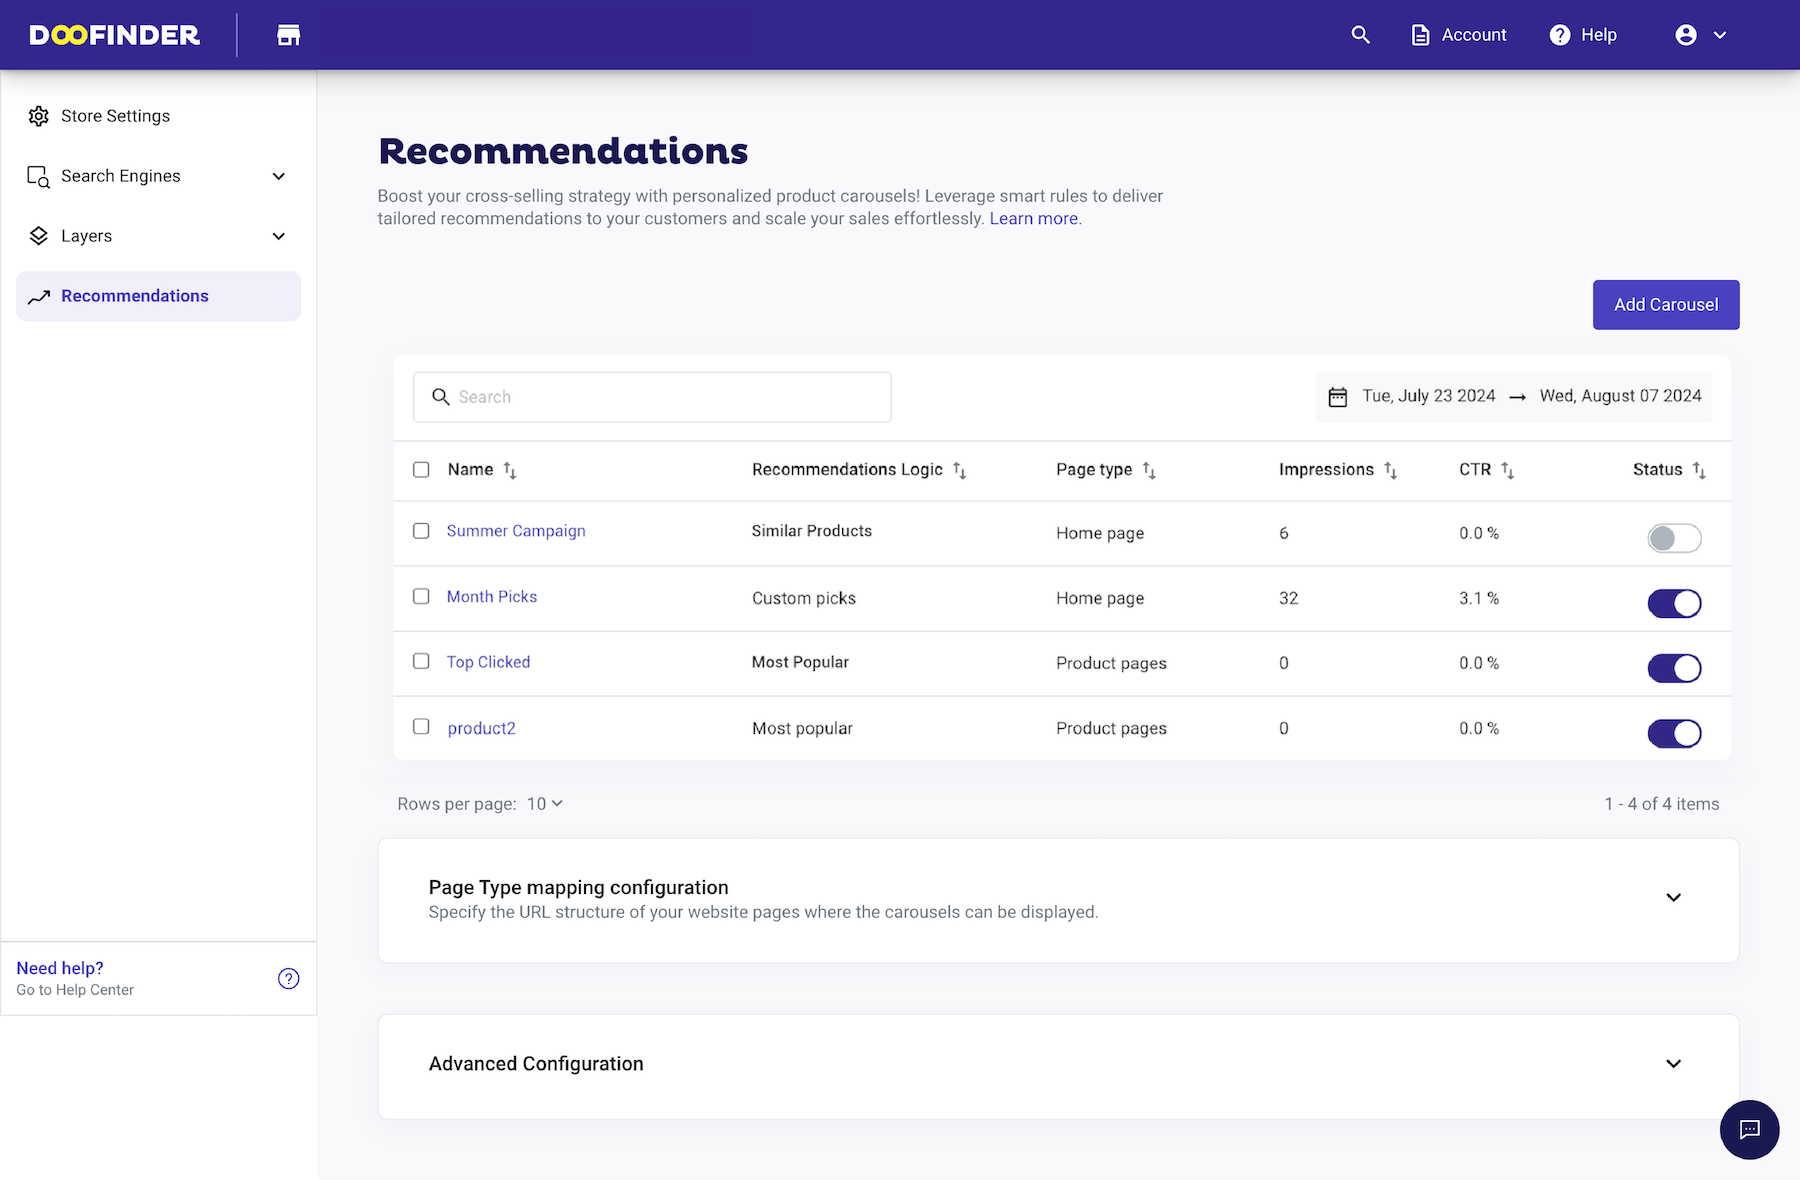
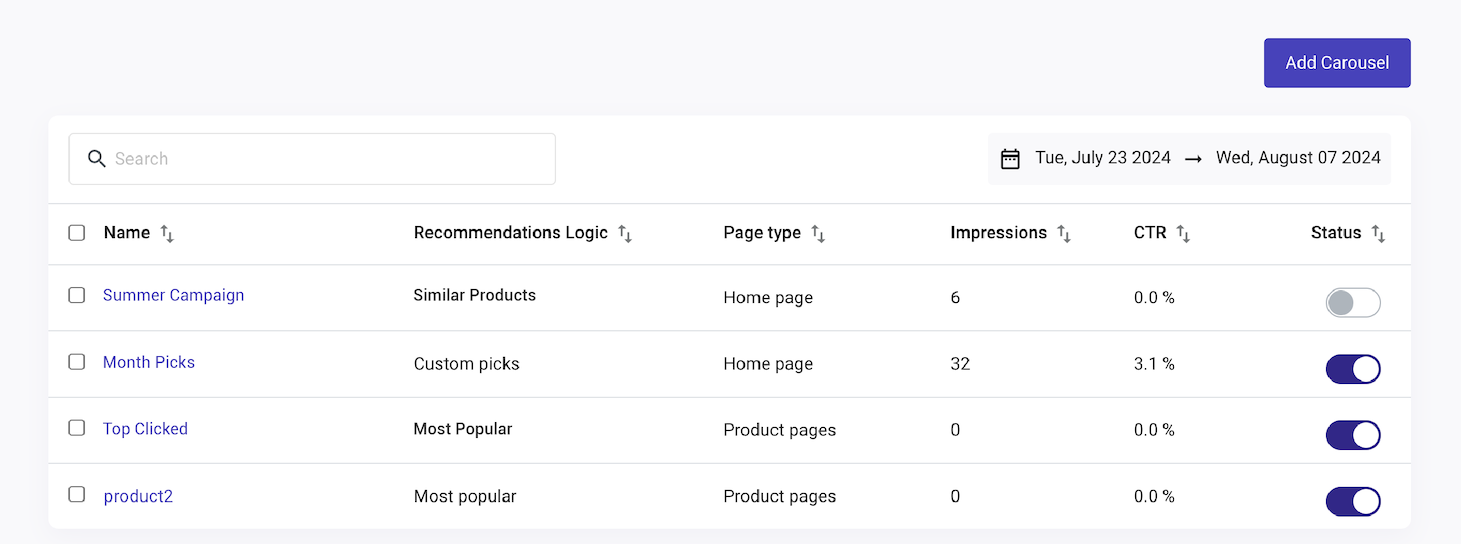
- “Add Carousel” button and existing Recommendation’s carousels summary: here, you’ll be able to add and configure a new carousel or edit an existing one. Once saved, you’ll have the option to edit it at any moment.
Also, you’ll find Impressions and CTR. The stats represent the total for the widget across all active Search Engines.
- Impressions: Impressions is when a carousel is loaded, then an impression is registered. CTR: The Click-through rate is the proportion between the number of clicks on the results and the number of searches performed.
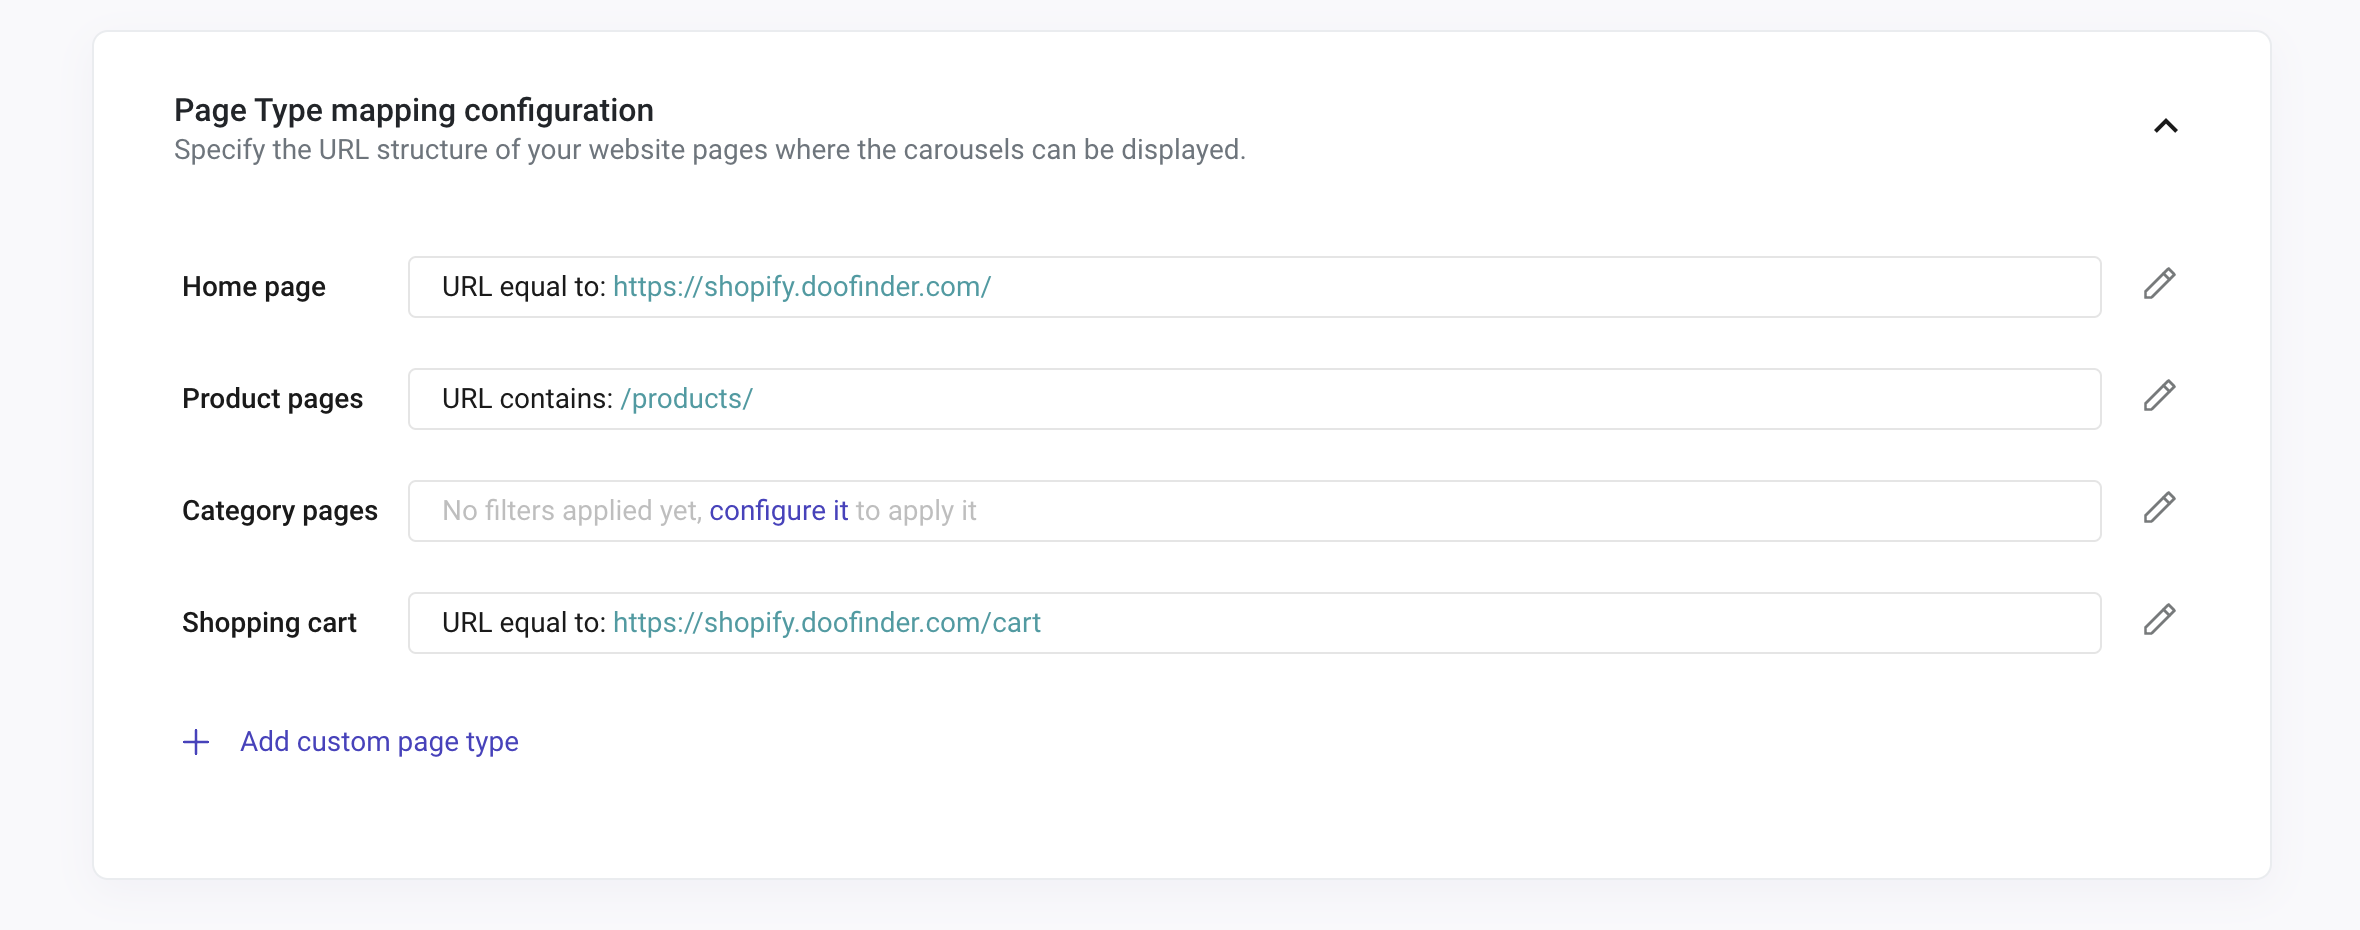
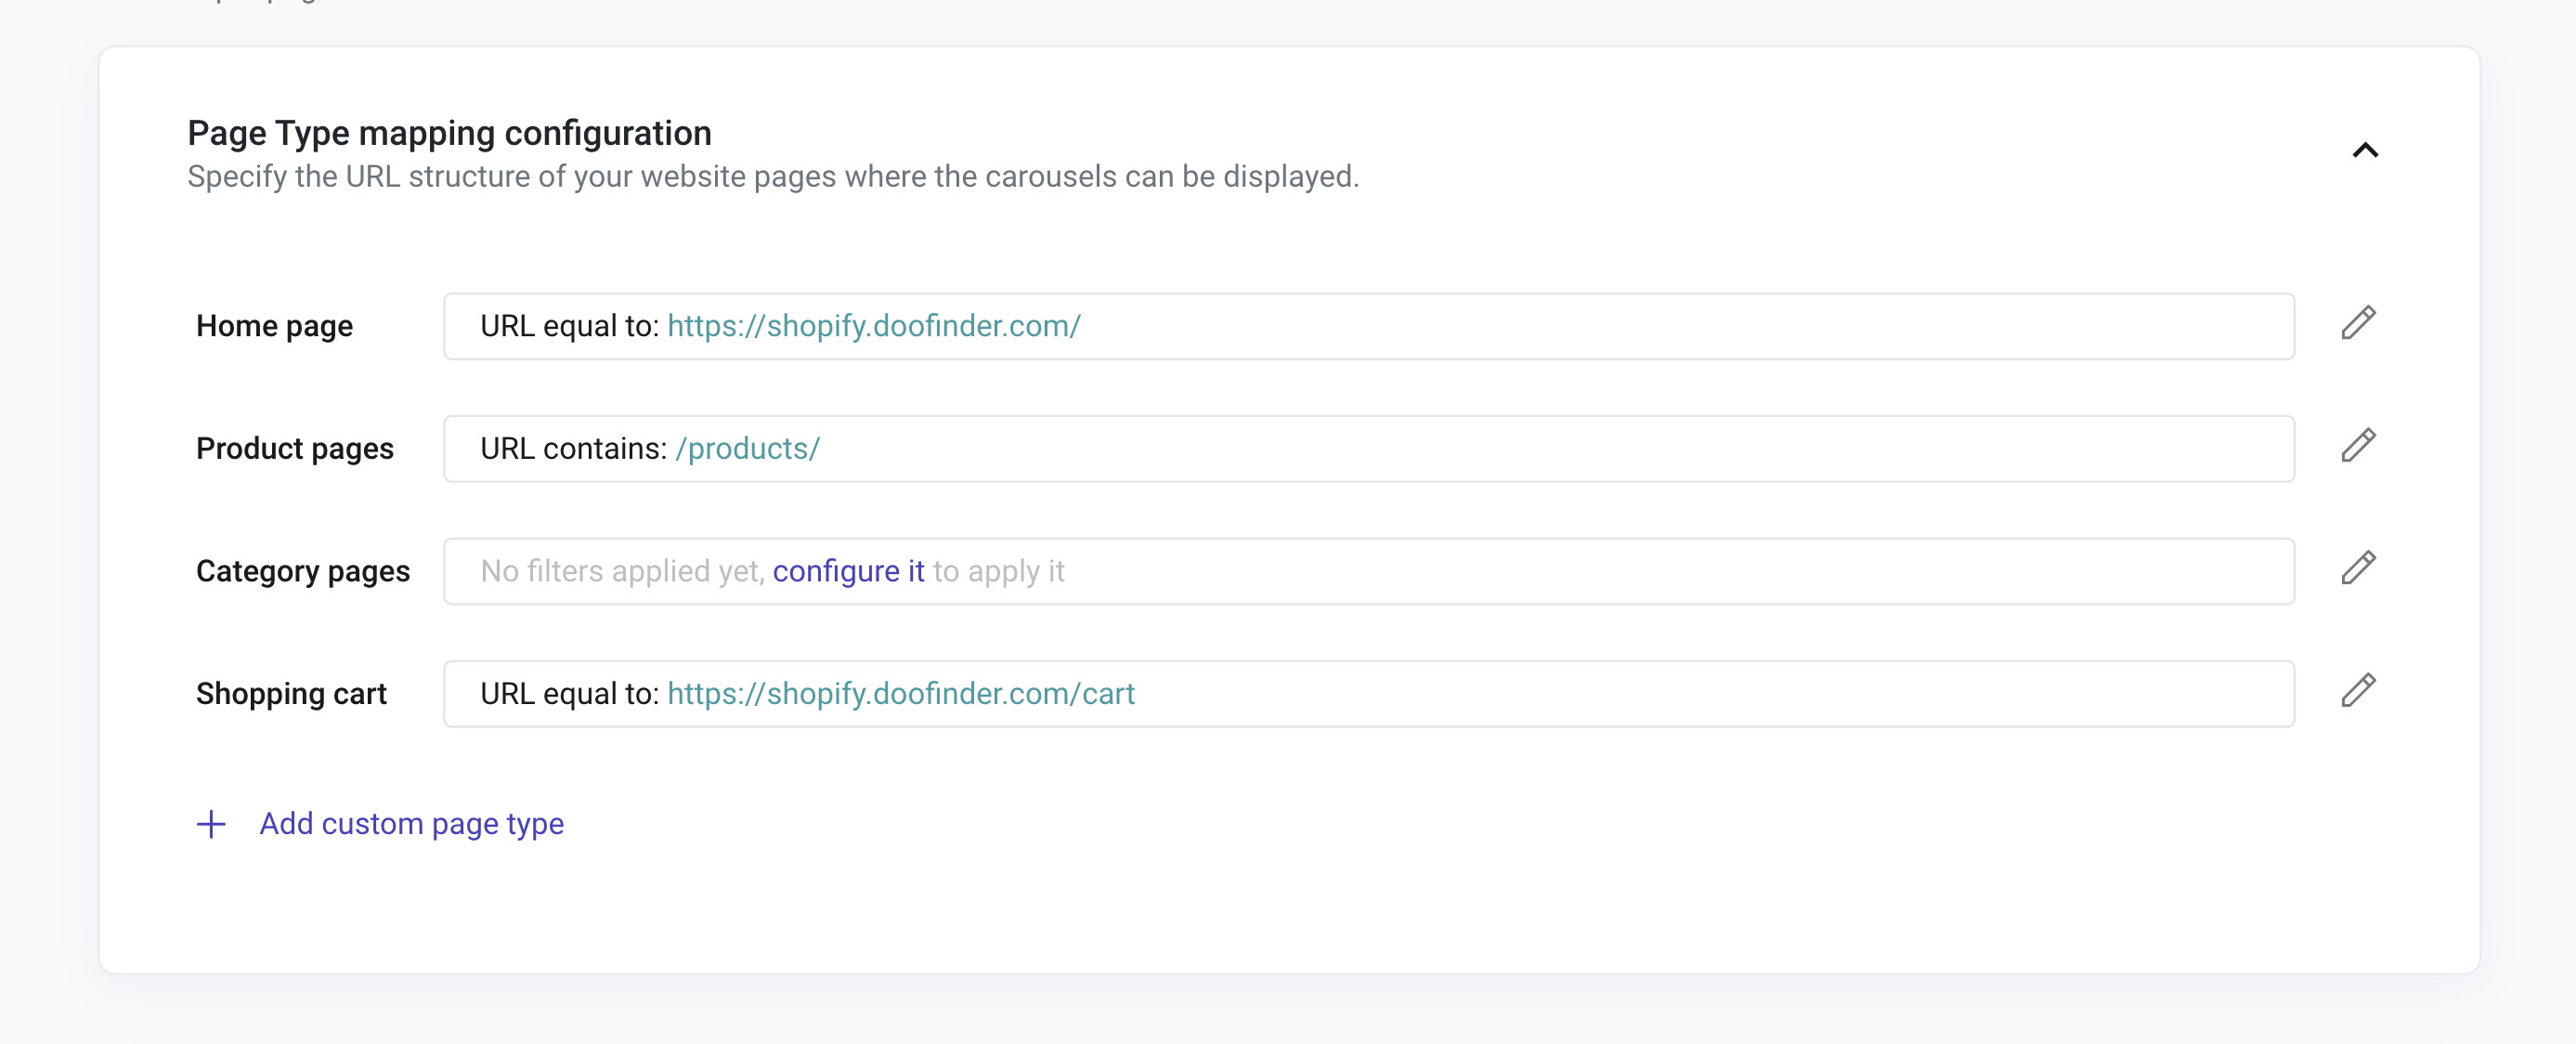
- “Page Type Mapping” to define your store’s Pages: specify the URL structure of your website pages where the carousels can be displayed. These are Home, Product Pages, Category Pages, Shopping Cart, and Custom Pages.
Please note that the URLs must be the same as they’re displayed on your website. For example, if you configure your Home Page as www.mydomain.com, it must be pasted as www.mydomain.com and not www.mydomain.com/. Otherwise, the recommendation carousel won’t be shown.
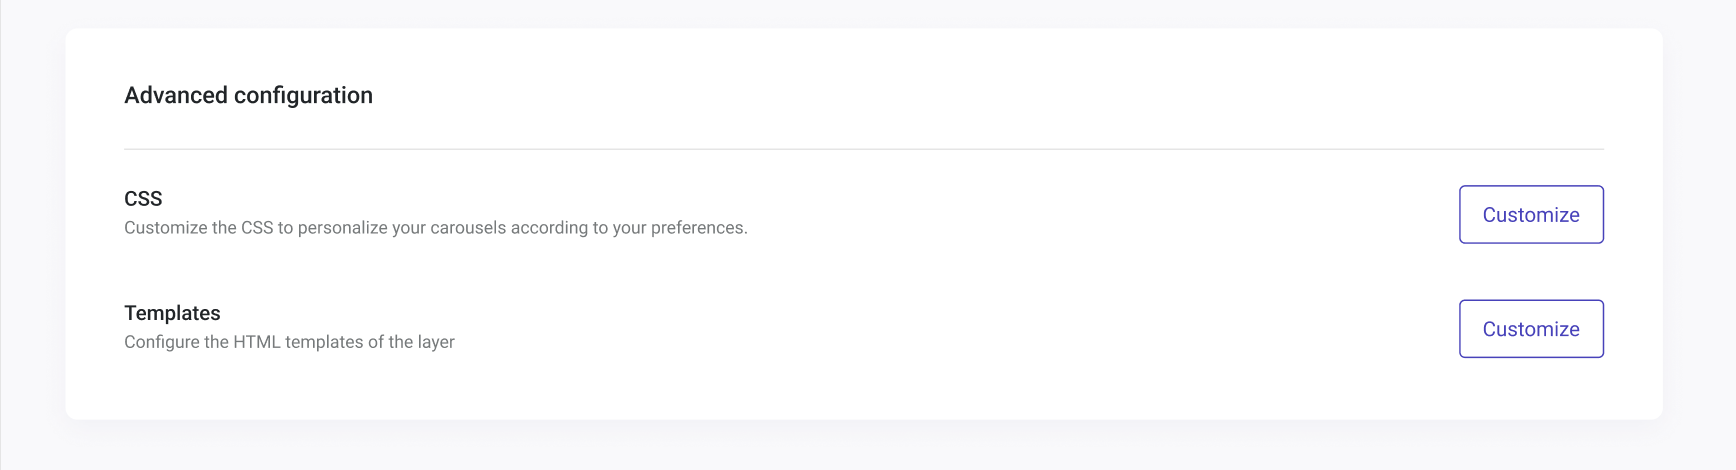
- “Advanced Configuration” to customize the appearance of the carousel. Customize the CSS to personalize your carousels according to your preferences or configure the HTML Templates.
Edit existing templates to adapt the carousel to your needs. Changing default templates may break your widget's visualizations entirely. Use with care.
You can always restore to default and revert the code configuration changes every time you need just by clicking the “Restore Default” option below the code.
Template Code:
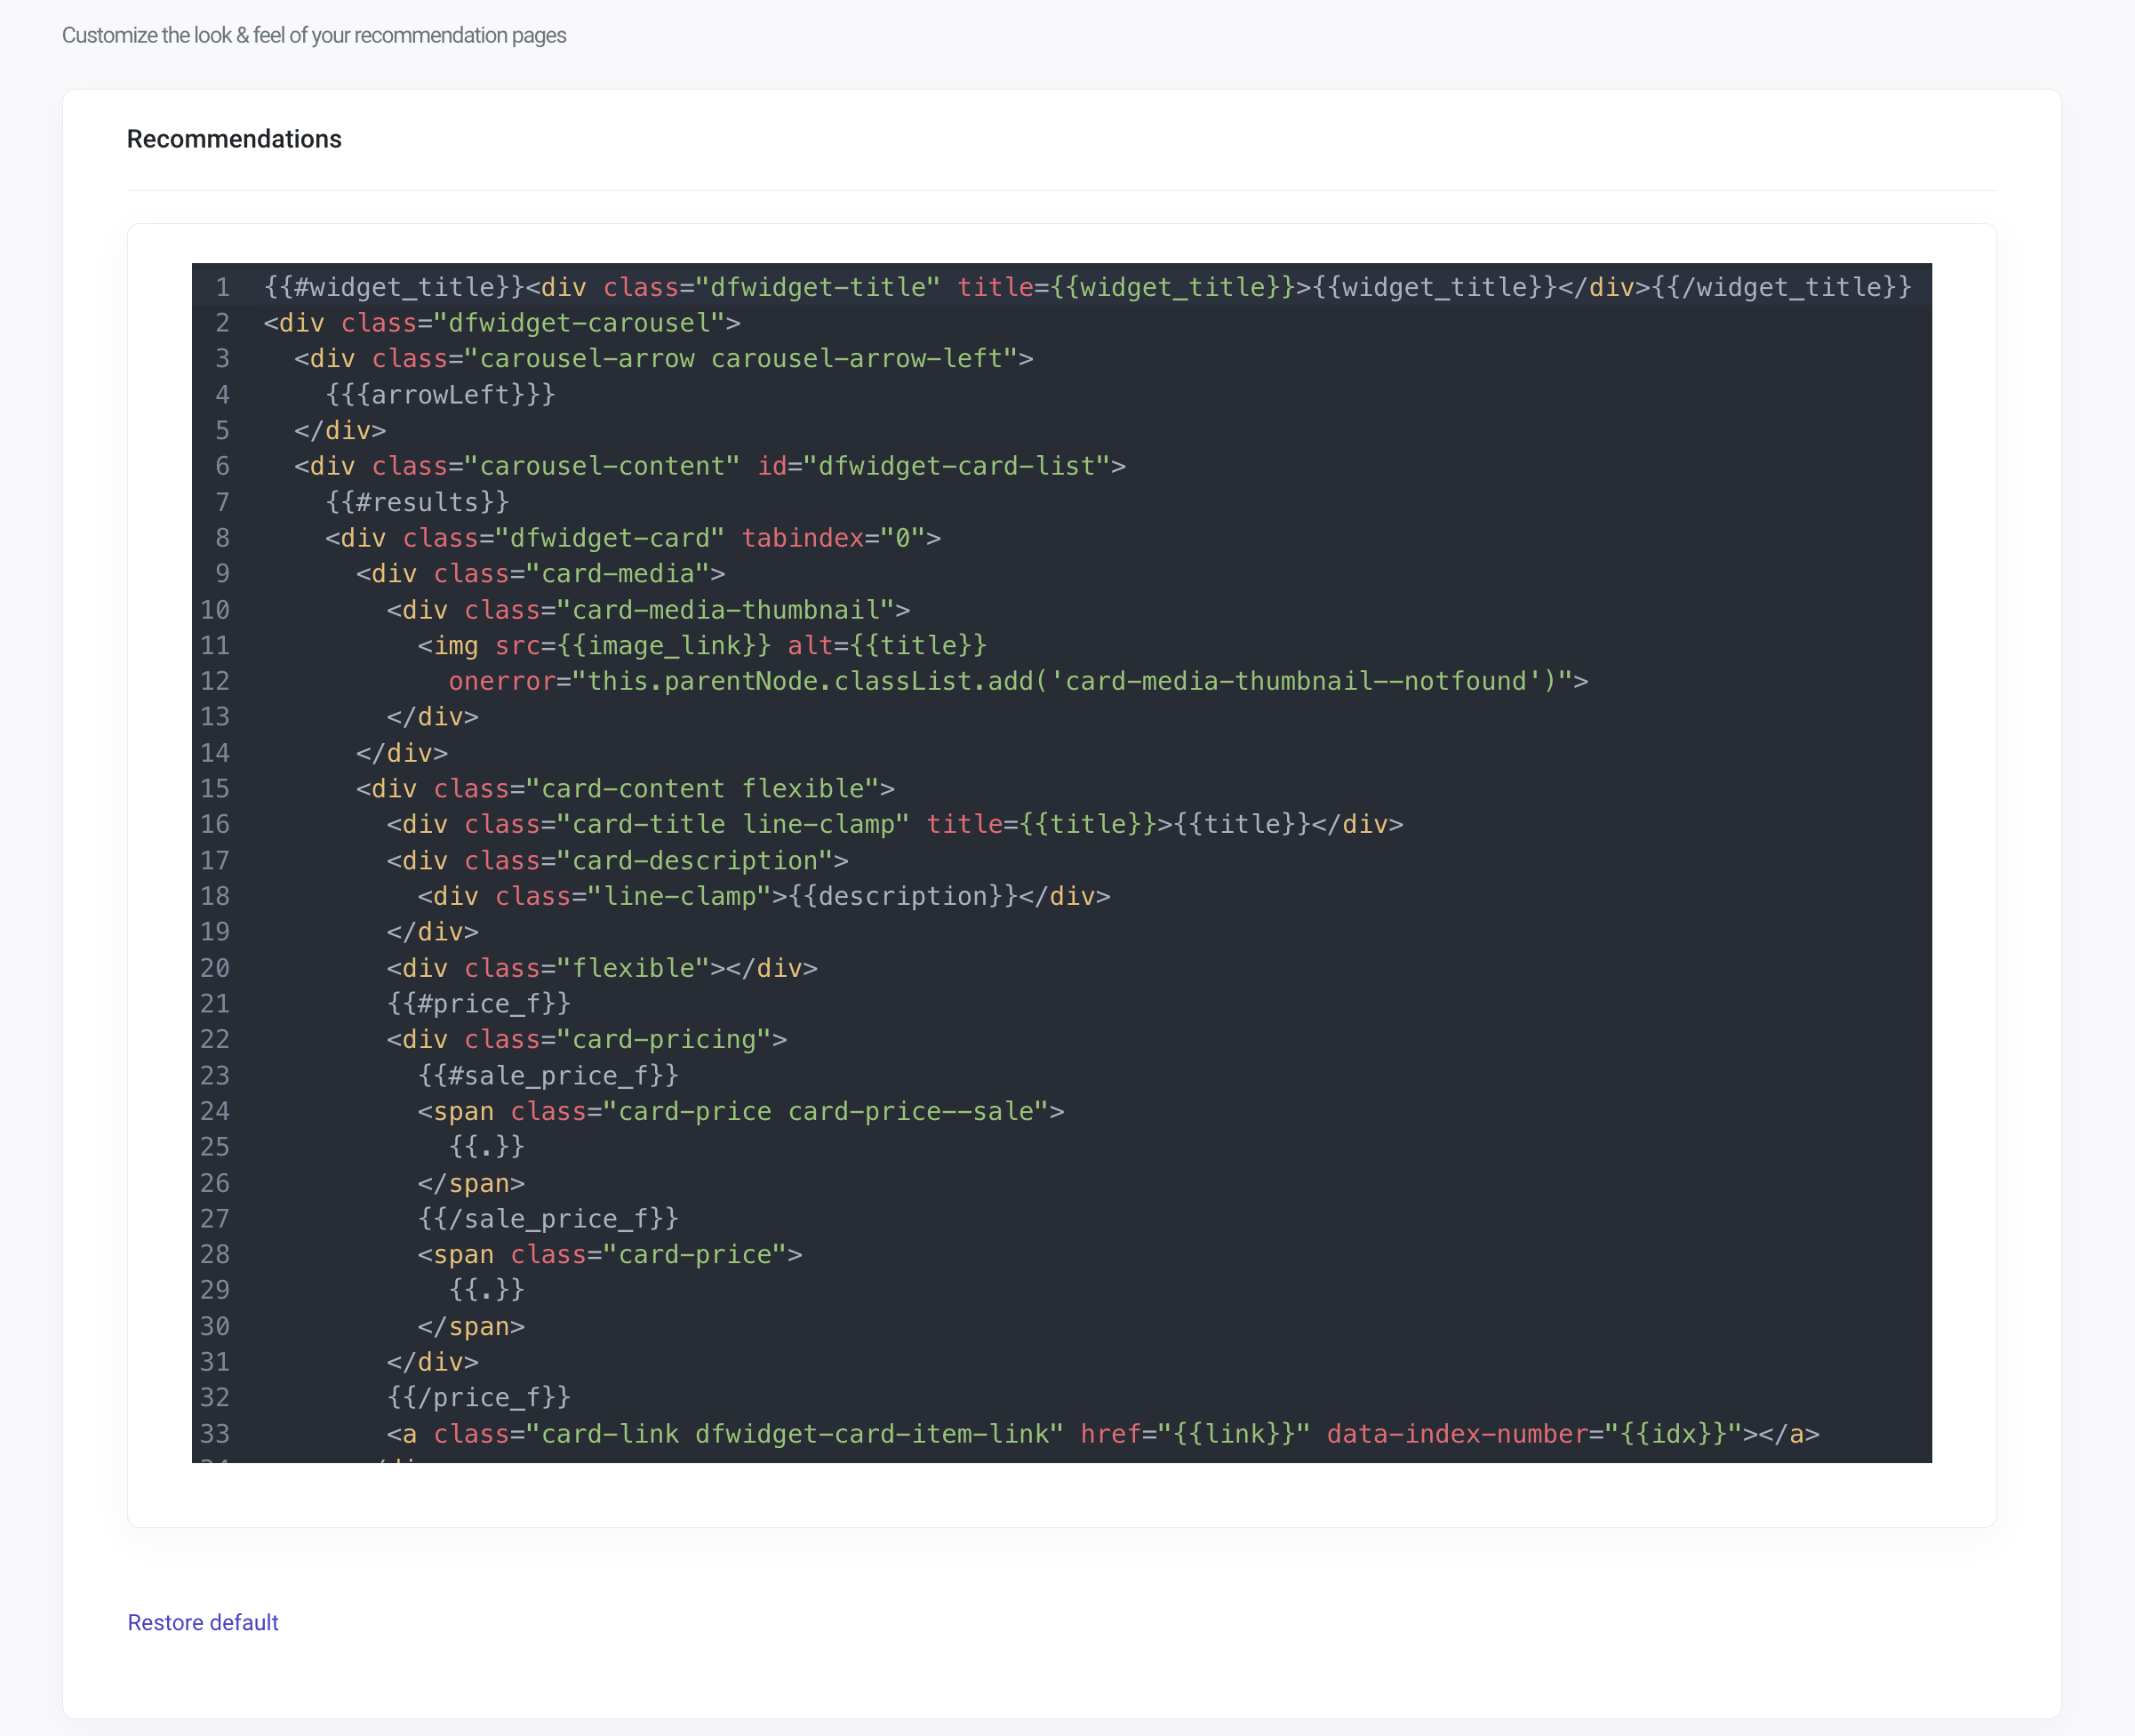
Remember to hit the “Save” button every time you change the code so that the changes save correctly.
1. How To Configure a Recommendation: Create Your Carousel
- Name the Carousel: type a name for your carousel. Remember, this name is internal and won’t be visible on your website.
- Select the Status: enable or disable the Carousel status so it will be displayed or not visible on your website.
- Home: the carousel will be displayed on your website's Home Page.
- Product Page: the carousel will be displayed on your website’s Product Page (single product shown).
- Category Page: the carousel will be displayed on your website’s Category Page (homepage for a particular product category).
- Shopping Cart: the carousel will be displayed directly on the shopping cart section.
- Custom Page: these are the pages that are not created by default by Doofinder. You can map any type of page in the same manner as home, product, and category pages. Once completed, it will be available in the widget configuration settings as a selection option (For example, an “Outlet” page.).
- Specific Page: the carousel will be displayed on a precise page that you need to configure directly on the Carousel configuration page. Is a unique web page created for a one-time event or situation, such as a “Mother's Day” promotion. It is used once and is not stored in the page mapping system. Due to the Specific Page characteristics, you can only apply this page type mapping to a unique search engine.
- Input the CSS selector of the location on your website page.
- Select one of the options to decide whether you want to:
- Replace that CSS with the widget.
- Place it At First or Last element of that CSS.
- Place it Before or After that CSS.
- Logics for all Pages: Most Popular, Most Searched, Browsing History, and Custom Picks.
- Logics for Pages that show one single product: Similar Products, Visually Similar, People Also Viewed, and Personalized Match (these last two need training).
- General Filters (General Rules): This condition will dynamically filter products based on the
fieldvalue of the product being viewed.You can choose if the carouselfal attributes shown are or are not: “Same as viewed”: If it’s the same as you’re seeing or different. Select “is” or “is not”. You can also “Add Condition” to configure more than one attribute.

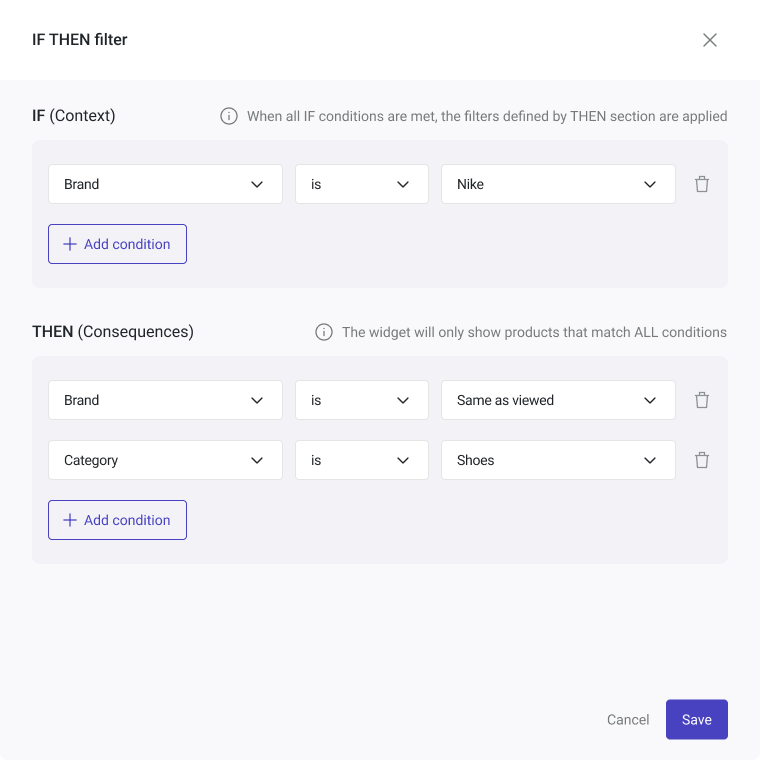
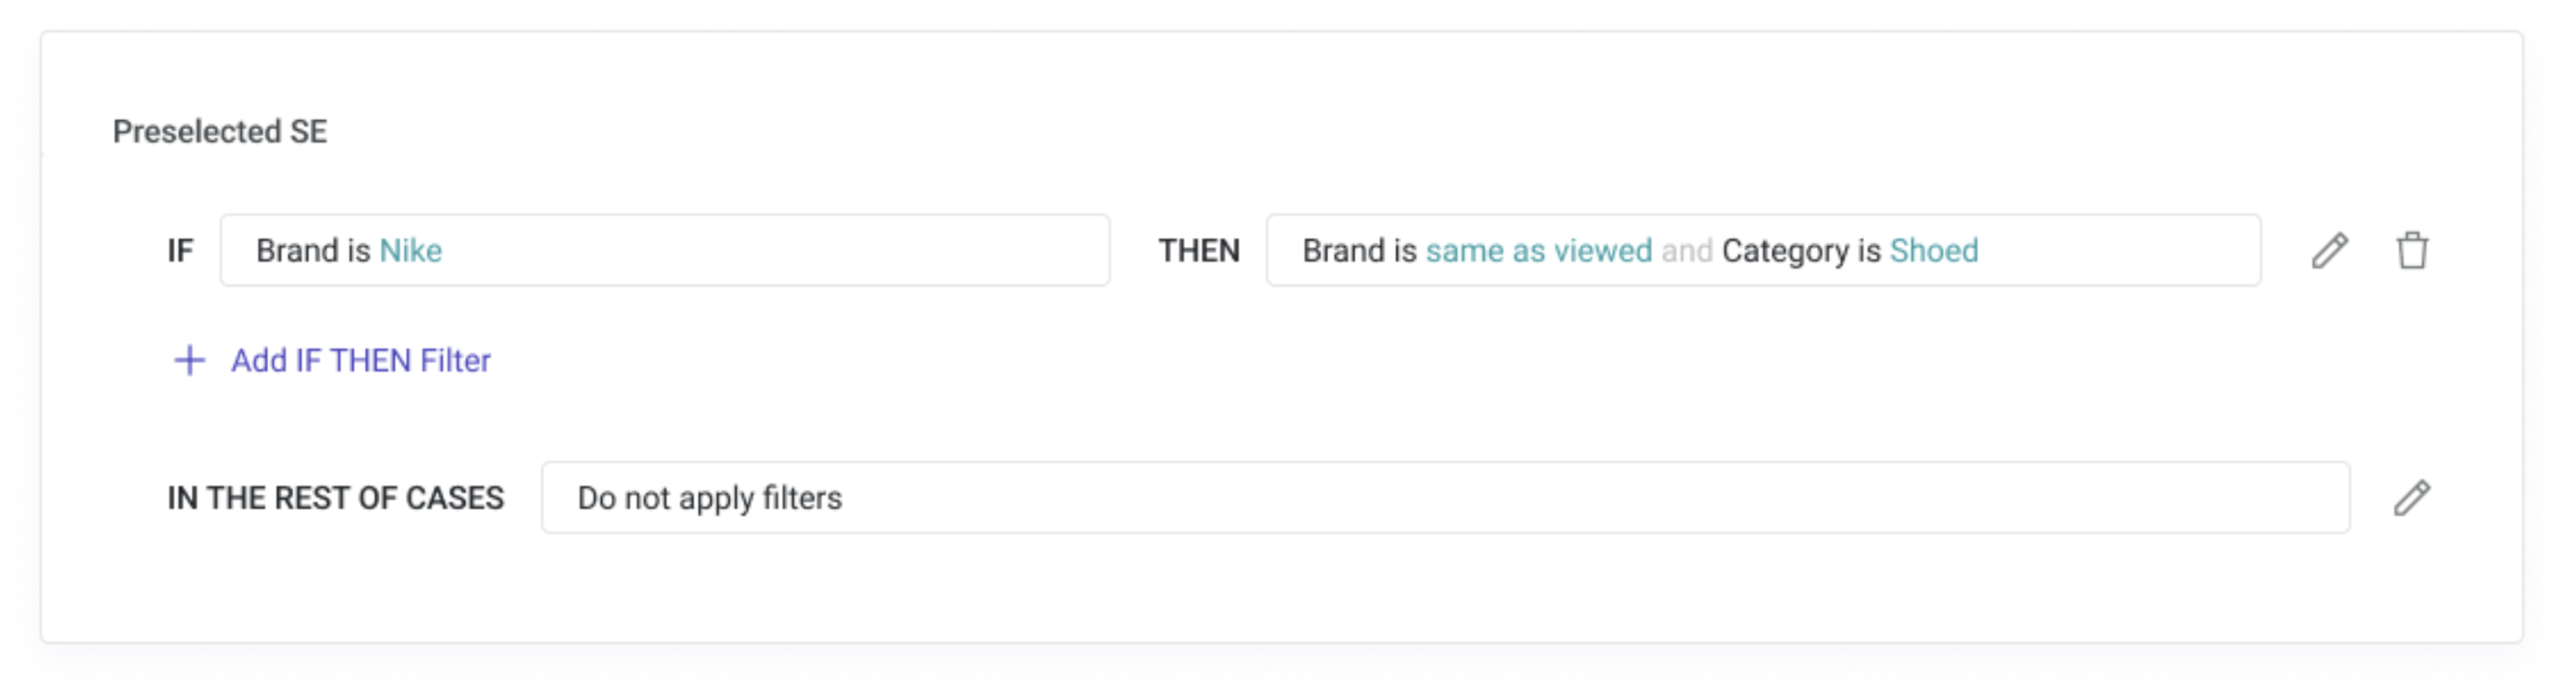
- Contextual Filters: IF (Context), THEN (Concequences):
This is only used on pages that display a specific product (Product Pages, Custom Pages, Specific Pages). The context defines the condition in which the FILTER (o THEN) is applied. If (IF) the product the customer sees is from the Nike brand, (THEN) the products that appear in the carousel must be from the Nike brand or must have a similar price.
When the “IF” matches the product viewed, the basic filter is NEVER applied. Therefore, also in this case, if the results are less than the configured "Number of Products To Display", the missing positions will be filled with the same logic but without applying any Filters. If even after this, the total results are less than 5, then it will be replaced with the Fallback.
Look at the example below:
Once Saved, you’ll see:
To add a new Recommendation Carousel, click on the “Add Carousel” button.
From here, you have the power to Add, Delete, and Save the changes to your new recommendation carousel.
Once the panel is open:
2. Pages to Display the Carousel
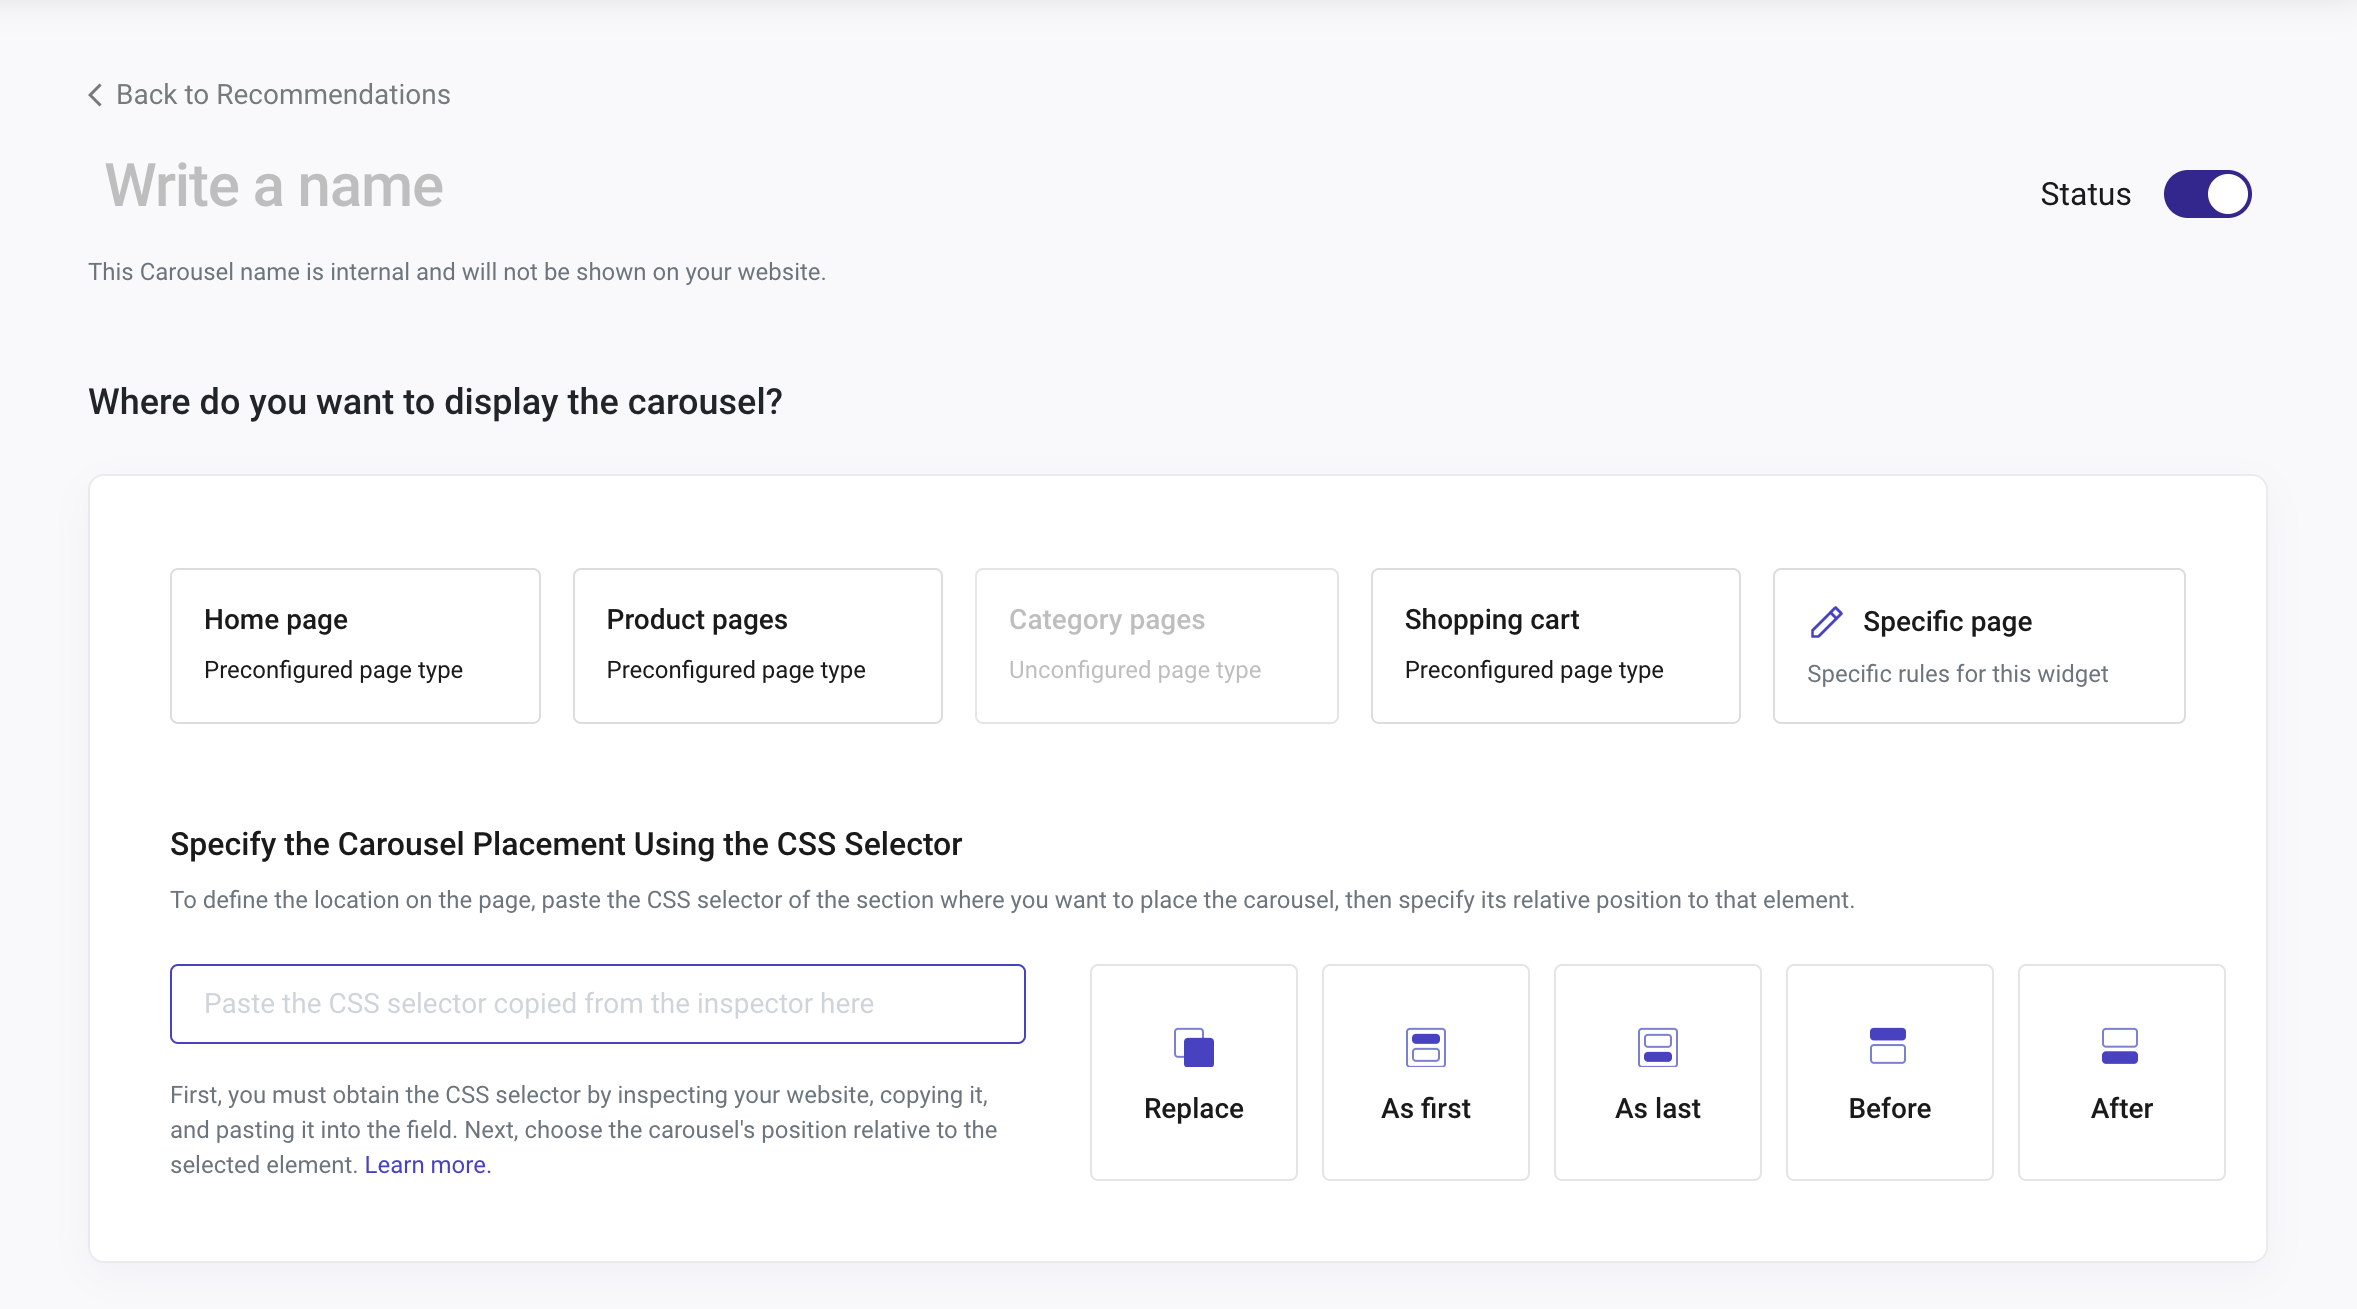
Select Where Do You Want To Display The Carousel: In this section, you’ll be able to select the exact location of the carousel. Home, Product Page, Category Page, Shopping Cart, and Specific Page and Custom Page are available options for showing the carousel.
These page selections will be enabled or disabled depending on whether a configuration on your (Recommendations) Page Type Mappings has been made before. Please, click here to learn how to configure Page Type Mapping.
If a Page not yet configured is selected, you’ll be notified with a message “The selected page type is not configured.”, and you’ll be redirected to configure it.

3. Carousel Placement
Specify the Carousel Placement using the CSS Selector: To define the location on the page, paste the CSS selector of the section where you want to place the carousel, then specify its relative position to that element.
First, you must obtain the CSS selector by inspecting your website, copying it, and pasting it into the field. Next, choose the carousel's position relative to the selected element. Keep in mind that you can add multiple CSS selectors. If the first one doesn't exist, Doofinder Recommendations will automatically use the next one.
Choose the Recommendation carousel location between: Replace / At first / At least / Before / After.
The position is defined through two compulsory actions:
Learn how to find your CSS selector in this article.
4. Carousel Logics
Configure What You Want To Show on your Carousel. In this section, you can select the Carousel Logic that best suits your business goals and customers’ experience.
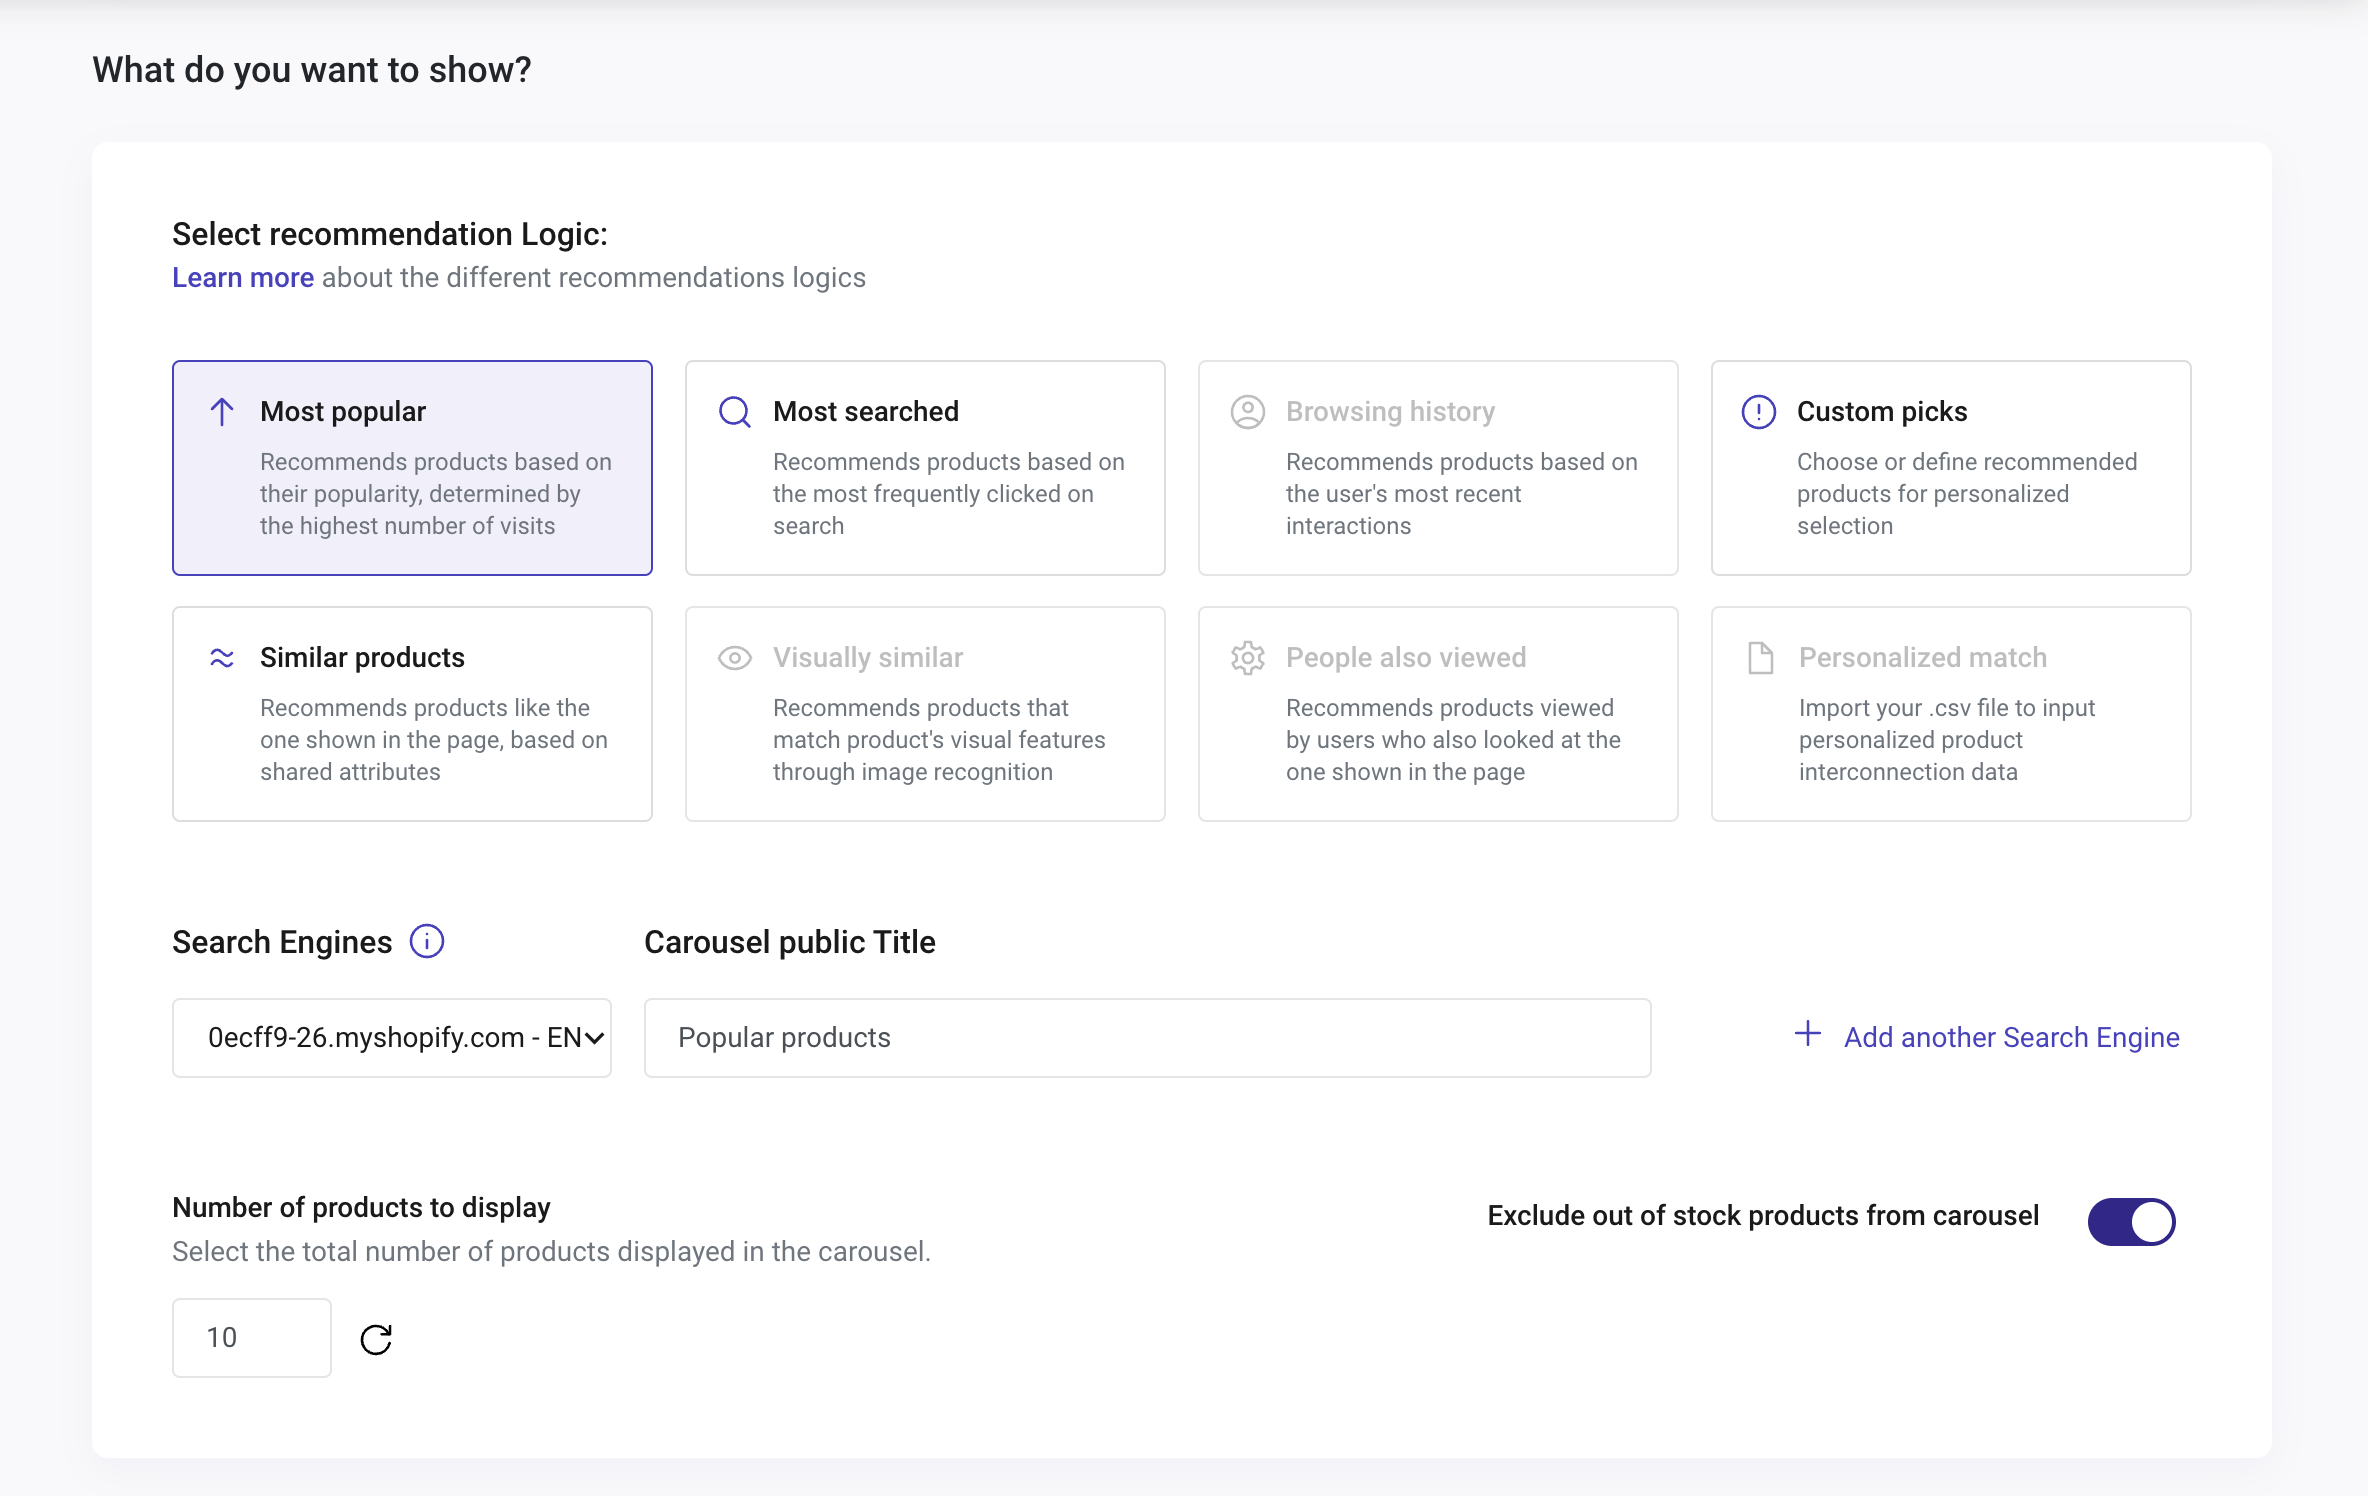
To choose a Logic, carefully review each one to understand how it displays products. Note that some logics require training to show the desired results. Additionally, some logics work across all Pages, while others are designed for single Product Pages and Customized Pages.
To learn about the Logics, refer to the Carousel Logics article.
5. Add Search Engines to your Carousel
“Carousel Public Title”: Here, type your carousel name. This space allows you to type a clear and visible name of your carousel that will be shown (if active) on your website.
“Another SE”: Here, you can configure the recommendation carousel for your desired Search Engines. The goal is to set up everything in one unified screen, making it easier to manage and customize the recommendation settings for each Search Engine simultaneously.
Adding another Search Engine will create a recommendation carousel for each Search Engine. Each carousel will have its own filters and public titles that must be configured separately. By adding all desired Search Engines in this step, you can streamline the setup process and ensure everything is configured in one go.
If you want to apply different logic to the carousel you have already created, remember that once saved, these cannot be modified. To make changes, you will need to create a new carousel and apply the desired logic.
The Carrousel public titles for each Search Engine will be automatically translated into a proposed language, but they can be manually edited into the desired language.
As you “Add another Search Engine” the panel will look like the image below, and you’ll be able to name the product recommendation carousel for each search engine you add. You can also delete it by clicking the trash can beside the name spacing. This applies only if you have 2 or more Search Engines created in your Store.

Also, indicate the number of products you want to show in the carousel. By default, 10 products are displayed. You can increase or decrease this number to suit your needs.
You can even Exclude or include “out of stock” products from the carousel by enabling or disabling this alternative.
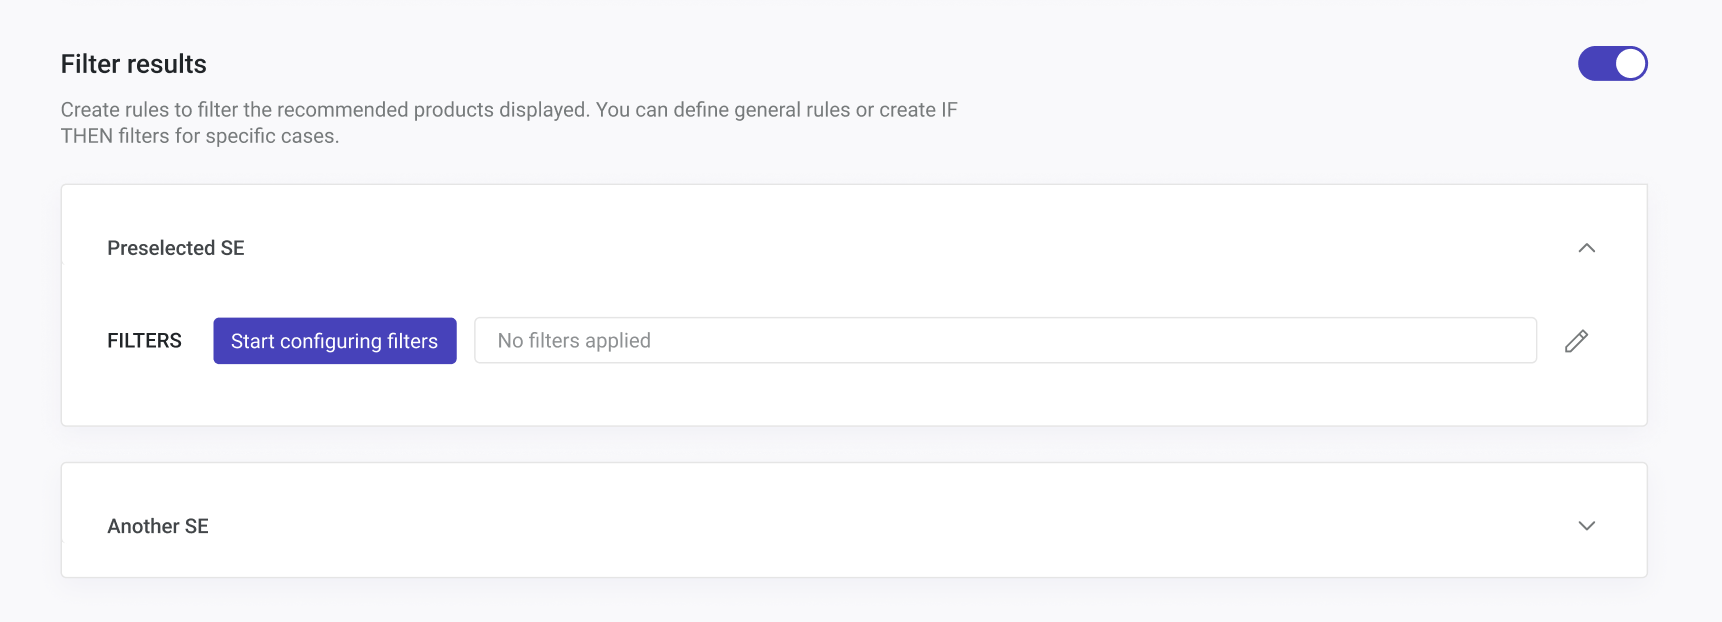
6. Filters Configuration
Configure Filter Results: Create rules to filter the recommended products displayed. You can define General Rules or create IF THEN filters for specific cases. Click on “Start Configuring Filters” to add a filter.
7. Fallback
Enable or disable Fallback: If the primary recommendation doesn't have the required amount of product, it will be replaced with the most popular items when the Fallback is activated. This happens when the results include fewer than 5 products.
If the logic to select similar shoe products results in fewer than 5 items, the remaining spots are filled with the Most Popular fallback products.
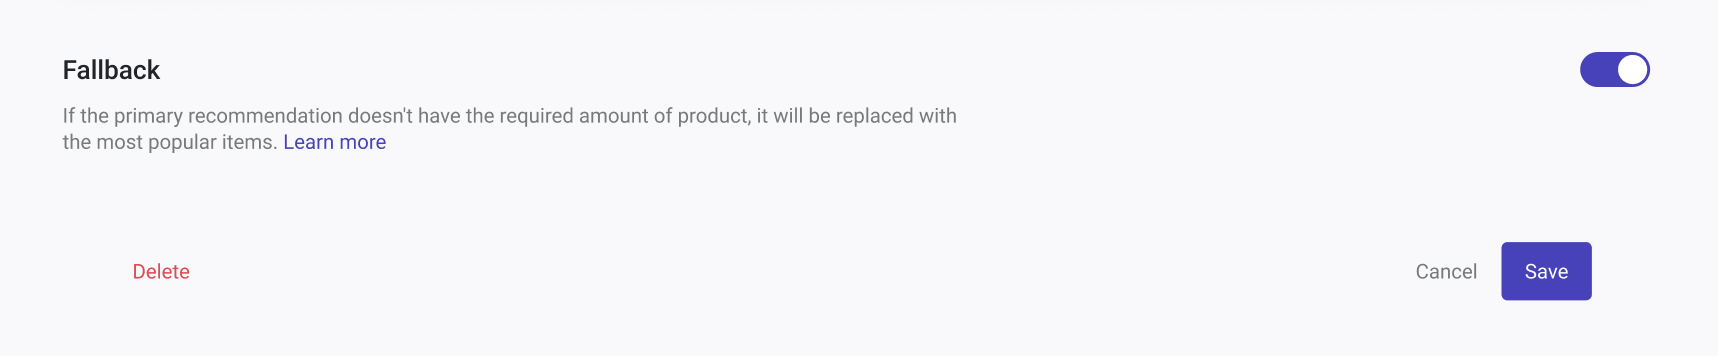
Fallback enablement is not mandatory but is recommended to keep it activated.
If Fallback is being displayed, the Carrousel Public Title won't be visible.
Lastly, save the changes.
Page Type Mapping Configuration
As you configure your Recommendation Carousel, you’ll be required to specify the URL structure of your website pages where the carousels can be displayed. As we mentioned, you’ll be asked to configure your Home, Product Pages, Category Pages, Shopping Cart, and Custom Pages
On this panel, you can always configure, edit, or delete the pages at any moment.
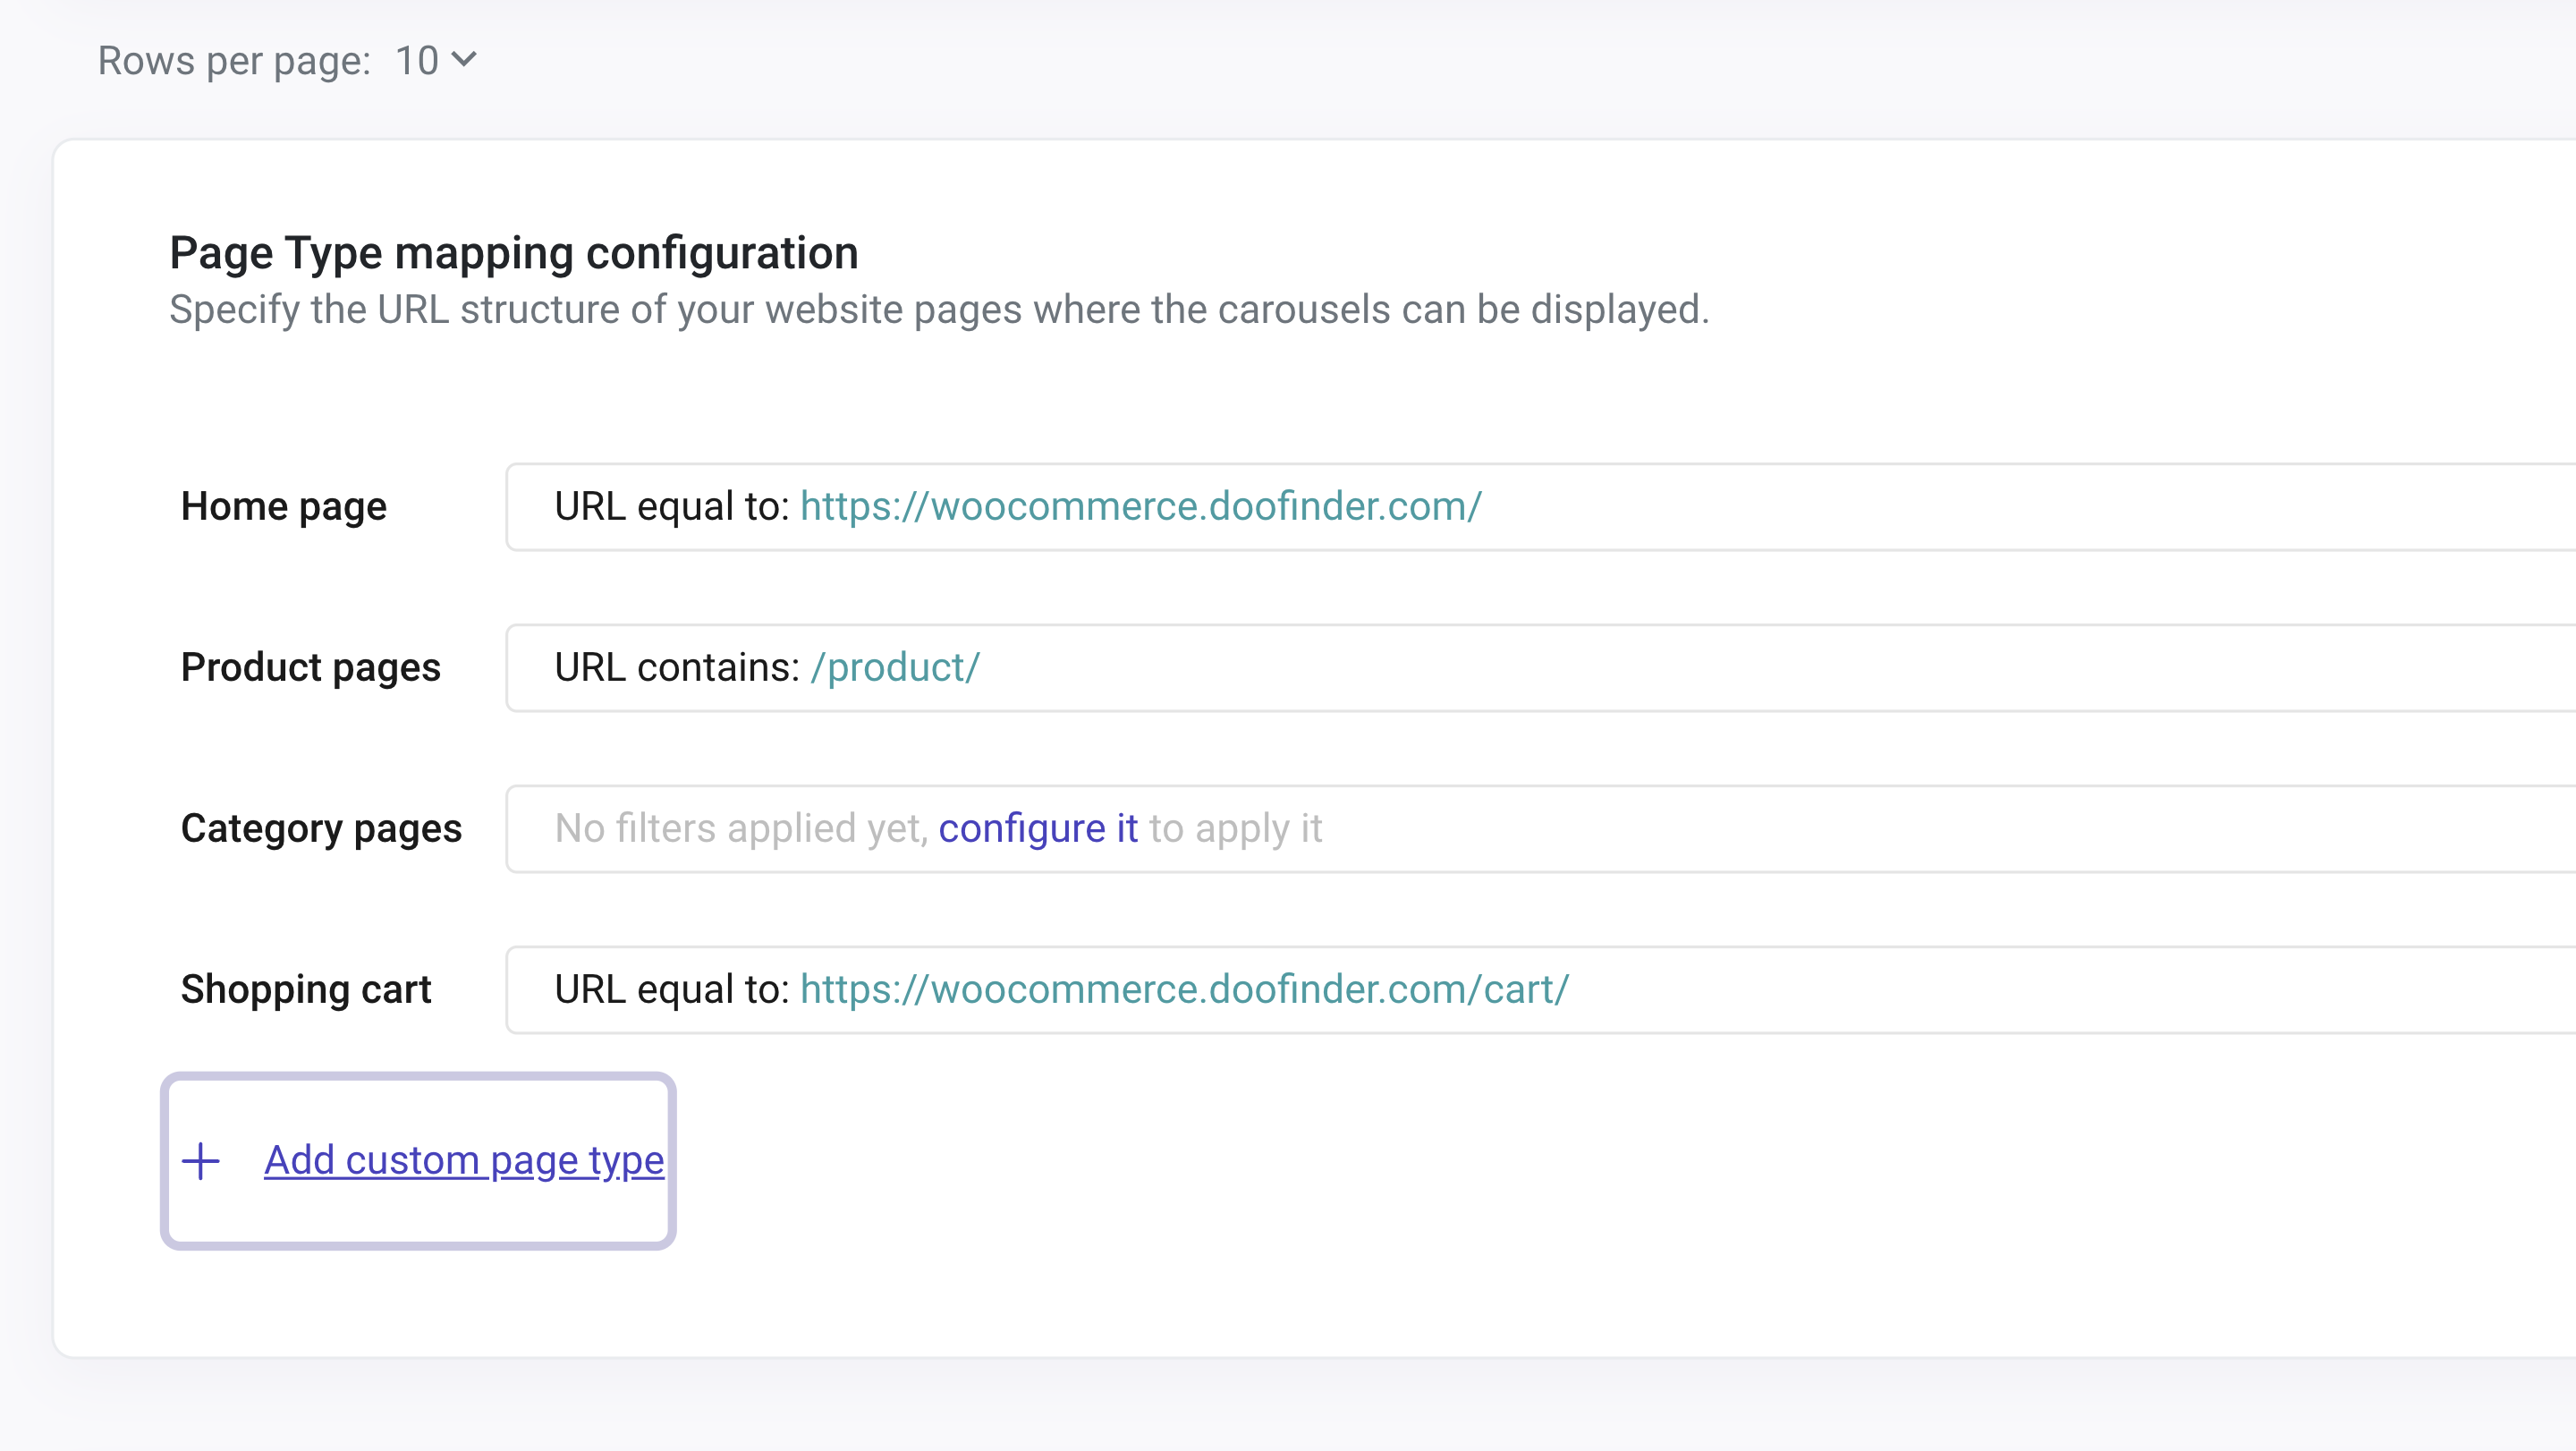
By clicking the plus button “Add Custom Page Type”, you’ll be able to create a new Page Type Configuration. This means Doofinder will allow you to Add a Custom Page. Select a name, and enter the URL fragment for the content and the URL fragment for the site.
By clicking the pencil icon, you’ll be able to configure your Page Type Name. As you can see, a dropdown menu will appear. When configuring Page Type Mapping, if you add multiple conditions, they stand combined with "ANY".
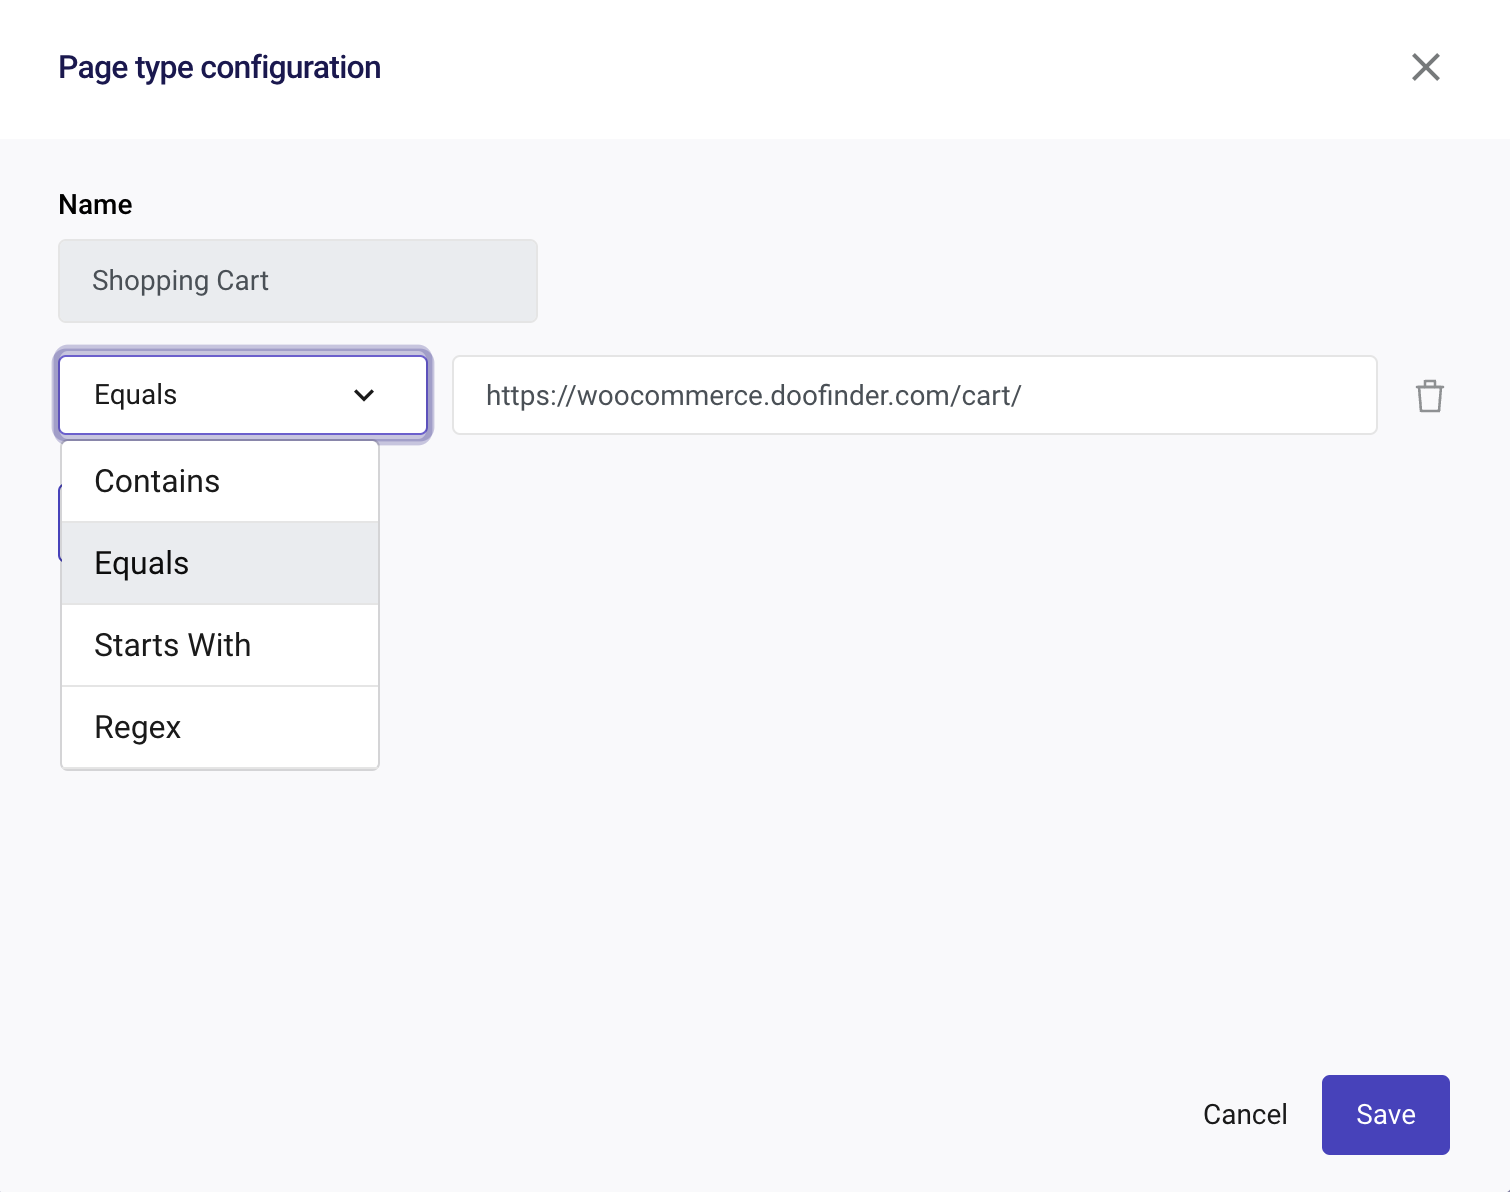
- Contains
- Equals
- Start With
- Regex: In some websites, the product or category pages cannot be identified with a specific word in the URL (such as /product). It might happen that your site URL does not have “keywords” to identify the page type. This happens, for example, in e-commerce websites that use Prestashop. In these cases, the Regex can be used to detect those types of pages since it uses a variety of characters and metacharacters to define a complex pattern.
Suggestion: you can use an AI language model to help you create a regular expression (regex) for URLs. By describing what you need the regex to match, the AI can generate the appropriate pattern for you.
For example, you can describe the structure of the URLs you want to match, and the AI will provide a regex that fits your criteria. This can save you time and ensure accuracy in your regex patterns.
Example URL: https://www.example-shop.com/2024/06/25/product-12345
Regex Pattern: https?:\/\/(www\.)?[a-zA-Z0-9-]+(\.[a-zA-Z]{2,})+(\/[0-9]{4}\/[0-9]{2}\/[0-9]{2}\/[a-zA-Z0-9-]+)?
Other Important Rules
First, Logic. Then, Filters
Filters are used to select products within the selection of items powered by the logic (e.g. within the logic “Most Popular”, I can filter for the brand “Nike”).
Basic Filters
When the results from the primary logic are fewer than the configured "Number Of Products To Display", the missing positions will be filled with the same logic but without applying any filters. If even after this, the total results are less than 5, then it will be replaced with the fallback.
Pricing
To access Recommendations, you need to subscribe to one of the Recommendation plans. The product is independent of the Searching feature. See Recommendations details here Remember you have a 30-day free trial.
If you need further assistance with this feature, please contact our Support Team from our contact form. If needed, simply login to your Doofinder admin panel. Click on “Help” in the top blue bar, then select “Contact our Support Team”.