Add To Cart
If you are not using the latest version of our plugins, you will have to provide custom JavaScript code to make the button work.
When the add cart button option is enabled, we create an event that triggers every time a person has clicked the button. This event is called doofinder.cart.add.
You need to catch this event and create a function in your code, to call your store's API for the implementation to work. This function will vary from platform to platform. You have to paste the script into your HTML code.
Example of generic implementation:
document.addEventListener('doofinder.cart.add', function(event) {
  const { item_id, amount } = event.detail;
  // add custom code to send the data to your cart API
  console.log(`added ${amount} of item #${item_id}`);
});
Enable Or Disable The Add to Cart Button
To enable or disable the add to cart button in your layer, go to your Admin > Layers > Appearance and swith the add to cart toggle on or off.
To customize your Add to Cart button, read the article Appearance.
Add Quantity Selector
You can incorporate a quantity selector next to your Add to Cart button, as shown in this example:
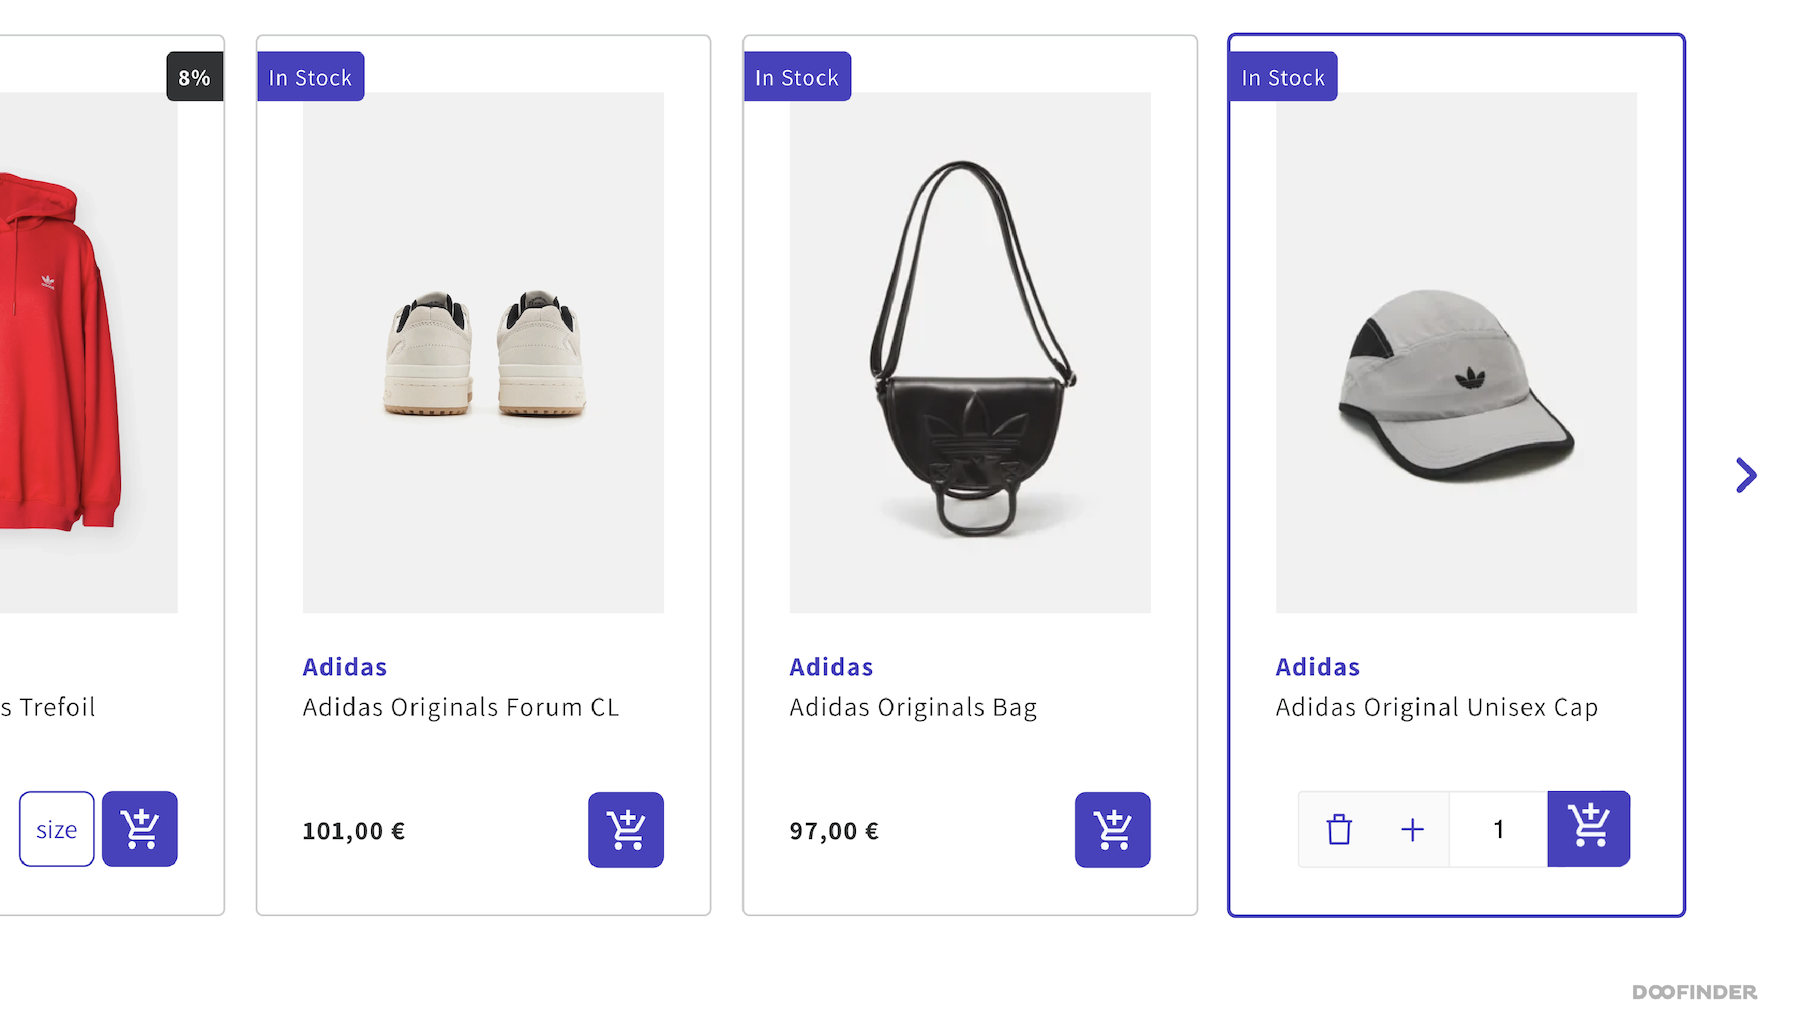
To do so, it is necessary to include the attribute quantity=”true” in the add-to-cart code line within the product card template. Please note that the unit selector appears after clicking on the "Add to Cart" button.
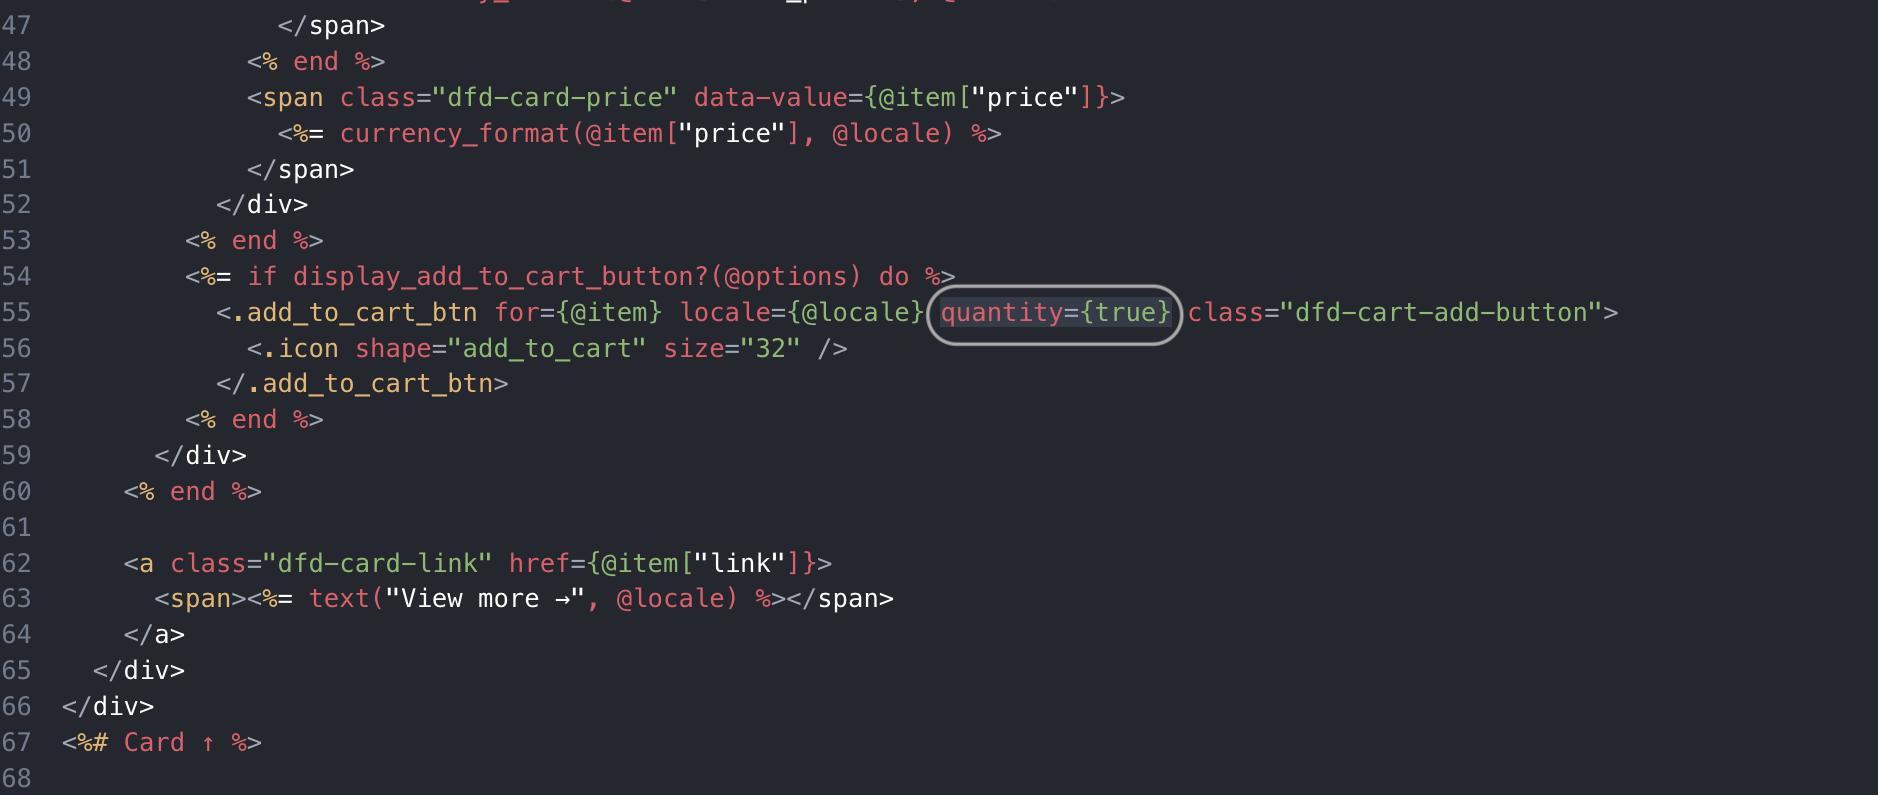
To access the product card template, navigate to Layers > Appearance, scroll to the Advanced section, and click on Customize. For detailed guidance on managing the product card template, refer to this article.
Add To Cart With A Variant
The add-to-cart feature comes with a variant that allows you to select size, for example, before adding it to the cart, without having to go through the product page.
If you are using the Doofinder plugin to index your content, you can configure the add to cart button, with a variant selector, in a few clicks.
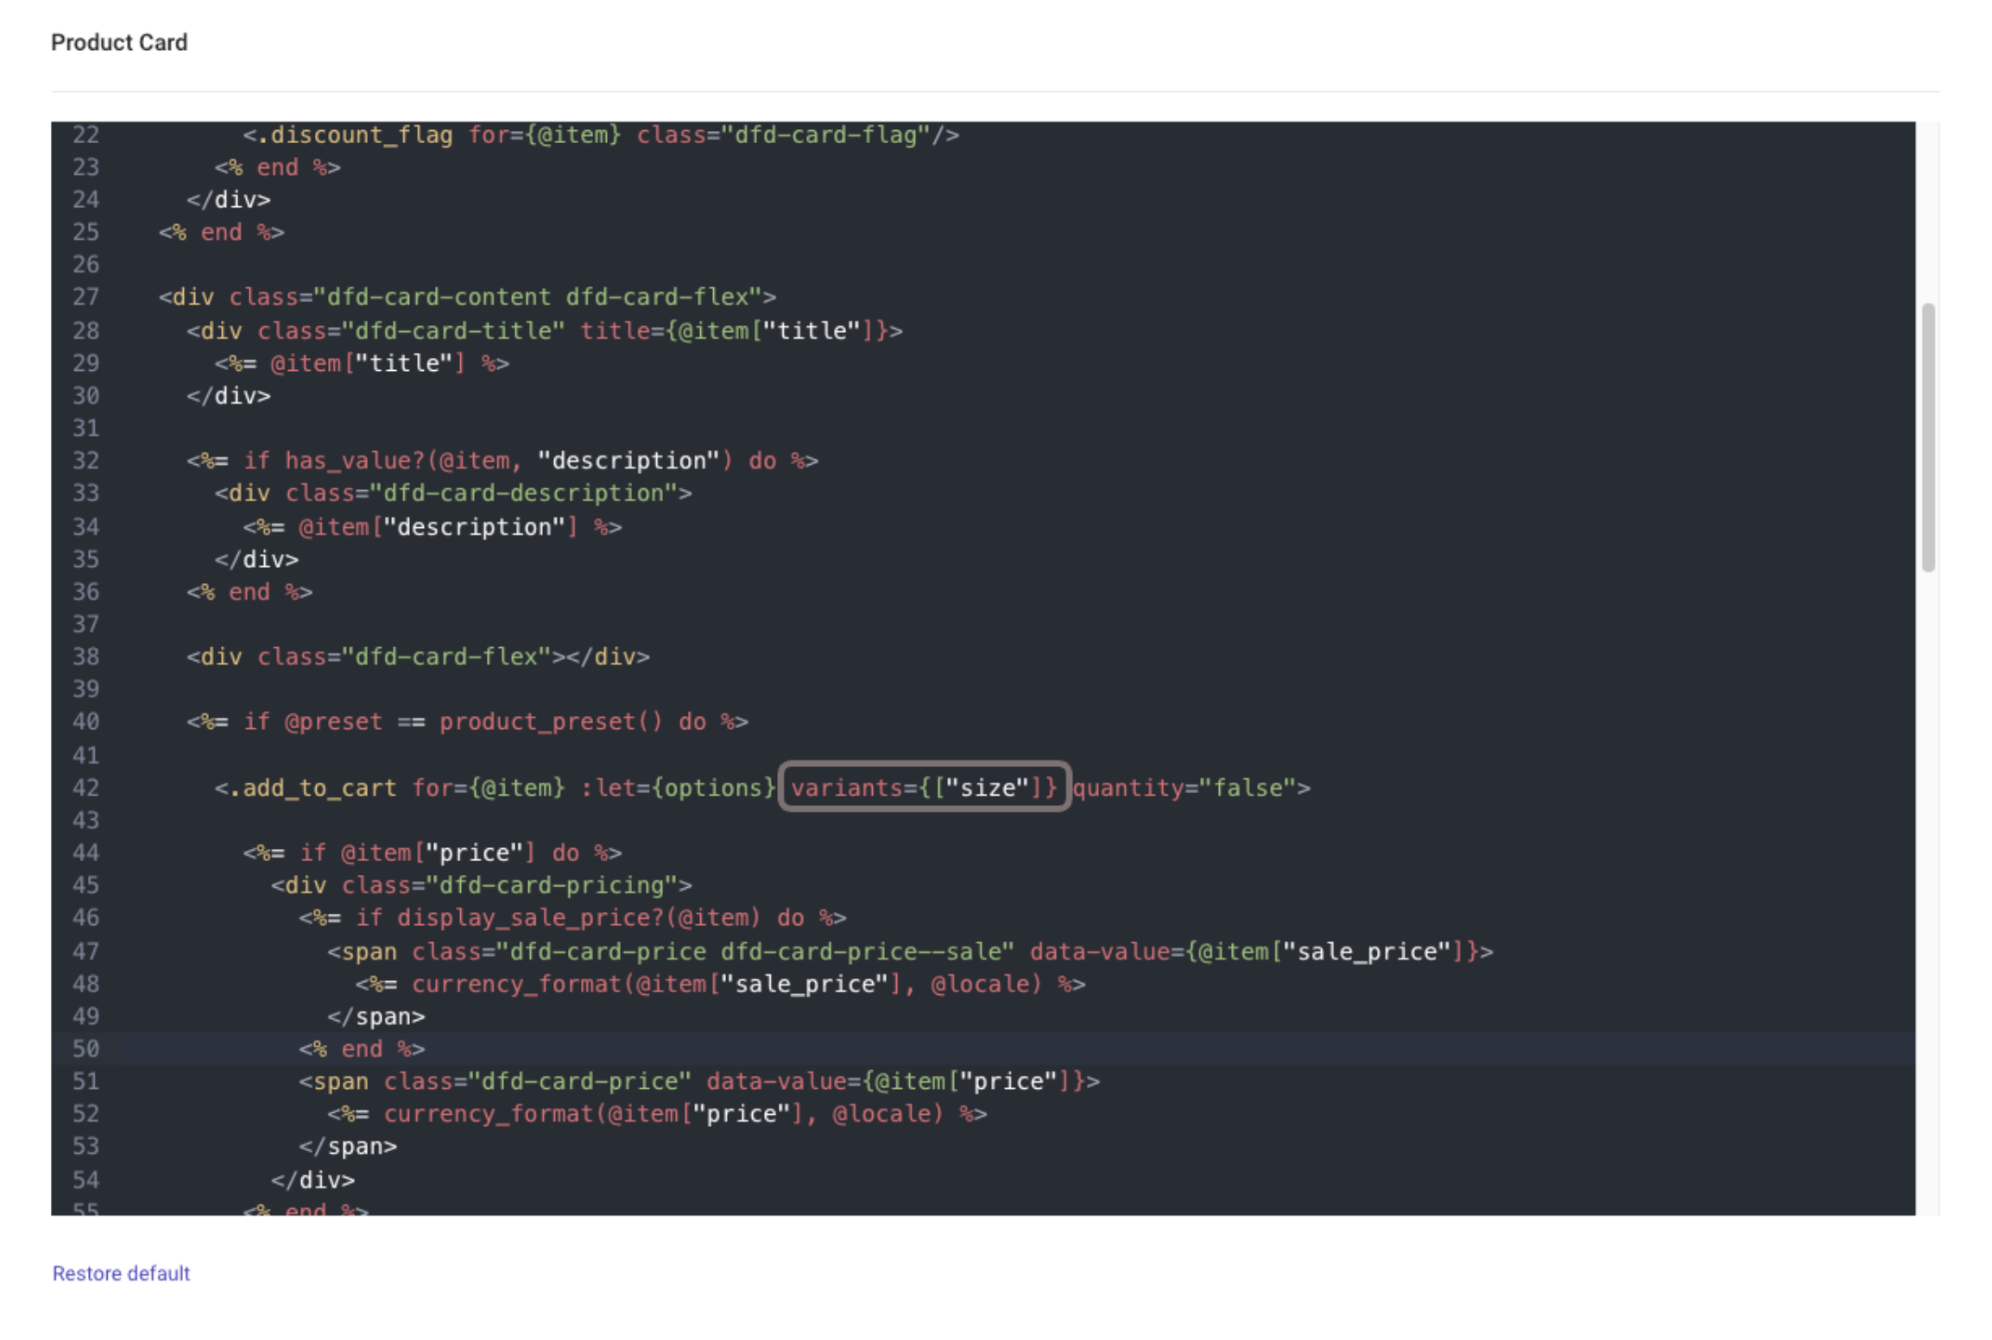
Go to the product card template and locate the following line:
<.add_to_cart for={@item} :let={options} variants={[]} quantity="false">
Simply modify the variants={[]} attribute, in order to add one or several attributes that will be used for the variant selector. In our example, we are using the size attribute, so our code would be as follows:
You can add more attributes, if needed, but note that only one can apply per product. For example, if we have another product, which doesn’t use sizes, but colors, our code would be as follows:
<.add_to_cart for={@item} :let={options} variants={[“size”, “color”]} quantity="false">
Prestashop - make sure you have activated the Index product attribute combinations option, from the Doofinder plugin configuration.
How To Configure The Variant Selector, Using A Custom Feed
If you are using a custom Data Feed, make sure you are exporting correctly the variants with a parent product.
The information must be added to the parent product (df_group_leader) and set as follows:
- TXT file:
header: df_variants_information
value: color%%size
- XML file:
<df_variants_information><![CDATA[color%%size]]></df_variants_information>
Variants will index the color and size as follows:
- TXT file:
header: color
value: Black
- XML file:
<color><![CDATA[Black]]></color>
For further help, please email Support through our contact form, and we will assist you with the process.
If needed, simply log in to your Doofinder admin panel. Click on "Help" in the top blue bar, then select "Contact our Support Team".
Configure the Variant Selector to Appear in Order
As seen above, the variants feature allows you to add as many variants as you need, so your customers can choose the exact product to purchase from the Layer.
The values of a variant appear in natural order by default, which means that sometimes you might need to revise and modify that order to match your desired sorting. For example, for "X-Large" to appear after "Large" and not before "Small" as natural order does.
Now, you have the option to control the order in which values appear.
Follow these steps to configure the order of the values for a variant:
- Go to your Admin Panel > Layers > Appearance > Advanced > Product Card Template, click on "Customize", and locate this line in your code to replace:
- Choose one of these options to specify how the variant should be ordered.
- Ascending order (
:asc): sorts numeric variants from smallest to largest. - Descending order (
:desc): sorts numeric variants from largest to smallest. - Alphabetical (
:alpha): sorts variants alphabetically. - Custom order: list the desired sorting for the variant by defining a specific order. For example:
[“S”, “M”, “L”, “XL”]. - Apply your desired sorting in your code, and save your changes.
<%= for item <- unique_variants(@variants, variant) do %>.
If you want to create a custom order for your store without entering all values, list the ones you want to appear sorted specifically. The rest of values will appear in natural order.
In this example, the original code is replaced by:
<%= for item <- unique_variants(@variants, variant, %{"size"=> ["small", "medium", "large", "x-large"]}) do %>
Find below a complete code snippet with different variants, used either on the same product or across different products:
unique_variants(@variants, variant, %{"size"=> ["S", "M", "L", "XL"], "colors"=> :alpha, "year_collection"=> :desc})
Now your customers can purchase from the "Add to Cart" seeing an ordered lists, whether by numbers, colors, text, or your desired variant.