1. Script
In order to manage your Layer in your Admin Panel, we have consolidated the management of all products into a single installation script enabling quicker and easier implementation of new features, services, and updates in the future. The Doofinder script is the javascript code Doofinder will provide once you’ve created an account while signing in as a new user.
2. Layer
You need to create and assign a Layer to your Store. Visit this article to learn how to set and activate your Layer.
For example:
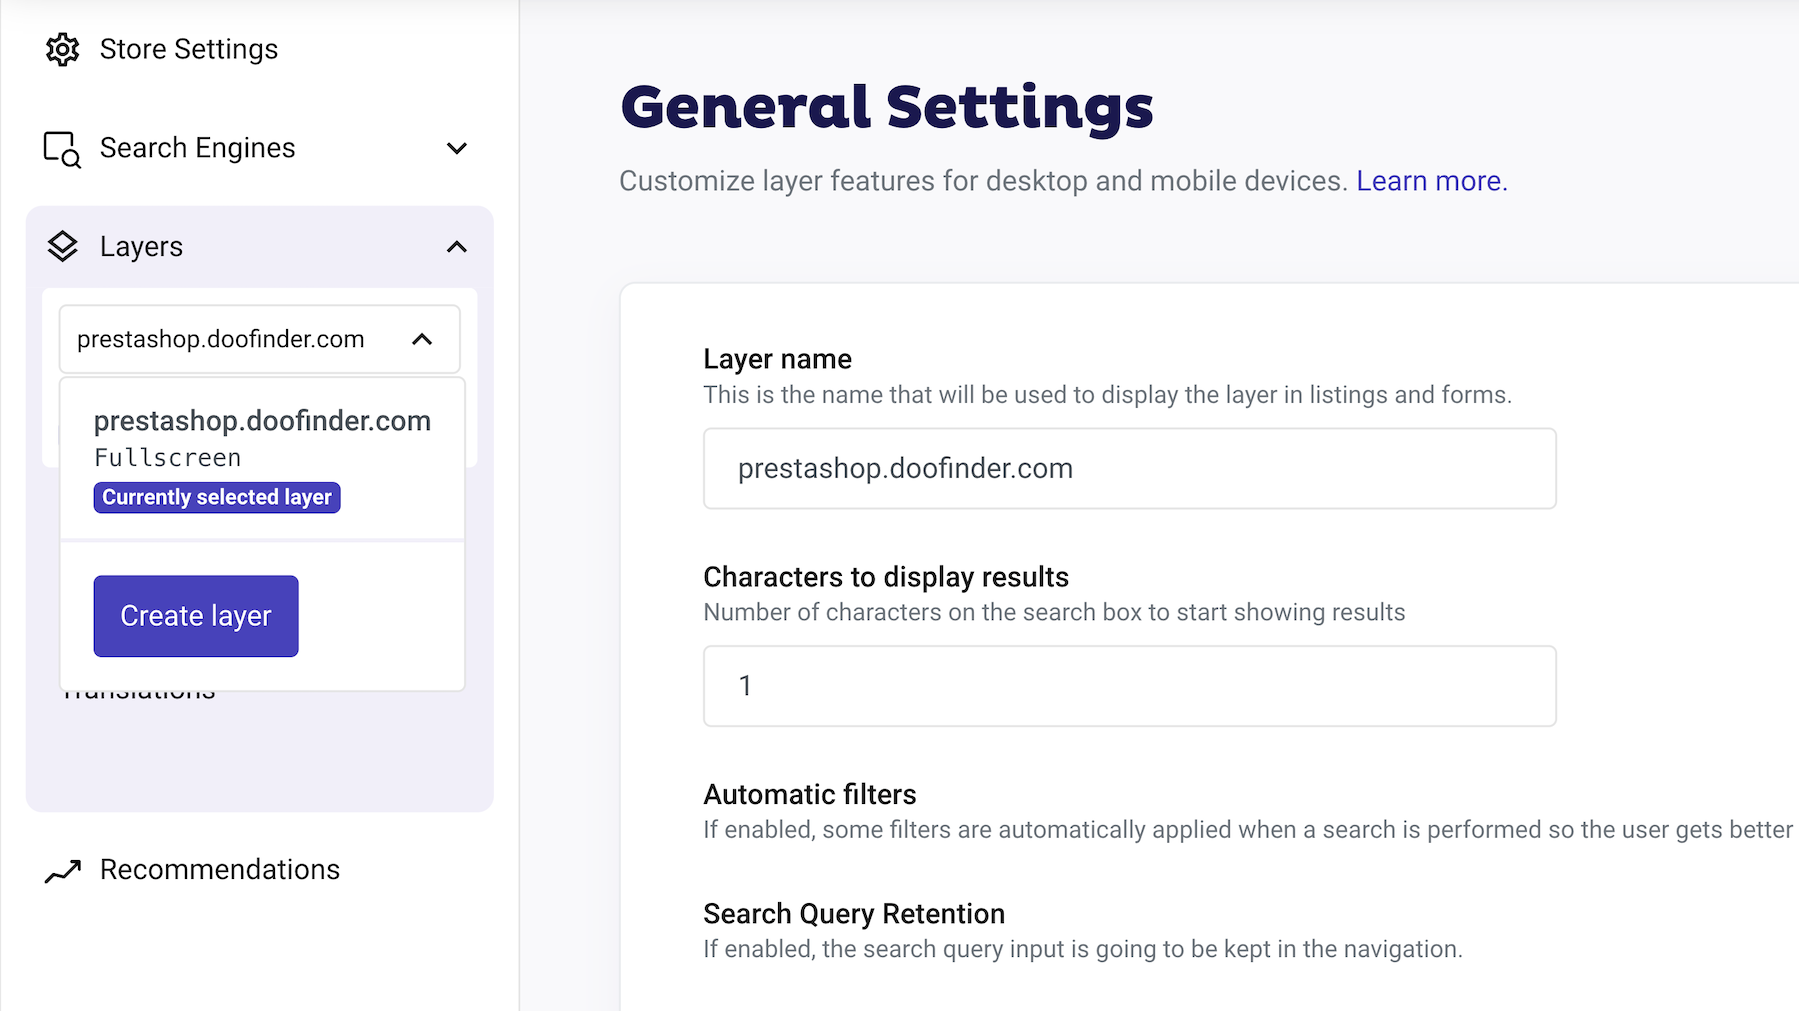
You must complete this step before configuring the Store Settings.
3. Store Settings
Make sure to configure your Store Settings on your Admin Panel > Store Settings
- Store URL: Enter the URL of your store, as typed in the web browser.
- Search Layer: select the Layer previously created.
- Trigger: Enter the CSS selector, like
#search-boxorinput[name="q"]of the element or elements in your page used to write the search query. Click here to how to find your search box CSS selector. - Search Engine: create a Search Engine or make sure to have one created and ready to run on your online store.
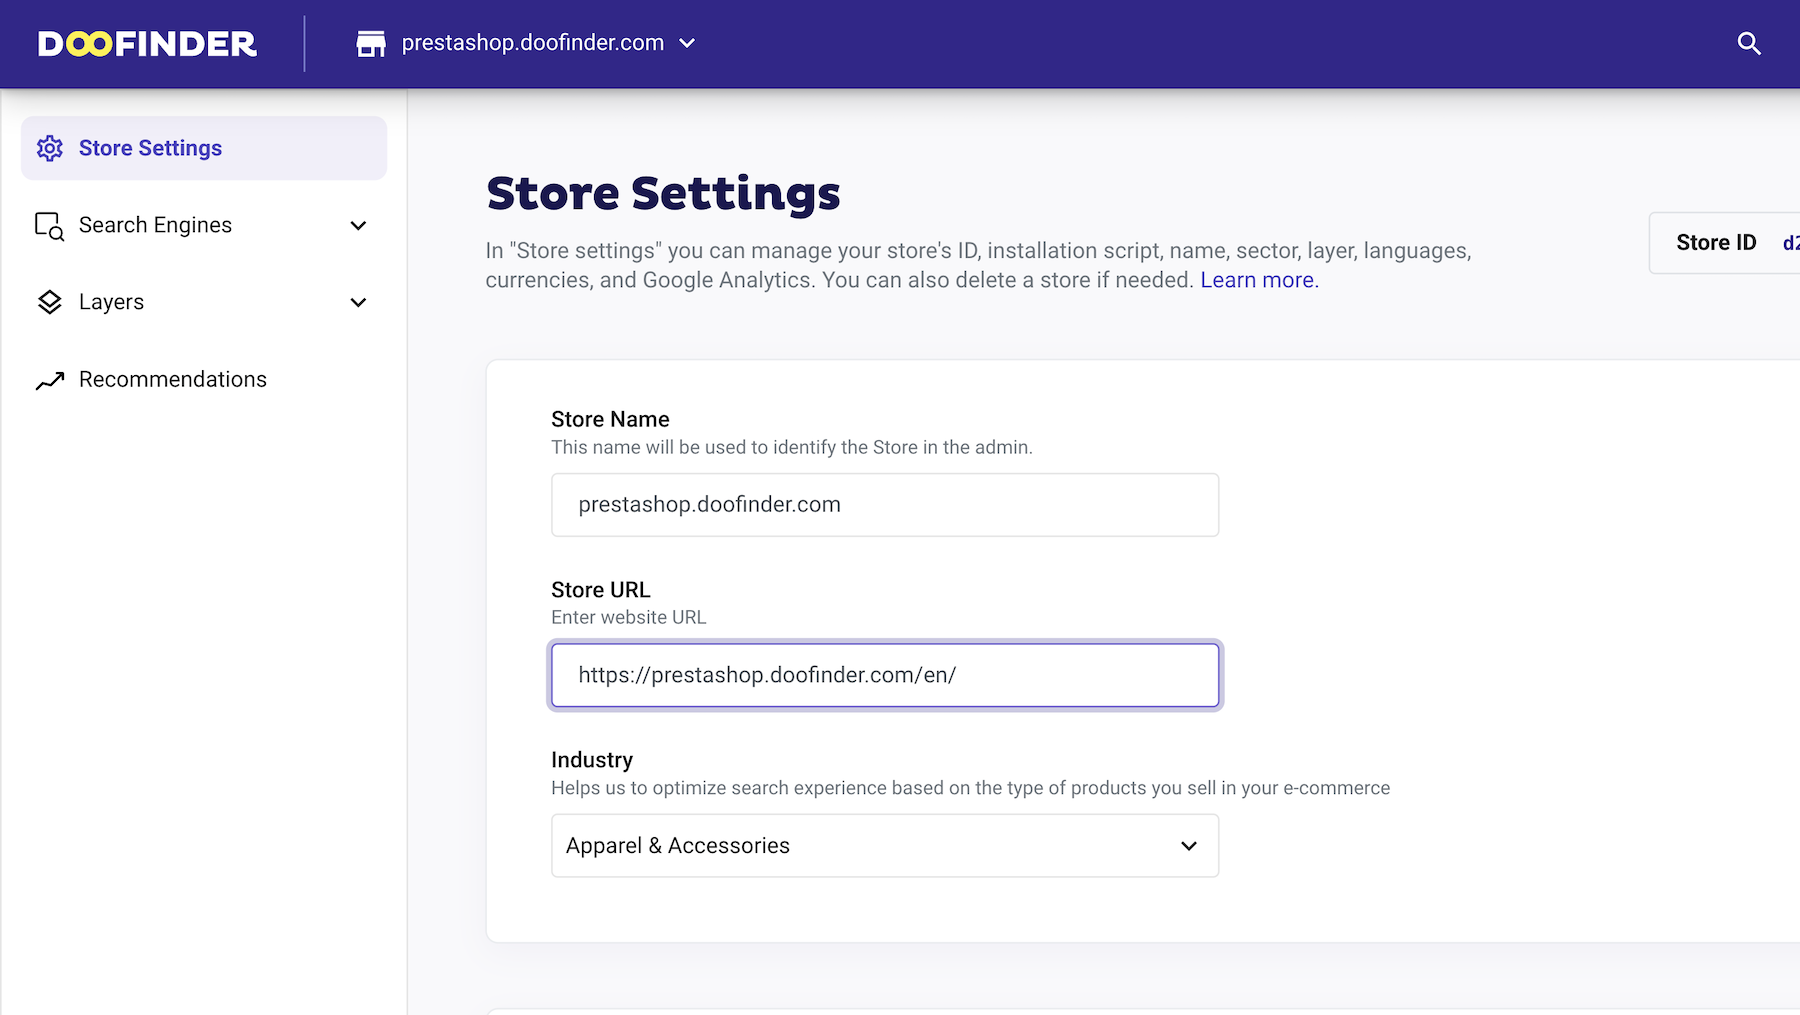
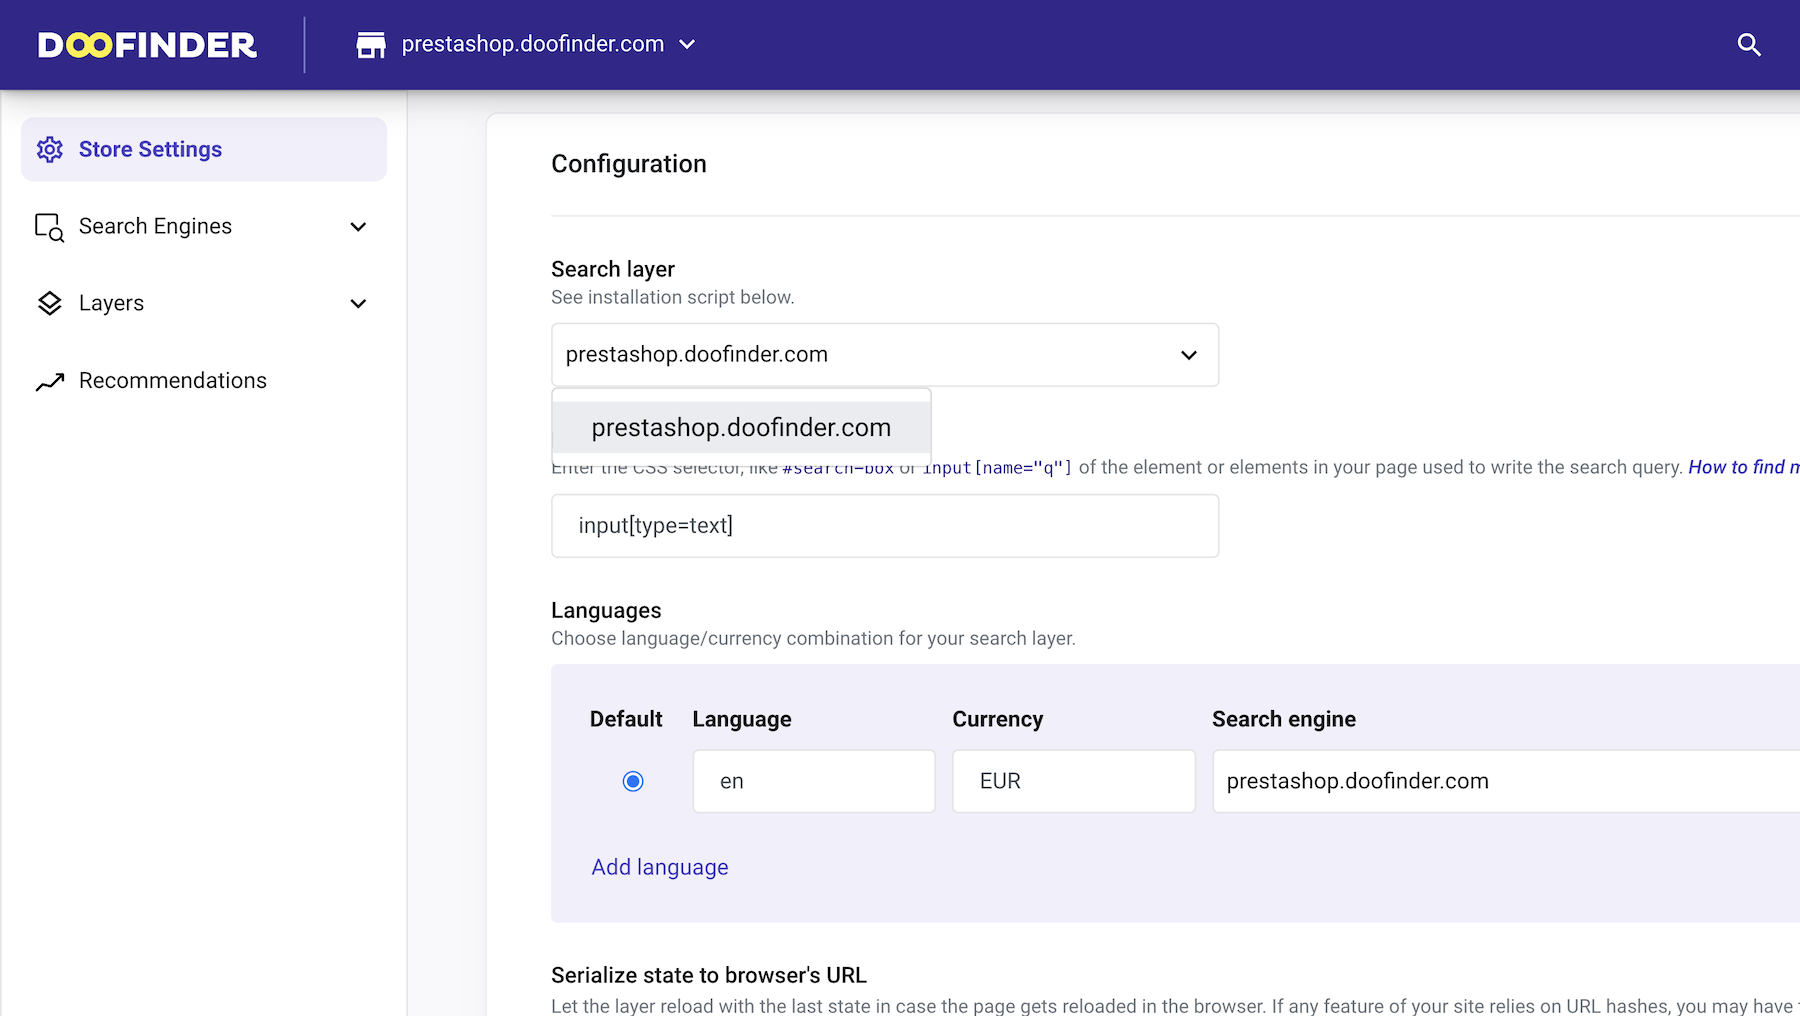
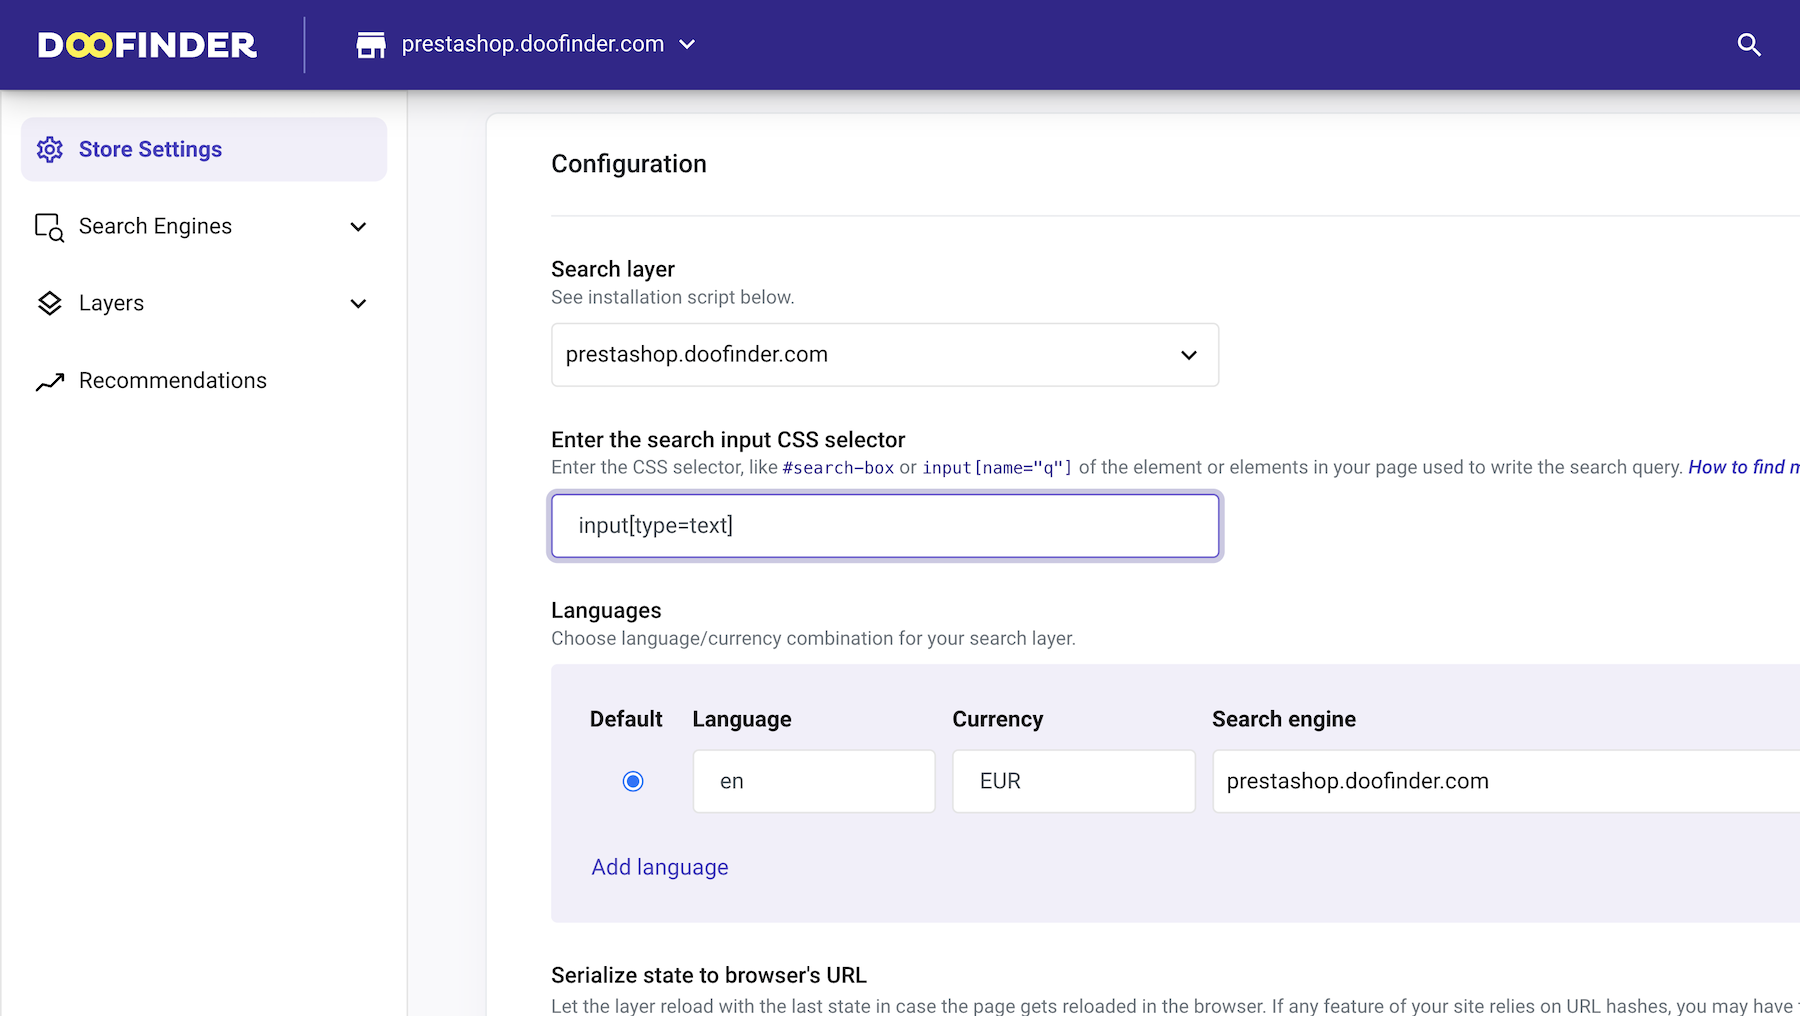
Regardless of whether you are using Doofinder from a plugin or a custom store, you must complete these initial steps and verify all the information is correct before proceeding.
Once step 1, 2 and 3 are completed, you can now follow the nex steps depeding if you're working with a Plugin or a Cusrtom website.
Plugins
Prestashop
Make sure to have followed and completed the guidance above. Then:
- Update your module to the last version.
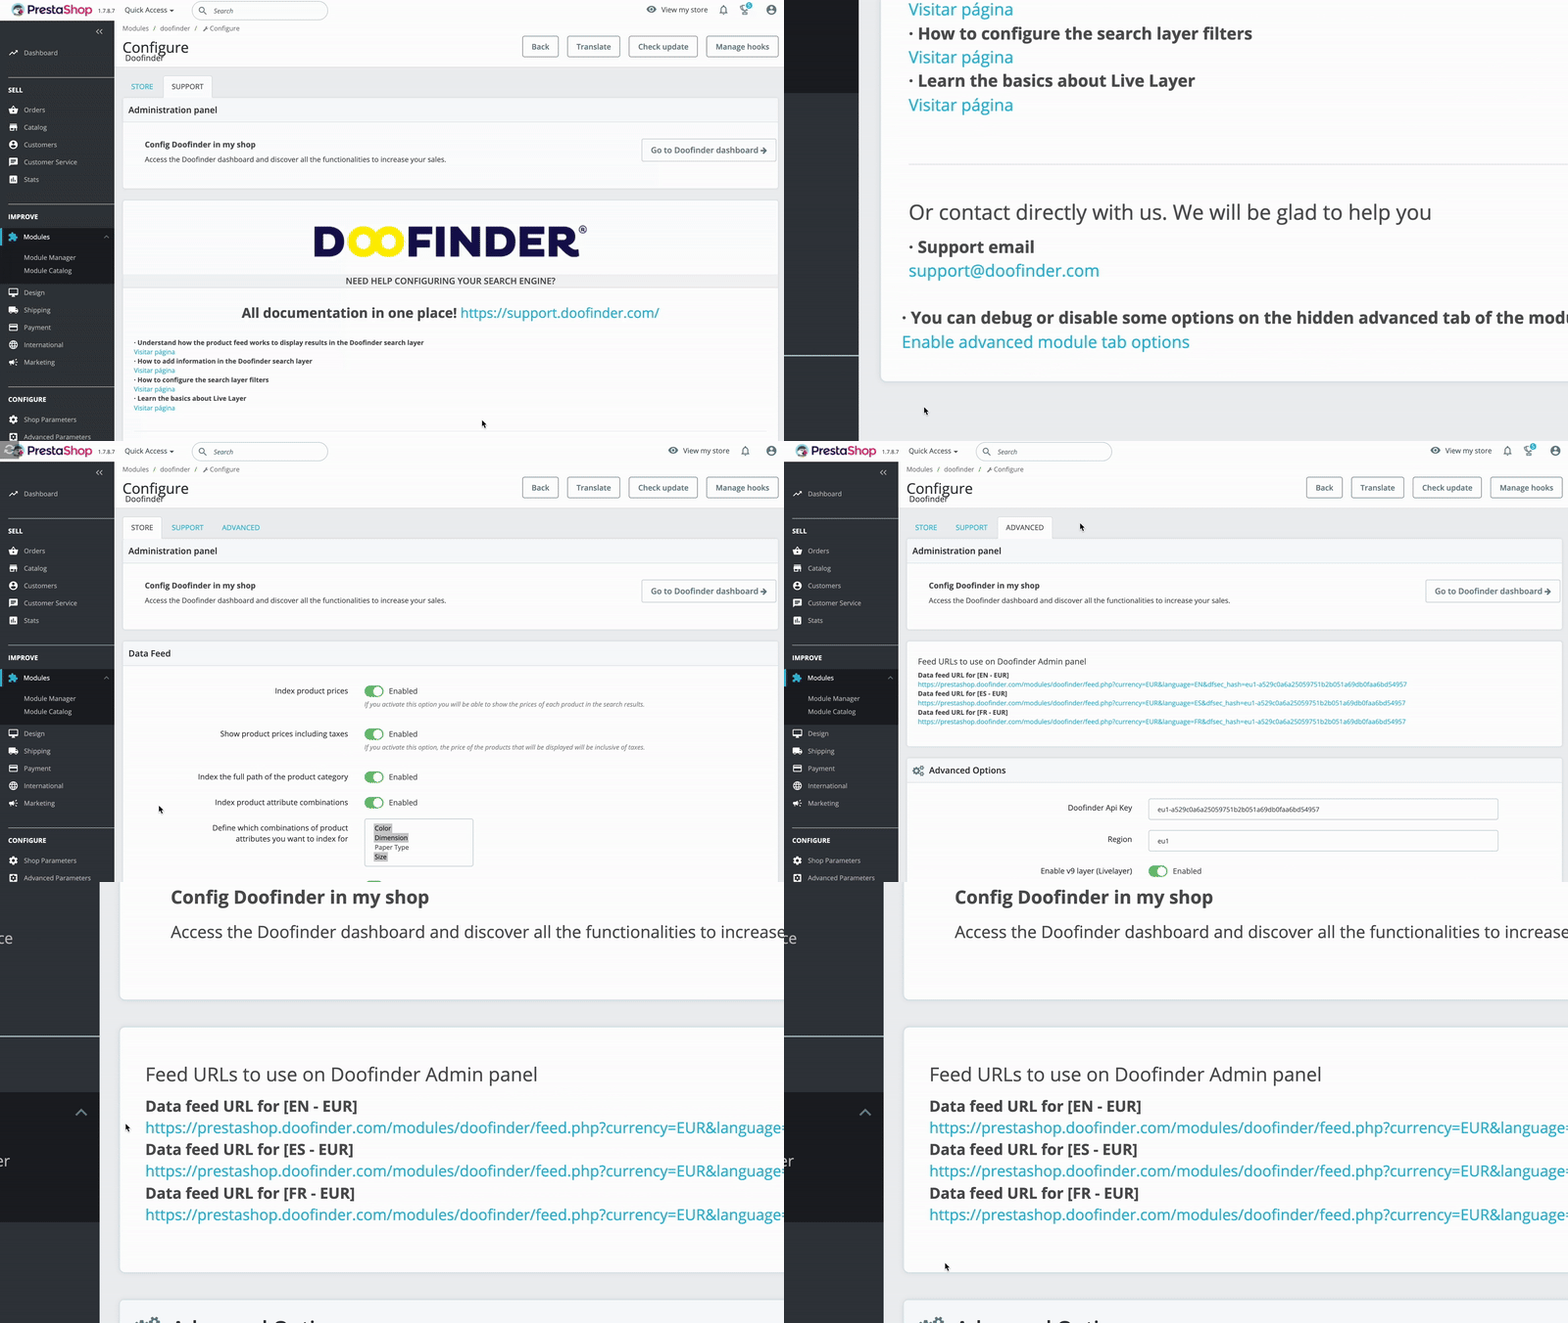
- In your module manager go to Store > Search Layer > Enable both checks (Doofinder search layer, and Doofinder search layer in mobile version) and include your Store ID. You can find your Store ID in your Admin Panel. Go to "Store Settings" and, at the top right corner of the page, your Store ID will be displayed.
- Once finished with the previous steps visit the Plugin Support tab. Scroll down to find and activate the "Enable advanced module tab options" setting.
- Go to the Advanced tab and fill in these boxes:
- - Doofinder API Key: To access your API Keys, go to your “Admin Panel” > “Account” > “User“> “API Keys”. You can find your API Keys in the Account Panel. On the left-side menu, to User > API Keys. There you will have your API Keys.
- - Region: Make sure it is filled with “eu1” or “us1”. Otherwise, it won’t work. Check your API Key to write the region correctly.
- - Enable V9 (Livelayer).
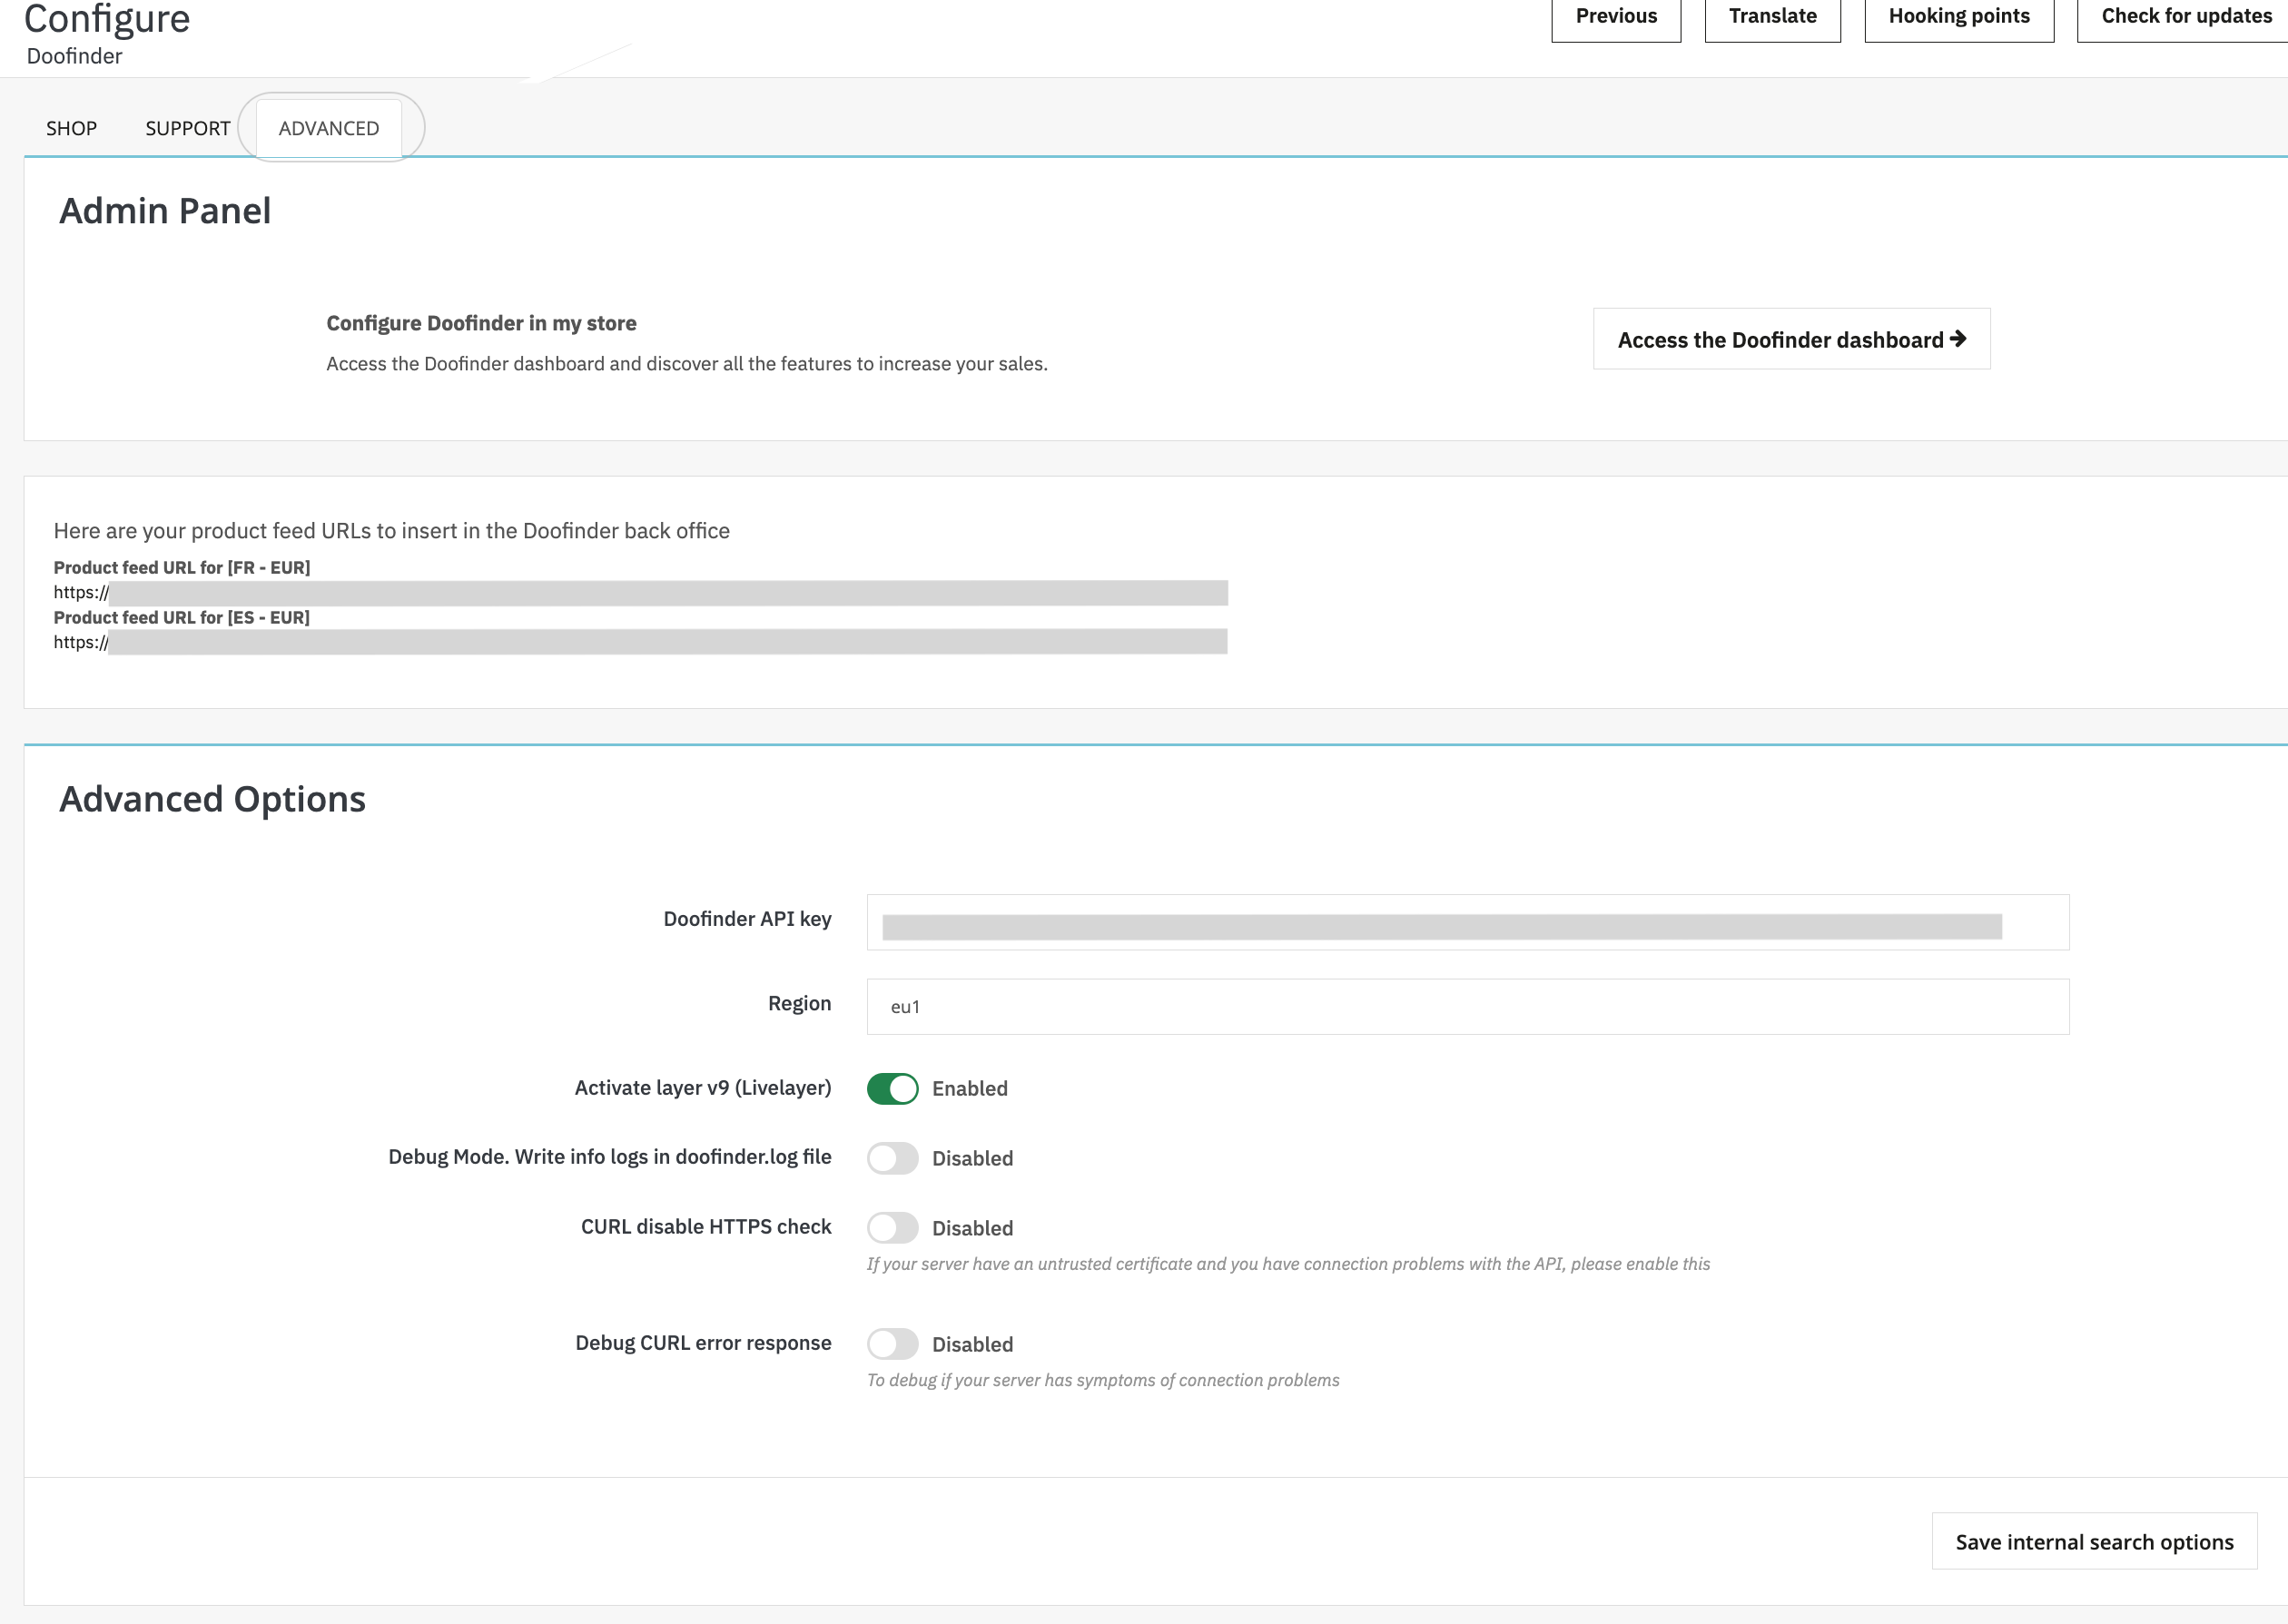
- Finally, from the available URLs on the panel, copy and paste them to update your URL feed in the Doofinder Admin Panel by navigating to “Store Settings” under the “Indices” Section.
- Save your changes.
Woocommerce
Make sure to have followed and completed the guidance above. Then:
- Update your module to the last version.
- In your module, go to Doofinder’s "General Settings" and replace the script for the single script in JS Layer Script box. You can always find the Doofinder Script on your “Admin Panel” > “Store Settings” > “Configuration”. Scroll down to “Installation Script” and you’ll find it displayed.
Warning: Force normalization (Reset Credentials) if an error occurs when indexing. If the error persists, contact our support team. Follow this documentation to update the Doofinder Data Source.
Shopify
It is not necessary to reinstall the Doofinder App.
Make sure to have followed and completed the guidance above. Then:
In your Shopify panel go to your Apps > Doofinder > disable the Layer by clicking on "Disable Doofinder search bar" Then, wait for 10 seconds before enabling the Layer again.
If you have previously manually added the Doofinder script to your theme, you will need to replace it manually.
Bigcommerce
Make sure to have followed and completed the guidance above. Then:
- Check your module is updated to the latest version.
- In your BigCommerce panel go to your Apps > Doofinder > disable the Doofinder search bar. Then, wait for 10 seconds before enabling the search bar again.
Magento
Make sure to have followed and completed the guidance above. Then:
- Check your module is updated to the latest version.
Custom
Follow this step only if you are not using one of our plugins.
Make sure to have followed and completed the guidance above. To update your Layer from Layer V7 to Layer V9 replace the script for the single script

