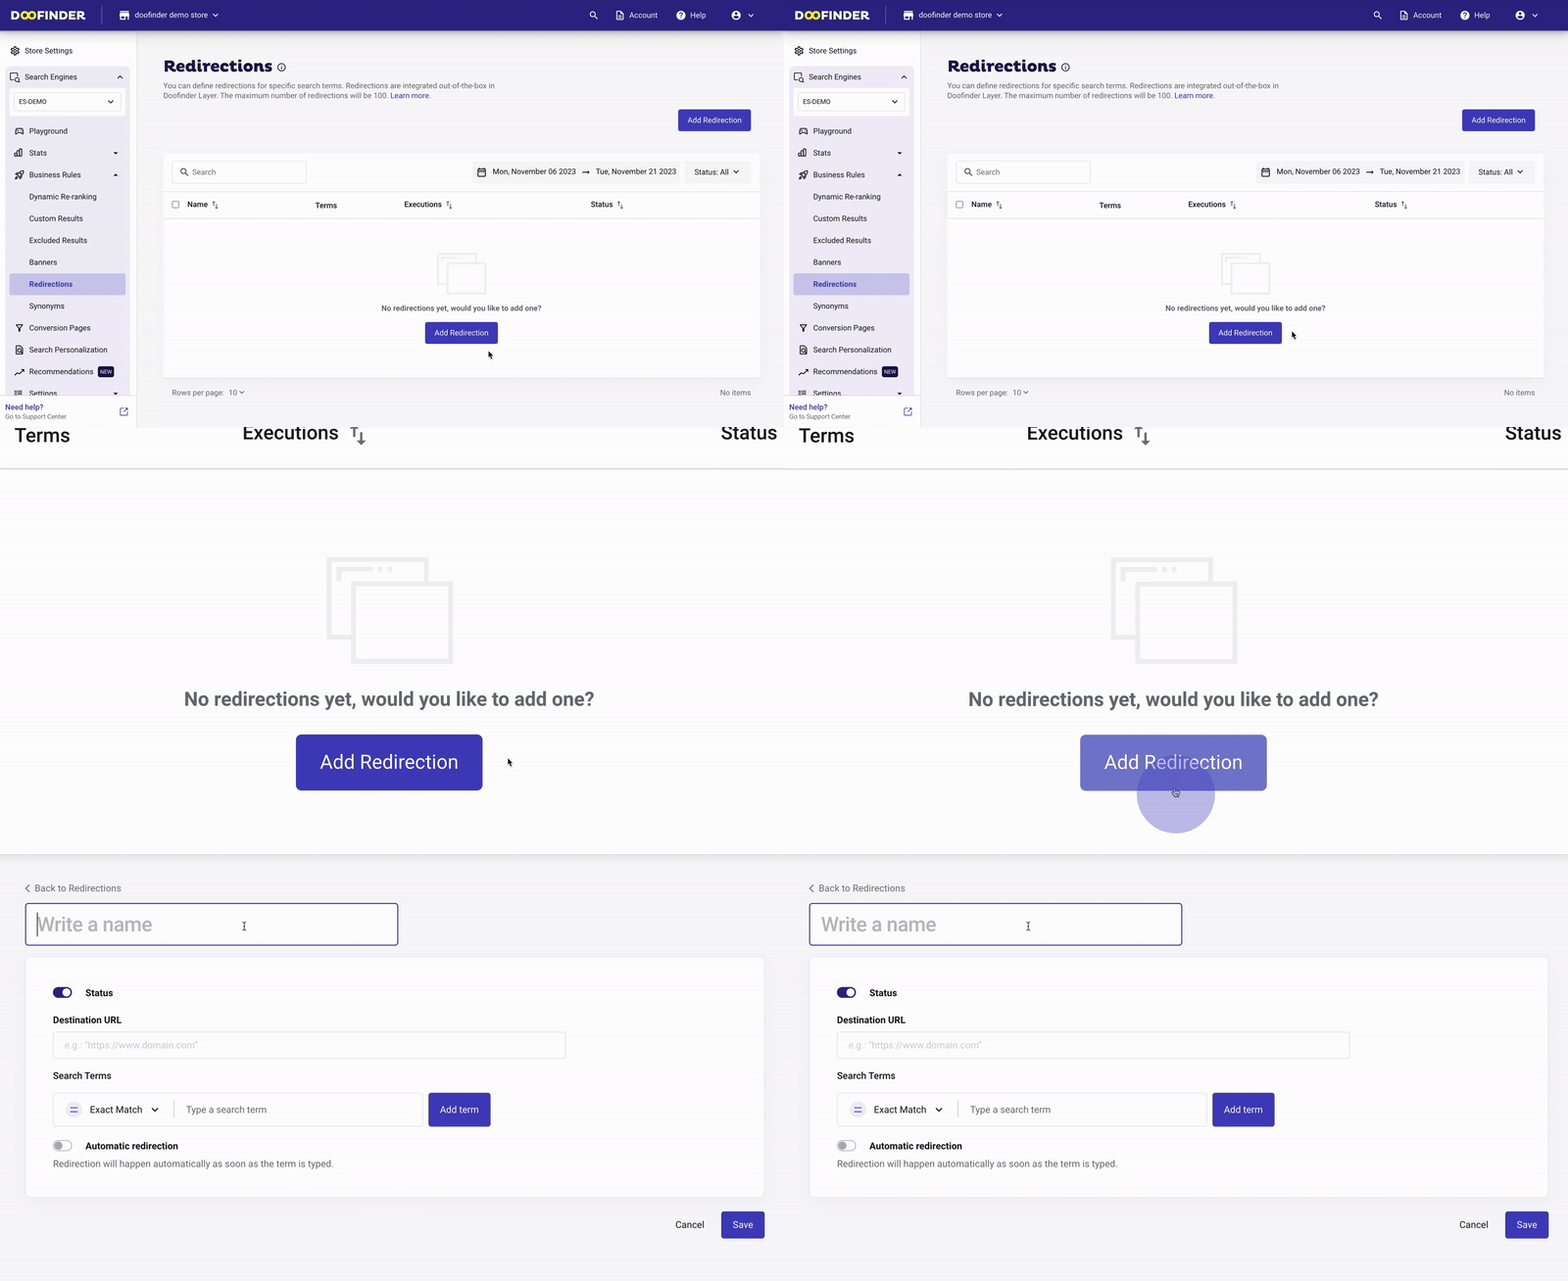
A redirection takes customers from the search Layer to another page specified by a URL when they type for any search term.
Your customers can find what they are looking for through the search bar, even if the product(s) or information is not inside your website, thanks to the Redirections option.
Having redirections on your website can be useful in several situations, such as:
- Review the privacy policy on your website.
- Access the contact page.
- Direct them to other web pages to find more information (e.g.: other pages of your company, blog, related pages, etc.)
- Redirect to specific landing pages, based on brands or campaigns, such as Black Friday, Sales, Christmas, etc.
How to Create Redirections
To access the Redirections feature, go to your Admin Panel > Business Rules > Redirections. Then, click on Add redirection button.

On the next page, you'll be required to fill in the following fields:
- Redirection name: A custom name to identify each Redirection.
- Status: Enable the status option to activate the redirection.
- Destination URL: Enter the target URL.
- Search terms: Choose what terms you want to activate the redirection. Additionally, you can select if you want it to be active for that exact term or variations.
- Automatic Redirection: By checking the Enable automatic redirection checkbox, the redirection will occur automatically. If left unchecked, the redirection will only occur once the user presses enter or search in the site.
- Once complete, hit the Save button.
Exact Match: This redirection will be triggered if the user types the EXACT search term.
Broad Match: This redirection will be triggered if the text typed by the user CONTAINS this search term.
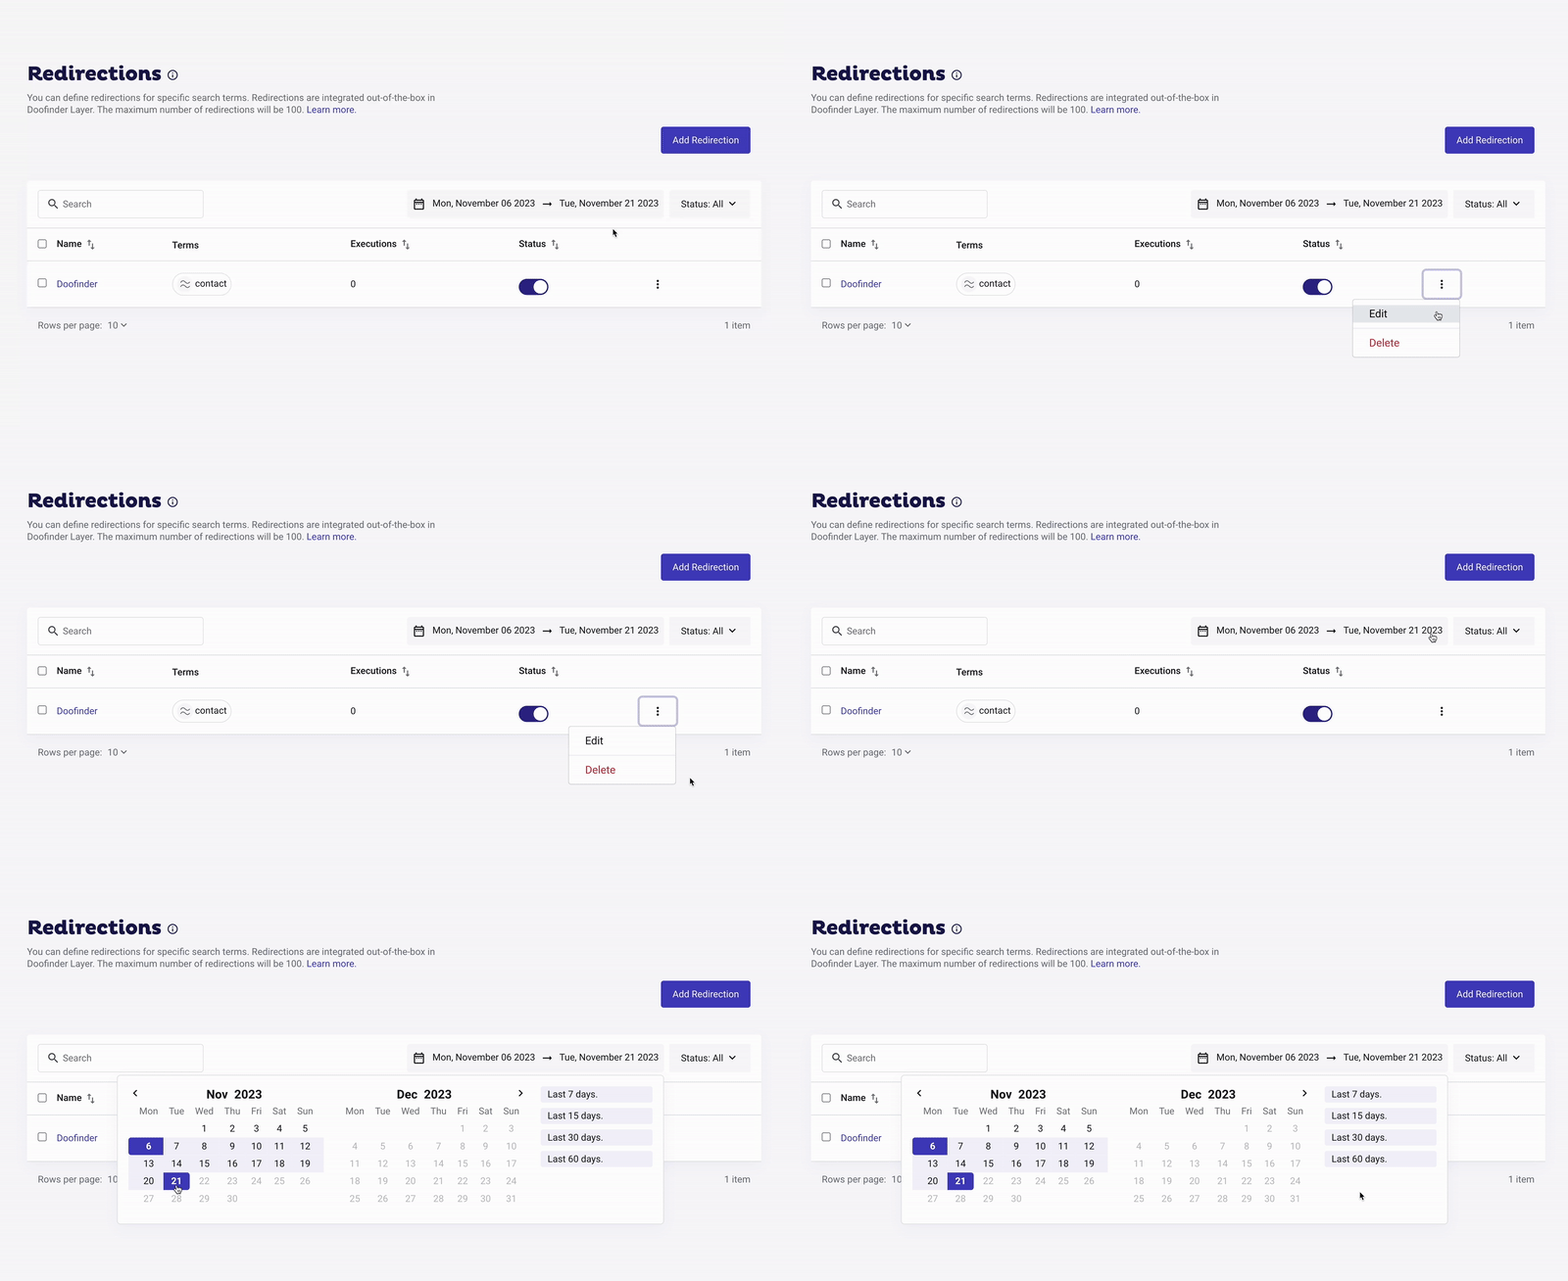
From here you can activate or deactivate the redirection and edit or delete it by clicking on the three dots. You can also search for a specific redirection and filter by date or status.

Each Search Engine has a limit of 100 redirections.

