The AI Assistant is designed to understand intent and reasoning. It dialogues with users to recommend and guide them based on their needs.
An example of question that can be made:
- "What’s best for hiking in the rain?"
The assistant would respond with a selection of recommended products:
- "These waterproof boots provide traction and support."
The greatest advantage of this Discovery product is to make the customer experience simple by giving direct advice, understanding the user intent and offering a personalized suggestion.
The assistant understands natural language, compares products, and answers customer questions using your product data feed and information uploaded, we will go more in depth below. It also adapts to your search layer look and feel, matching its design.
Prerequisites
Before configuring the AI Assistant, ensure that:
-
You have an active Store and Search Engine in your Doofinder Admin Panel (products must be already indexed).
-
Your data feed includes the fields you want the Assistant to use when recommending products (e.g.: title, price, best_price, color, categories, brand, description, dfid, etc).
-
Field names in your feed are properly mapped to Doofinder’s normalized fields, especially if you use custom field names. You can use Field Name Mapping for this.
-
Ensure that the script is updated to the single script, it looks like this on your HTML. With that, Bubble and the mobile version of the AI can work correctly.
-
Finally, you should create a new Layer, as the following message suggests:

If you have any previous configurations on your layer you should copy all CSS and Template codes over to the new layer.
Configuration Steps AI Assistant
In the following steps, you will learn how to configure your AI assistant. Notice that this configuration is per store:
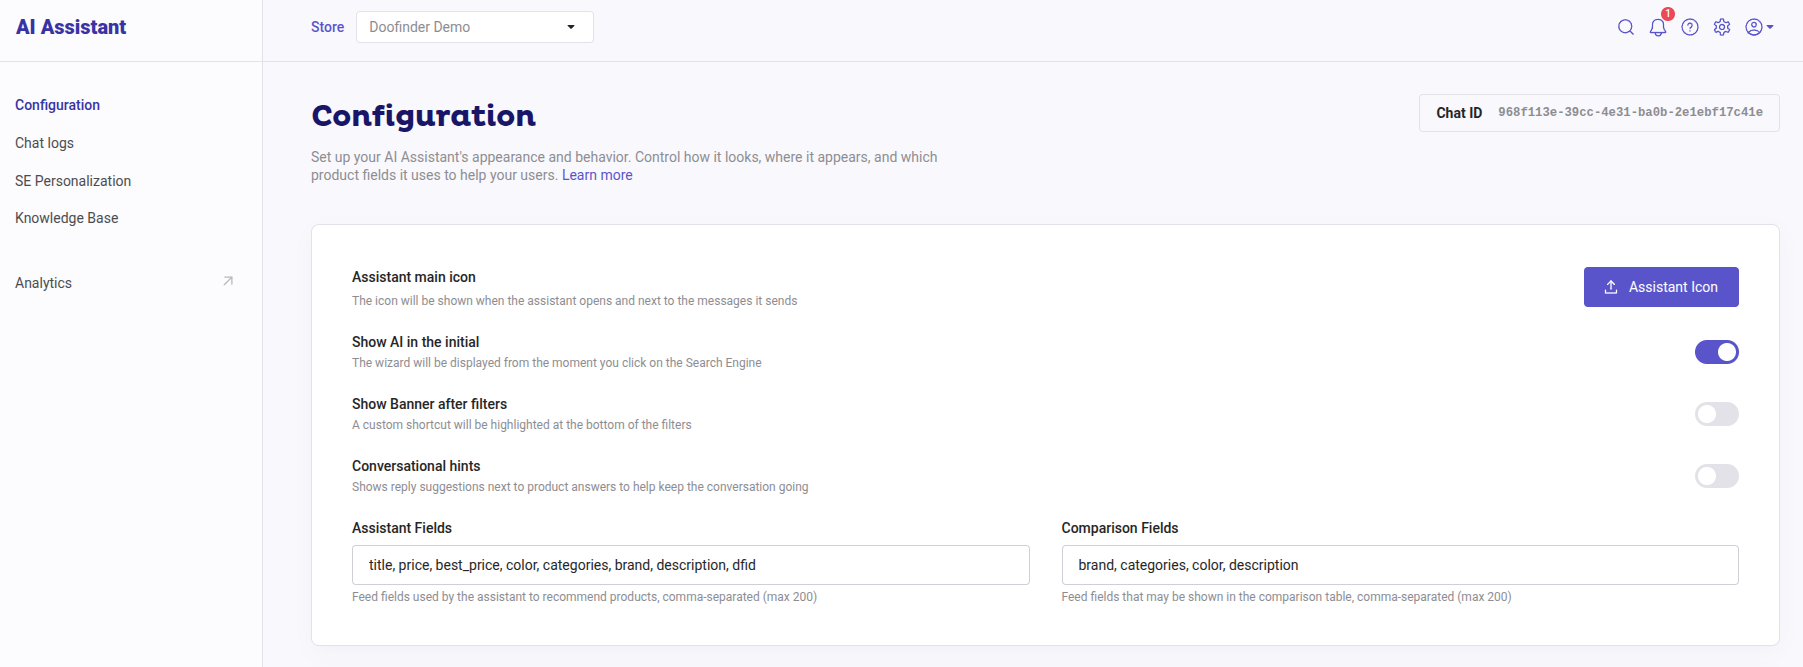
Show AI in the initial
If the toggle is enabled, the AI assistant will be shown from the moment the search box is clicked on, alongside the initial results. Otherwise, you will need to first type something in the layer.
Show Banner after filters
If the toggle is enabled, the assistant will be shown at the bottom of the filters, otherwise, it will be on top of it.
Conversational hints
If activated, it suggests common responses to users to keep the conversation flowing. It makes it easier for continuing interaction by simply clicking on the answers, avoiding typing, as it asks follow-up questions, and explore products.
See the following example with "Scooters":

Assistant Fields
Here you can choose the feed fields used by the assistant to recommend products, they must be separated by comma, see example below:
- title, price, color, brand, etc.
However, if the box is empty, we will use a default list of fields: title, price, best_price, color, categories, brand, description, dfid. The purpose of this is to add fields when you need to control what you want the AI assistant to read instead.
Comparison Fields
In the Comparison Fields you can opt for feed fields that may be shown in the comparison table, separated by comma, see example below:
- brand, categories, color, description.
The system will use the selected Comparison Fields to show a side-by-side comparison of the products, using only the fields you defined. However, if the box is empty, the system will pick the most relevant fields in your data feed.
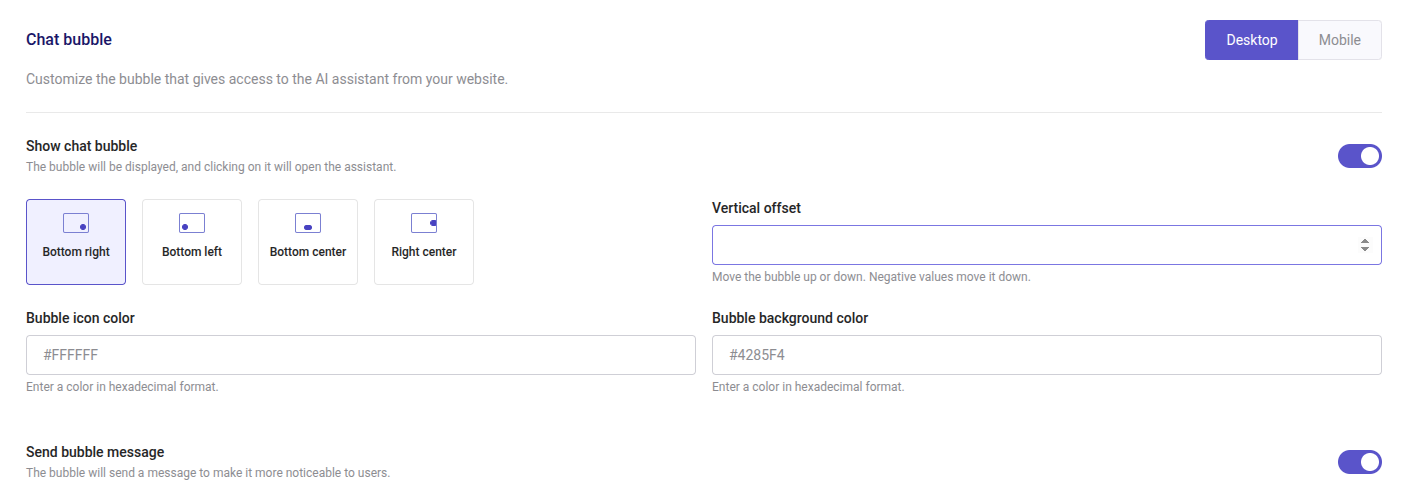
Chat bubble
Show chat bubble
You can enable it to draw your customer's attention to the AI Assistant beyond the standard interface on the layer. Once activated, the bubble will appear on all website pages, apart from the checkout view, providing users with a direct entry point to open the conversational layer.
You are also able to customize the chat, see available options:
Vertical offset
Shift the bubble upward or downward. Negative values move it downward.
Bubble icon color
Easily change the bubble icon color using hexadecimal format.
Bubble background color
Change the chat bubble background color.
Send bubble message
The bubble will send a message to make it more noticeable to users. If enabled, customers will be directly addressed on your web by the assistant.
Notice you can activate both Bubble “chat” and “message” for desktop and mobile.
Customize using CSS
You can use CSS styling for more advanced changes to the appearance of your chat:

Notice this CSS will affect all devices and the whole page.
The AI Assistant on a Product Page
You can activate the AI Assistant also on products pages, by configuring it under your AI Assistant’s configuration block.
How does it work? The AI, activated from a Banner, will use the product page context to provide more precise answers, as well as search for relevant information when needed, without extra configuration. It also considers the full Knowledge Base in every response.
The AI on the product page opens in a side panel, allowing your customers to continue browsing and buying.
Follow the steps below to achieve it:
- Activate if under AI Assistant panel > Configuration > Enable the AI Assistant on the product page.
- You can Enable questions at banner on the product page if you would like the Assistant to provide some guidance to buyers.
- You can also enable the option of Display an access section with text and a button on the product page, you'll need to select a place on your page, follow through step 4.
- Choose a CSS selector to define the right place on your product page and the position of the element.
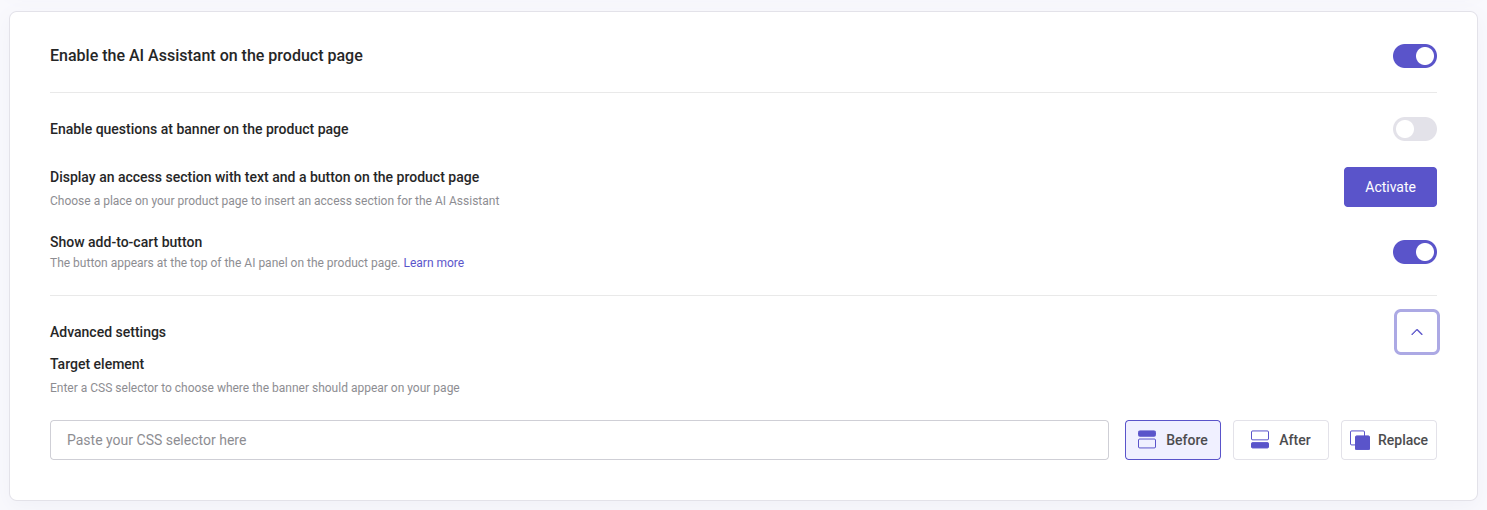
In the same section you can also enable the Add to cart button for maximizing its potential.
See example:
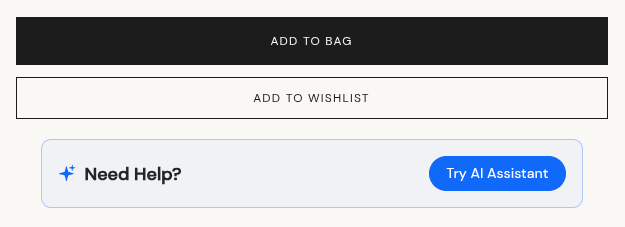
You can place it where you prefer, in the example above we have it under the page’s native “Add to Cart”.
The AI Assistant on a product page acts the same way as your regular chat bot.
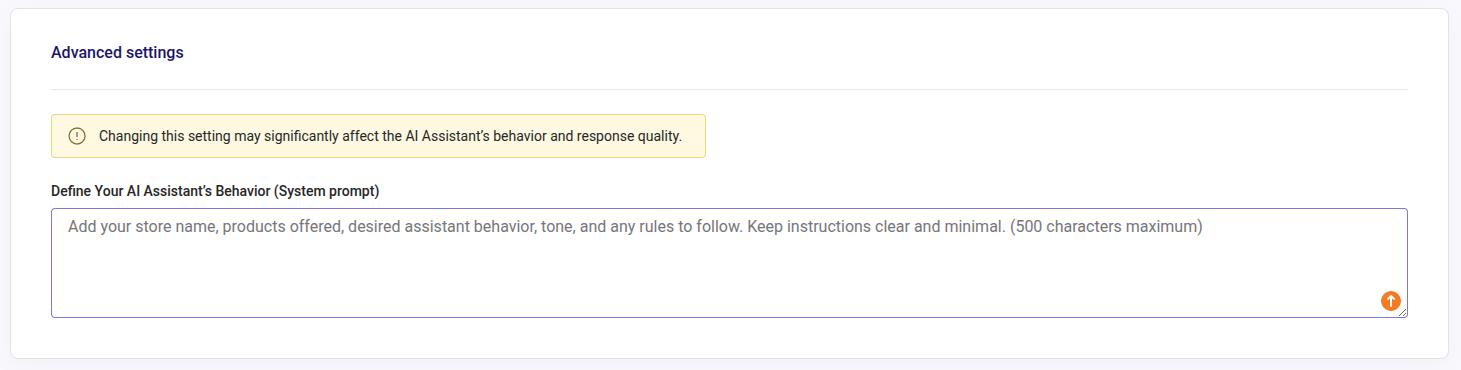
Define Your AI Assistant’s Behavior (System prompt)
Here you can add basic information about your store to help the assistant to answer questions about your business, shaping how the assistant responds. However, it is not necessary to modify or add information in this field for the assistant to function properly. Our recommendation is to leave it blank at first: test the assistant with your current setup and only add information here when you need to correct or refine its behavior. Keep in mind that any changes will affect all responses and, if not carefully written, may reduce quality or lead to unexpected behavior.
Nonetheless, if you need to add information, it’s important to make clear and concise instructions in order for an accurate performance. You may include:
- Store general information: name, industry, general information.
- What kind of products do you sell? This helps the AI Assistant to know when it should use your feed to answer (vs the knowledge base).
- Specific instructions on how the assistant should handle certain questions.
- Tone of the AI responses.
Notice that this section is not the same as the Knowledge Base section you will see below in this guide, which instead allows you to upload and manage additional store information that the AI Assistant cannot get from the product data feed.
Search engine personalization
Customize the messages shown on and by your AI Assistant. And, you can switch the Search Engine using the option on the right side of the Custom Text section: :
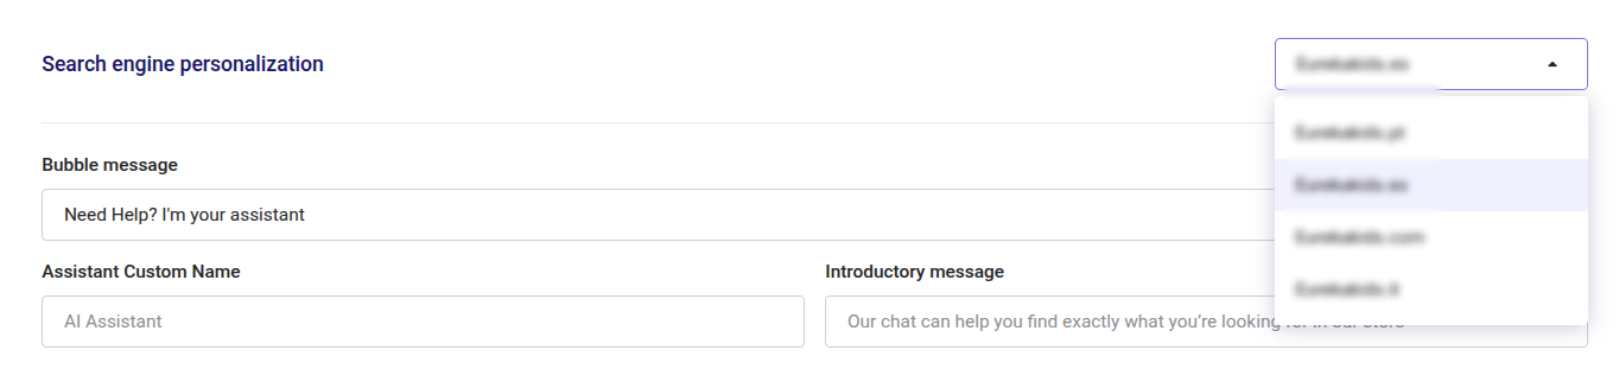
Bubble message: customize it when it addresses the customer directly, “Need help? I'm your assistant.”
Assistant custom name: a name can be assigned to your Assistant, instead of the default “AI assistant” title, you can customize it to your needs:
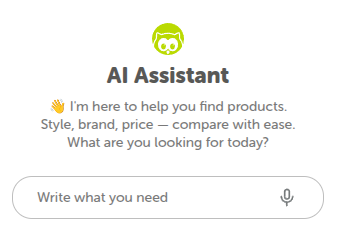
AI assistant Introductory message: refers to the message “Hi, how can I help you today?”
Suggestion 1, Suggestion 2 and Suggestion 3: add your own suggestions, see real case example:
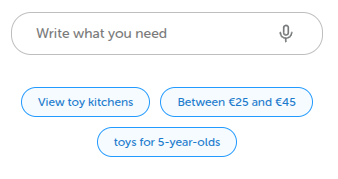
You can use for example, your top searches data to turn it into questions.
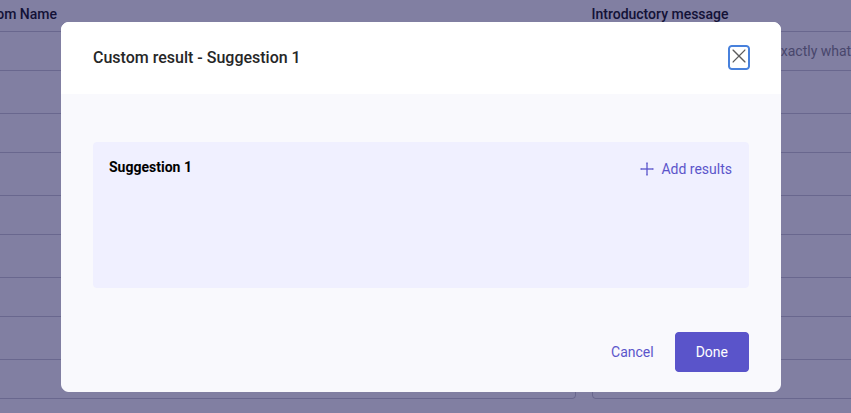
Custom Results: in front of the Suggestions text boxes you are able to also include custom results. The suggestion message should have context to the custom result, the more specific it is, the better. This is crucial for when customers click on the suggestion provided in the chat, they get the custom result of your choice.
Note that when adding a custom result, you will be required to fill in both the Suggestion and the Assistant’s response.
How to do it? Go to your AI Assistant > SE Personalization > Suggestion > add the message > click on Custom Result > Add results, where you can introduce individual or a set of products using the rules, see more here.
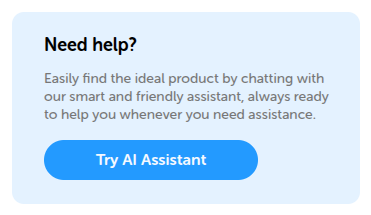
Banner title: you can change the “Need help?” title.
Banner button text: to change the green button of the banner.
Banner description: customize the text “Easily find the ideal product…”
See below:
Chat logs & Stats
At first, you will see the insights box. The Insight functionality is a feature that automatically analyzes the assistant activity and generates concise summaries highlighting key trends, user interests, and opportunities.
Right below, you can see the AI stats:
How the AI Assistant performs in your store - Stats
A built-in stats panel shows how customers interact with the AI, including chat activity and search behavior, giving you valuable insights into what users are looking for.
- AI assistant sessions: the number of sessions. The same user might have different sessions if the chat is used after one hour.
- Clicked products: amount of products clicked after interacting with the AI assistant chat.
- % of sessions lead to a purchase: percentage of interactions that ended on purchasing a product.
- min average per conversation: average conversation duration (in minutes).

On the top right-hand side of the screen you can narrow down the information using the calendar functionality to see the stats per period as well as per device. This will also apply to the Chat Logs.
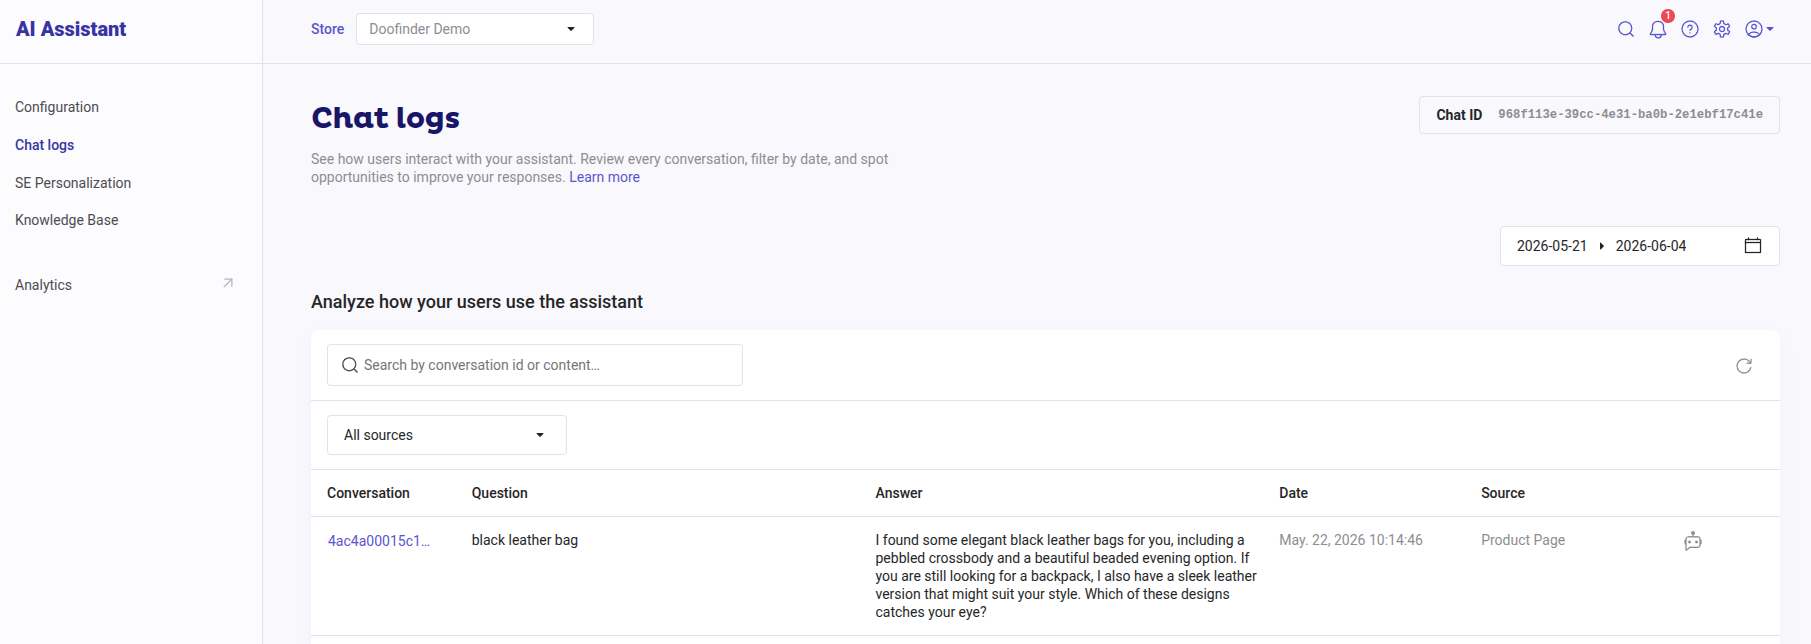
Chat Log Filters
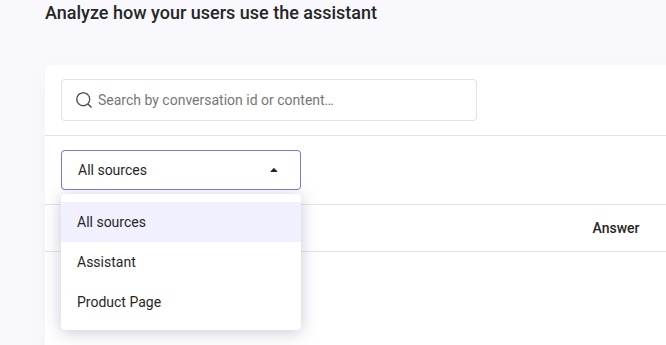
In the Chat Logs, you can filter the interactions your customers have had with the AI Assistant, specifically under the section Analyze how your users use the assistant.
You can also filter the conversations by date using the calendar, as well as per device. The filters also include a search bar where you can search for specific details.
Other filters:
From the dropdown on top of the chats you will find:
- All Sources: will show all messages.
- Assistant: shows only the interactions with the assistant on the search layer and bubble.
- Product Page: shows only the interactions with the assistant on the product page.
Once filtered you will be able to see:
- Conversation: ID of the conversation.
- Question: the transcript of your customers interactions.
- Answer: the answer given by the AI assistant.
- Date: date of the conversation.
- Source: All sources, Assistant and Product Page.
Logs will be conserved for 6 months.
Knowledge Base
The AI Assistant will mainly get all information from the data feed of your products, however, with this functionality, you can increment its expertise adding up any type of information about the store, shipping and payment methods, contact, address, policies etc. The Knowledge Base is the section where you can upload it.
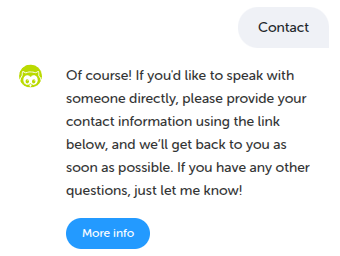
We also suggest adding a document containing contact information, customer service hours, and related details, using a descriptive title such as "Contact Info, Customer Service Hours, etc." This will allow the assistant to recognize when it should reference that document.
Notice this section won't complement your product data feed but add more clarity to the Assistant to answer specific questions.
Real case example:
- If a customer asks how to contact your store, the chat will pull the details from the Knowledge Base and display the contact information with a clickable URL or button:
The data format
Data source: the limit is 50 text sources and each text can contain up to 35,000 characters.
Data Training: up to 30 training attempts per day are allowed without a waiting period (informed when the limit has been reached). Once that time has passed, you’ll need to click “Save & train” again manually. After you do, the system will immediately process and apply the latest modifications.
How to upload it?
Upon click on the button “Add source” you can choose between Text source or URL source.
Option 1 - Text source: you can add the text directly into the text box as you can see below:
- Gather all important information.
- Convert it on a clean and organized text (with titles and sections, if applicable).
-
Copy and paste it into the text box.

-
Once you have finished adding all prompts, click on "Save & train". This might take a few minutes.
Option 2 - URL source: you can add a text URL source.
Only the content found directly on the provided URL will be imported, meaning that linked pages or sections within that URL will not be processed.
Source URL: paste the URL in the box.
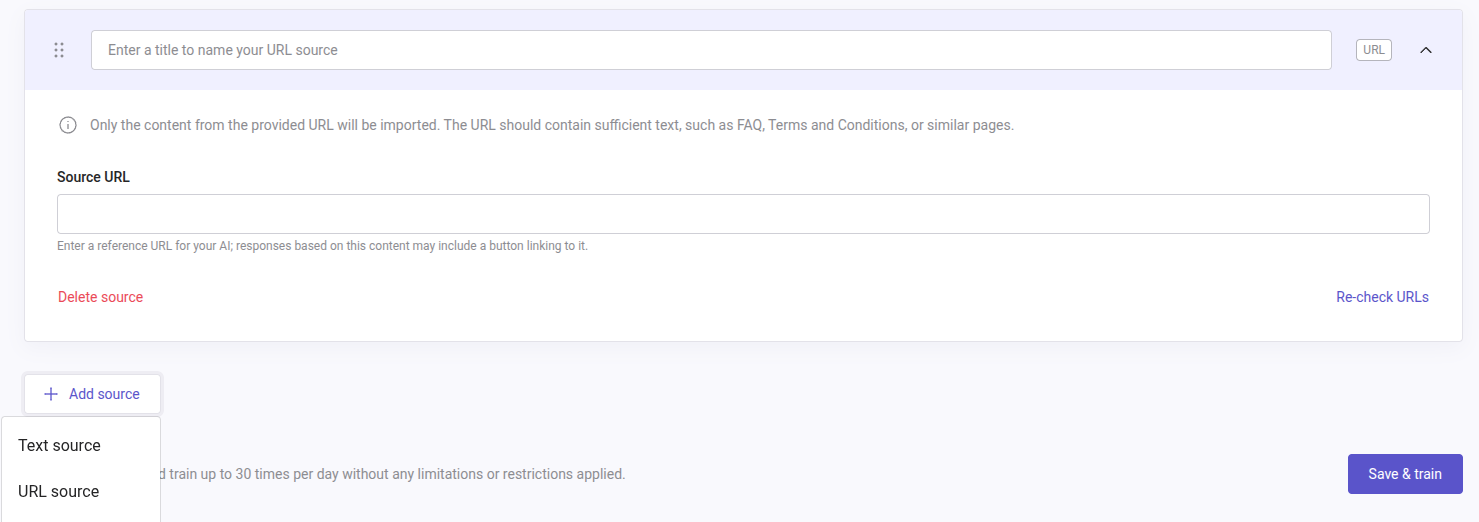
Do not forget to "Save & train".
Clickable links in text sources
When you add a URL to the Knowledge Base text source, it will appear as a clickable link in the search layer for as long as its domain is listed in the Security section, see here.
If the domain is not authorized, the link will show as plain text. See how to achieve it:
- Go to Admin Panel > Configuration > General Settings > Security > Authorized domains and confirm the domain is listed.
- Add the URL to your text source URL for info button.
- Save and re-index.
Customers will now be able to click the link directly from the chat responses.
Languages
The configured texts inherit the language defined for the layer in your admin panel of Doofinder.
Once in the AI assistant, you can interact in any language. The system will automatically detect your input and understand it correctly. However, responses will be generated in the language configured in the search engine, regardless of the language you use. If you explicitly request a different language, the AI will accommodate it.
Adding The AI Assistant To Any Element on Your Web
You can link your AI assistant to any element on your website, accessing it from your backend. This implementation uses a standard HTML ‘onclick’ event handler, which is an attribute that executes JavaScript when the element is clicked.
This allows you to call the method when clicking the element that opens the AI Assistant.
Add onclick="Doofinder.AI.Assistant.open()" to any div, img, button, etc, see:
<!-- Example using a div -->
<div onclick="Doofinder.AI.Assistant.open()">
  Open AI Assistant
</div>

<!-- Example using an image -->
<img
  onclick="Doofinder.AI.Assistant.open()"
  src="https://EXAMPLE.com/image.png"
/>

<!-- Example using a button -->
<button onclick="Doofinder.AI.Assistant.open()">
  Open AI Assistant
</button>
Best Practices
- Include the suggestions: this functionality allows you the opportunity to better guide your customers.
- Enable Conversational hints: to improve the user experience, especially on mobile.
- Enable the AI Assistant Chat Bubble: this will give your customers the ability to access the chat from any page on your website.
- Knowledge Base: upload any kind of pertinent info, such as FAQs about payments and shipping, it helps your AI Assistant to cover up those questions.
More info about the product can also be found here in our Discovery section: https://www.doofinder.com/en/ai-assistant