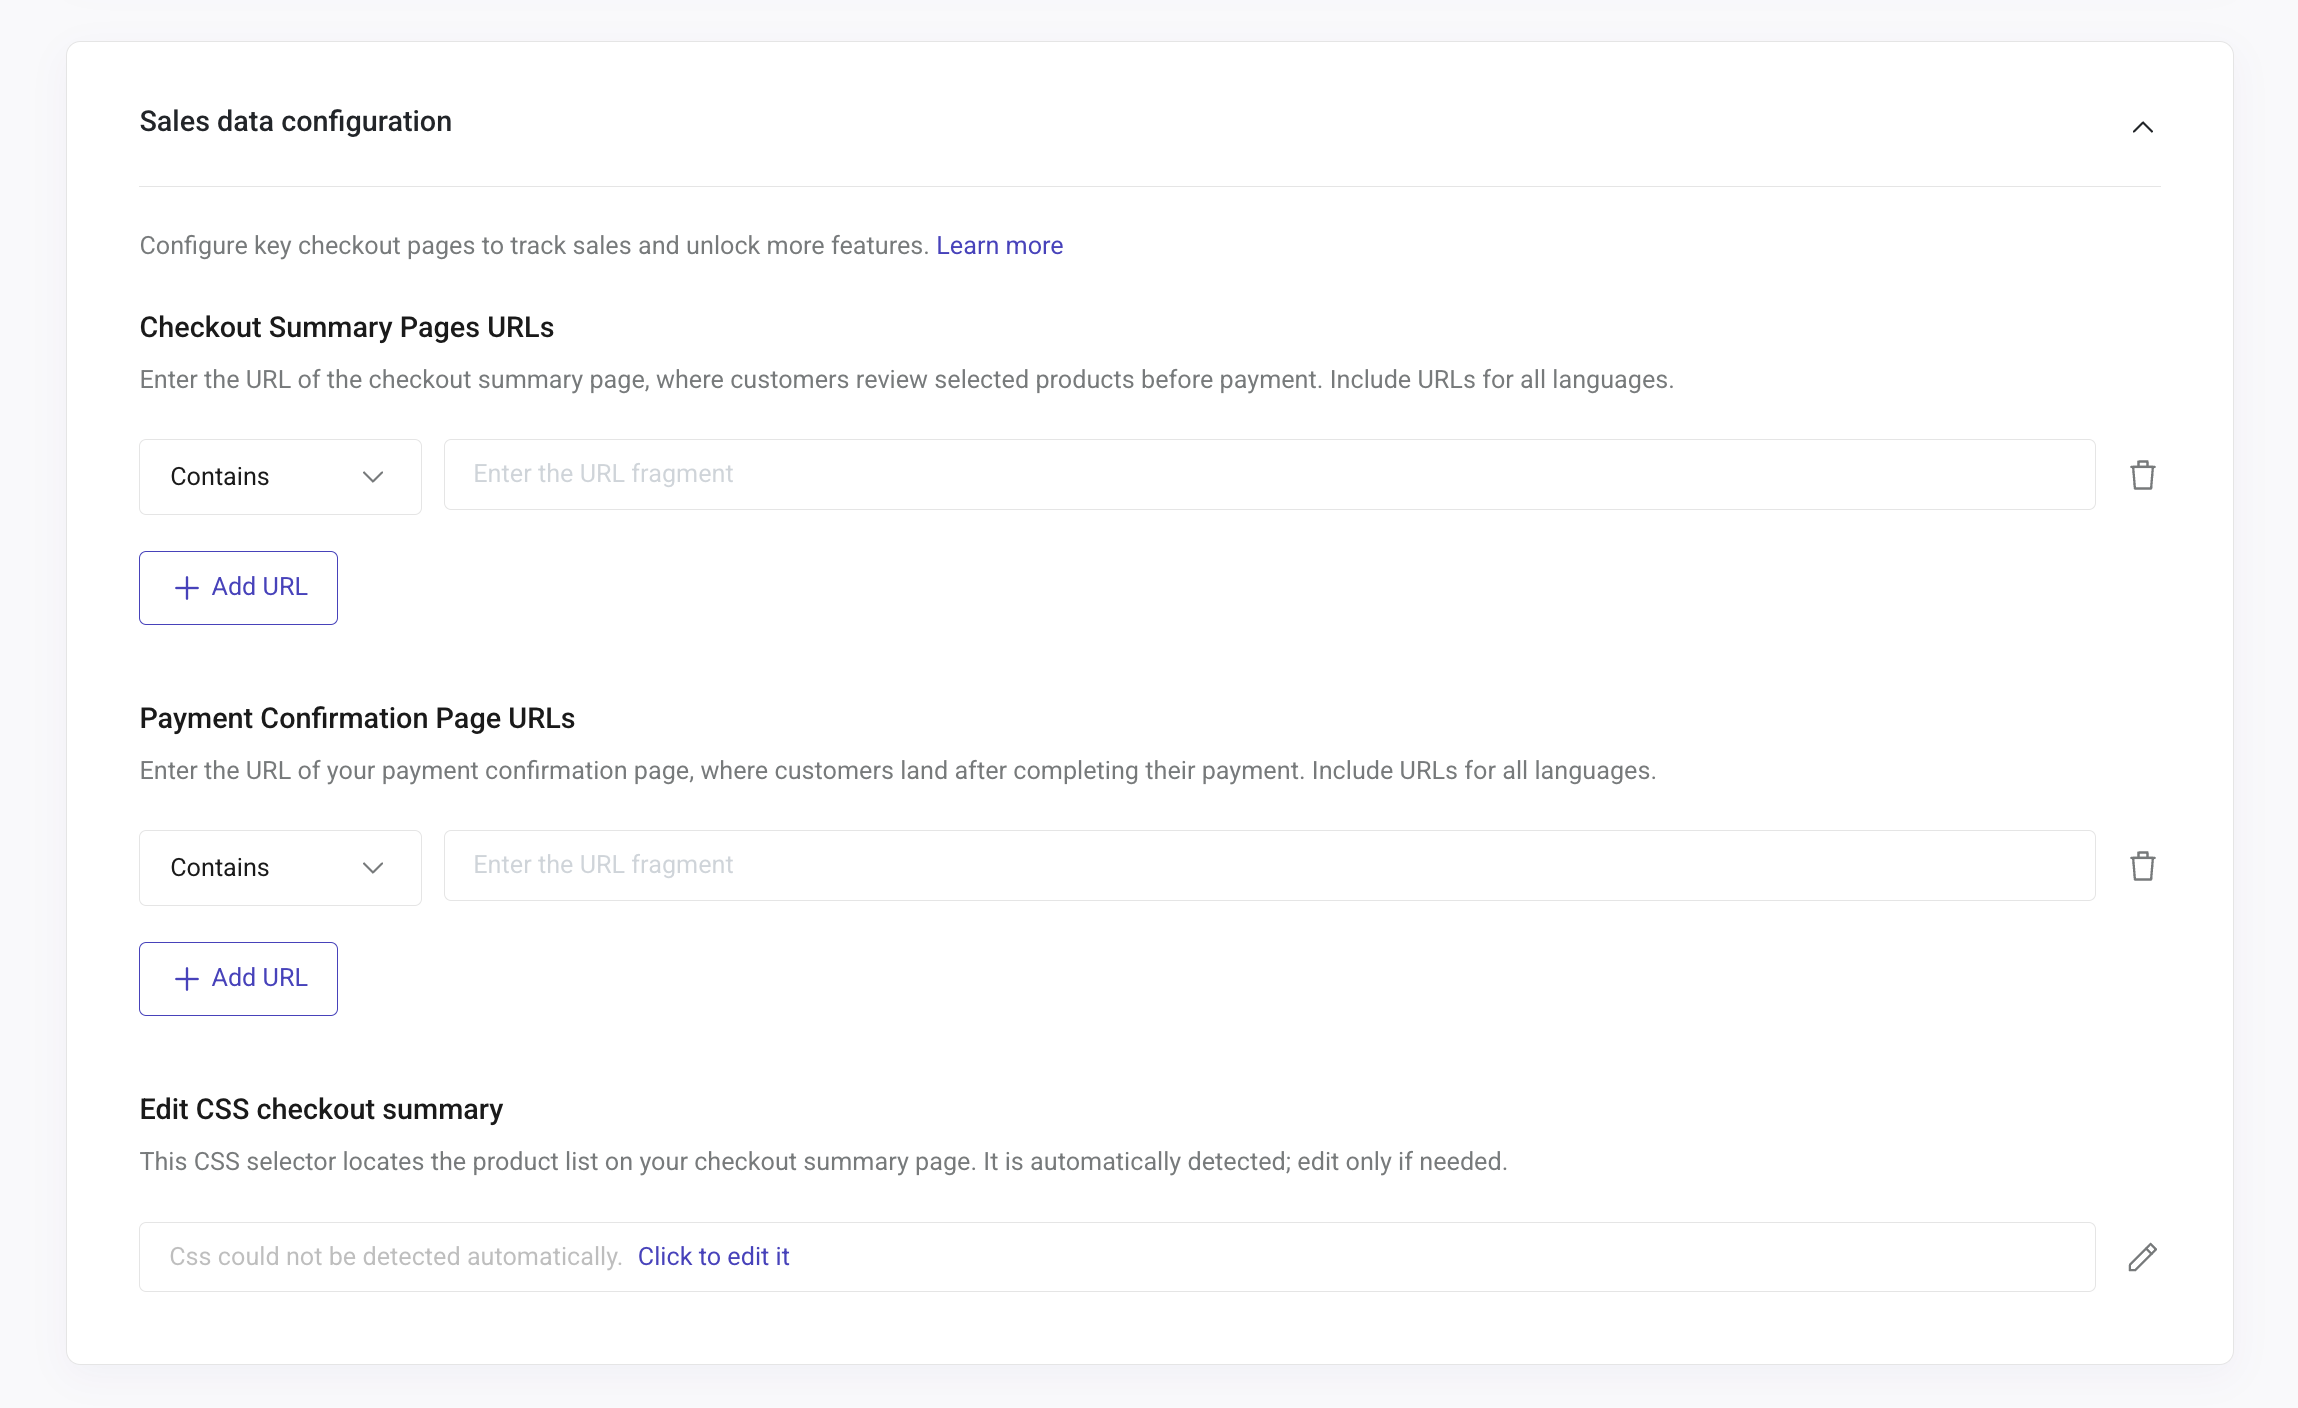
Sales Data Configuration is the section in which you can configure your checkout and payment URLs to track sales effortlessly and unlock Doofinder’s sales related features, such as Recommendations’ Best Seller Logic or Conversion Rate statistic on Search.
By configuring this section, you will have high-end sales data collection, which will help you enhance your sales with solid analytics, and attract customers through upscale product recommendations.

To set up Sales Data Configuration, go to your Doofinder Admin Panel > select your Store > click on Store Settings on the left-side menu > scroll down to the third section: “Sales Data configuration”.
Managing Sales Data configuration at Store level means that all Search Engines are configured seamlessly in the same place. Therefore, make sure to configure all checkout and payment URLs of every Search Engine on this panel.
Once on the section, you’ll find three parts:
- Checkout Summary Pages URLs
- Payment Confirmation Page URLs
- Edit CSS Checkout Summary
Let’s explore them all.
How to Configure Checkout Summary Pages URLs
This page is where customers review the products they have selected before going to payment, it is the summary of products of their order.
-
On the dropdown list, choose between “Contains” or “Equals” for the URL fragment you’d like to use.
-
Use “Contains” for URLs that may be partial, fragmented, or if you want to configure simple URL patterns to match all URLs sharing the same structure. For example, use
/cart. Doofinder will match any URL containing/cart, whether it isfr/cart/,/cart?action=show, orcheckout/cart/index/. -
Use “Equal” for URLs that are an exact match. For example,
https://shopify.doofinder.com/cart. Doofinder will match only URLs equal tohttps://shopify.doofinder.com/cart.
If you configure URLs incorrectly, Doofinder won’t be able to track sales. For example, if you choose “Contains” or “Equals” and pick the URL /es/carrito?action=showid234, it will only register sales for this user, as Doofinder is looking for every URL that contains the whole fragment.
Make sure that Doofinder Script is loaded on all screens during the checkout process. If it isn’t, no sale event will be registered.
-
-
Fill out the boxes with the URLs selected of the checkout summary page. Make sure all domains fall under the same URL, or include URLs for all languages.
-
To configure more URLs, click on the button “+Add URL”; a new row will appear.
-
Once finished, scroll down to the bottom of the panel and click on “Save”.
To erase any of the URLs configured, just follow the box of the URL to the right and click on the trash icon.
How to Configure Payment Confirmation Page URLs
This page is where customers land after completing payment, it usually looks like a “thank you” page.
-
On the dropdown list, choose between “Contains” or “Equals” for the URL fragment you’d like to use.
-
Use “Contains” for URLs that may be partial, fragmented, or if you want to configure simple URL patterns to match all URLs sharing the same structure. For example,
/confirmation-order/or/confirmation-order/*/payment-method/credit-card. Doofinder will match any URL containing/confirmation-order/, or/confirmation-order/(anything in between)/payment-method/credit-card. -
Use “Equal” for URLs that are an exact match. For example,
https://shopify.doofinder.com/confirmation-order/
If you configure URLs incorrectly, Doofinder won’t be able to track sales. For example, if you choose “Contains” or “Equals” and select the URL /confirmation-order?user_id=234, it will only register sales for this user, as Doofinder is looking for every URL that contains the whole fragment.
Make sure that Doofinder Script is loaded on all screens during the checkout process (including the confirmation order page). If it isn’t, no sale event will be registered.
-
-
Fill out the boxes with the URLs selected of the payment confirmation page. Make sure all domains fall under the same URL, or include URLs for all languages.
-
If you need to configure more URLs, click on the button “+Add URL”; a new row will appear.
-
Once finished, scroll down to the bottom of the panel and click on “Save”.
To erase any of the URLs configured, just follow the box of the URL to the right and click on the trash icon.
Edit CSS Checkout Summary
On Edit CSS Checkout Summary you will find the CSS Checkout Summary Page by default. Doofinder automatically detects your CSS checkout summary page, appearing like this:

If it doesn’t appear automatically, the following message will be displayed: “CSS could not be detected automatically”. To add a CSS, click on the pencil icon at the right of the box or on “Click to insert it”:

How to choose your CSS Checkout Summary
In the case that your CSS Checkout Summary is not detected automatically, and you don’t know how to choose the correct CSS, follow this example:
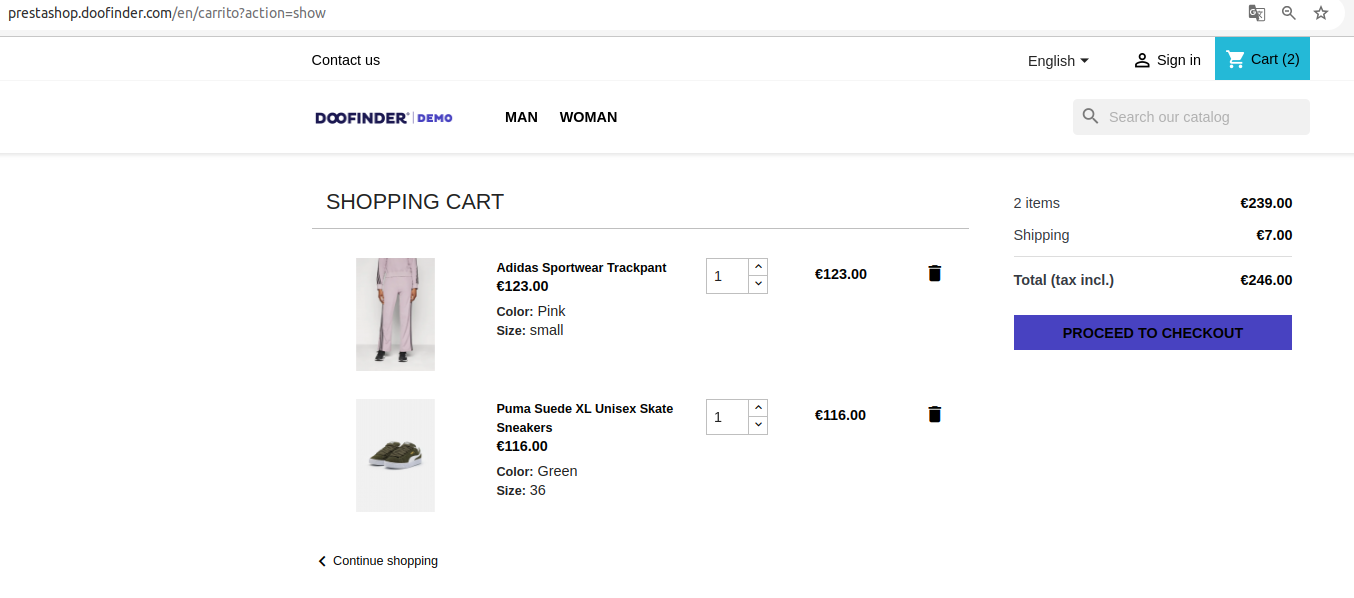
- Open your website, put some products in your shopping cart and click on the basket to open the checkout summary page. It should look like this:
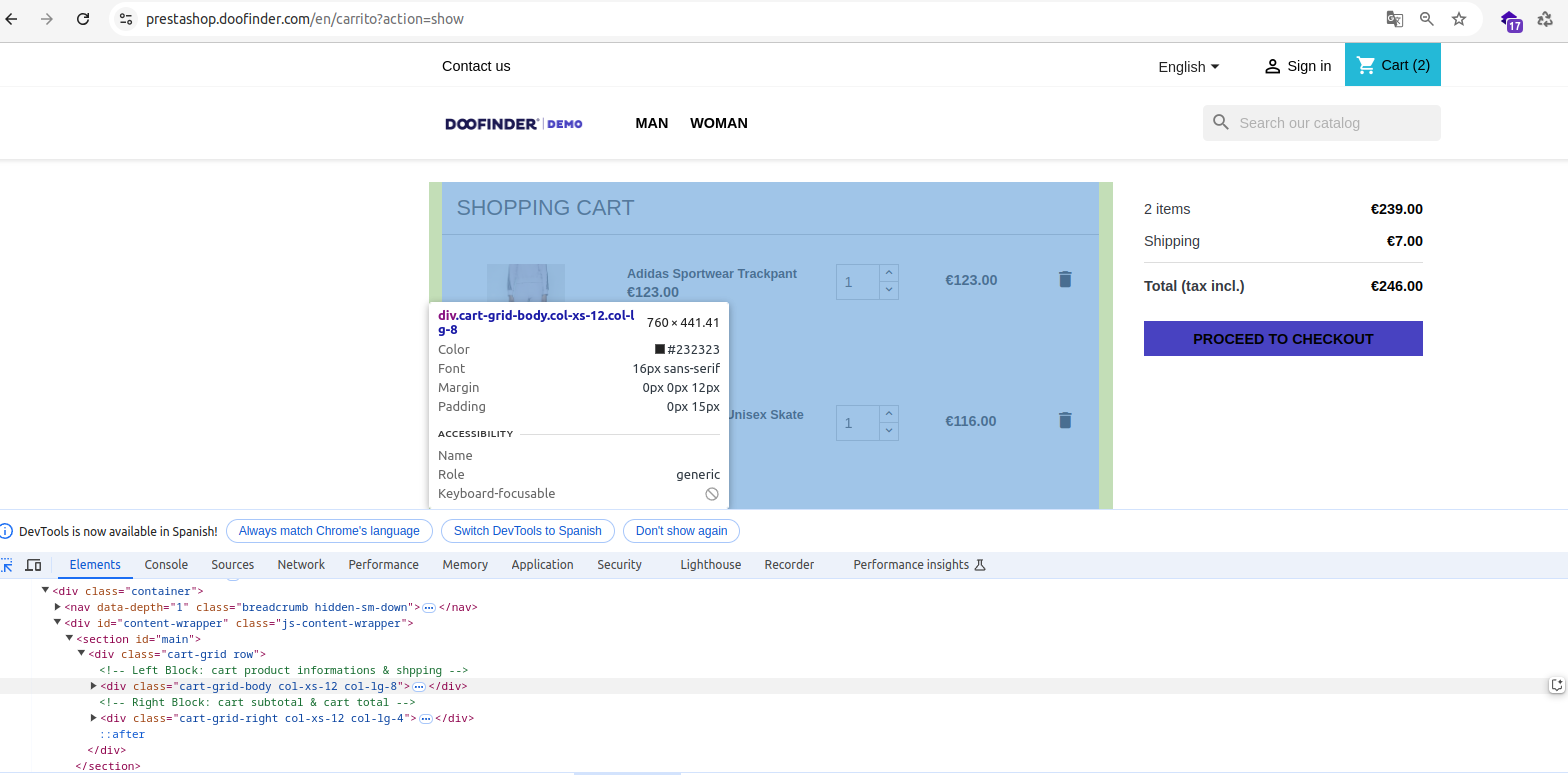
- Now, click on the right button of your mouse and select Inspect. Select the box on the toolbar and navigate on the page until the shopping cart table is colored. It may look like this:
- Take a look at the DevTools bar, once you find the shopping cart table, the element will also appear colored. Go to the colored element and copy the
class,id, ornameof the selector. For example, you may find a selector like:.cart-overview.js-cart. - Go back to your Doofinder Admin Panel > Store Settings > Sales Data configuration > Edit CSS Checkout Summary > click on the pencil icon > Paste the selector.


Make sure that the shopping cart table is the only element selected. Avoid wrapping the “Process to checkout” summary section or any other part of the page.
If you copy the selector by clicking on the right button and copy the selector, it copies the entire path. That means that if your HTML changes, the CSS Checkout Summary may stop working.

