The Live Layer can be customized for desktop and mobile devices, selecting the behavior that best suits your Store.
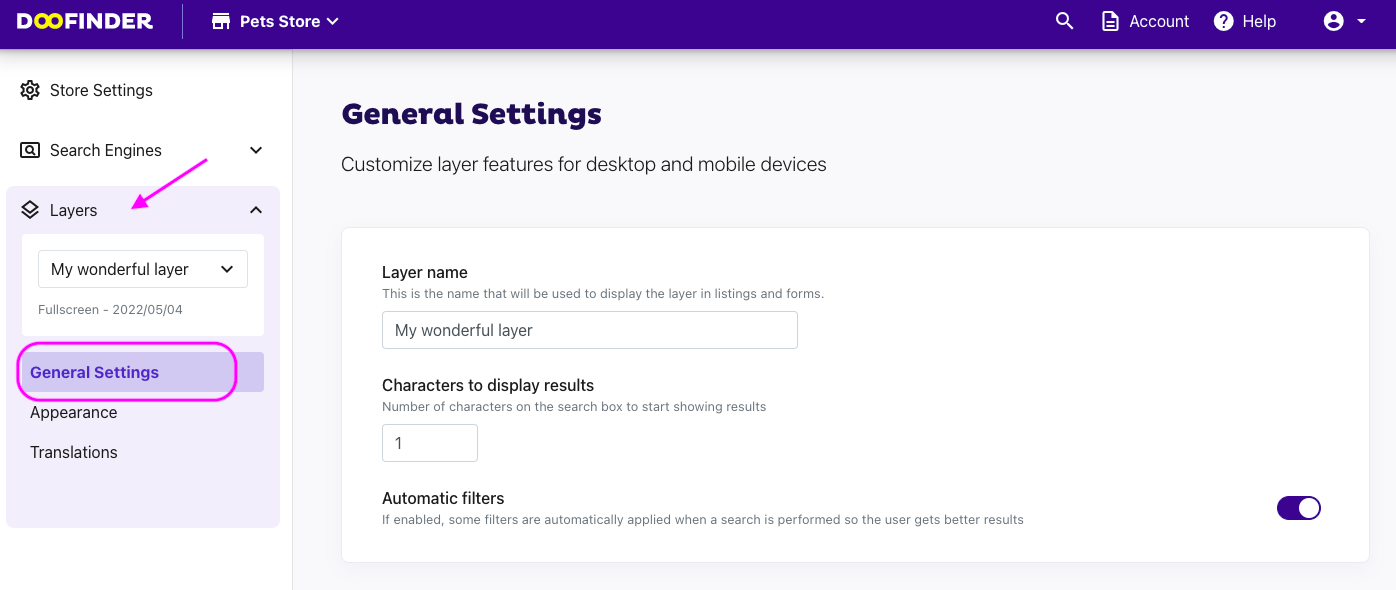
To customize the Layer, go to Layers > General Settings.
-
Layer name: You can edit the name of the Layer if needed and click Save to save the changes.
-
Characters to display results: Number of characters on the search box to start showing results. You can edit the number from here, default is 1.
-
Search Query Retention: If enabled, the search term will remain in the Layer's search box during the web browsing process.
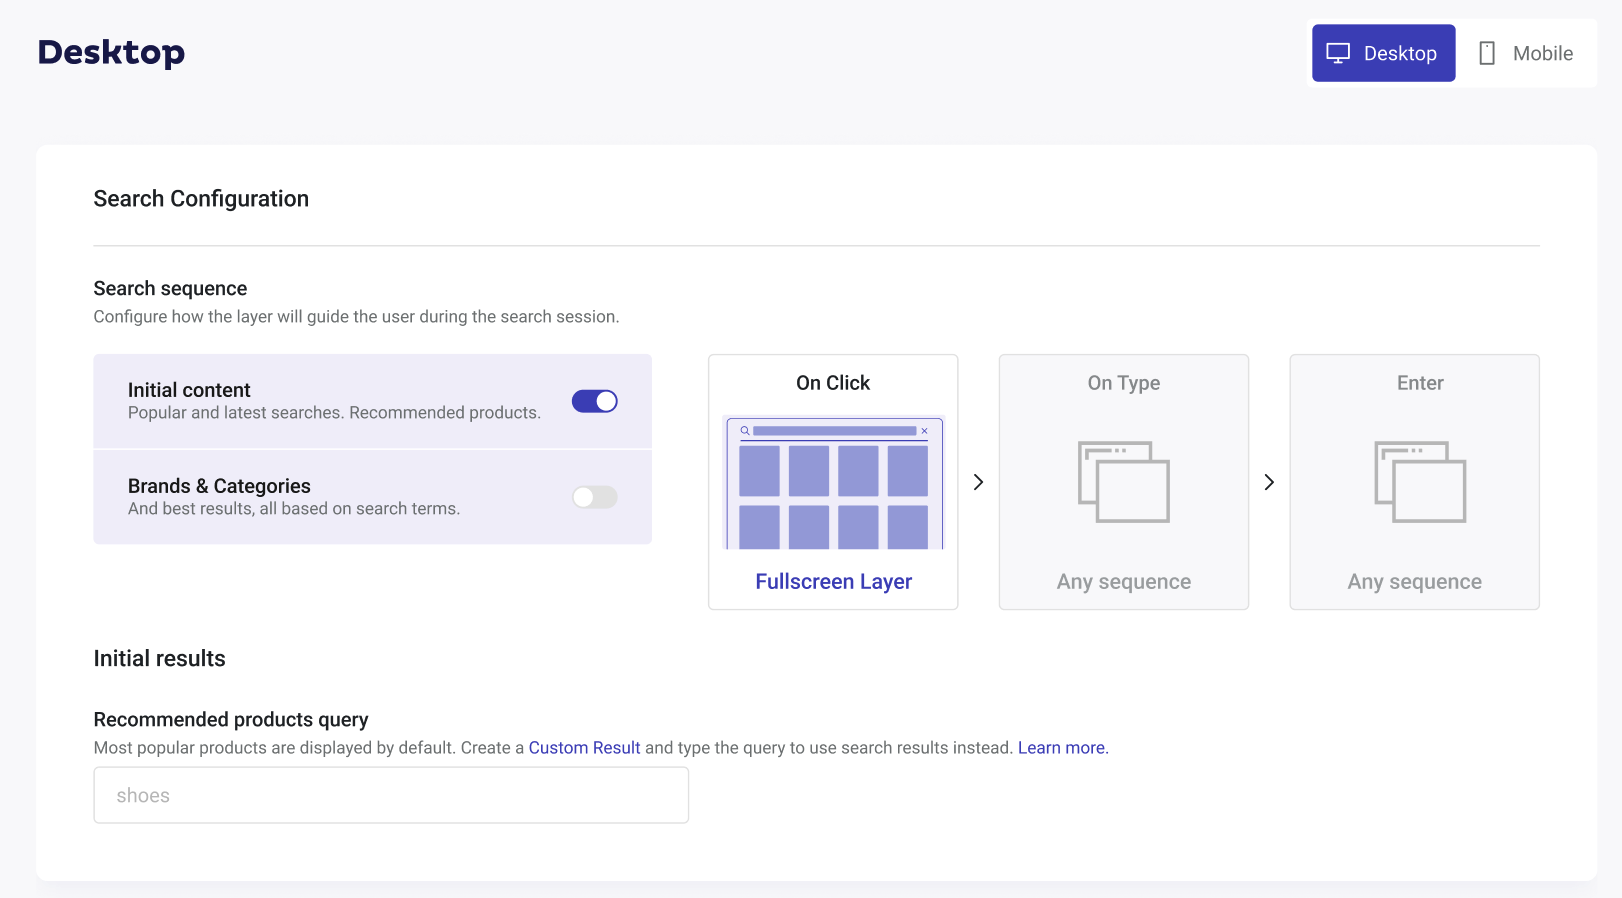
Search Sequence
The search sequence allows you to choose the order and layout of your Layer, to guide your client during the search session. This sequence can be customised according to 3 events: CLICK - TYPE - ENTER.
- On Click: The moment the user clicks on the search box.
- On Type: When the user starts typing in the search box.
- On Enter: When the user presses Enter inside the search box.
How to configure the Search Sequence
You can easily configure the search sequence in the Admin Panel going to Layers > General Settings > Search Configuration.
First, you will have the option to select Desktop or Mobile view. Then you can organize the search sequence by enabling or disabling the options. The search sequence option may vary depending on the chosen view and Layer selection.
Desktop Vvew
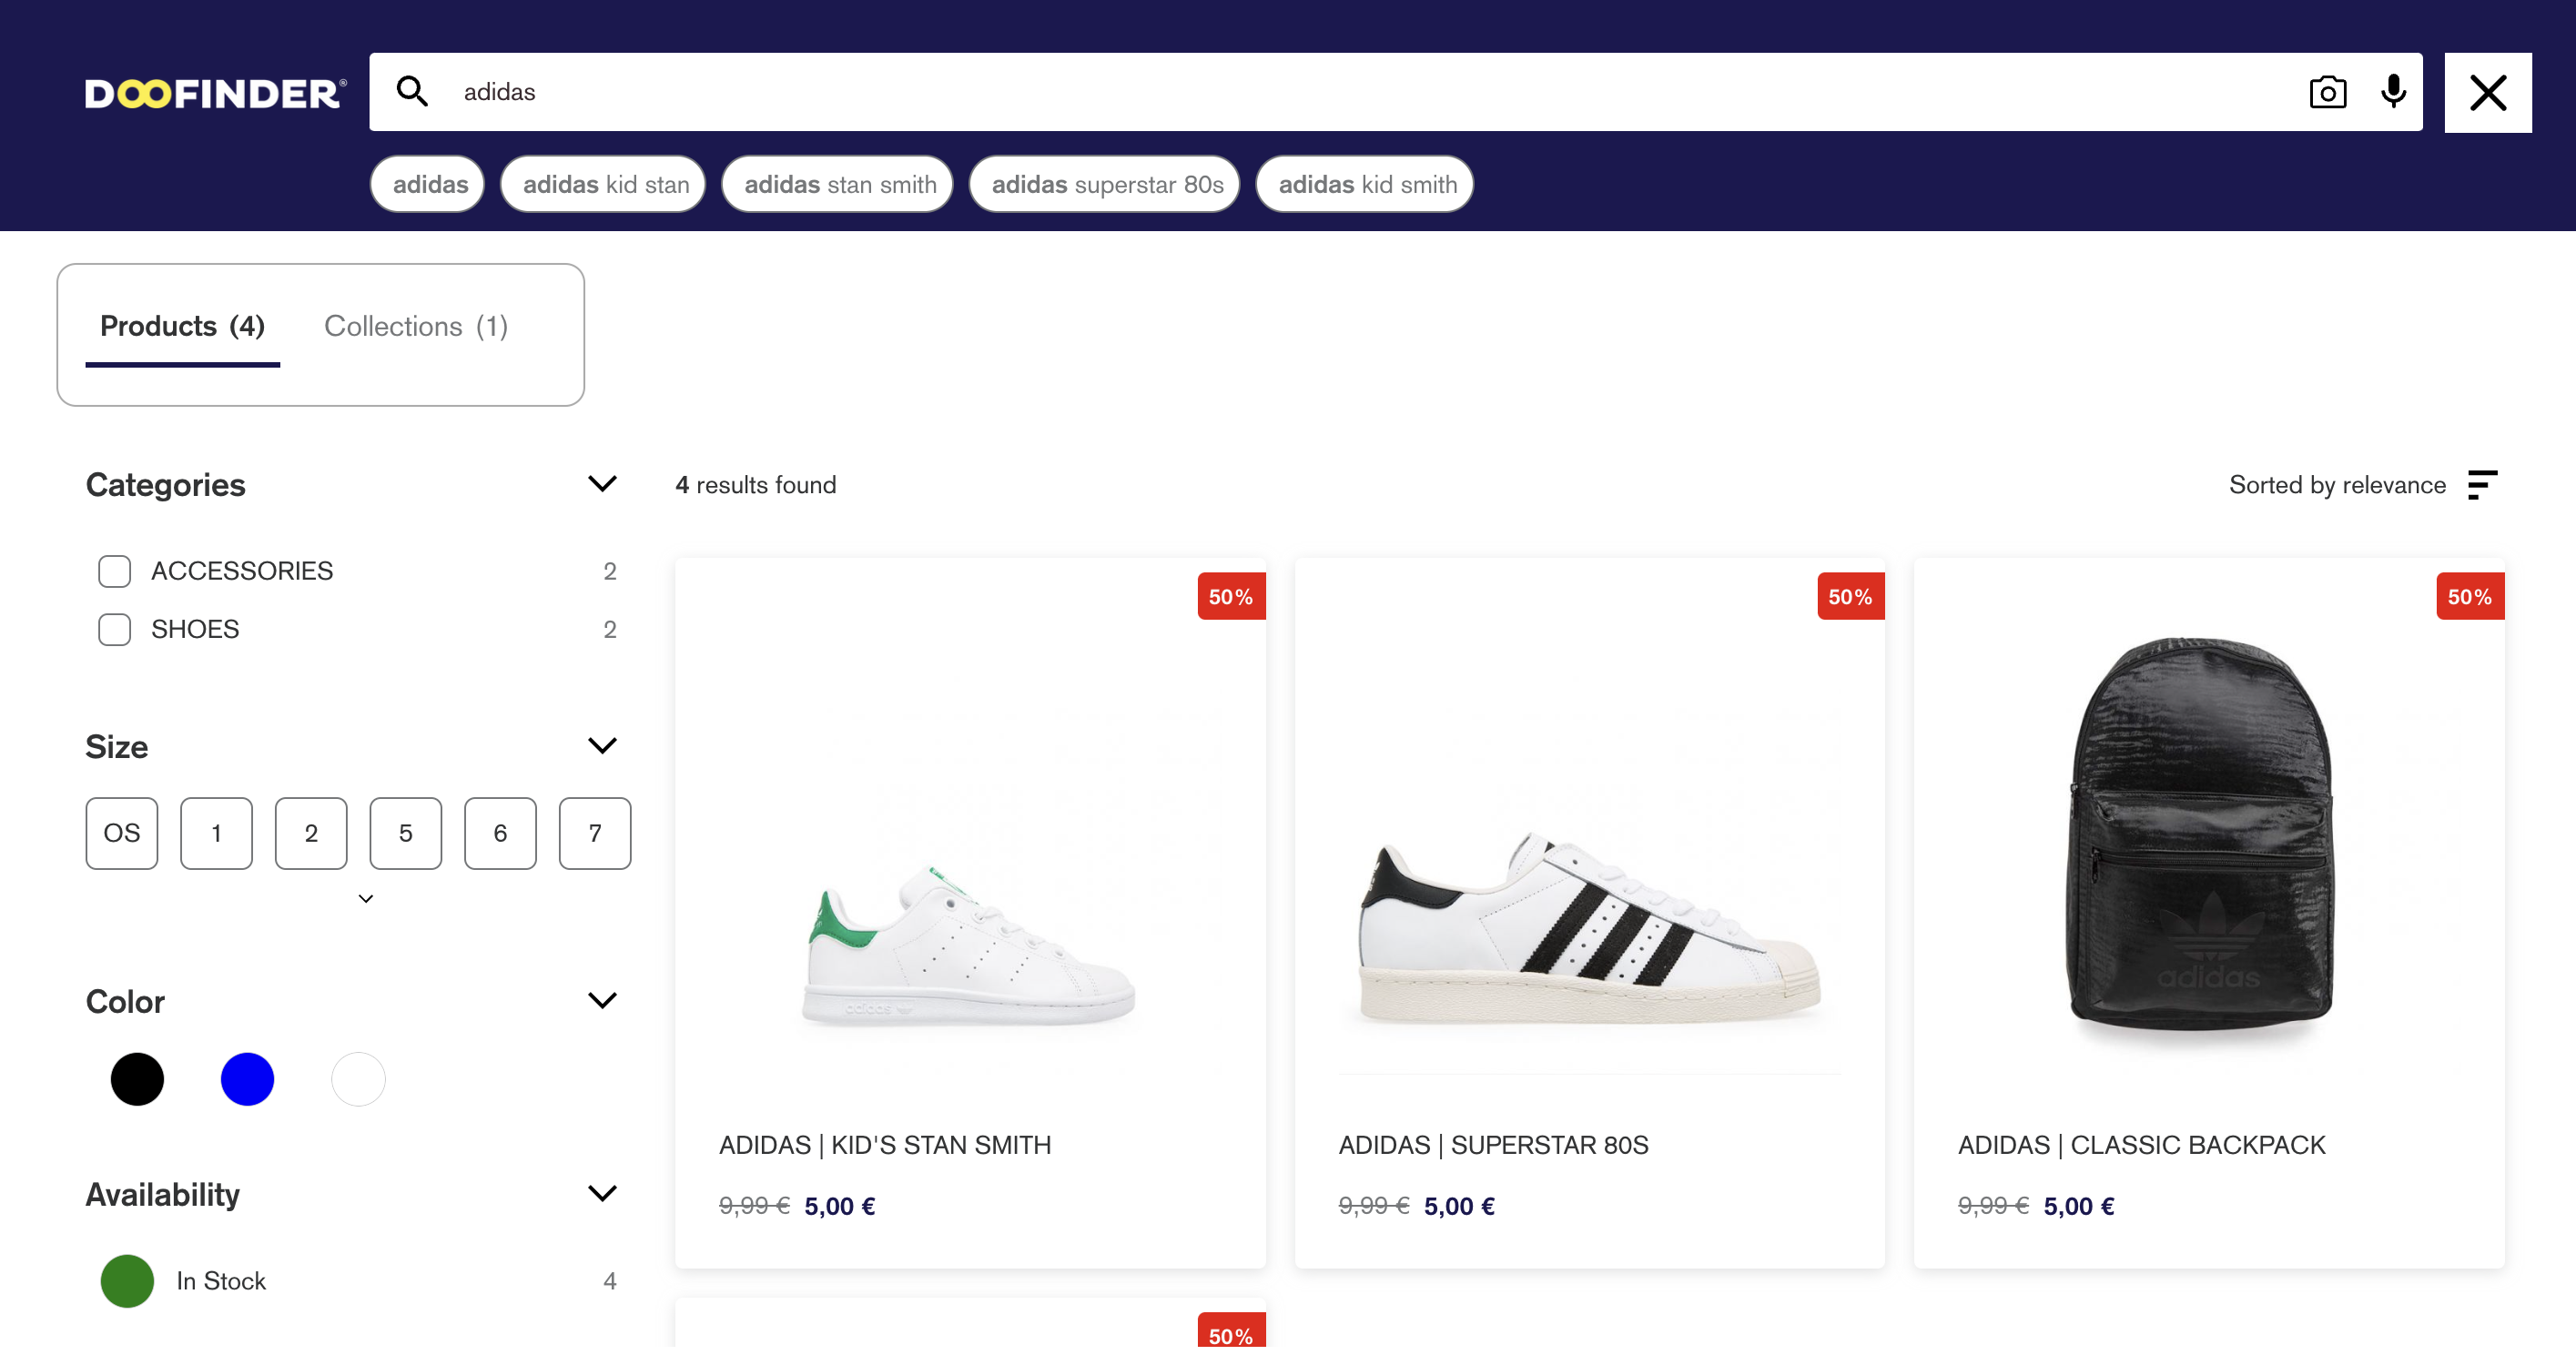
For Desktop view, you'll find these available options depending on the selected Layer:
- Initial content: You will activate the On Click event, popular and latest searches, and recommended products will be displayed.
- Brands & Categories: You will trigger the On Type event, showing Brands & Categories, and best results, all based on search terms. It is displayed prior to the results Layer, offering suggestions of products and filters in categories and brands, according to the search that the user is typing.
- Embedded results: Will trigger the On Enter event, embedding search results directly into your site design (only available on Desktop view and Floating Layer).
Mobile view
For Mobile view, you'll find these available options:
- Initial content: You will activate the On Click event, popular and latest searches will be displayed.
- Initial Results: You will activate the On Click event, and recommended products will be shown from the first click.
- Brands & Categories: You will trigger the On Type event, showing Brands & Categories and best results, all based on search terms. It is displayed prior to the results Layer, offering suggestions of products and filters in categories and brands, according to the search that the user is typing.
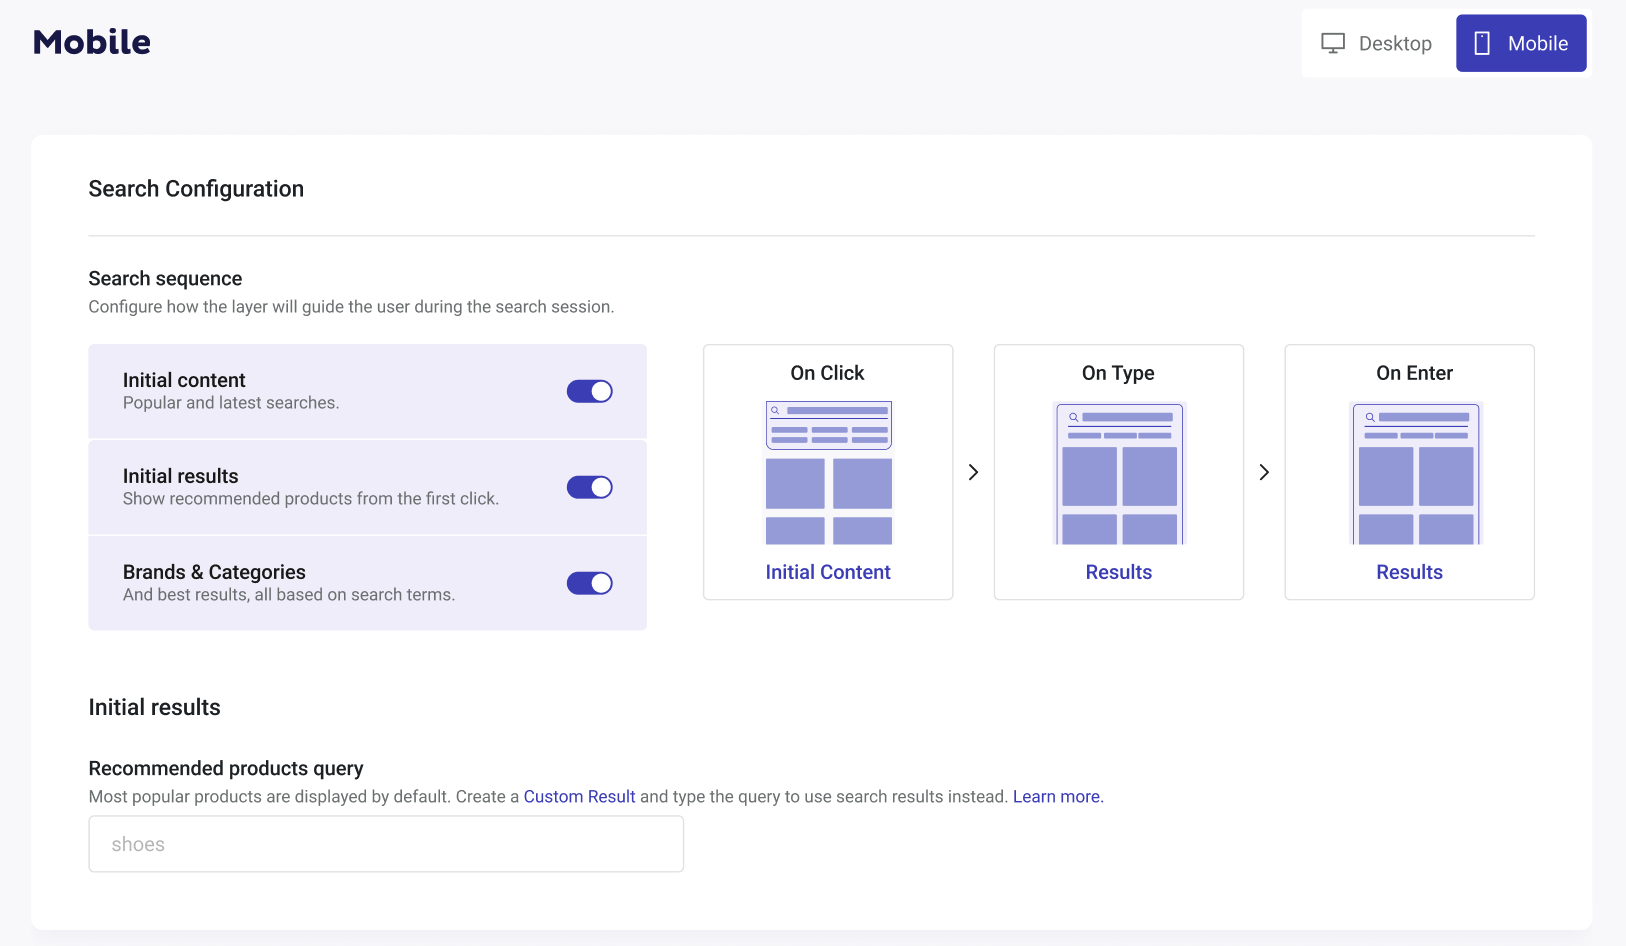
Initial Results Recommended Products Query
- Recommended Products Query: If you have enabled this option, you can include a query for recommended products. This means a search term to be used to select the recommended products. If empty, the most popular ones will be displayed. Please note that this query will not be included in your statistics.
You can apply a Custom Result in a Query for recommended products and choose the first products that you want to appear in your Layer when it opens. Click here to learn how to do it.
Embedded Results
-
Insertion point: Enter a CSS selector to choose the element or elements in your page that can hold embedded search results.Find more information here.
-
Query parameter: The Layer uses the search parameter of your Store URL to extract the search query for autoloading. The query parameter will be what calls the Embedded Layer and triggers the correct query.
For the embedded results to display correctly, you need to enter an insertion point using a CSS selector.
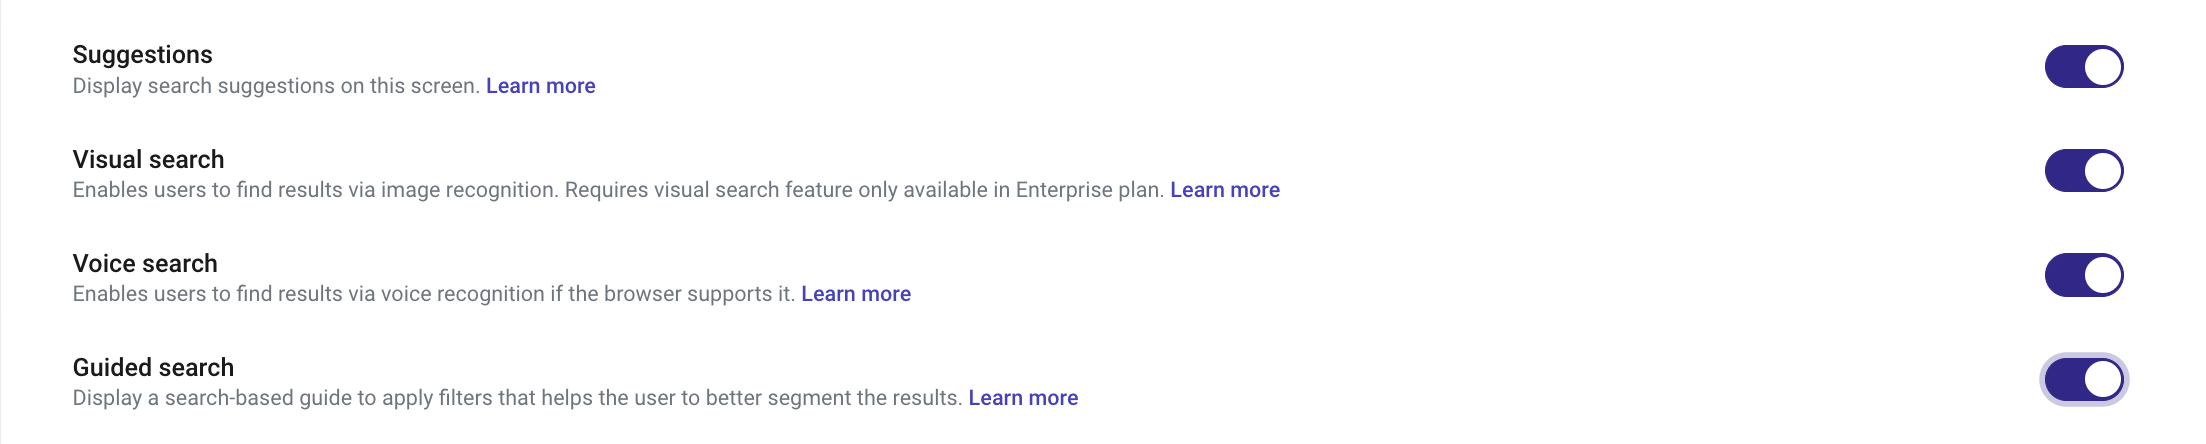
Enhanced Search Features
-
Suggestions: Allows you to display search suggestions on the screen.
-
Visual Search: Enables users to find results via image recognition. Only available for Enterprise Plans.
-
Voice Search: Enables users to find results via voice recognition if the browser supports it. Available for mobile devices; for Desktop only on Fullscreen Layer.
-
Guided Search: Display a search-based guide to apply filters that helps the user to better segment the results.
Popular searches
Popular searches provides insights into the most sought-after queries within a specified timeframe, typically spanning approximately two weeks.
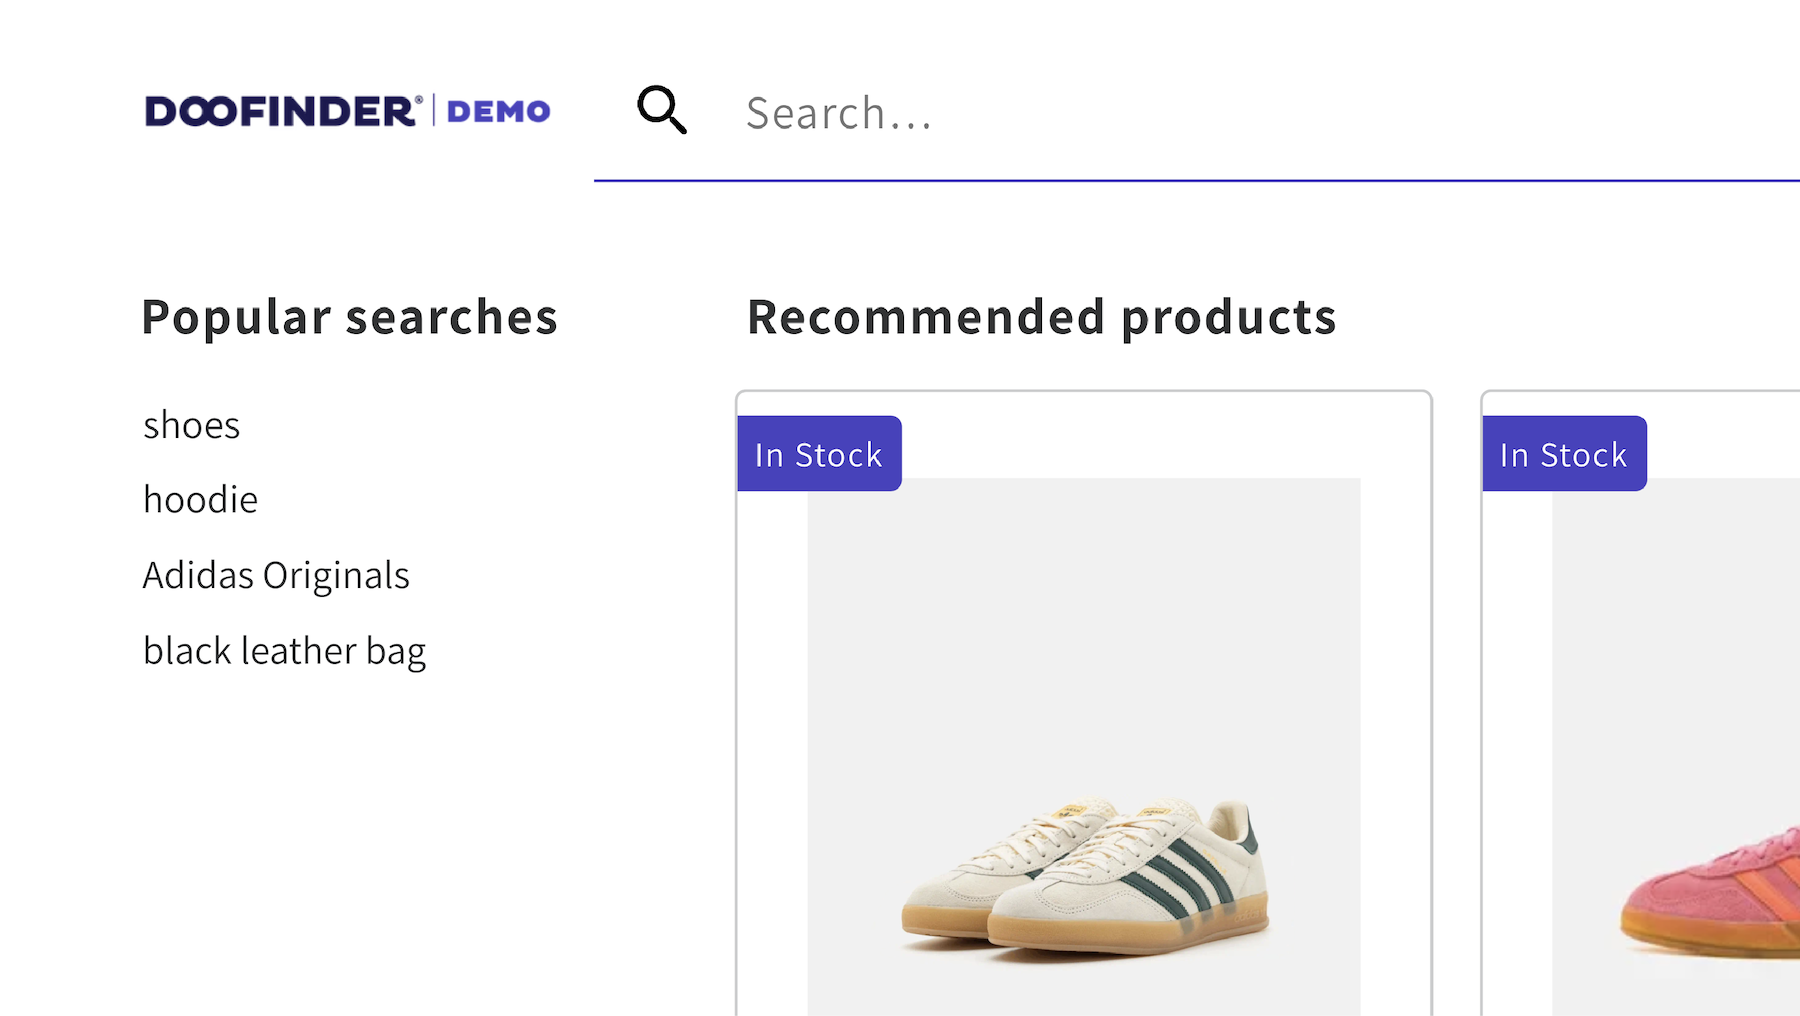
By analyzing the patterns and trends in search queries, Doofinder accurately identifies and displays the phrases deemed most popular on your Layer, reflecting the pulse of your site's search activity.
You'll notice that these terms will be in a state of constant change over time. This is because Doofinder generates continuous updates for them, ensuring they are always synchronized with the evolving search tendencies of your site.
Popular Searches gather the searches with most clicks.
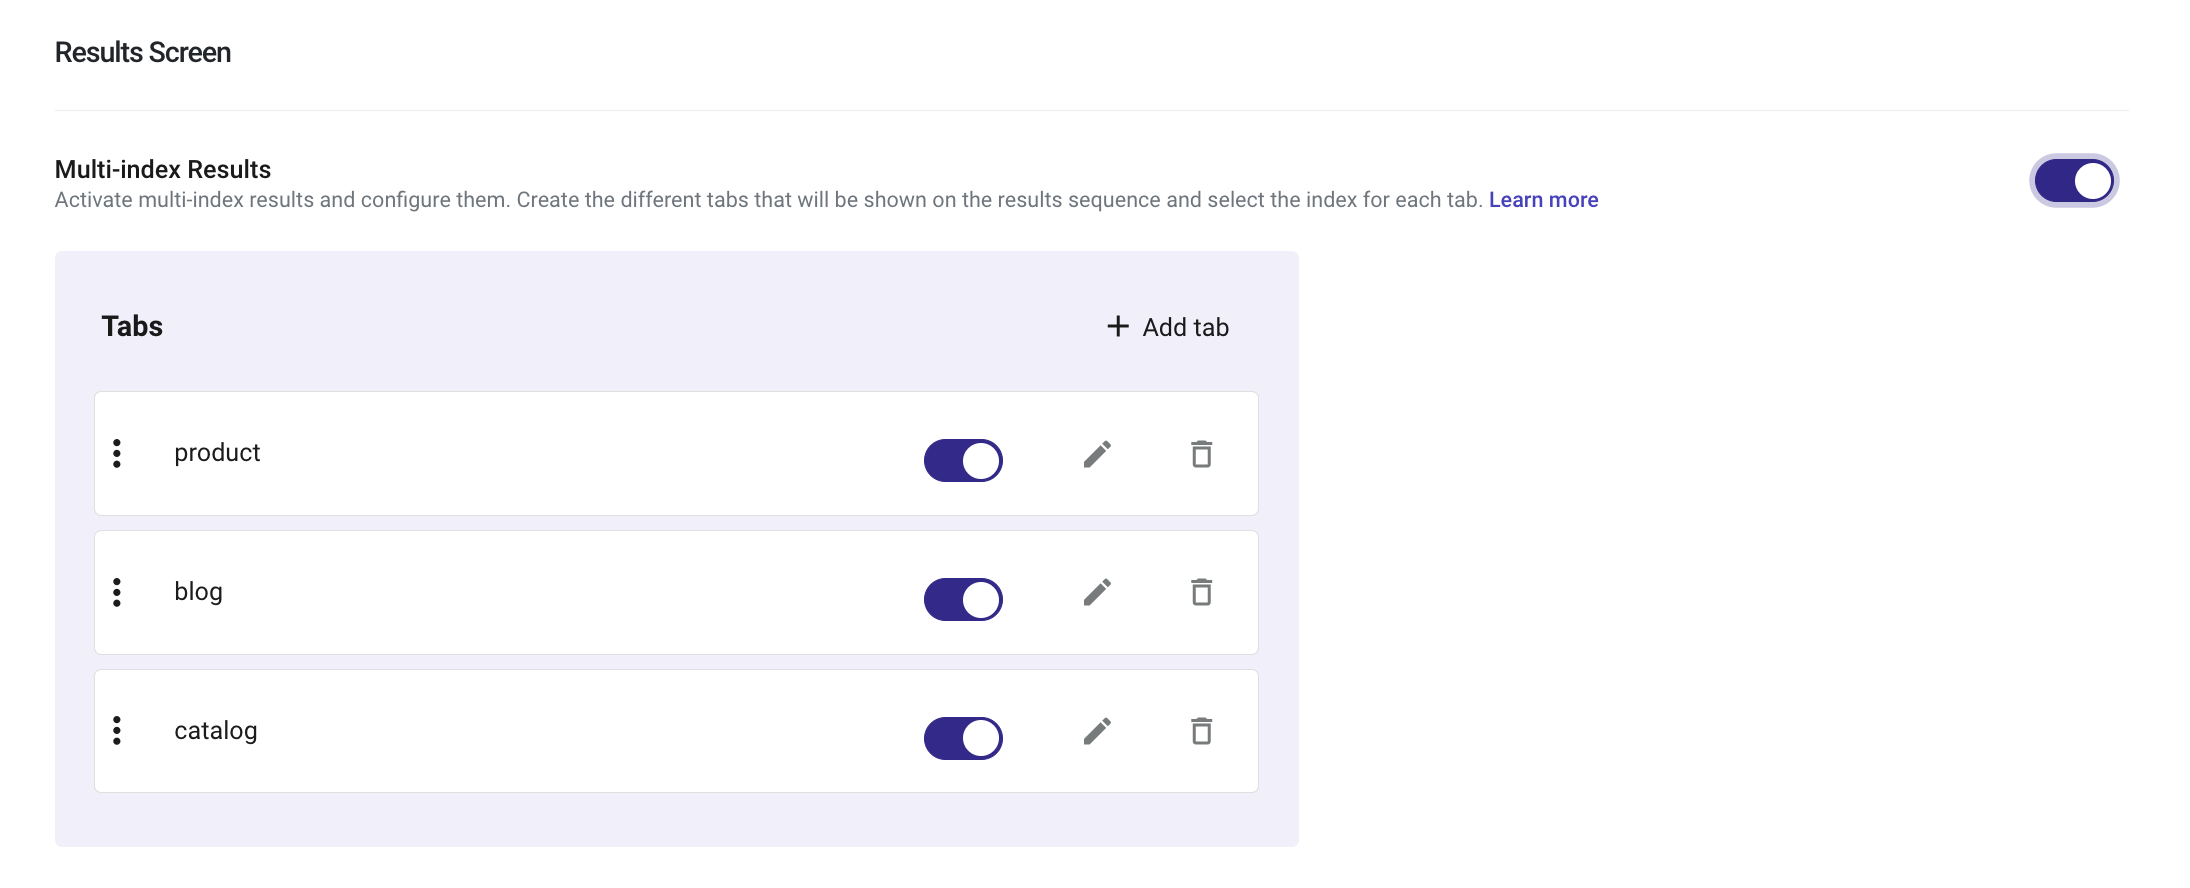
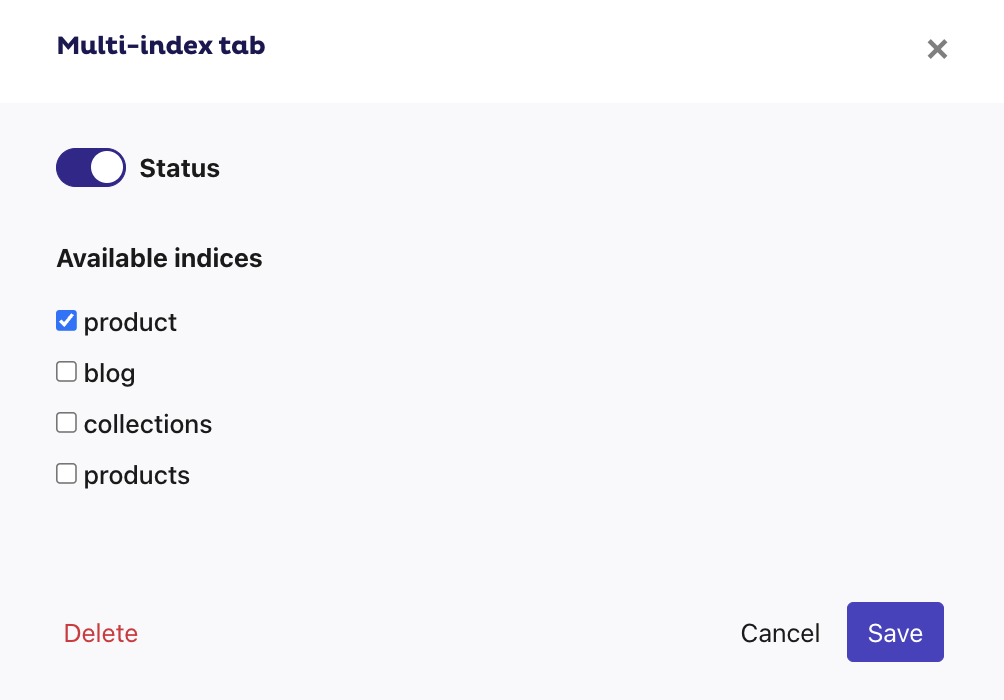
Multi-Index Layer
Before configuring this type of Layer, make sure that the indexes have been created correctly in your Search Engine section. You can refer to this article that explains how to do it: Multi-Indices.
- Go to Layers > General Settings and activate the option Multi-index Results.
- Once activated, each available index will be added in a different tab.
- To edit the content of each tab, you can click on Edit. All available indices will be listed and grouped among Search Engines by name.
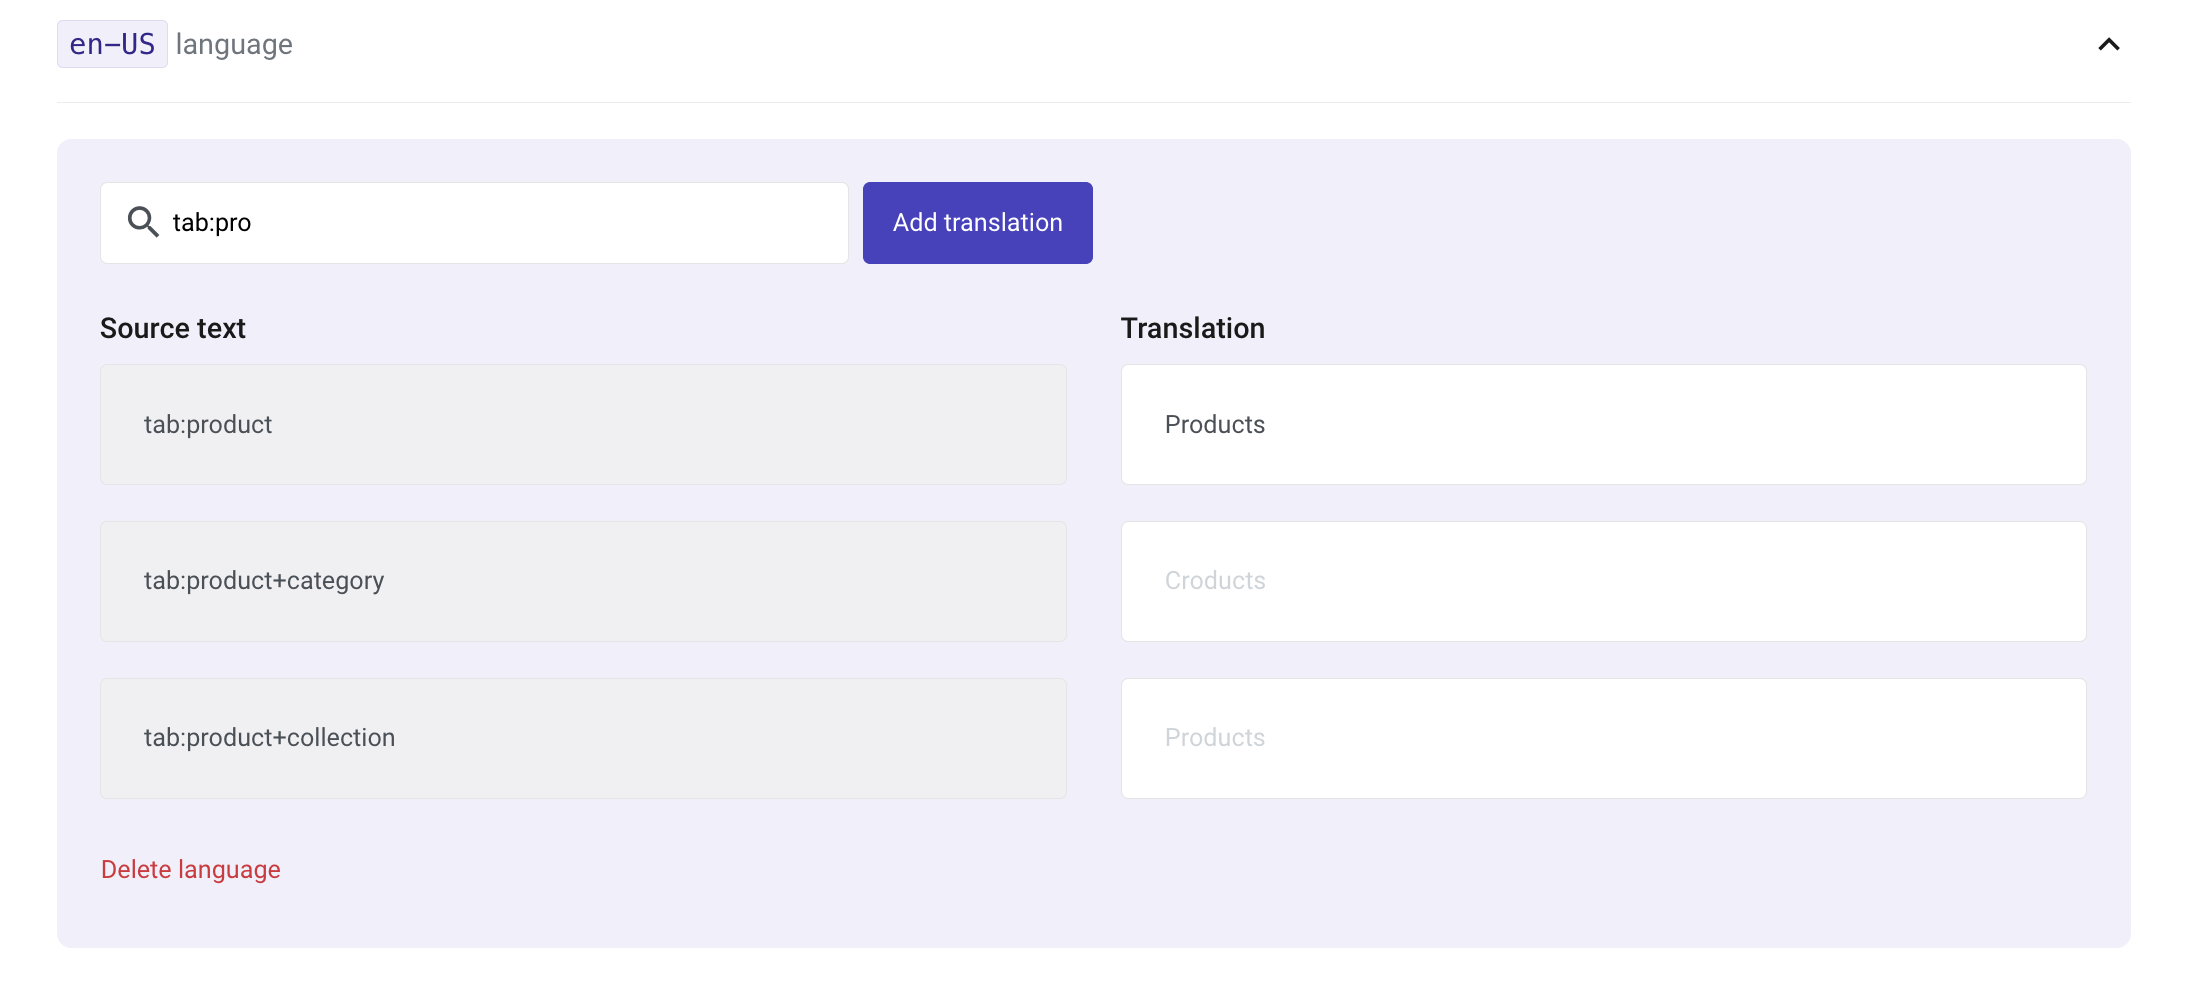
- For the tab label, there are default translations for the most common use cases and name indexes:
product--> Productscategory--> Categoriescollection--> Collectionsblog_posts--> Blogpages--> Pages
- Save your changes.
This configuration is common for all Search Engines, so the same index type must have the same name among all Search Engines.
For other use cases or customization it can be done from Layers > Translations.
- Tab Labels: Check that proper translations for
tab:<type_name>strings exist, liketab:productortab:collection. The translation entered will be the displayed name.
Multi-Index Layer is available for Fullscreen, Floating and Embedded Layers, for desktop and mobile views. Remember to select the Layer option in your Store Settings.
Results
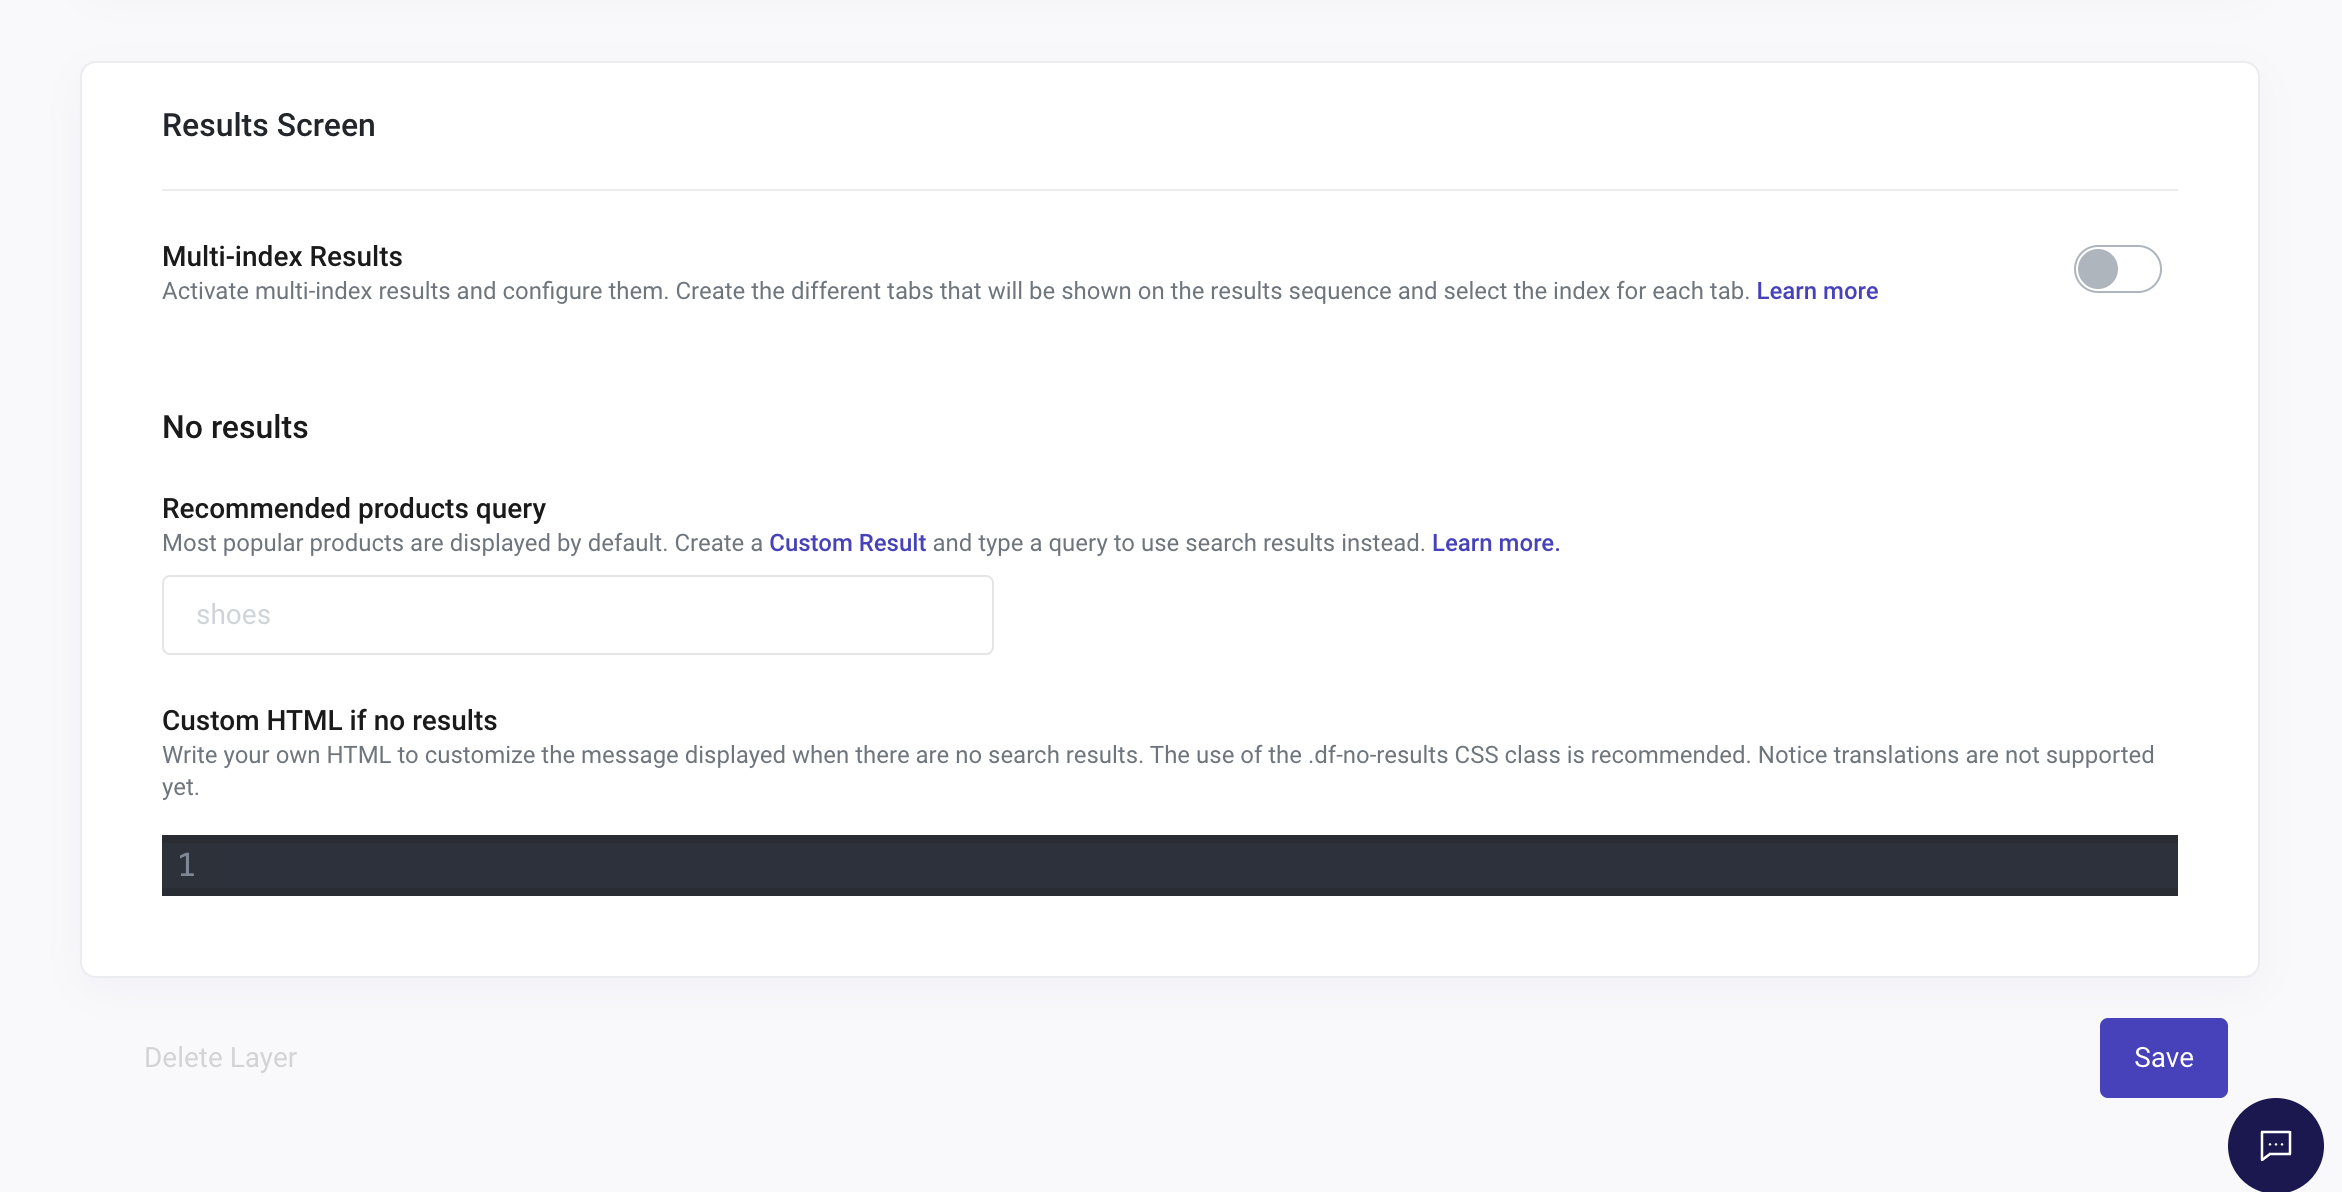
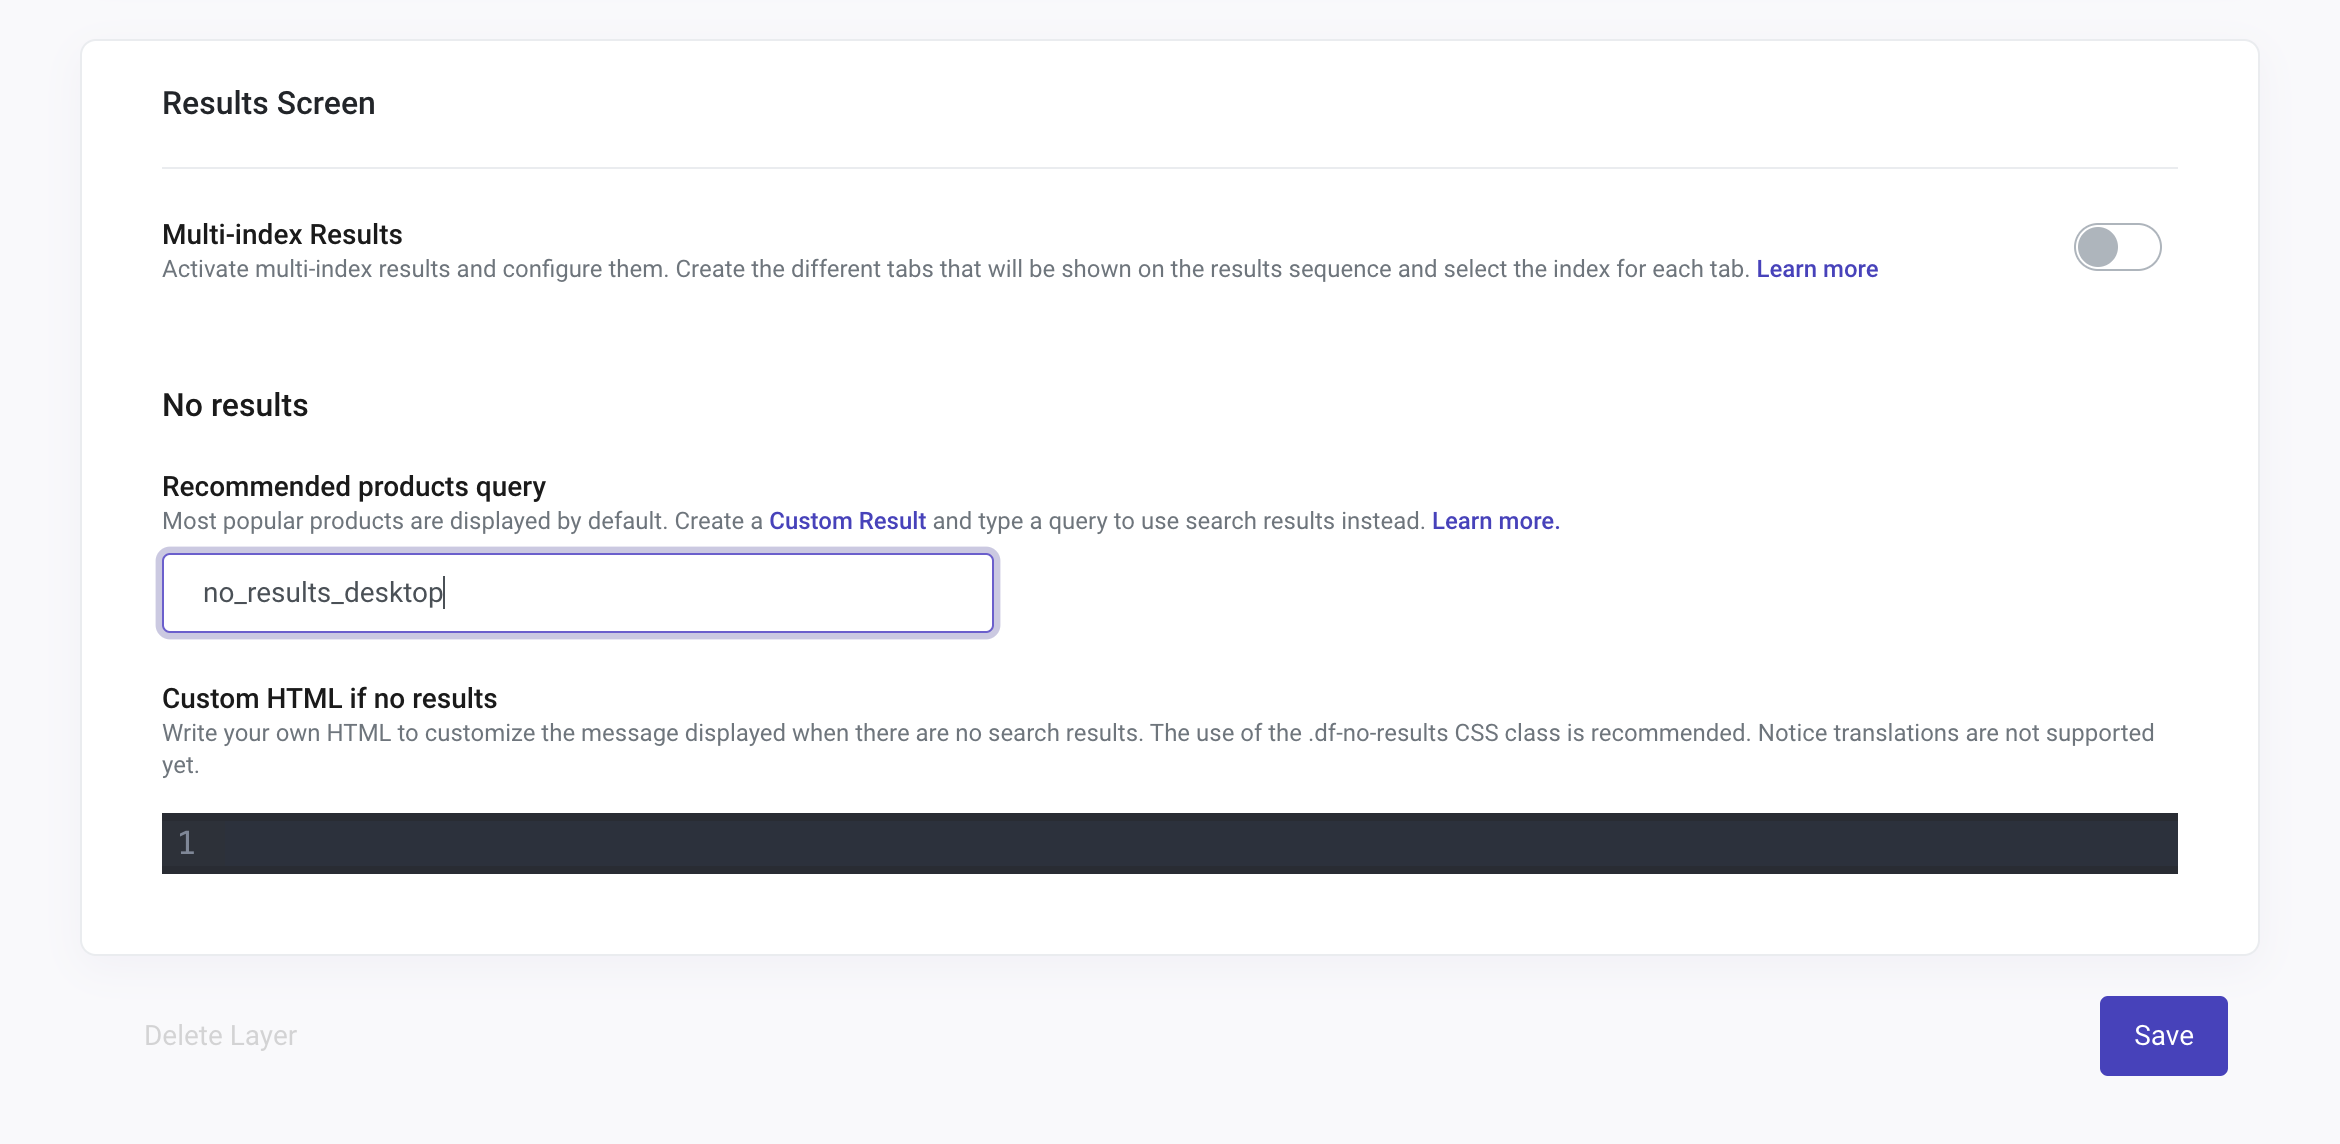
No results: Recommended Products Query
Here, you'll be able to configure the Query for recommended products when a customer types and no results are found. To choose the first products that you want to appear in your Layer, please visit this article.
Custom HTML if No Results
You can write your own HTML to customize the message displayed when there are no results found in the results screen.
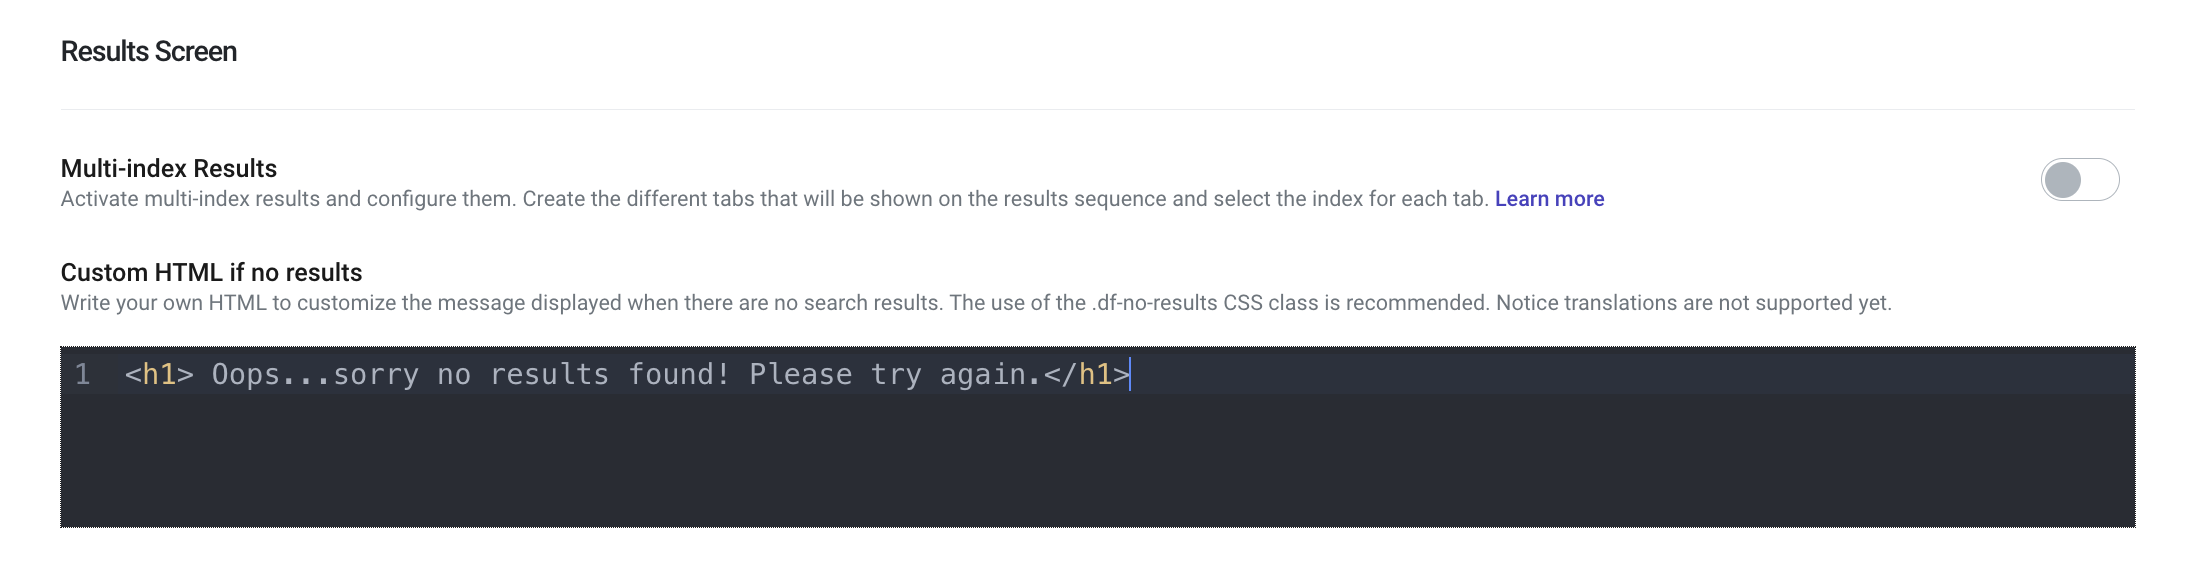
The use of the .df-no-results CSS class is recommended.
Custom HTML and No Results Recommended Products Query are not compatible. This means that if you decide to apply a Query for Recommended Products for No Results, the HTML sheet has to be empty.
Take a look at this example:
Delete Layer
You can remove the Layer by clicking on Delete layer at the bottom left of the screen.
Always, remember to click Save.