What Is The Category Merchandising?
Category Merchandising is a feature that allows businesses to control and optimize how products are displayed on the category pages, in the same way search results are managed.
It transforms category pages from static listings into dynamic, merchandisable experiences, giving merchandisers direct control over product visibility and ordering.
Prerequisites
- Single Script Installed or Updated.
- A Store, and at least one Search Engine created in Doofinder.
- If you’re not under the following plugins: Shopify, Bigcommerce, Woocommerce, Magento, Prestashop or Shopware, you must include the
category_merchandisingfield in your feed.
Adding category_merchandising to Your CSV Feed
This field contains the category page slugs where the product appears, using the full path for subcategories, with no initial or final slashes. A real cade example If a product appears in Women > Accessories > Belts:
Product_id, name, category_merchandising
123,Leather Belt,"mujer|mujer/accesorios|accesorios/cinturones"
Each category path is separated by a | pipe, and every level of the hierarchy must be listed individually.
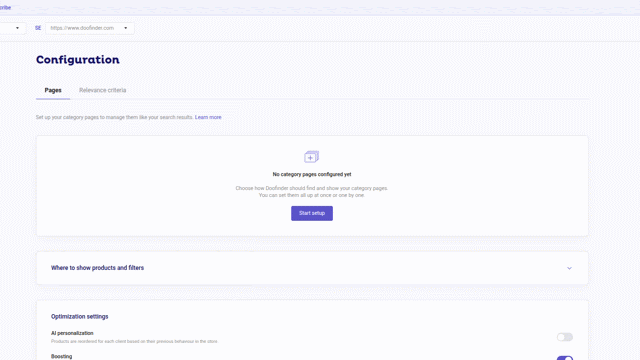
Configuration: Main Panel Overview
In the main panel, you will find the listed elements Pages and Relevance Criteria.
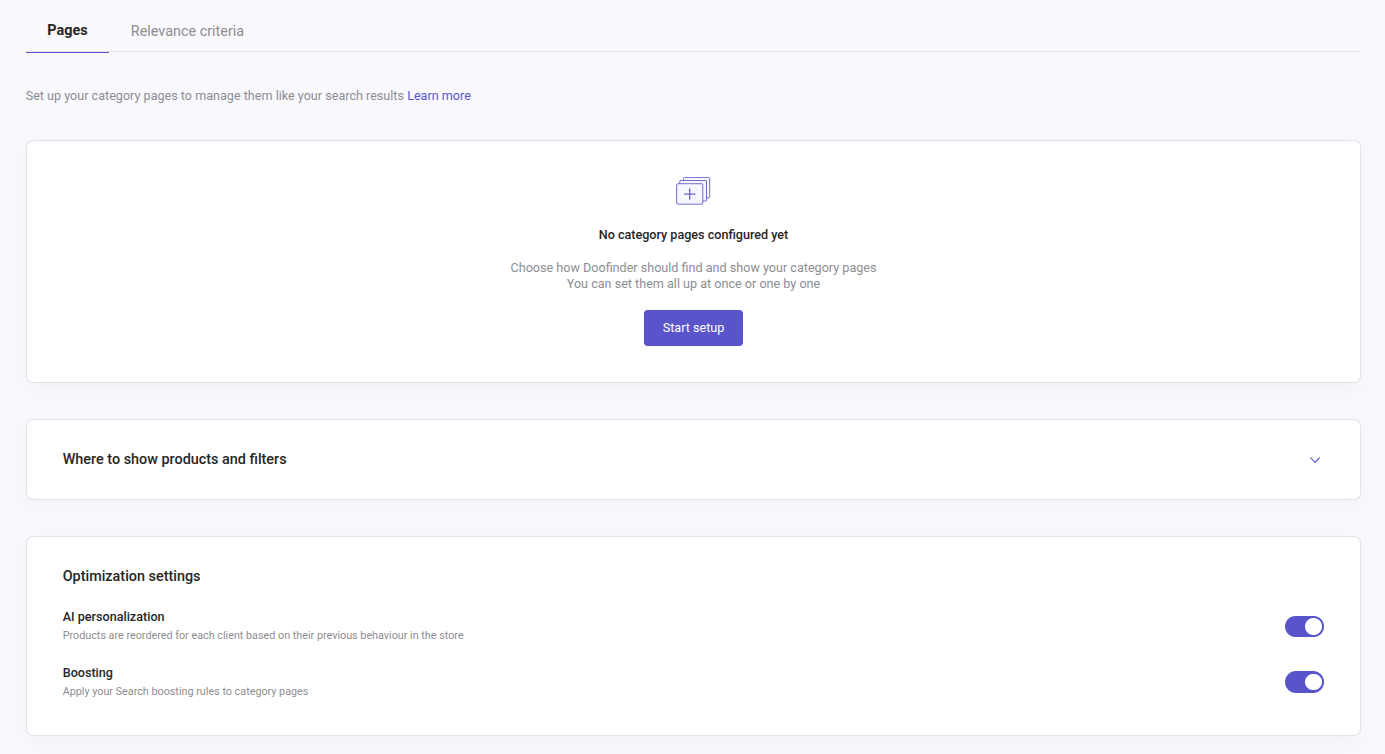
Pages
- Start setup: click on it to start your Category Merchandising page.
Where to show products and filters
- CSS selector:
- Desktop: you need to add the CSS Selector of your choice to determine where the page will be triggered on Desktop.
- Mobile you need to add the CSS Selector of your choice to determine where the page will be triggered on Mobile.
- Here you can find all information on How To Choose A CSS Selector!
Optimization settings
- AI personalization: each user sees a version of the category page that’s tailored to them, showing the products they’re most likely to purchase.
- Boosting: allows you to apply your predefined rules from the Search.
Configuration
To work correctly, you need to configure which pages are category pages and how they behave. Click on “Start setup” to begin to configure:
-
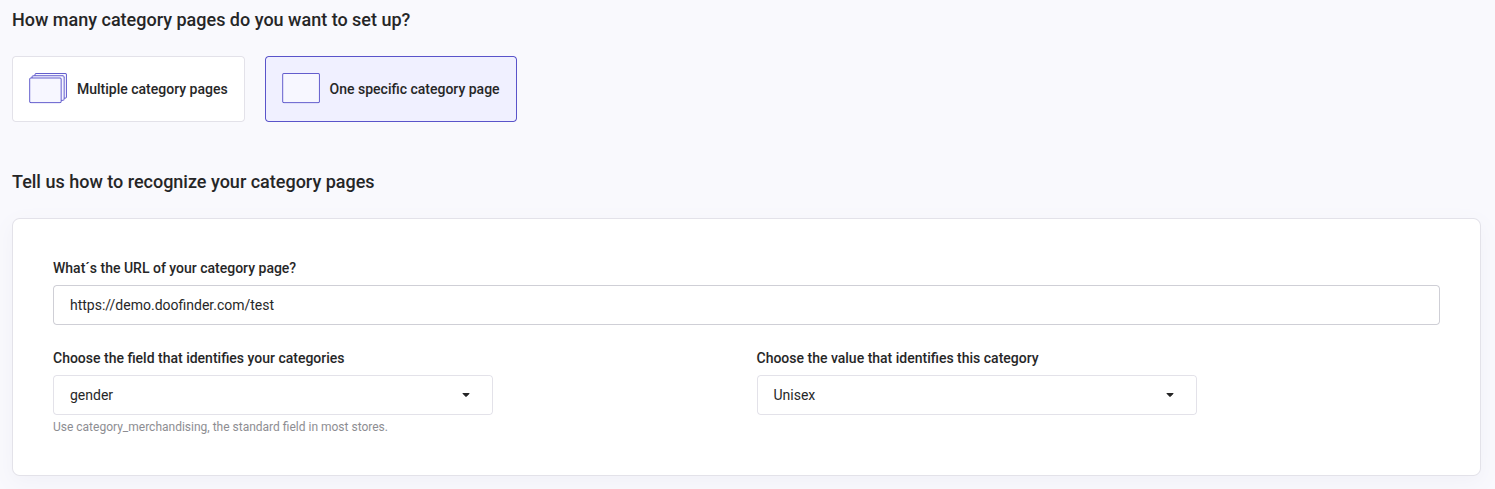
Once clicked on setup, the first step is to choose “How many category pages do you want to set up?”. You have the possibility to create 1 page or multiple.
-
What's the URL pattern for your category pages? Here we require you to add three category pages from your website (we recommend including at least one subcategory, if possible). Once done, let us know and we will handle the matching of these entries to their corresponding category URLs.
-
Choose the field that identifies your categories: use the standard category field most stores already have. When configuring multiple pages, you need to use the field category_merchandising, automatically selected when present. Default for: Shopify, Prestashop, Magento, BigCommerce, Woocommerce and Shopware.
-
Choose the value that identifies this category: this option will only be unfolded if you have chosen to configure a single category page. In that case, choose the appropriate value. See:
If chosen the “Multiple category pages”, this is what you will see:

When choosing the multiple category pages option, you will see a new section unfolded called “Exclude specific URLs”. You can use optionally to skip a page that look like a category but isn’t one, excluding URLs from the category merchandising setup:
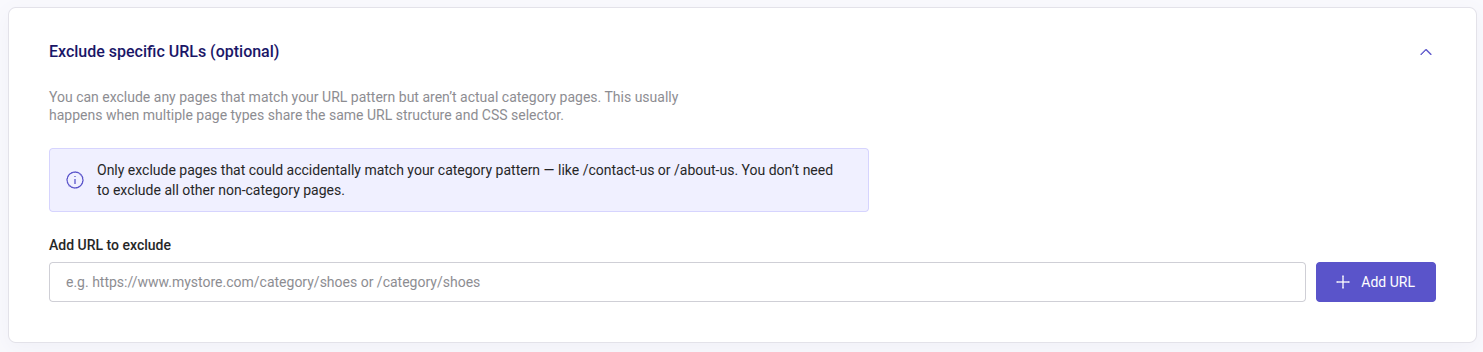
Add the URLs, hit save and you should be all set. Repeat the process for other pages, you can add a max of 20 pages!
Relevance Criteria
Back on the overview screen and under the Relevance criteria, tab you can select in which order the result elements from a query will be displayed by managing the fields you want to priotise.
Notice that this is a very sensitive configuration, to which we highly recommend reading about here, as it will affect the natural order of your products.
CSS Selector for Category Merchandising
In this section, you need to add the CSS Selector of your choice to determine where the category page will be triggered. To pick a CSS Selector, inspect your webpage > choose the one that best fits your needs > copy it > then return to the Admin Panel to paste it into the box under “Where to show products and filters”. Learn more on CSS Selector.

Display Settings: Customization
Under the Display Settings section you will find 3 different tabs: Appearance, Sorting Options and Filters:
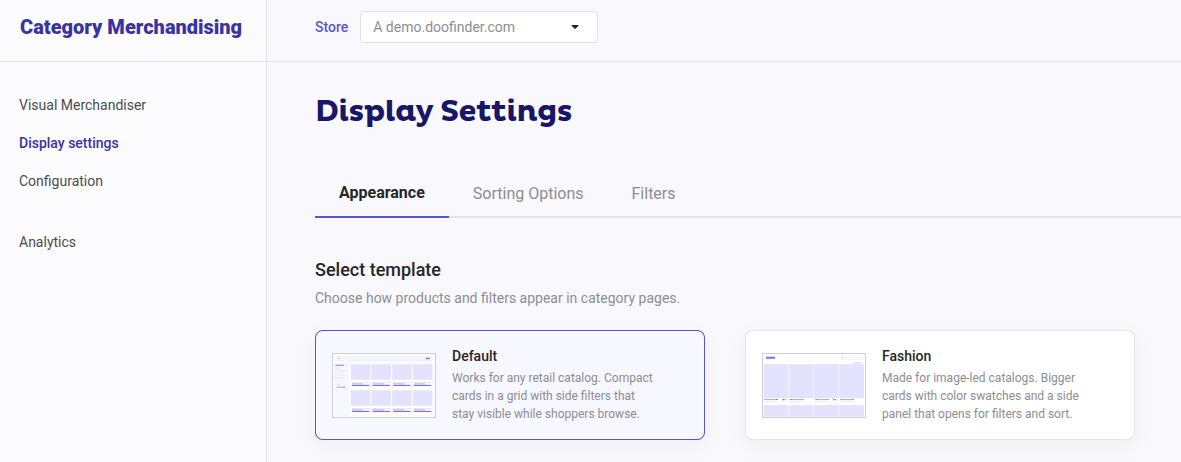
Appearance
Here you can configure the look and feel of your Category Merchandising banner by configuring the following:
Select template
Default Theme
The default theme is designed for a broader range of catalog types, while the Fashion Theme is specifically tailored to the fashion industry.
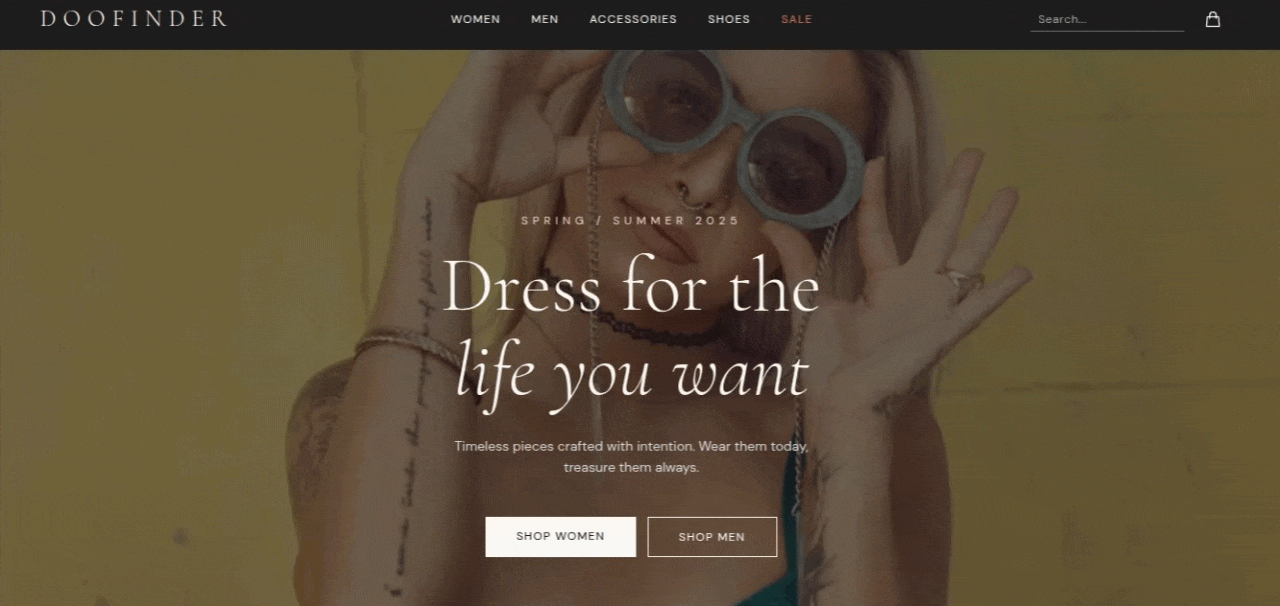
Fashion Theme
An image-first look and feel, built for fashion and apparel stores. This theme aligns with how fashion customers navigate: by colour, size, and visual feel.
Brand identity
Enter the HTML color you want to show using the HEX color code.
- Primary: This is the accent color used to highlight buttons, links, selected filters, and highlights.
- Primary contrast: This color is used for text that goes on top of the primary color.
- Text: This color is used for all text.
Product card template
You can enable the following options to be displayed in your results screen and customize the colors to match your brand:
- Product availability: Indicates if the product is out of stock based on the availability field of your data.
- Discount percentage: If the product has a discount price, displays the discount percent.
- Add to cart button: Displays a button to provide a cart action directly in the results.The button color comes from Primary colors. To configure your 'Add to cart' button, read the article 'Add to Cart'.
You also have access to a Colors tab, where you can customize the colors for the specific icon options listed above.
Complements
You can enable the Search More Like This which allows searching for similar products based on a selected product, see more info here.
Advanced customization
To edit the CSS of the Category Merchandising's appearance or the Product Card Template, click on Category Merchandising > Display Settings > scroll down to Advanced customization.
If you want to customize the CSS just click on the "Customize" button on the right.
If you want to customize the Product Card Template, just click on the "Customize" button on the right. When modifying the template bear in mind that it may lead to potential issues with the Category Merchandising. In this template you can always restore to default version by clicking on the "Restore default" button on the left-bottom under the product card template code.
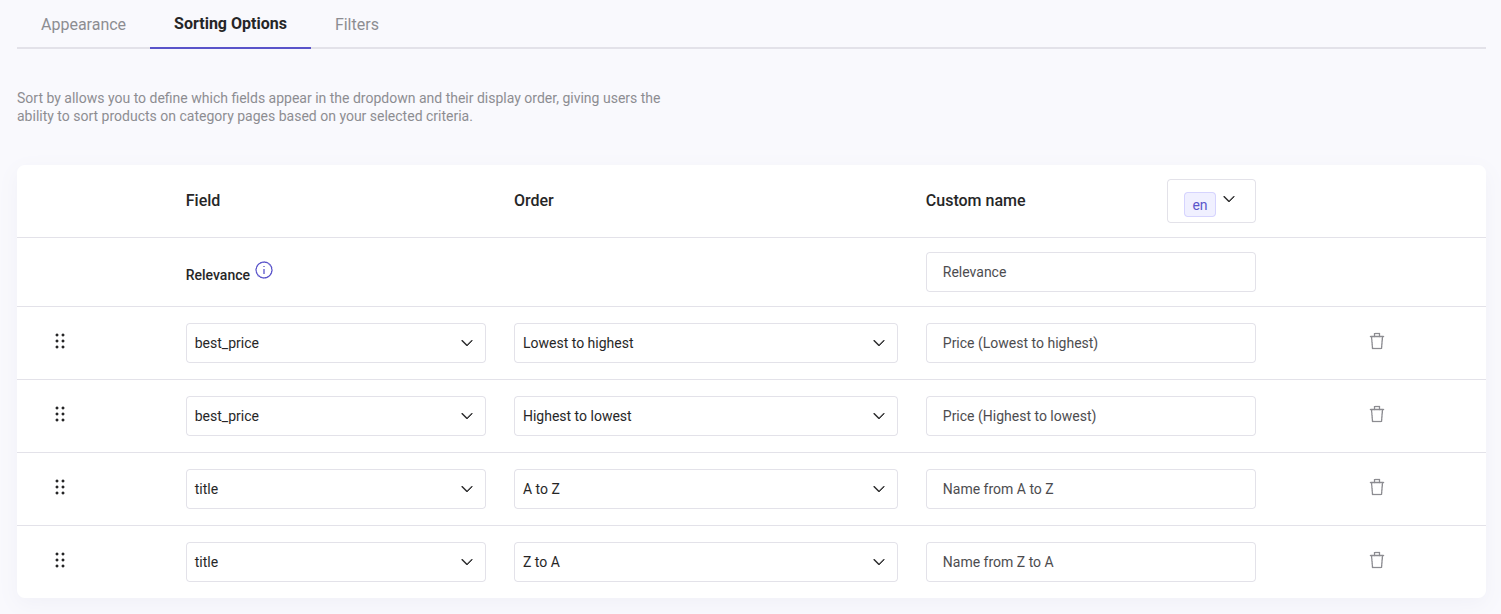
Sorting Options
Next to Appearence, you will finde Sorting Options, where you can add and customize the fields that appear in the Category Merchandising’s sorting dropdown menu, tailoring the result ordering to your business needs and customer preferences.
This feature allows you to diversify sorting options, enabling customers to arrange their results in a way that best suits their needs, enhancing their shopping experience.
You will find this feature in your Category Merchandising > Display Settings > Sorting Options.
If you do not have a search engine configured, you might see the allert "Please, configure Search Engine, Language and Currency."
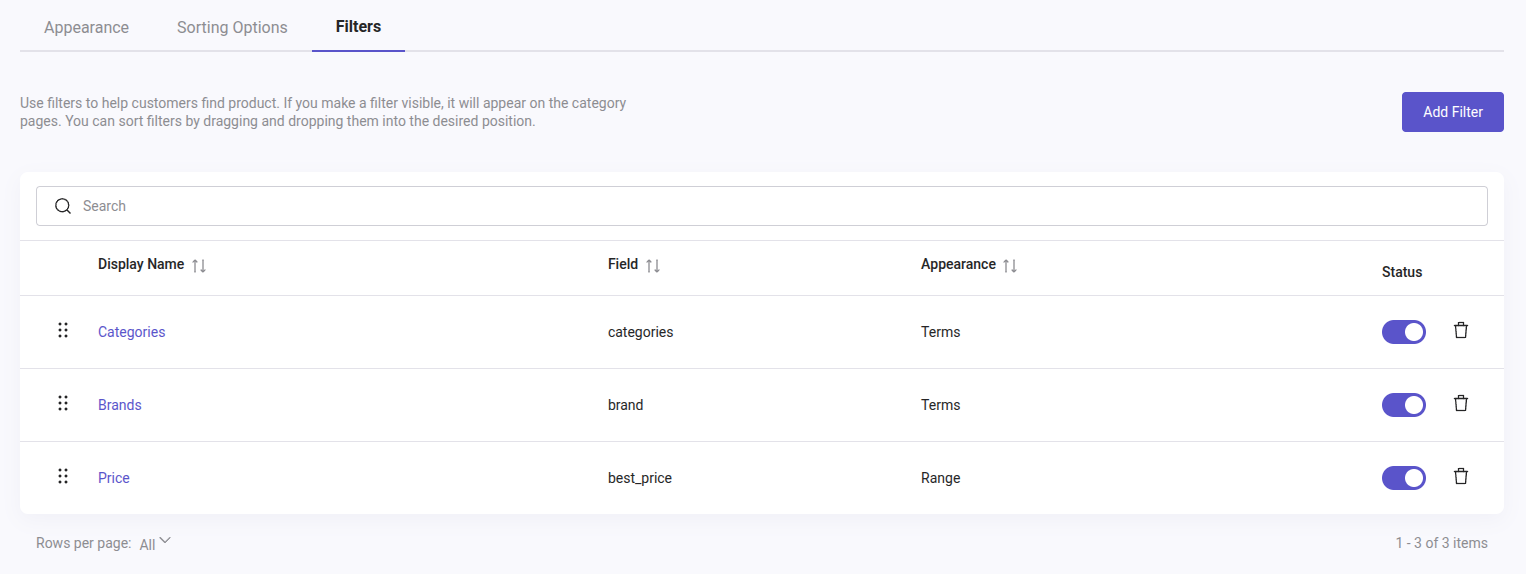
Filters
The ability to filter the results is crucial for an eCommerce site since it helps users locate products more efficiently, leading to an improved user experience and potentially increasing sales by assisting customers in finding what they are looking for quickly and easily.
The Filters functionality is used to narrow down the results based on the fields of your data feed. These filters can include attributes like price, product category, brand, size, color, and various other product-specific characteristics.
You will find this feature in your Category Merchandising > Display Settings > Filters.
Hiding Your Native Results
Because Doofinder inserts results after your page loads, your native category results may appear briefly before ours replace them. To avoid showing two sets of results, or causing layout shifts (which damages the SEO performance), you need to hide your native results.
There are two ways to do this:
Option 1: Hide Native Results From Your Backend (Recommended Method)
You hide or disable the native product list in your templates/backend, but keep the outer container where results should appear. The min-height of this wrapper must be 8000px.
Doofinder then injects results into that placeholder.
| Pros | Cons |
|---|---|
| No flicker or layout jump. | Requires small backend edits. |
| CLS remains very low, protecting SEO performance. | — |
| Best user experience. | — |
| Cleanest layout behavior. | — |
Option 2: Hide Native Results Using CSS (Quickest Method)
You can hide your store’s native result components directly from the CSS editor inside Doofinder by applying display: none; to the selector that contains your product cards.
Example:
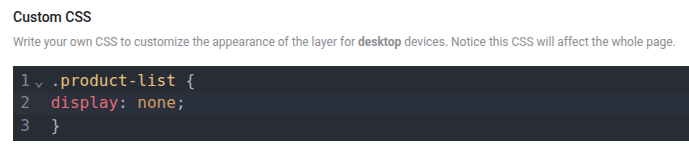
Instead of ‘product-list’ you should use your own website’s page wrapper.
Here in this page you can find more insights about CSS use!
| Pros | Cons |
|---|---|
| Very easy to set up. | Because the content loads first and is then hidden, you may see a layout shift when Doofinder results appear. |
| No backend changes required. | This can increase CLS (Cumulative Layout Shift), which may negatively affect Core Web Vitals. |
| SEO indexing remains safe (content is still present in the DOM). It means your content can still be seen, even if users don’t immediately see it on the screen. | — |
The Wrapper
What’s the wrapper?It’s the outer container of your product results area, but without the native product cards inside it.
So instead of:
<div class="product-list">
  <!-- Native products -->
  <div class="product-card">...</div>
  <div class="product-card">...</div>
</div>
You keep only:
<div class="product-list doofinder-results-wrapper">
  <!-- Empty on load -->
</div>
Why keep the wrapper?
- Prevents the page from collapsing upward.
- Ensures no layout shift when Doofinder injects products.
- Fully protects CLS (Cumulative Layout Shift) which is good for SEO.
Visual merchandiser
The Visual merchandiser section allows you to test your category pages and see how your merchandising settings affect product display. You can quickly assess and adjust configurations for your results page.
You will have two boxes:
- Select page: here you can select the field that identifies your categories, same configured under the page setup.
- Search: search for specific products using the search bar.
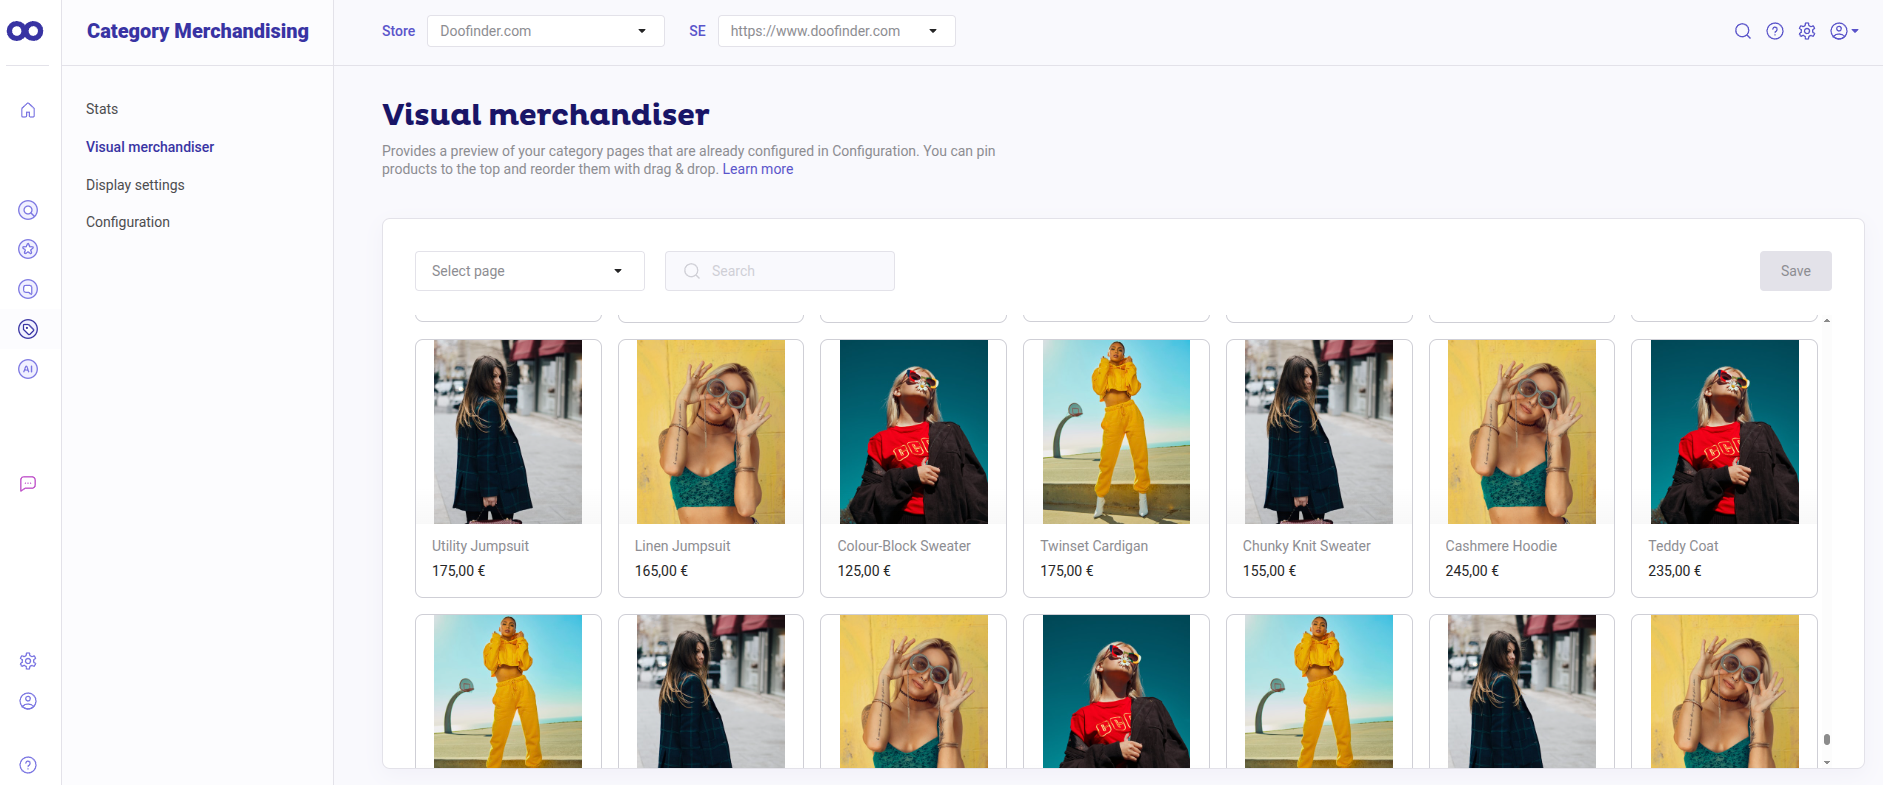
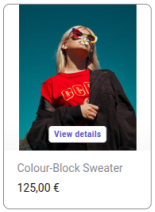
You can also check the product card image, title and price.
Hover over images
When hovering over the product images, you will see the “View details” button at the bottom of the image. This option allows you to check the product data feed details.