If you have installed the plugin for the first time, starting from version 2.0.0, you will need to configure the custom attributes to be indexed automatically.
If you already had custom attributes configured in versions prior to 2.0.0, your previous settings for custom attributes will remain intact.
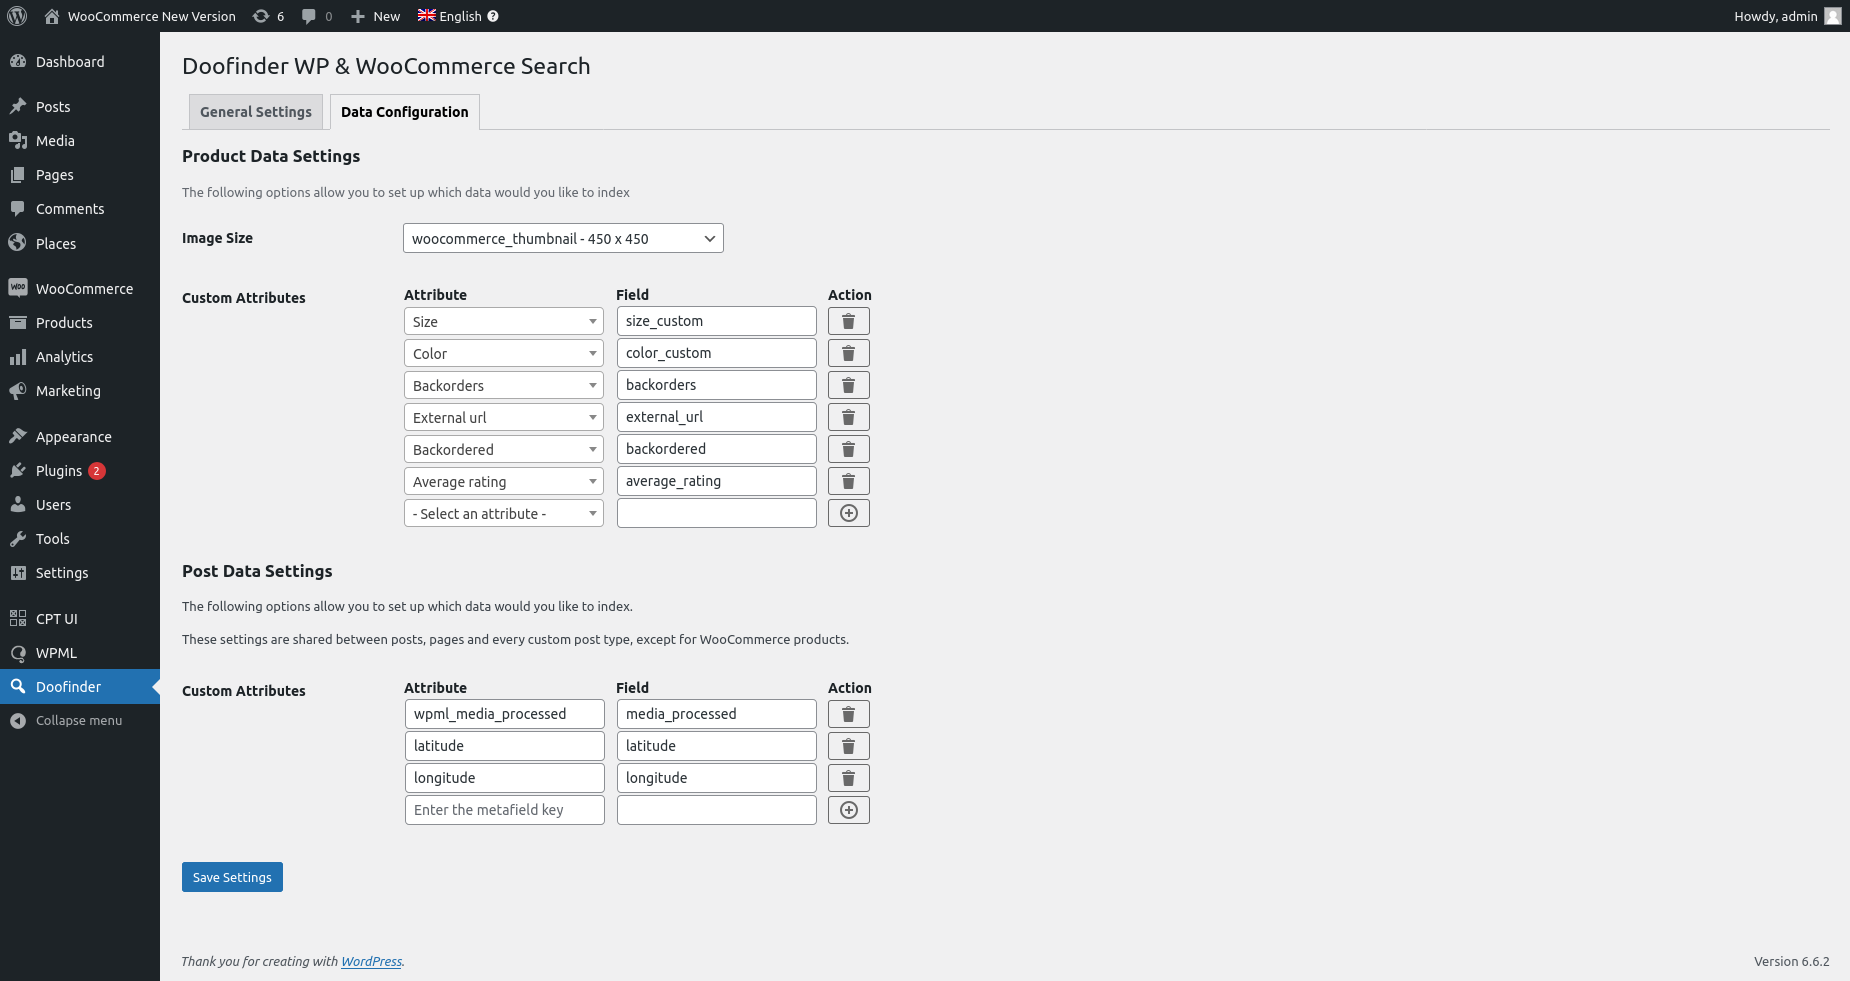
To configure Custom Attributes, go to your WooCommerce, access Doofinder from the left-side menu, and click on the tab “Data Configuration”.
Here, you will have the following data settings: Product Data Settings, and Post Data Settings.
In WooCommerce, when an attribute is added directly from a product page, it does not become a full WooCommerce attribute. As a result, it does not appear in the custom attributes dropdown. It must be done from the attributes page.
About Post Data Settings
For this section to appear, Doofinder plugin must be updated to the latest version (2.5.15). Also, this section will appear only if you have posts available and/or already created.
This section allows you to configure your attributes for posts, pages and custom post types.
Let's first understand what kind of attributes exist in WooCommerce:
Before configuring anything, it helps to know which type of attribute you are working with. There are two categories:
Standard product attributes
These are attributes created via Products > Attributes in WooCommerce. They appear in the admin panel when editing a product and are used for frontend filters and dropdowns.
Examples: Brand, Color, Size, Stock status.
When retrieved via the WooCommerce REST API, standard attributes use a pa_ prefix in their slug:
GET /wp-json/wc/v3/products/attributes
[
  { "id": 1, "name": "Brand", "slug": "pa_brand" },
  { "id": 2, "name": "Color", "slug": "pa_color" }
]
Always use the slug value (e.g., pa_brand), not the display name (e.g.,brand``), when configuring attributes in Doofinder.
Custom meta attributes
These are product fields that do not exist in the WooCommerce attribute dropdown. They may come from plugins, custom database entries, or fields injected via code or API.
Learn by example:
ts_product_brand, _upc, doofinder_color_code.
To find the correct key for a custom meta attribute, call:
GET /wp-json/wc/v3/products/{product_id}
Look for the meta_data array in the response:
"meta_data": [
  { "key": "ts_product_brand", "value": "iKrusher" },
  { "key": "_upc", "value": "810013432947" }
]
The key value is the exact name you must use in Doofinder.
How to use the custom meta attributes in Doofinder?
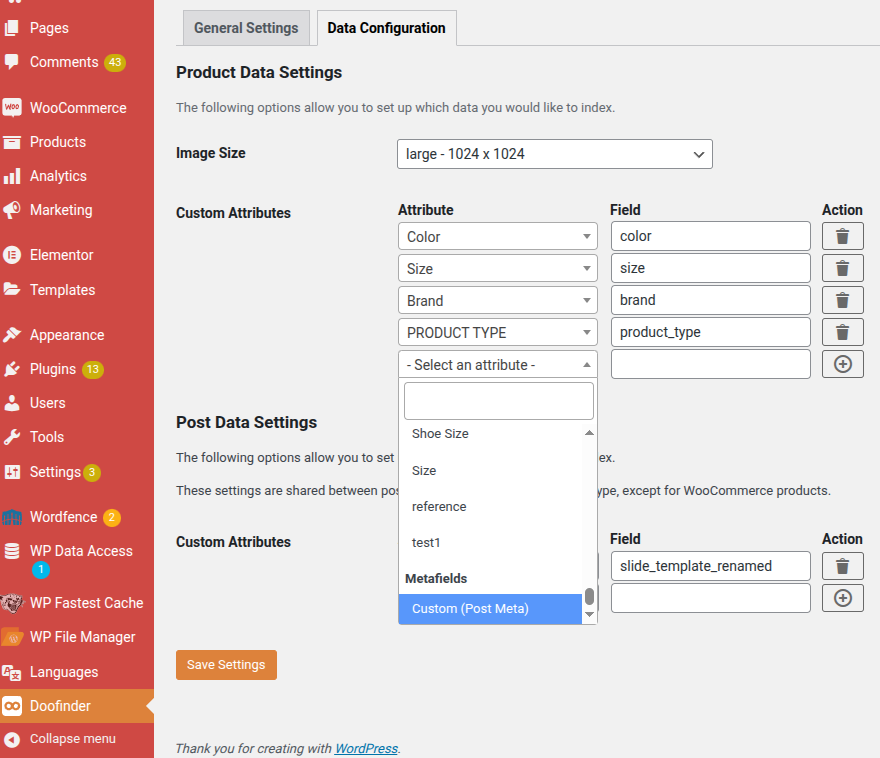
- Go into your WooCommerce admin > Doofinder > Data Configuration > Custom Attributes.
-
Select the attribute, as shown in the picture below:
-
Next, add the Field name. Use the trash symbol to delete or the ‘+’ to add more.
-
Hit the “Save Settings” button.
- Finally, reindex in Doofinder, see how to here.
Taxonomies cannot be indexed via the Doofinder WooCommerce plugin. As an alternative, create the attribute directly in WooCommerce, or use a custom data feed that includes the taxonomy data.
How to know which one you are using?
- Go to WooCommerce > Products > Attributes
- If the attribute exists there, it is standard > use
pa_ slug. - If it does NOT exist there, it is custom meta > retrieve via API.
Configuring custom attributes in the plugin
Access the configuration
- In your WordPress admin, go to WooCommerce > Doofinder from the left-side menu.
- Click the Data Configuration tab.
You will see two sections: Product Data Settings and Post Data Settings.
Product Data Settings
This section manages attributes for WooCommerce products.
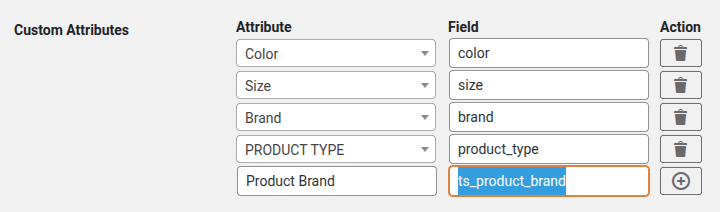
- Under Custom Attributes, open the Attribute dropdown and select the attribute you want to index.
- In the Field column, enter the name that will be used in Doofinder to identify this attribute.
- Click the '+' button to add it.
- Click Save Settings.
To remove a custom attribute, click the trash icon that appears next to it instead of the '+' button.
Post Data Settings
This section applies to posts, pages, and custom post types, but not WooCommerce products.
- Under Custom Attributes, type the metafield name directly in the Attribute field (there is no dropdown for post attributes).
- In the Field column, enter the name that will be used in Doofinder.
- Click the '+' button to add it.
- Click 'Save Settings'.